Fee Schedule would help you in defining a time-line for the Fee payment of the students, based on the Student Group.
To access Fee Schedule, go to:
Home > Education > Fees > Fee Schedule
- Prerequisites
How to create a new Fee Schedule
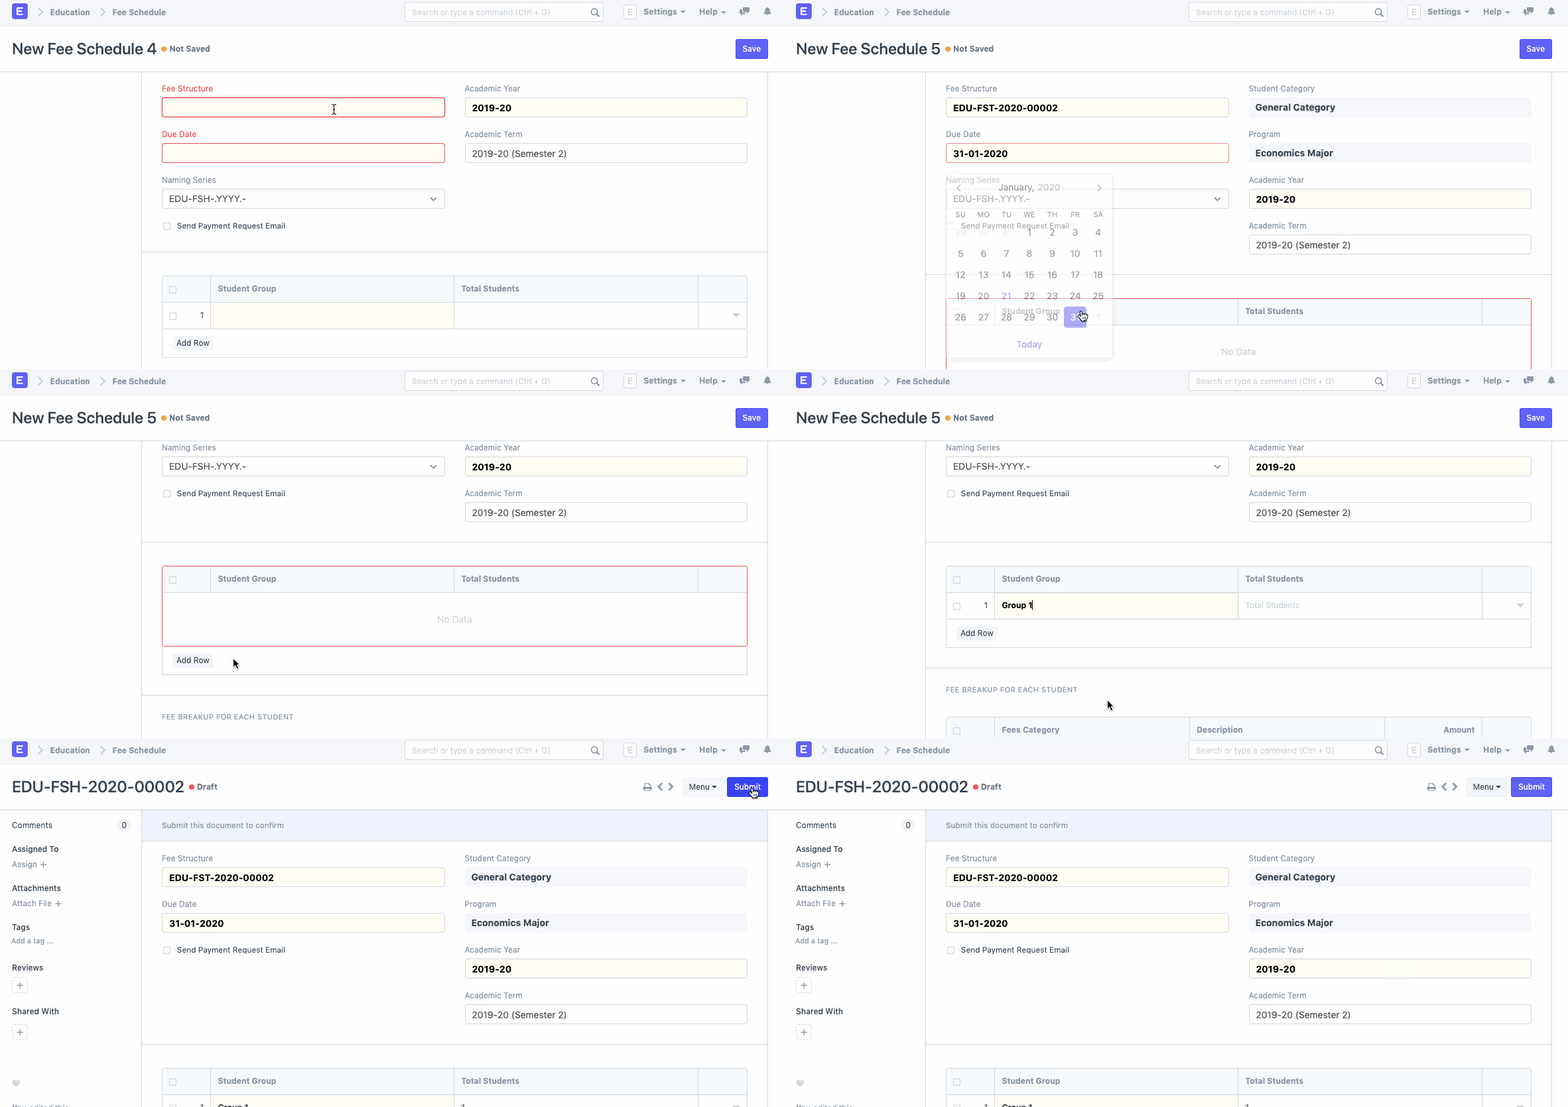
- Go to the Fee Schedule list and click on New.
- Select and add the Fee Structure. The moment you add the Fee Structure, the Fee Break Up for Each Student will be auto-populated.
- Select and add the Academic Year and the Academic Term.
- Add the Due Date for the fees.
- Select and add the Student Group.
- Save and Submit.
- Features
The Accounting features and Accounting Dimensions will be fetched as-is from the Fee structure.
2.1. Printing Settings
- Select and add the Letter Head to be used for printing the Fee Receipt.
- Select and add the Print Heading for the Fee Receipt.
2.2. Accounting
Working with ERPNext allows you to update your account entries with extreme ease. Whenever a student submits their fees and it gets recorded in the system, your Accounts will get updated simultaneously.
To facilitate that smoothly, you can add your Accounts details in the fee structure.
- Receivable Account: Enter the name of the Receivable Account for your Institution.
- Income Account: Select and add the Income Account for your Institution.
- Company: Select and add the Company under which all the payments are made. If there are multiple institutions in your ERPNext account, or if the Accounts are handled by a Sister Company.
2.3. Accounting Dimensions
- Cost Center: Select and add the name of the Cost Center of your Institute for Accounting Dimensions.
2.4. Version 15.1.0
When the document is submitted, you get an option to Create Sales Invoice.
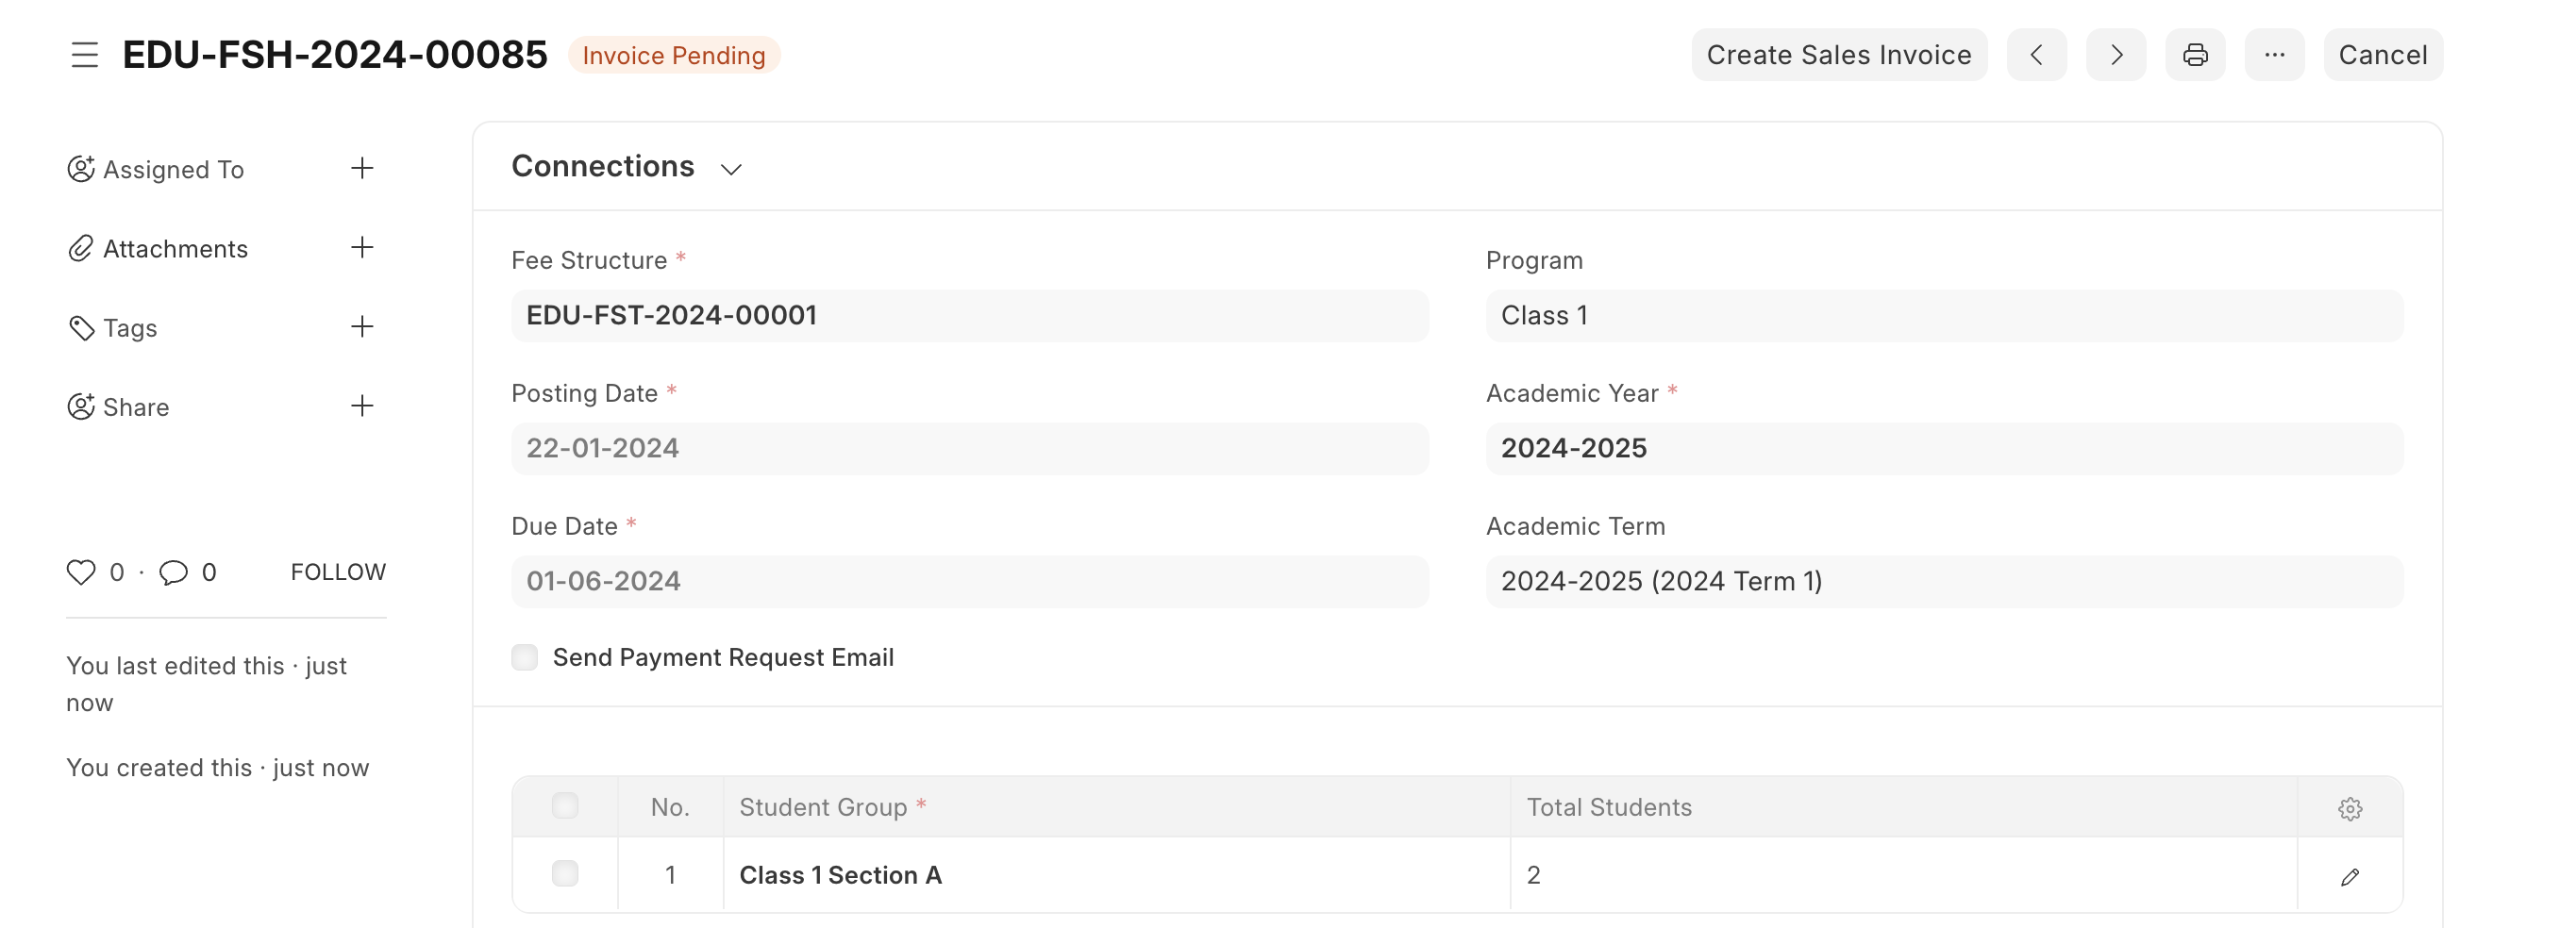
As soon as you submit the document, the status changes from "Draft" to "Invoice Pending".
On clicking the "Create Sales Invoice" button, sales invoices will be created for all the students for all the student groups present in the document, and the status will change from "Invoice Pending" to "Invoice Created".
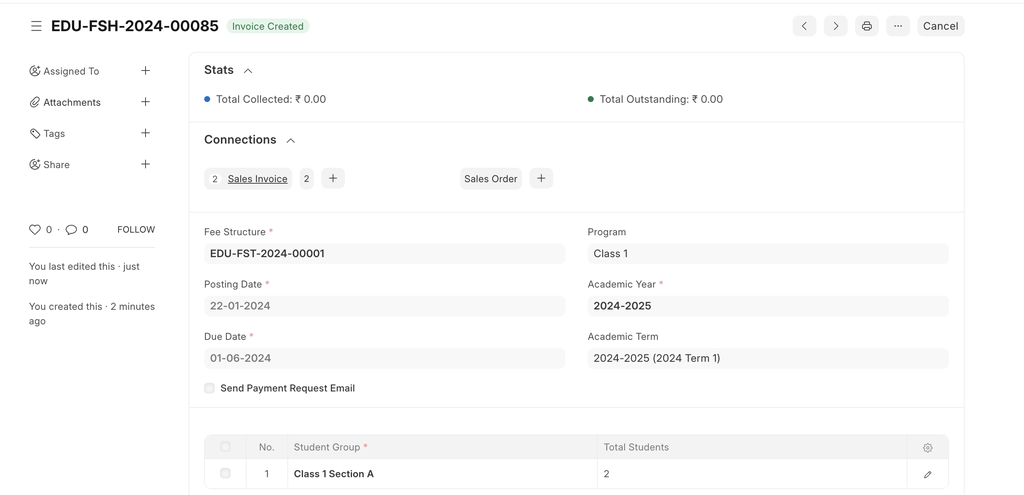
Sales Invoice is created with the customer field filled as Student's Name, the Fee Schedule Name is also stored in the Sales Invoice Document, and all the Fee Categories are linked to Sales Invoice Item Table.
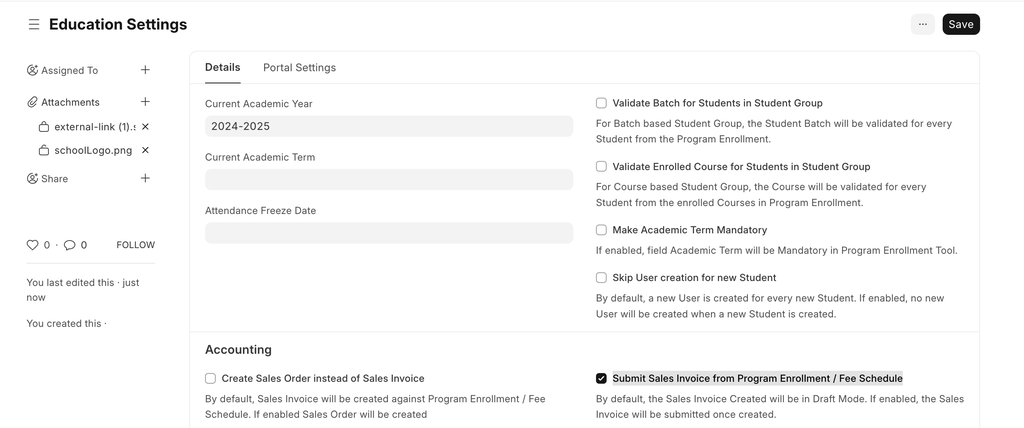
By default the Sales Invoice will be created in the Draft mode, you can change this using enabling "Submit Sales Invoice from Program Enrollment / Fee Schedule" in Education Settings.
If this is enabled then clicking on "Create Sales Invoice" button in the Fee Schedule DocType, all the Sales Invoice will be automatically submitted.
2.5. Version 15.3.0
From version 15.3.0 onwards, users will have an option to create Sales Order instead of Sales Invoice.
This feature can be helpful in the situations where you want to show accounting ledgers only when a student is joining the school. In such scenario you can create a "Sales Order" then when you want to create ledgers, you can create Sales Invoice against the Sales Order.
To enable this feature, go to:
Education Settings > Create Sales Order instead of Sales Invoice.
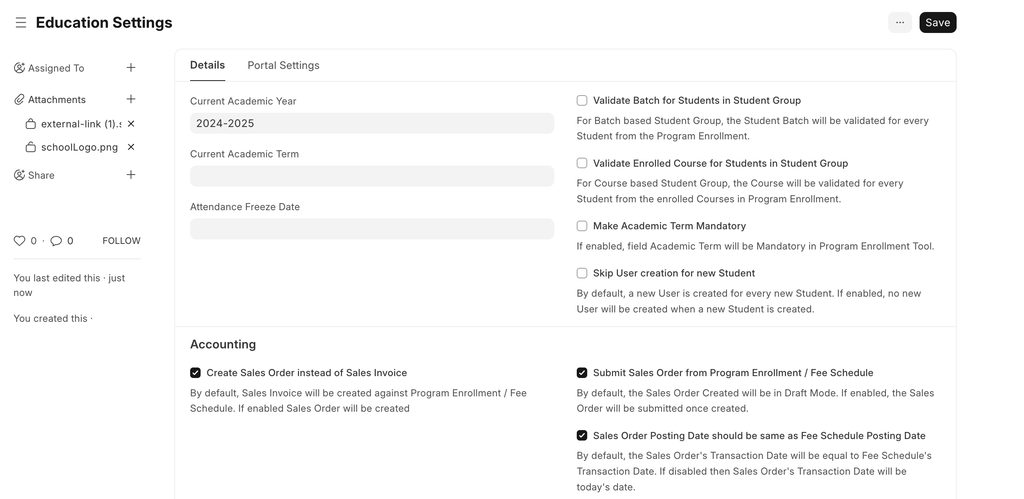
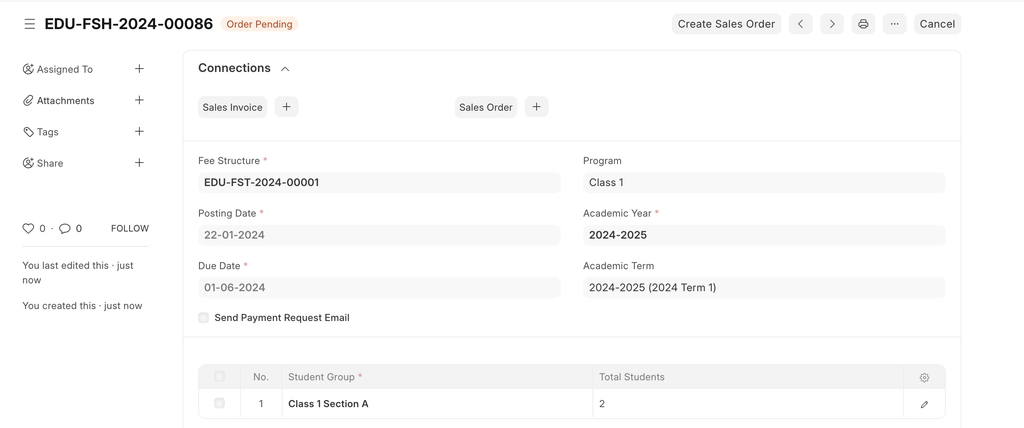
After enabling, whenever a Fee Schedule is submitted. The status of the document will be "Order Pending" and "Create Sales Order" button will be shown instead of "Create Sales Invoice" button.
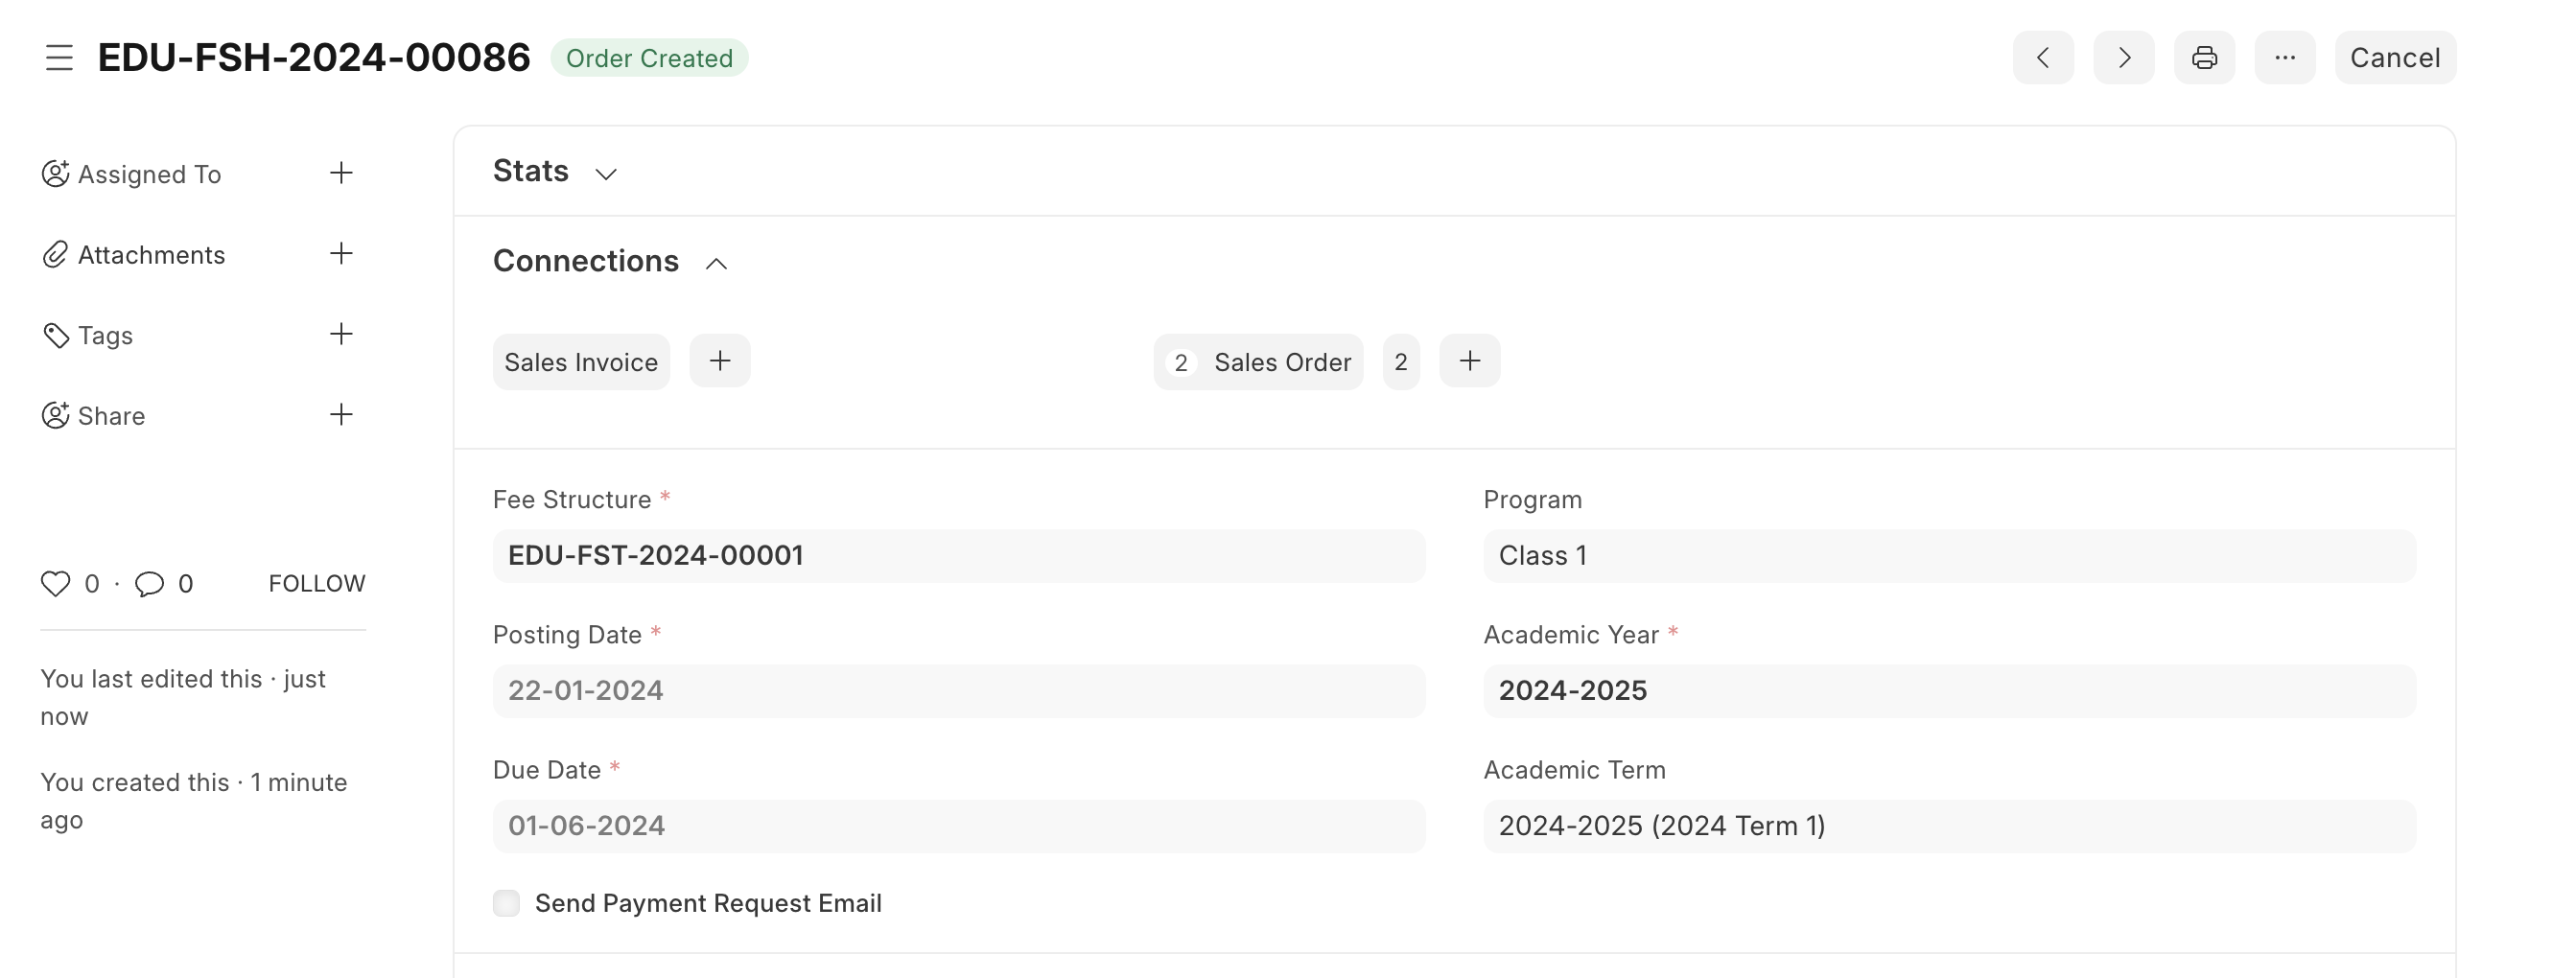
On clicking the "Create Sales Order" button, sales order will be created for all the students for all the student groups present in the document, and the status will change from "Order Pending" to "Order Created".
All the Sales Order by default will be created in Draft Mode. If you want to submit the Sales Order directly when created, you can enable "Submit Sales Order from Program Enrollment / Fee Schedule" in the Education Settings(as shown above).
2.6. Version 15.5.0
Fee Component table in Fee Schedule is editable. This allows user to add or delete Components for just one Fee Schedule.
Usecase:
Alot of times, institutes wants to collect one fee component in only one Fee Schedule and not in other Fee Schedules.
Note: If a component which is added in Fee Schedule which is not their in the Fee Structure an alert message will be shown to the user.
