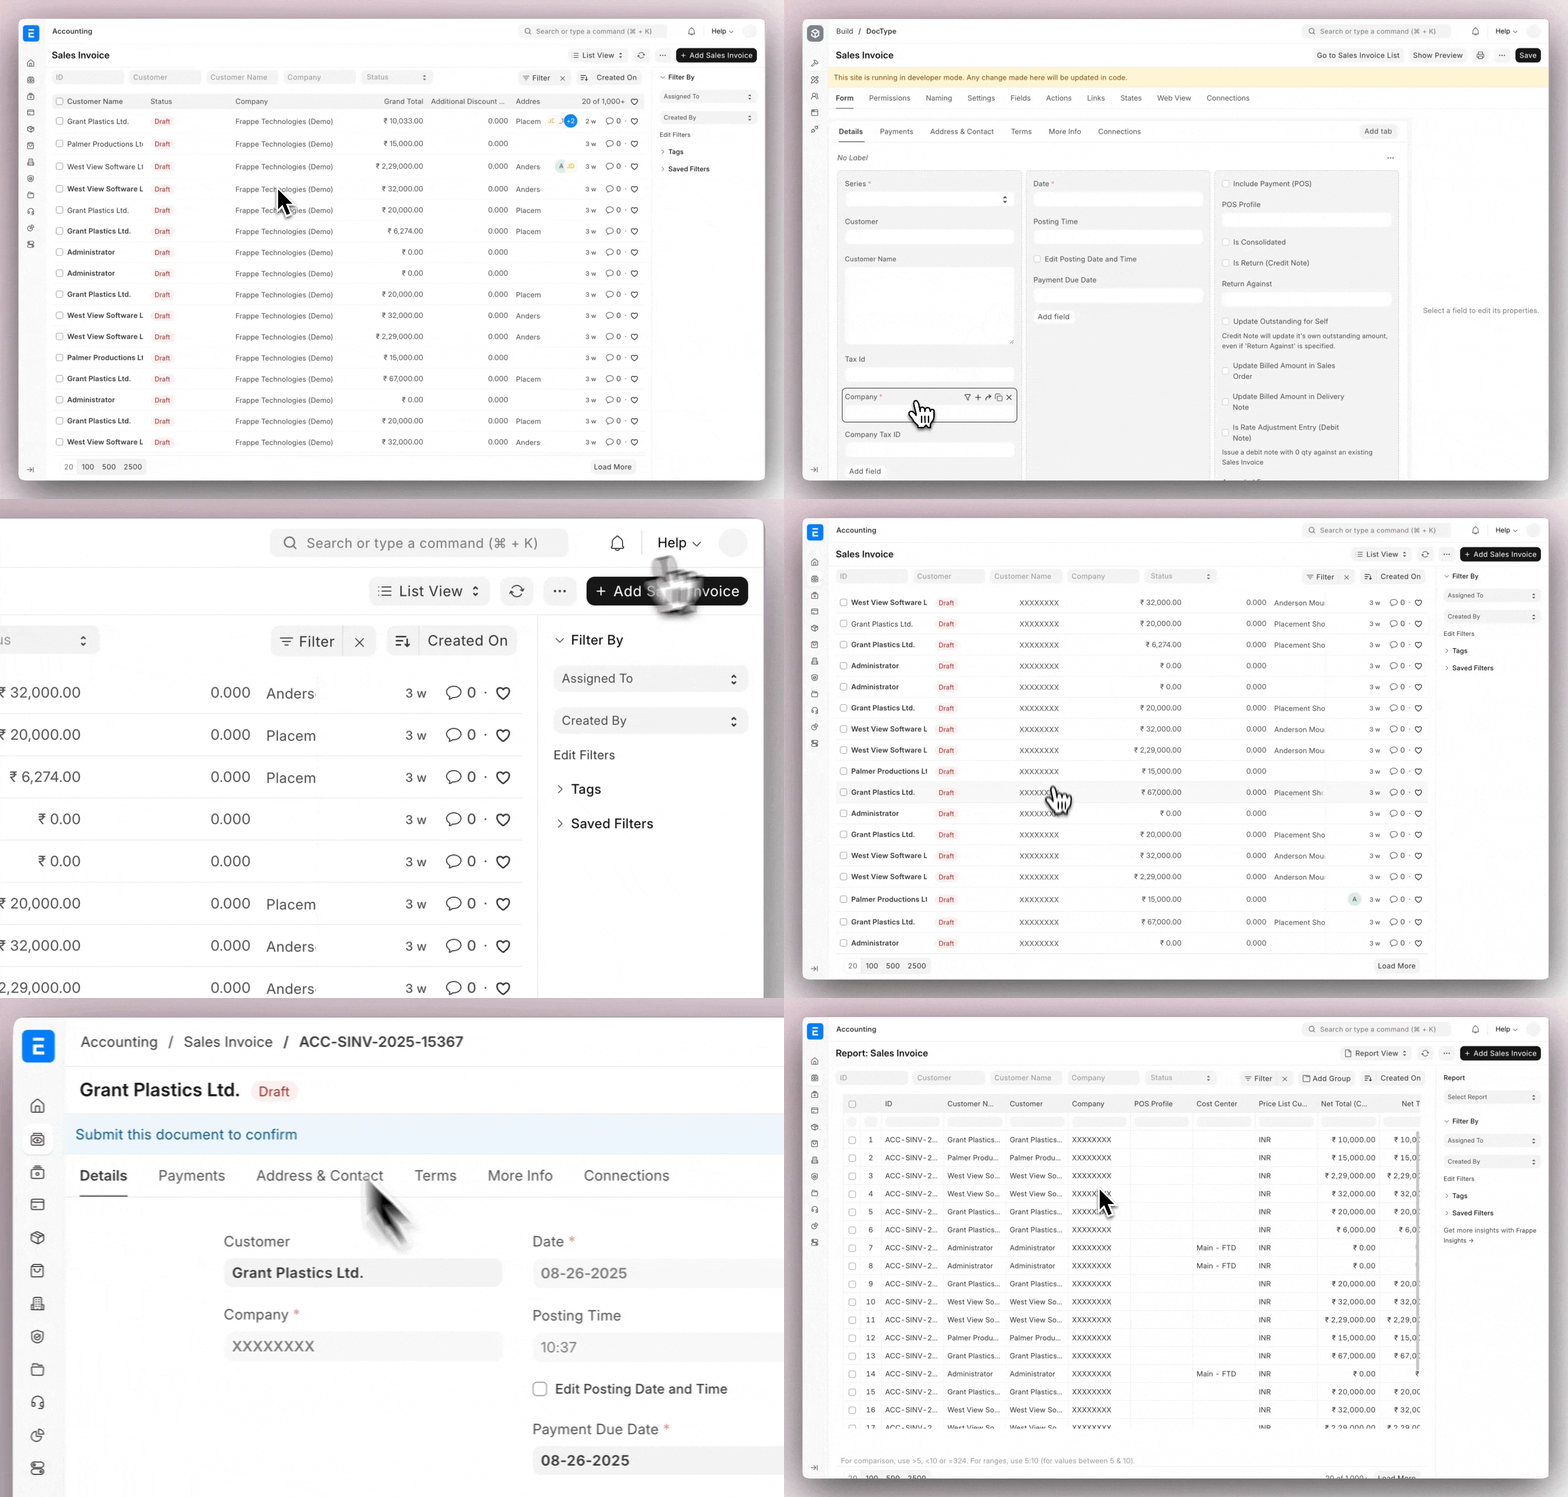
Note: This feature is only available in nightly (v16) version. This feature is considered experimental.
In the Frappe Framework, permissions can be applied to control field visibility using Perm Levels.
However, in many business scenarios, it's important to show certain fields while hiding their sensitive data. For example:
- HR users might need to view employee details but should not see salary amounts.
- Support staff may see customer phone numbers in a masked format like
811XXXXXXX. - Finance users can view bank account fields without exposing the full account number.
This is where Data Masking comes in.
With Data Masking, you can configure specific fields to display masked or hidden values based on the user's roles and permissions — without restricting field visibility.
It ensures sensitive information remains protected while keeping the user interface consistent and informative.
Enabling Data Masking
Data Masking can be enabled directly from the Doctype or through the Customize Form.
Steps to Enable Data Masking
- Open the Doctype (in Developer Mode) or Customize Form where you want to enable masking.
- Select the field you want to mask.
- Check the Mask checkbox.
- Save and reload the form.
Once enabled, users who do not have the Mask permission for that field will see masked or hidden data, while users with the appropriate permission will see the actual value.
Here's a quick demo showing how to enable Data Masking:

Supported Field Types
Data Masking can be applied only on the following field types:
Select, Read Only, Phone, Percent, Password, Link, Int, Float,
Dynamic Link, Duration, Datetime, Currency, Data, and Date.
For Developers
Data Masking in the Frappe Framework works seamlessly with the existing permission system.
When a user doesn’t have the required Mask permission for a field, the framework automatically replaces the actual value with a masked version both in the UI and backend responses.
How It Works Internally
Field Configuration
Each field can have amaskproperty enabled in its DocField.{ "fieldname": "phone_number", "fieldtype": "Data", "options": "Phone", "mask": 1 }Permission Check
The system checks if the current user has themaskpermission for that field using:meta.has_permlevel_access_to(fieldname=df.fieldname, df=df, permission_type="mask")Automatic Masking in Responses Once the permission check fails, the framework automatically masks the field value before returning it. This applies to:
- Form view data loading
- List view queries
- Reports using ORM or standard data fetching
- API responses (e.g.
/api/resource/...,/api/method/...)
Note: Data Masking does not apply automatically to custom SQL queries or Query Reports that use raw SQL. In such cases, developers need to explicitly apply masking logic in their query results before returning the response.
