
To go to the settings tab click on the dropdown present in the sidebar, then click on settings to open the settings modal. Settings tab will only be shown to the users who are either "System Manager" or "Administrator".
Inside the modal, 2 settings are present, let's go through them one by one,
- Email Accounts.
Inside this settings, user can create a new email account or edit an existing one
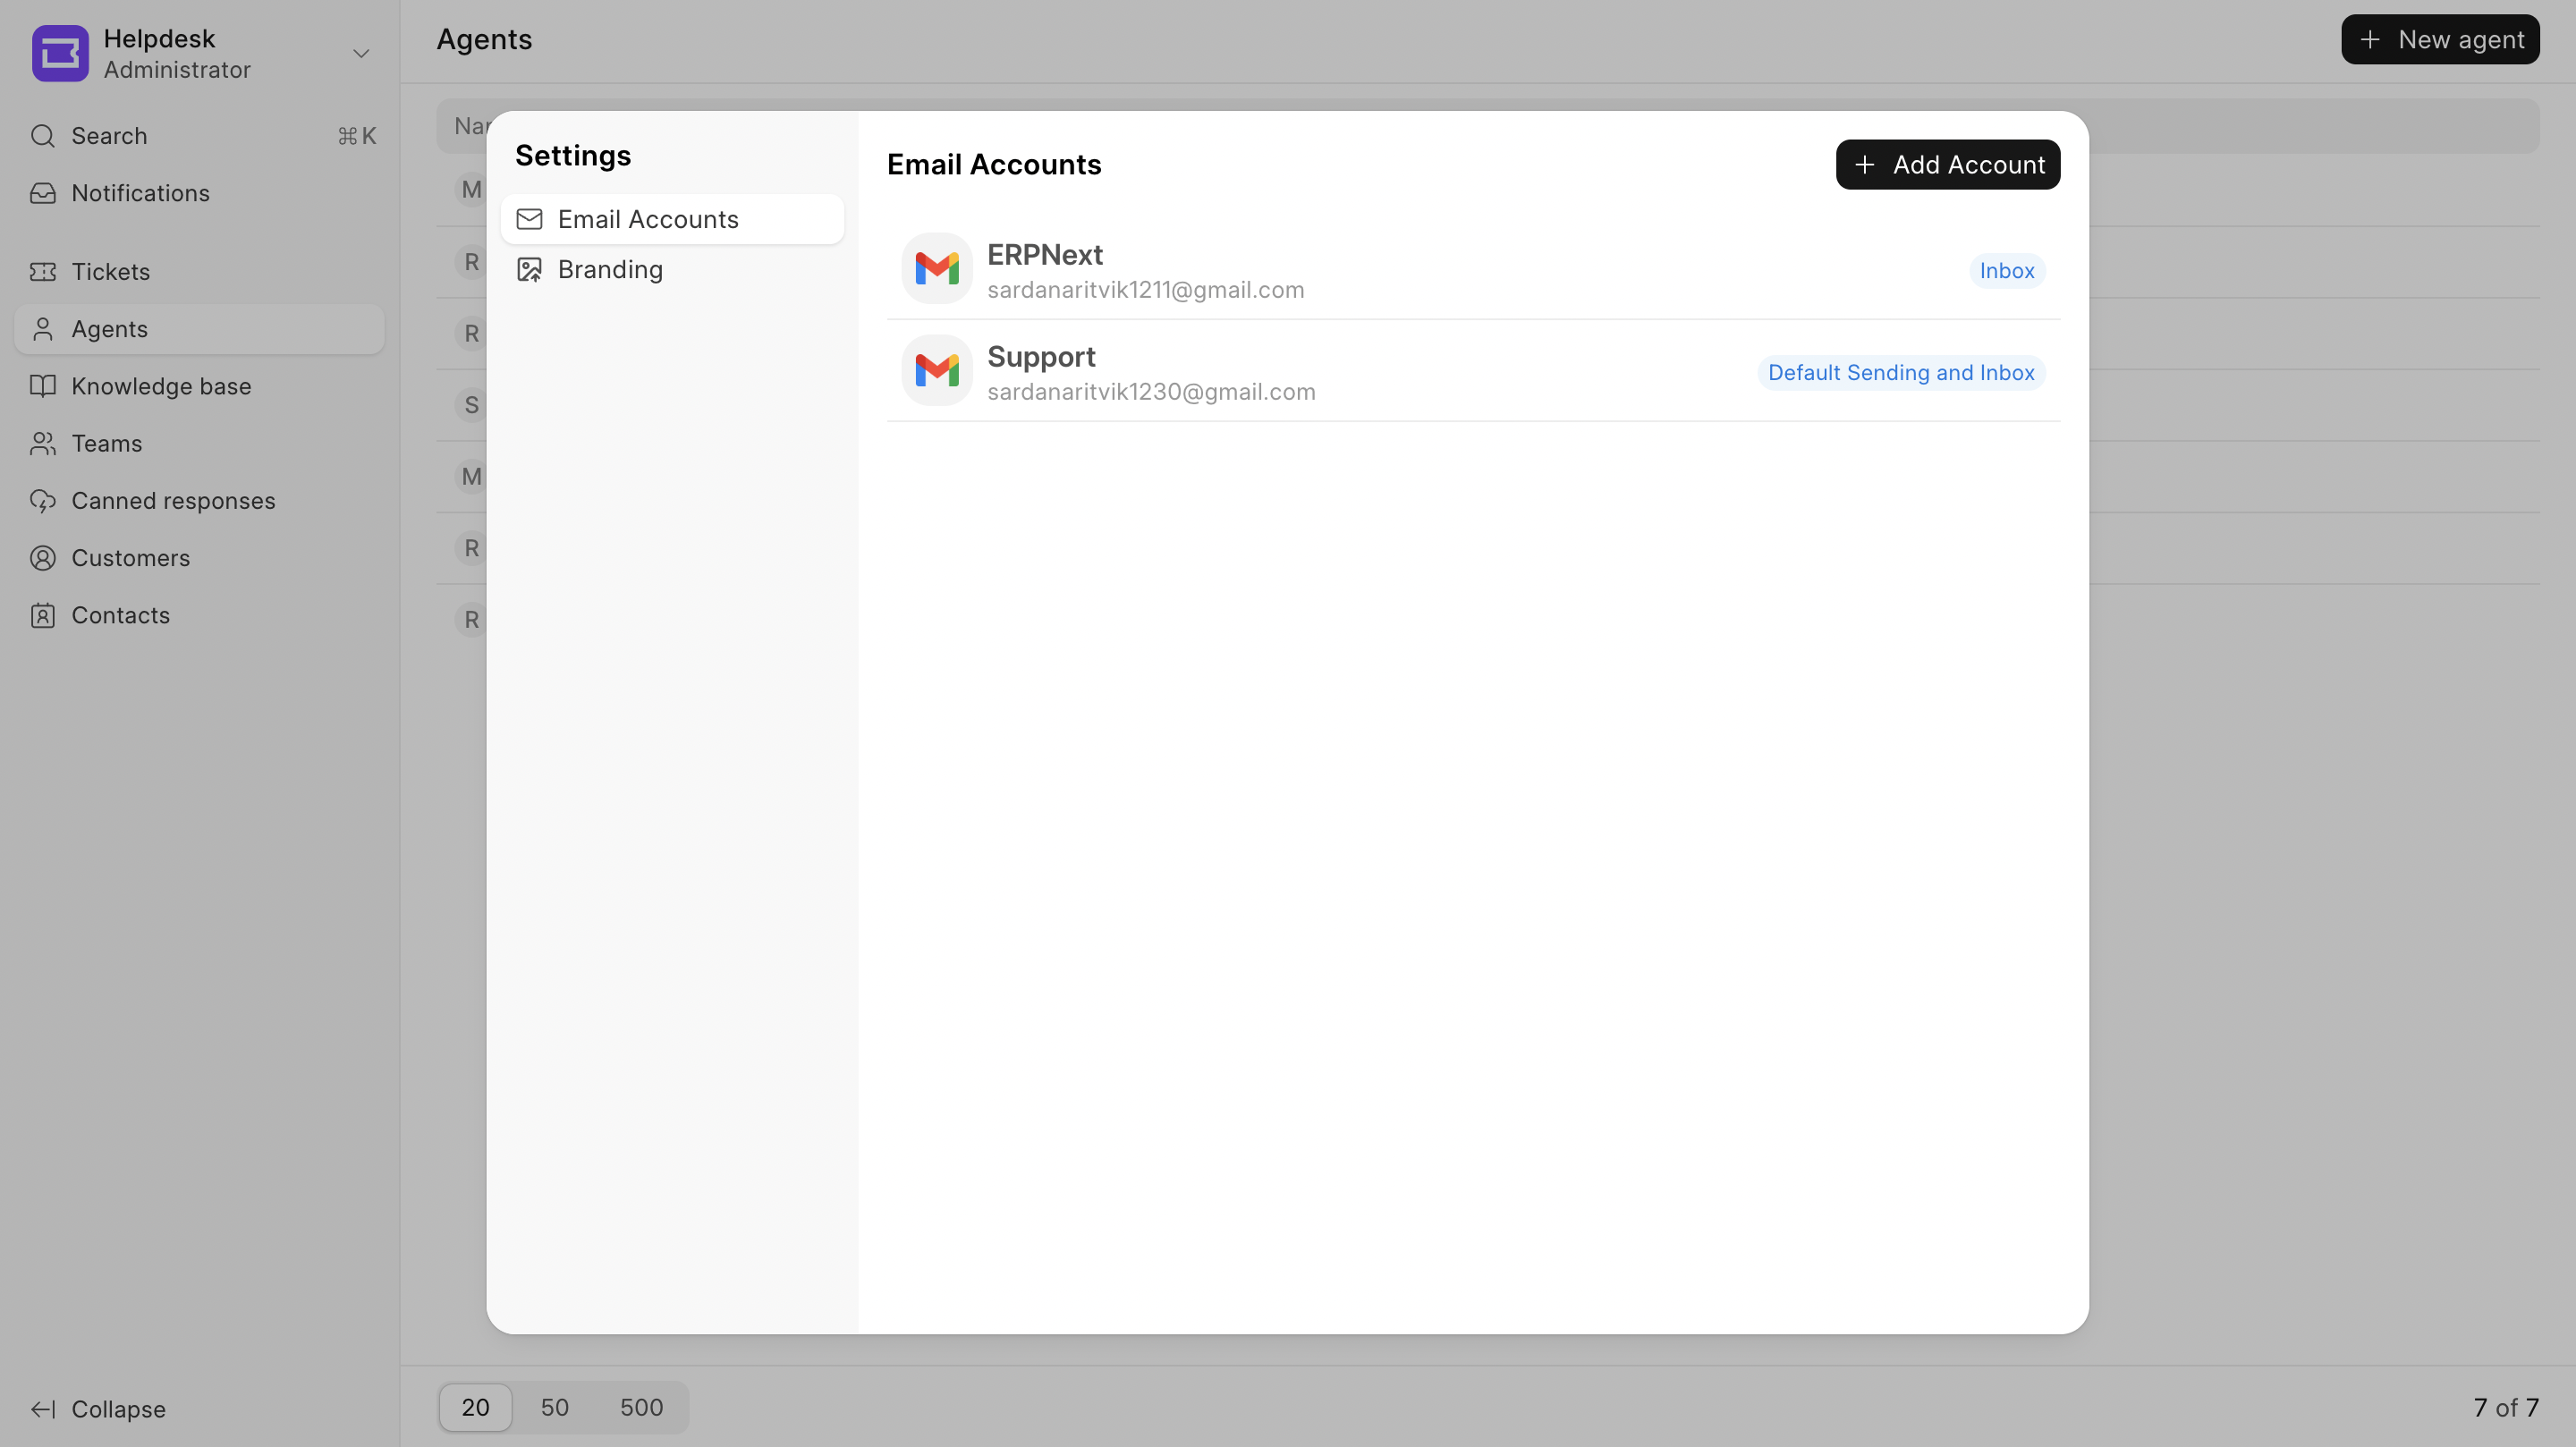
To create a new email account click on the "Add Account Button"
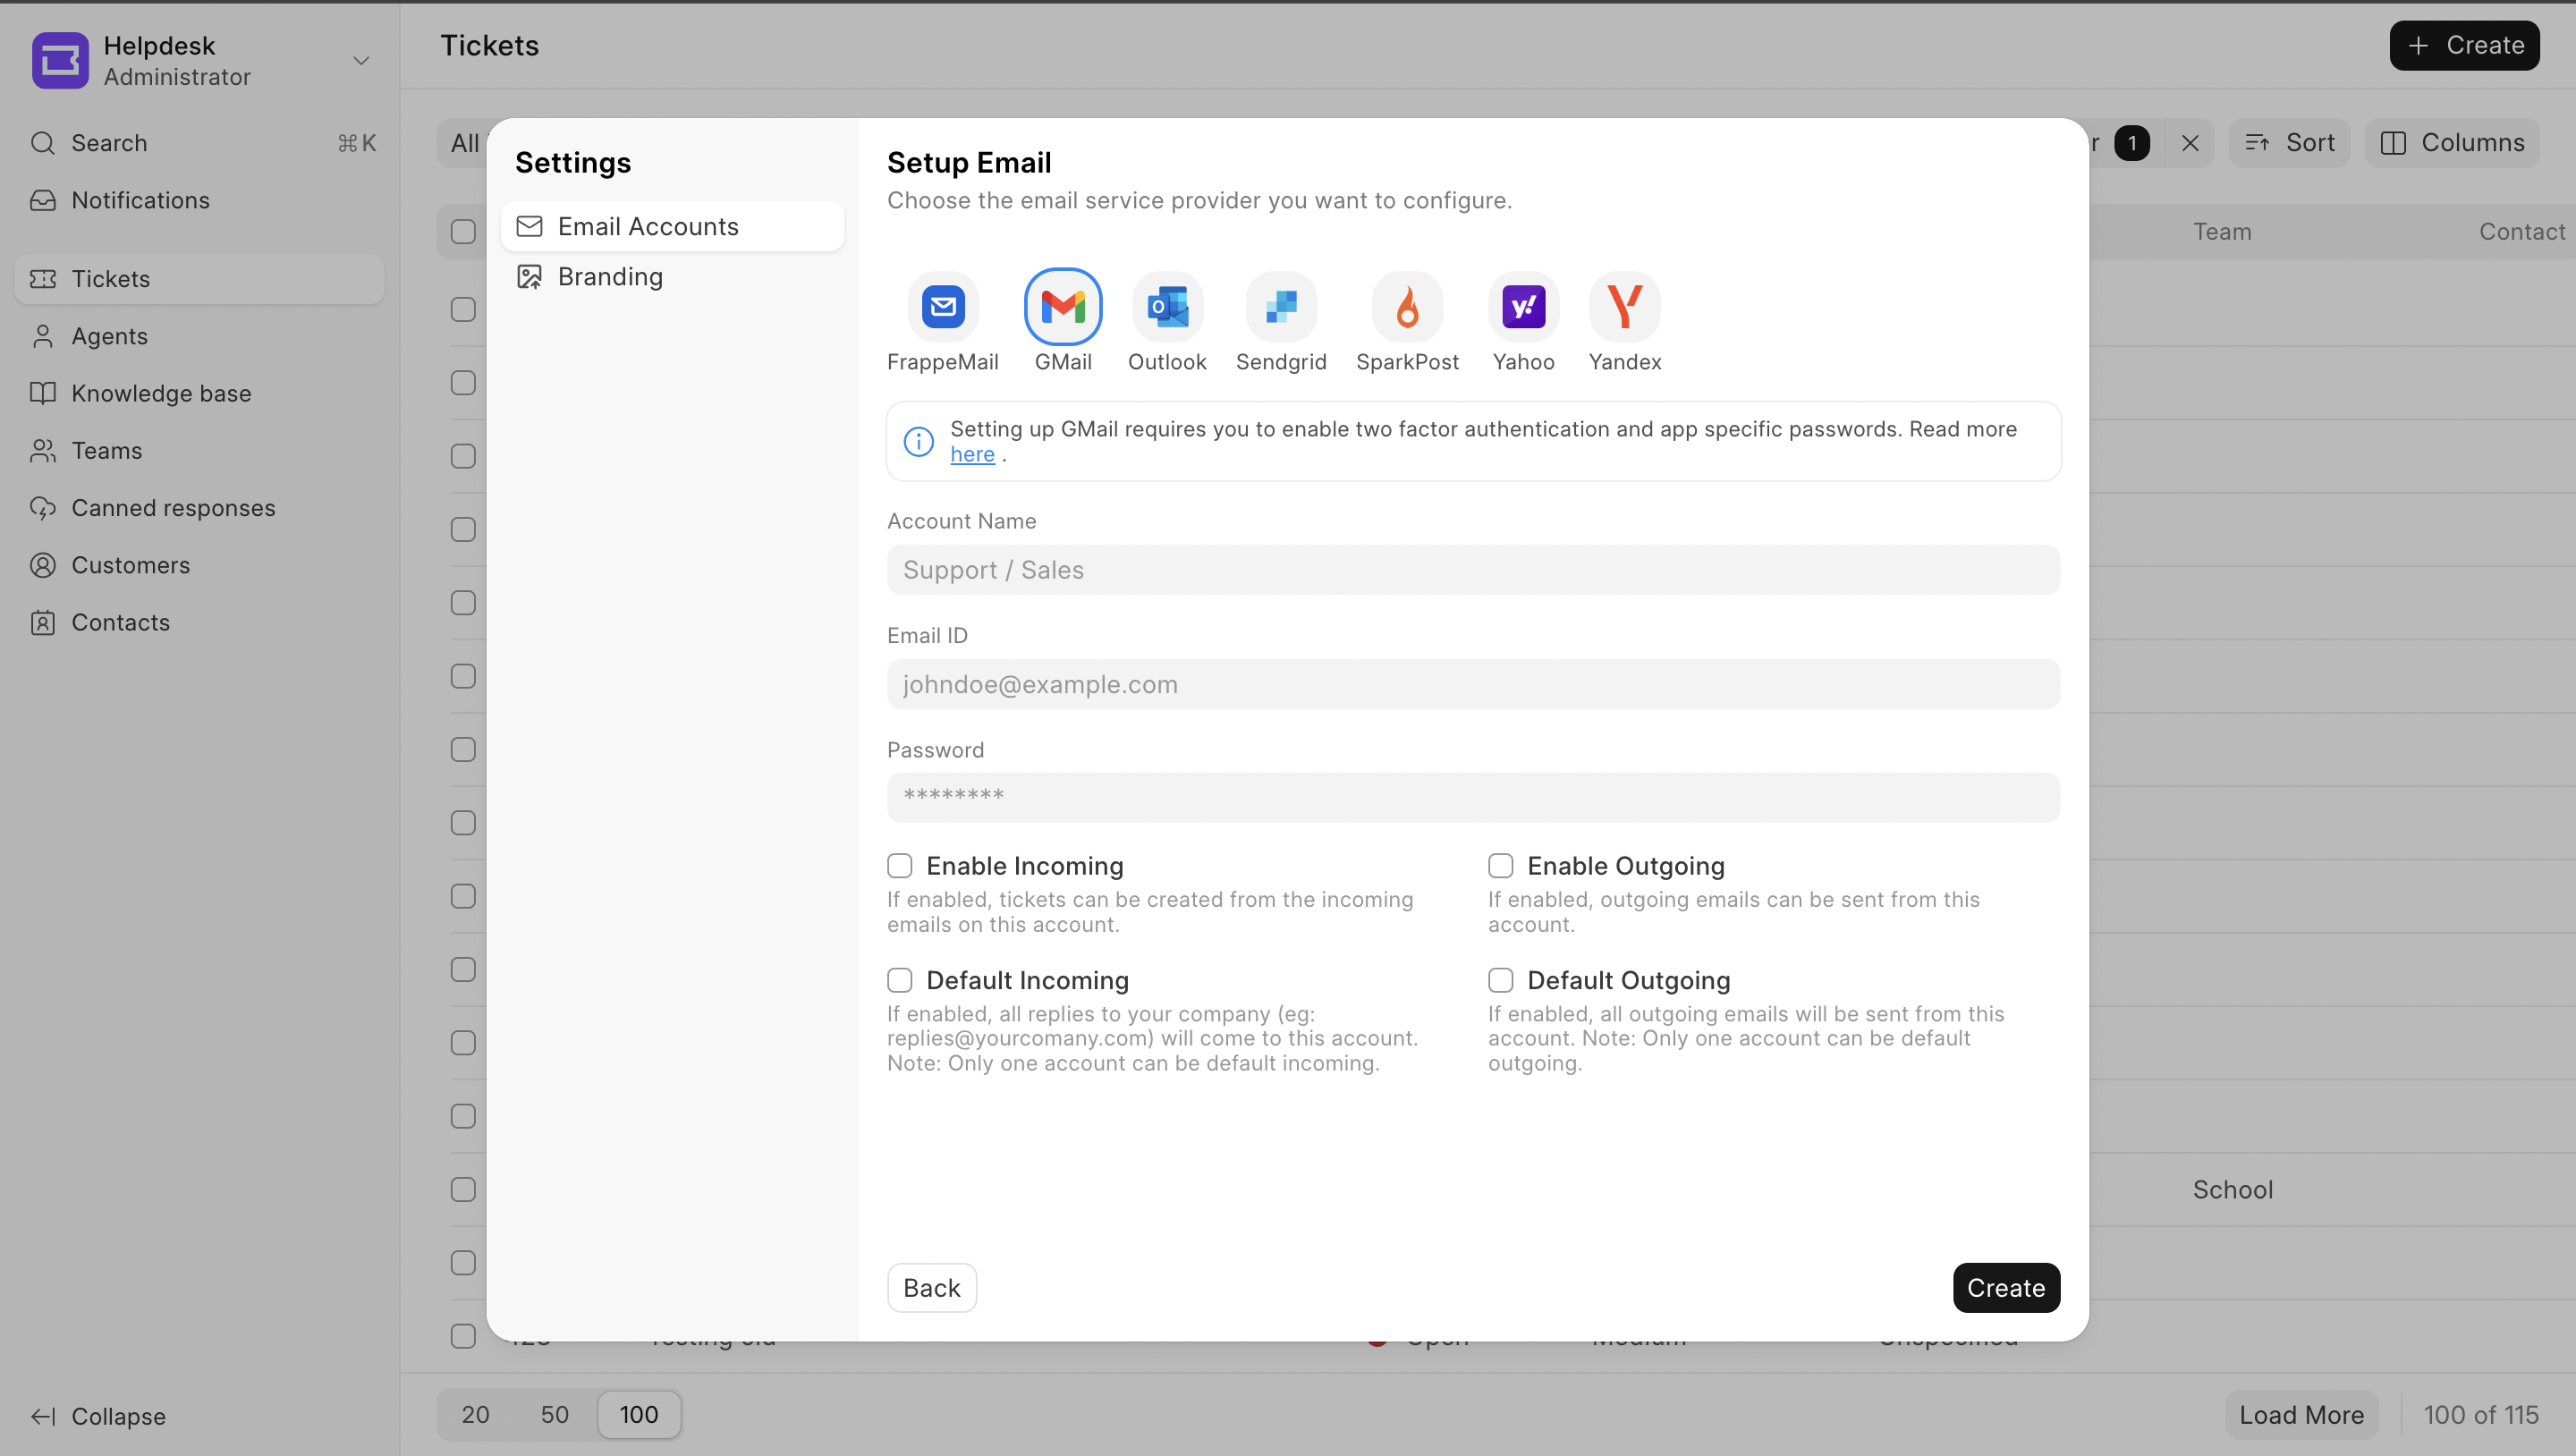
Select the email account provider from the list , then fill the fields mentioned in the image above, the form accepts 7 fields
- Account Name: The name of your account, it can be support/sales or any other email account for which you are configuring it.
- Email ID: The email address of your email account.
- Password: App password for your email account which can be found from the link provided in the banner.
- Enable Incoming: If enabled, all the emails which you will receive in this account will be created as a ticket in your Helpdesk System.
- Enable Outgoing: If enabled, all the replies to the tickets will be sent from this email address.
- Default Incoming: If enabled, all replies to your company (eg: [email protected]) will come to this account. Note: Only one account can be default incoming.
- Default Outgoing: If enabled, all outgoing emails will be sent from this account. Note: Only one account can be default outgoing.
- To edit an email account, simply click on the account and you will be able to edit your email account.
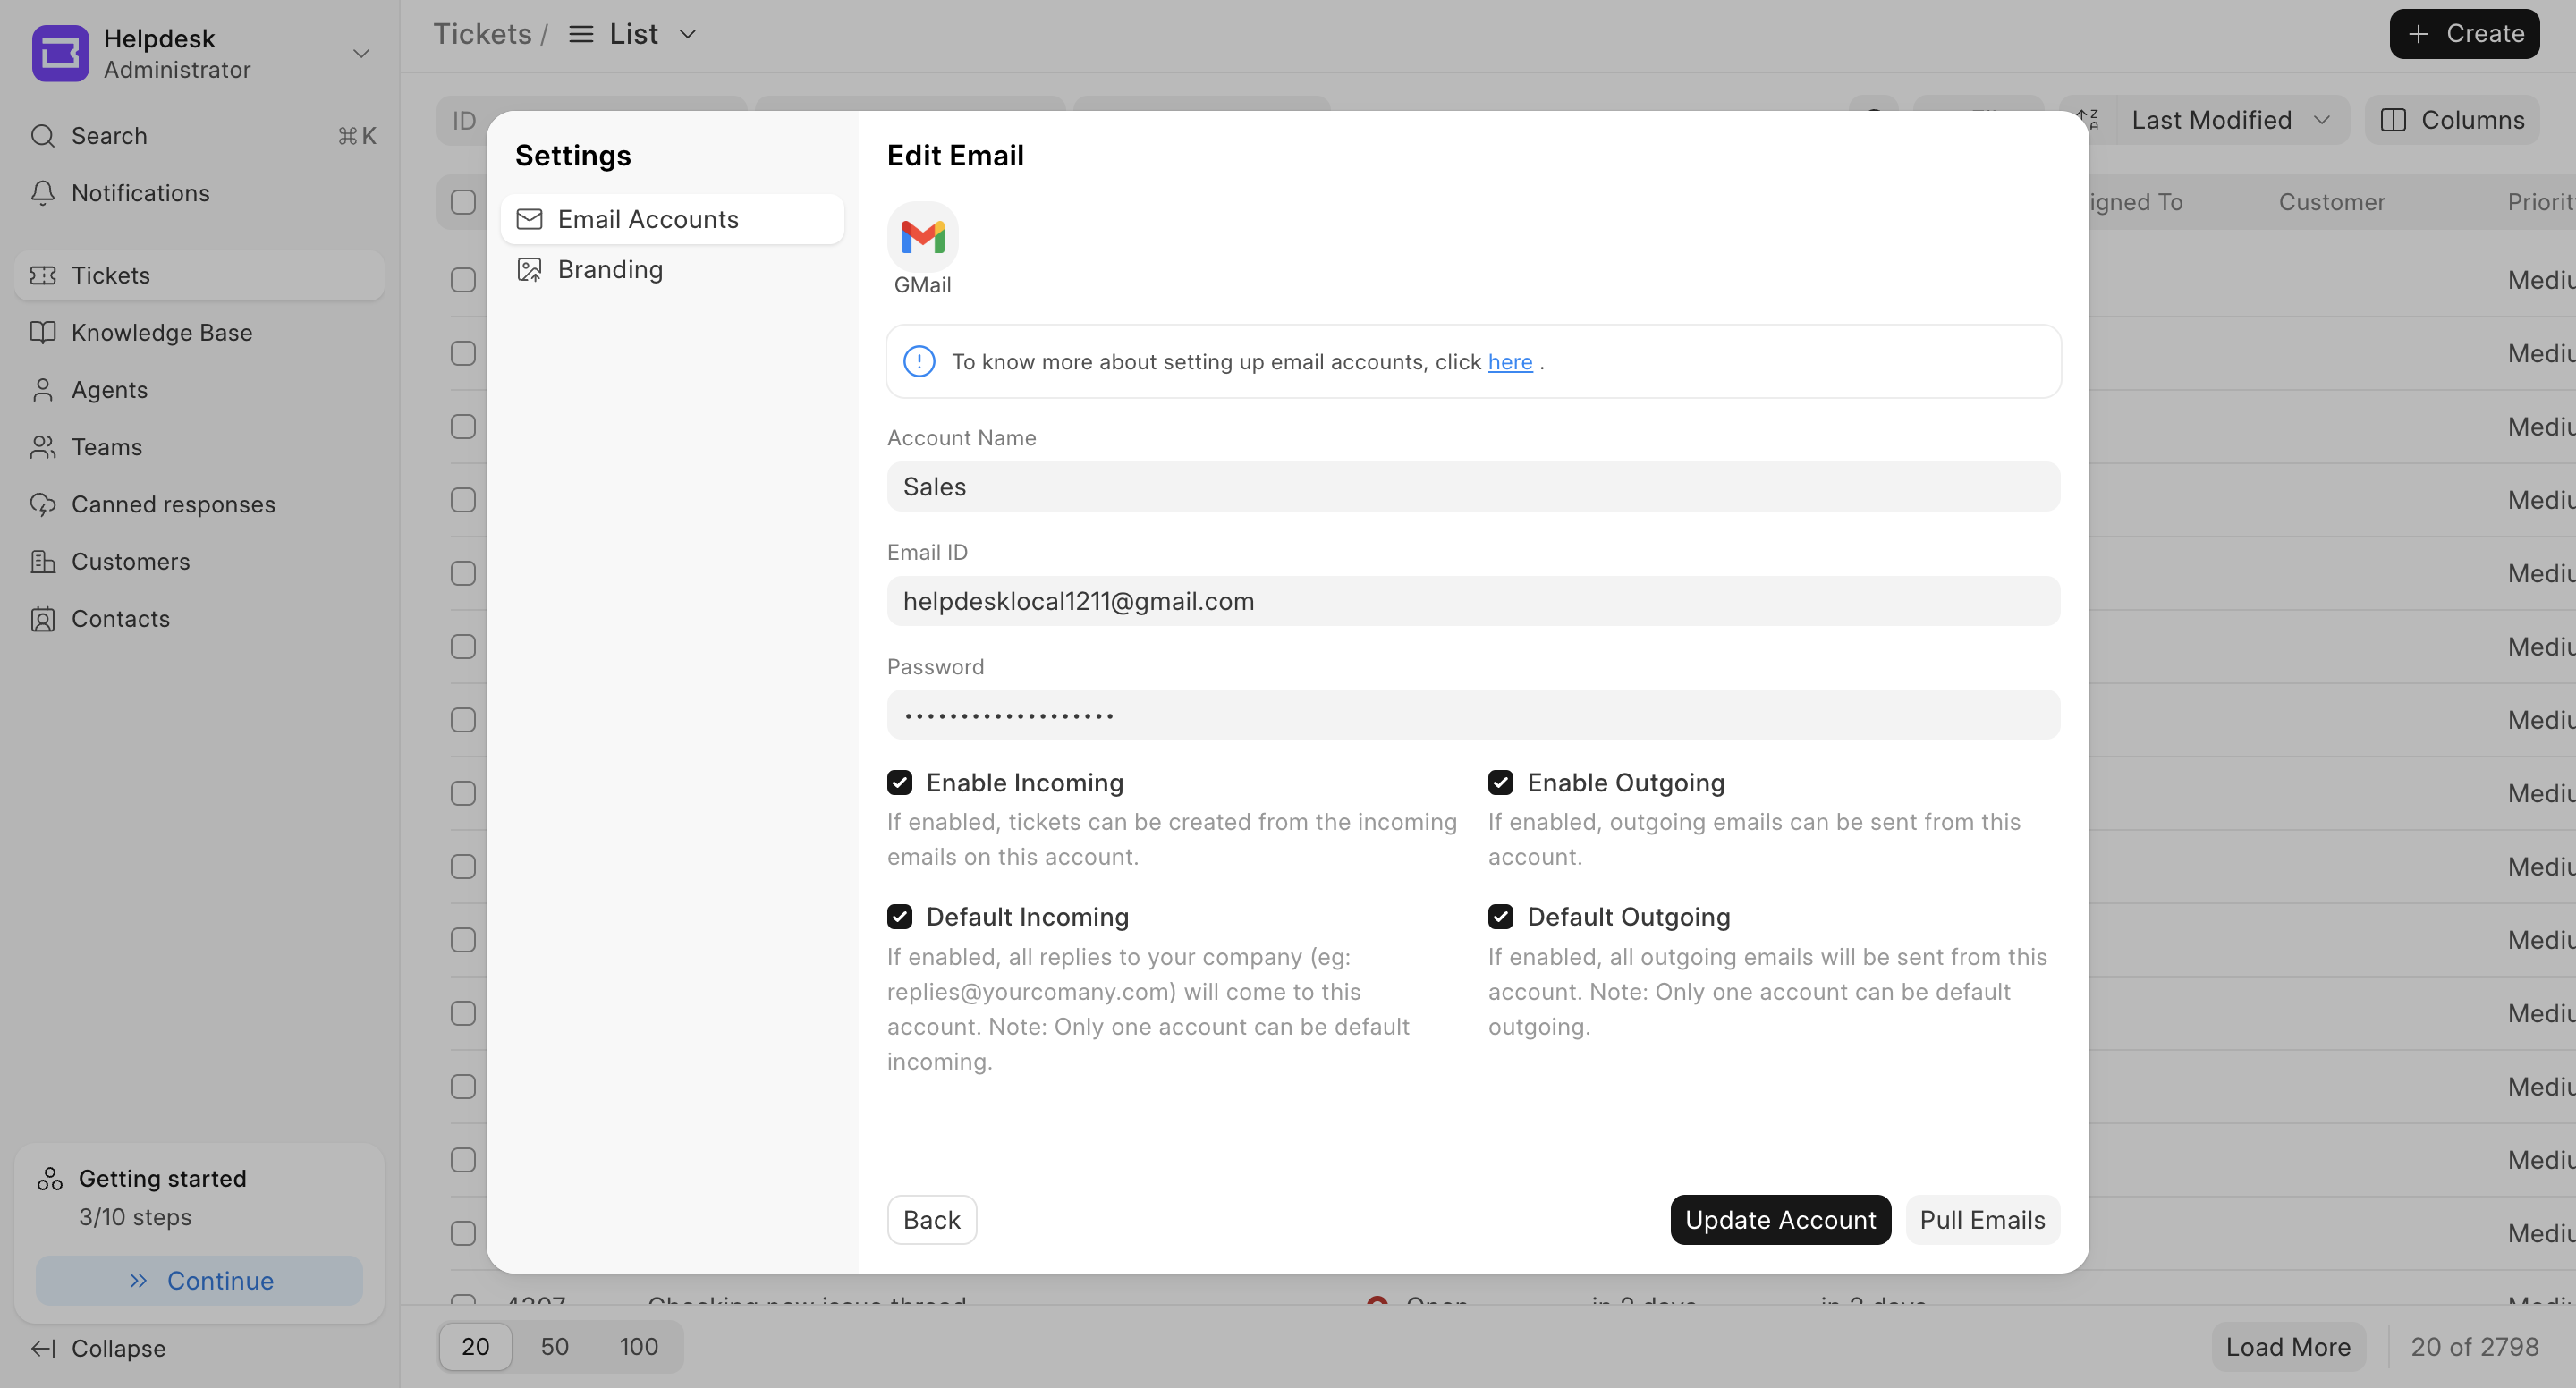
Pull Emails: All emails are pulled every 10 minutes, if you manually want to trigger that, you can click on the "Pull Emails" button to get the latest tickets. This button is only visible when the "Enable Incoming" is checked.
Note: Emails will be pulled automatically only if the set email account has not set awaiting password field as 1.
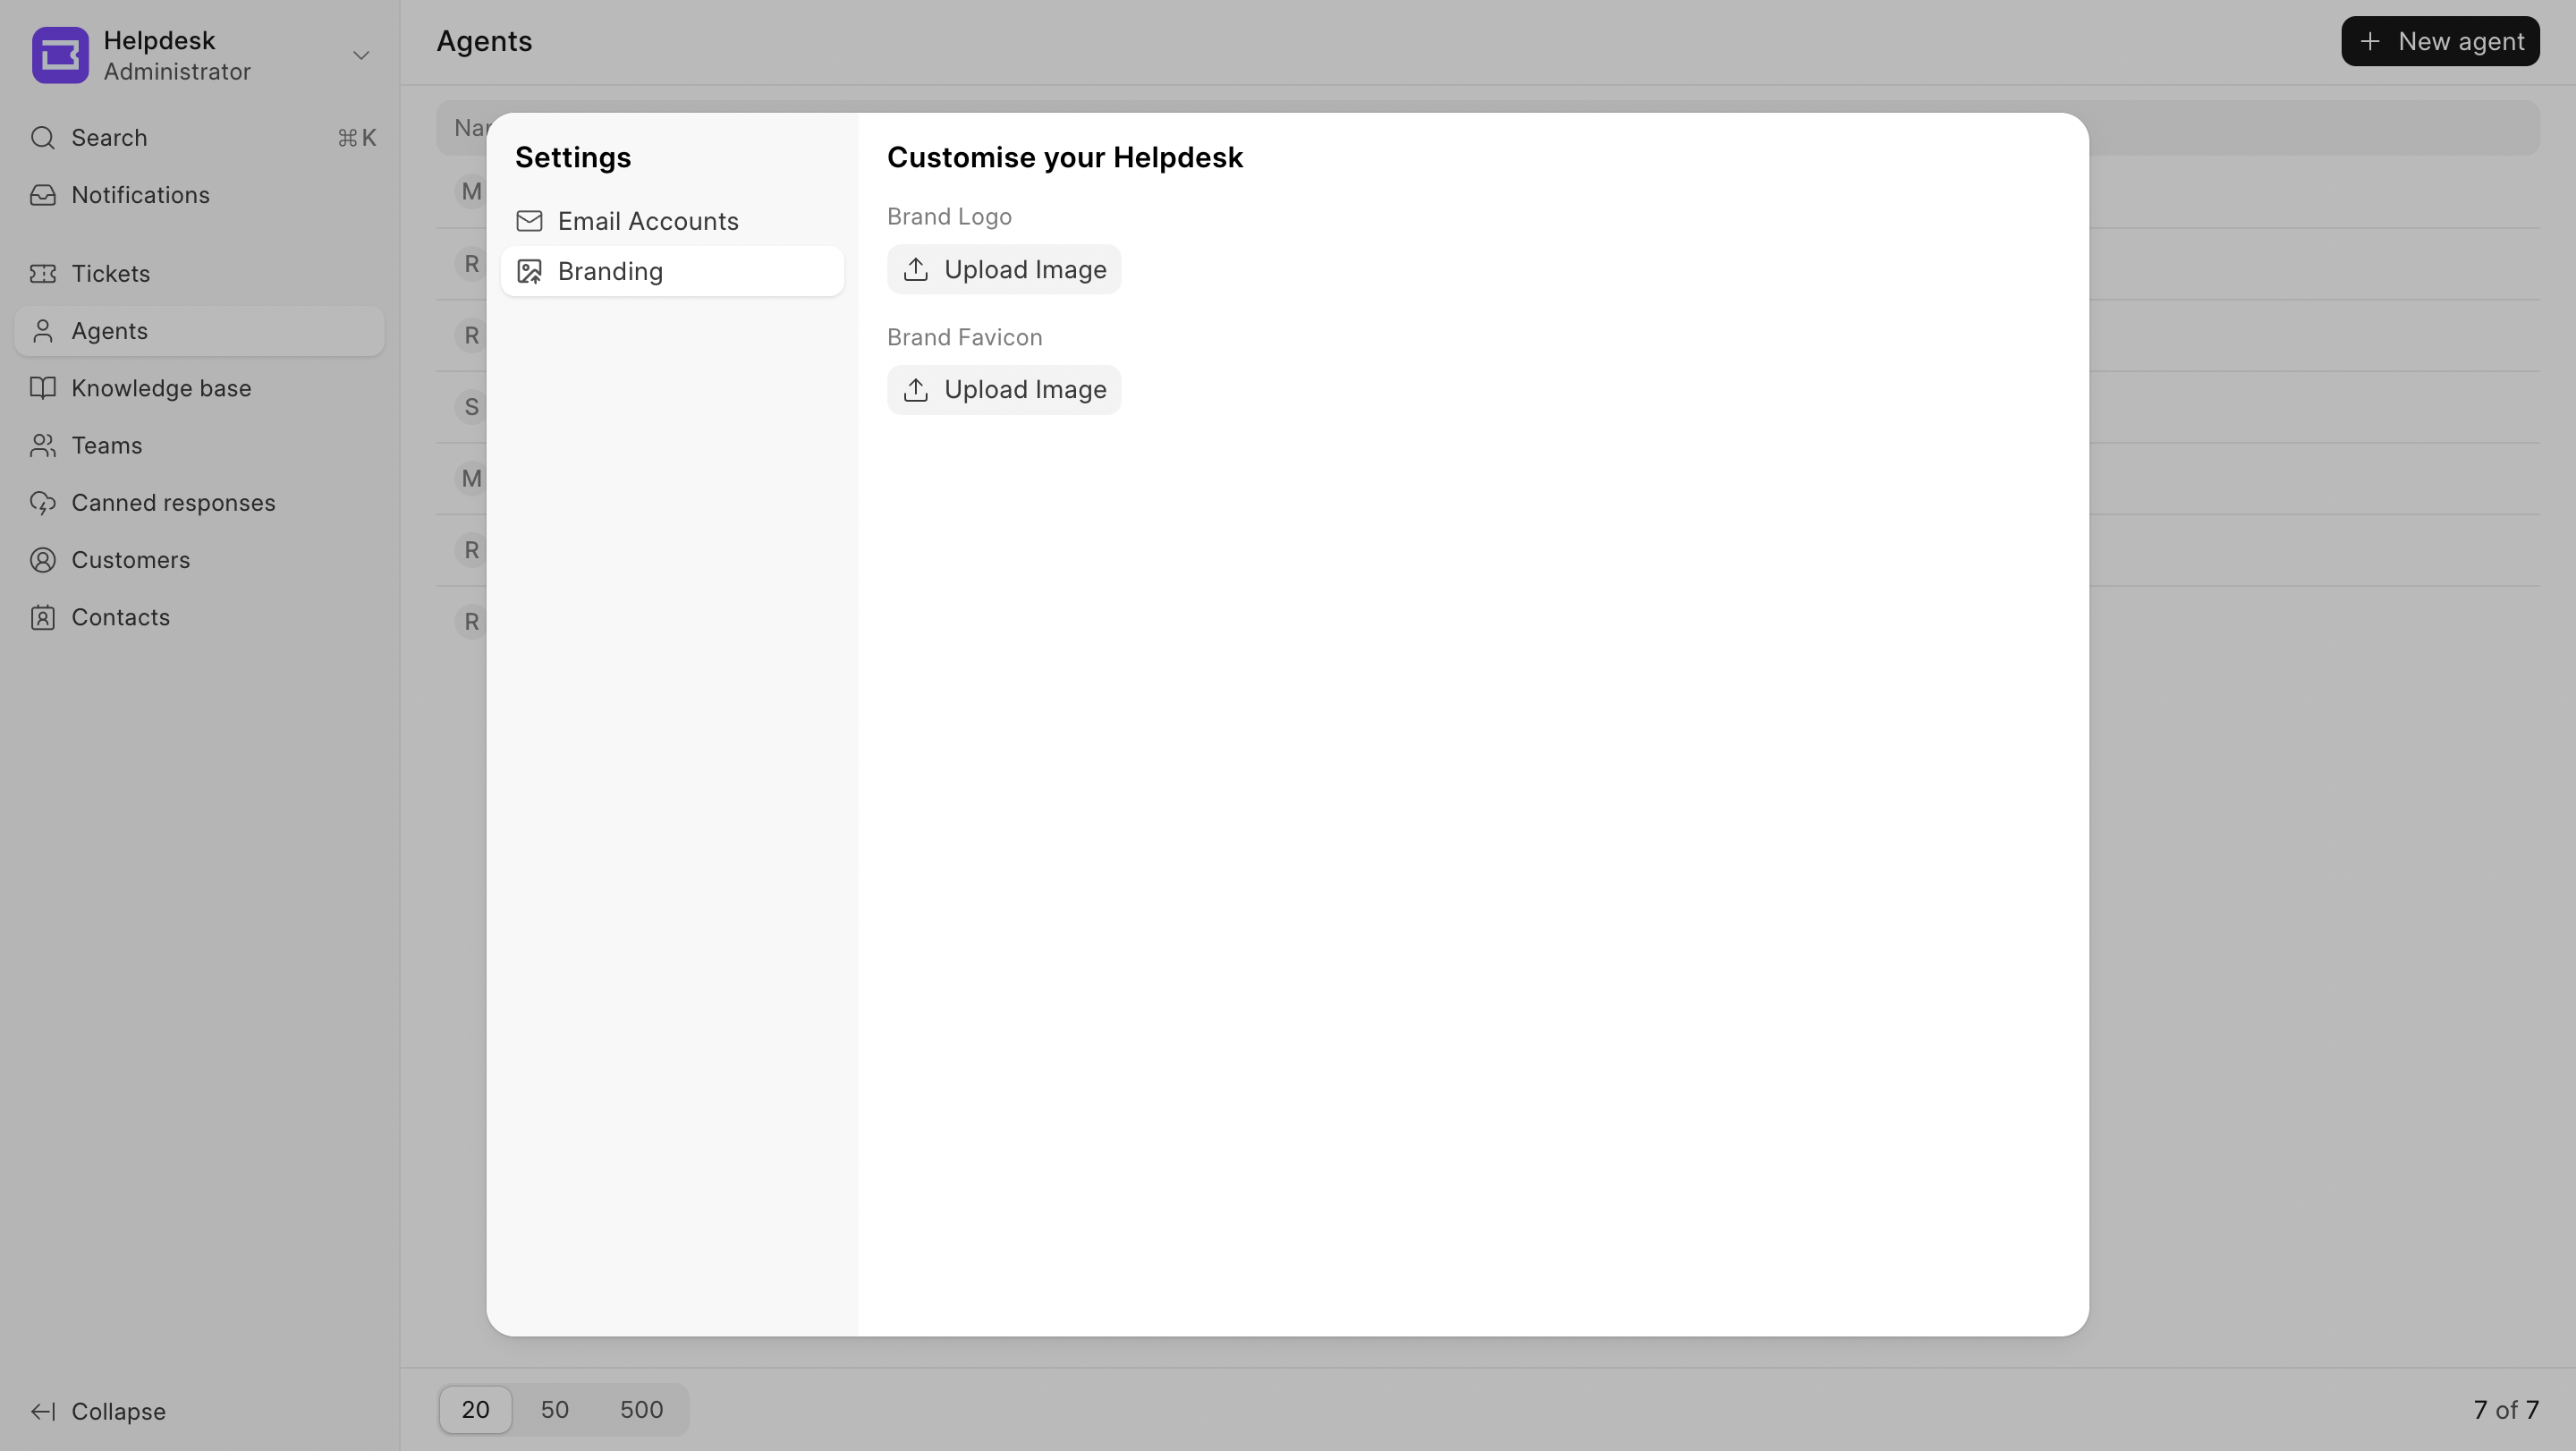
- Branding
Inside the settings, user can change the logo and favicon of their Helpdesk.
There are many other settings in Helpdesk to customise the software according to your organisation. These settings can be found in HD Settings DocType.
To go to HD Settings DocType:
- Switch to desk
- Type HD Settings in the search bar at the top & press enter. URL path
app/hd-settings/HD%20Settings
Details Tab
Default Priority
When enabled, agents will only be able to view tickets that are assigned to teams they are a part of.
Team Restrictions
- Restrict tickets by Team: When enabled, tickets are only visible to members of the team they are assigned to.
- Do not restrict tickets without a Team: This setting is only visible if the above setting is enabled, it allows unassigned tickets to be visible to everyone, that means tickets without any teams or agent_group will be visible to all the teams till some team is assigned to those tickets.
Restrict agent assignment to selected Team
If team restrictions are enabled, tickets can still be assigned to agents outside the assigned team. This feature ensures that tickets can only be assigned to agents within the team specified on the ticket.
To enable it, go to HD Settings and click on "Restrict agent assignment to selected Team"
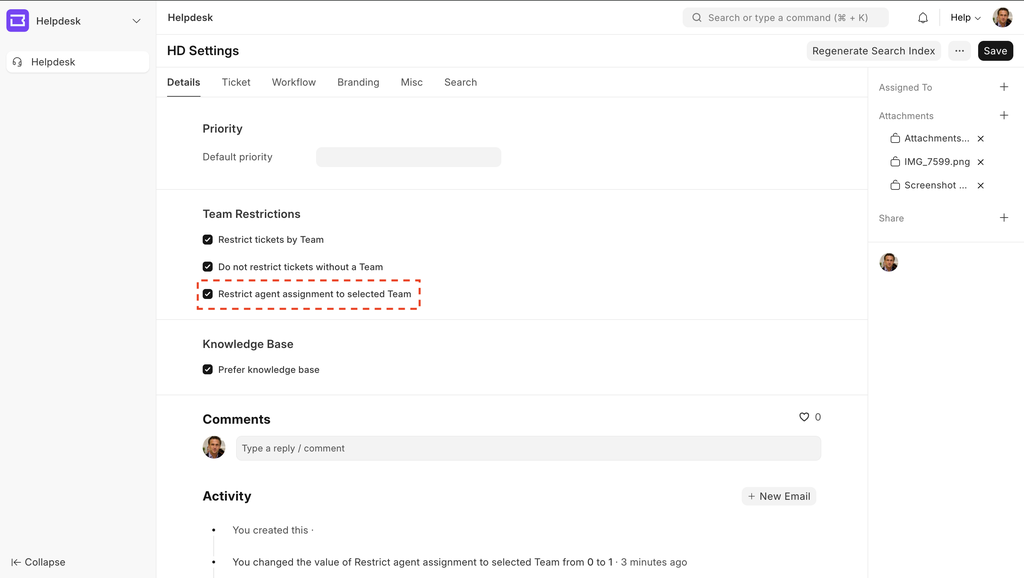
Note: We need to enable "Restrict tickets by Team" for this setting to work.
Prefer knowledge base
When enabled, the Knowledge Base becomes the default landing page for users accessing the Customer Portal.
Ticket Tab
Default ticket type
Set a default type that will be pre-selected when a new ticket is created.
Ticket type is mandatory
If enabled, agents must select a ticket type before creating or updating a ticket.
Allow anyone to create tickets
Allows users to create tickets without needing any specific permission.
Enable feedback for Customer Portal
Users will be required to give feedback before a ticket can be closed.
Auto update status
Automatically changes the ticket status to "Replied" when an agent sends a response.
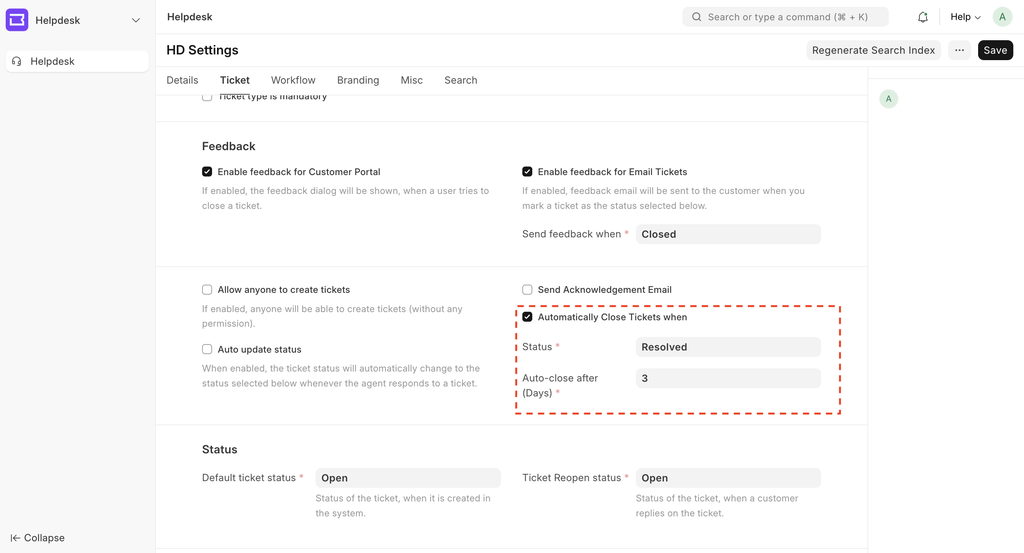
Automatically Close Tickets when
Enables the system to automatically close tickets if the customer doesn't respond after a reply.
Auto-close status
This field is visible if the "Automatically Close Tickets when" field is enabled. Here you can set the status on which to trigger this functionality.
Auto-close after (Days)
This field is visible if the "Automatically Close Tickets when" field is enabled. Here you can set after how many days the tickets in the status mentioned above closes automatically (e.g: after the ticket has been in resolved status for 3 days the ticket will be closed automatically)
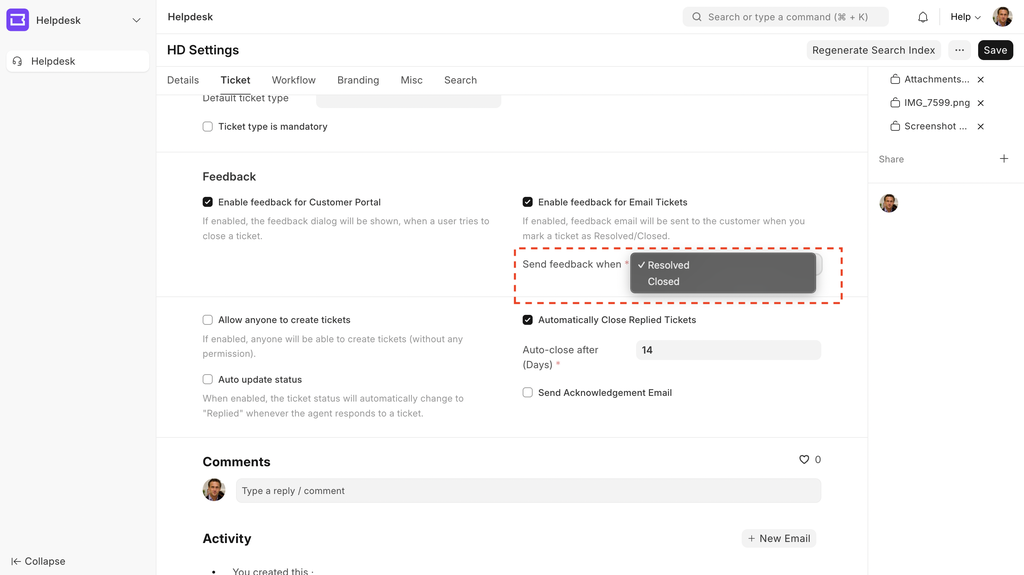
Enable feedback for Email Tickets
Click on "Ticket" tab, and click on "Enable feedback for Email Tickets".
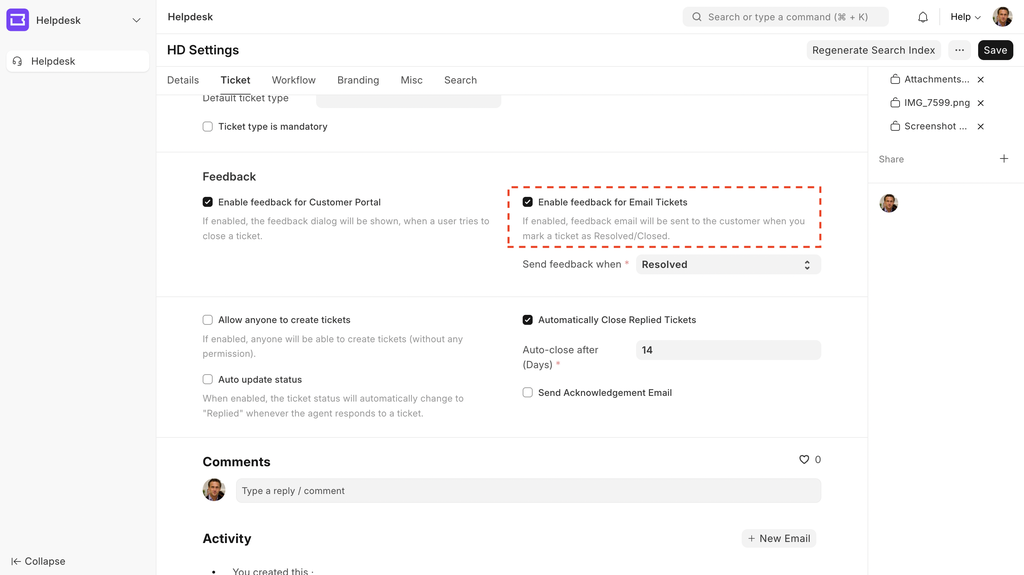
Once you enable it, the feedback email will be sent to the customer either when the status of the ticket is "Resolved" or "Closed". You can configure the status on which email is sent by using the field "Send feedback when"
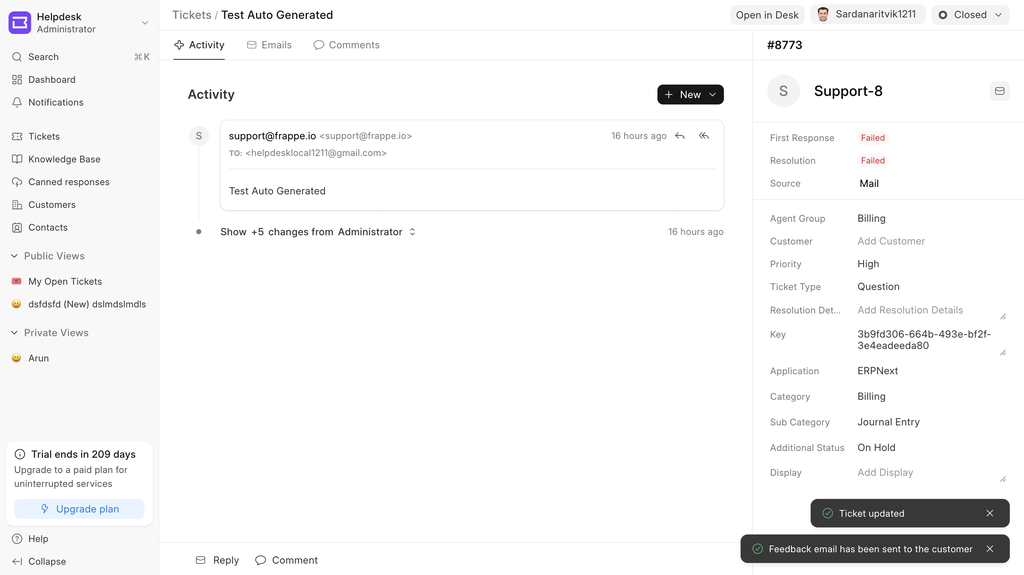
Now once the ticket status is changed to "Resolved" or "Closed", the email is shared with the customer on the same thread. When they click on the button in the email, they are redirected to a "WebForm" on which they can fill the feedback. Once they click on submit, the feedback is attached to the relevant ticket.
When the email is shared, the agent is also notified about it on the frontend via toast:
Internal working
Whenever a Ticket is generated, a unique UUID4 key is generated for the document.
When we set the status of the ticket to either "Resolved/Closed" (depending on your settings), an email is shared to the customer on the same "email thread", when they click on the button, they are navigated to the feedback form (the URL contains the UUID of the ticket which is removed from the URL after a few milliseconds) where they fill in the details.
Once they click on submit, a record is generated in the doctype "HD Email Feedback".
In before_save of this doctype, we check whether the key exists or not in the HD Ticket doctype, if it exists, then the feedback is added to that particular ticket.
Note
- Works for only new tickets.
- Feedback once added the the ticket, cant be changed by the customer.
- Only works for Tickets received via email.
Search Tab
On the top of settings there is a button called Regenerate Search Index. Clicking on it will regenerate the search results which will include the latest articles, also if some error is thrown regarding search you can click on this button to solve the search issue.
This section lets you define how important each field is when someone searches for a ticket or an article.
- Name Weight: 1
- Subject Weight: 6
- Description Weight: 5
- Headings Weight: 8
Higher values mean that field will have more weight in the search ranking. You can adjust these weights according to your needs.
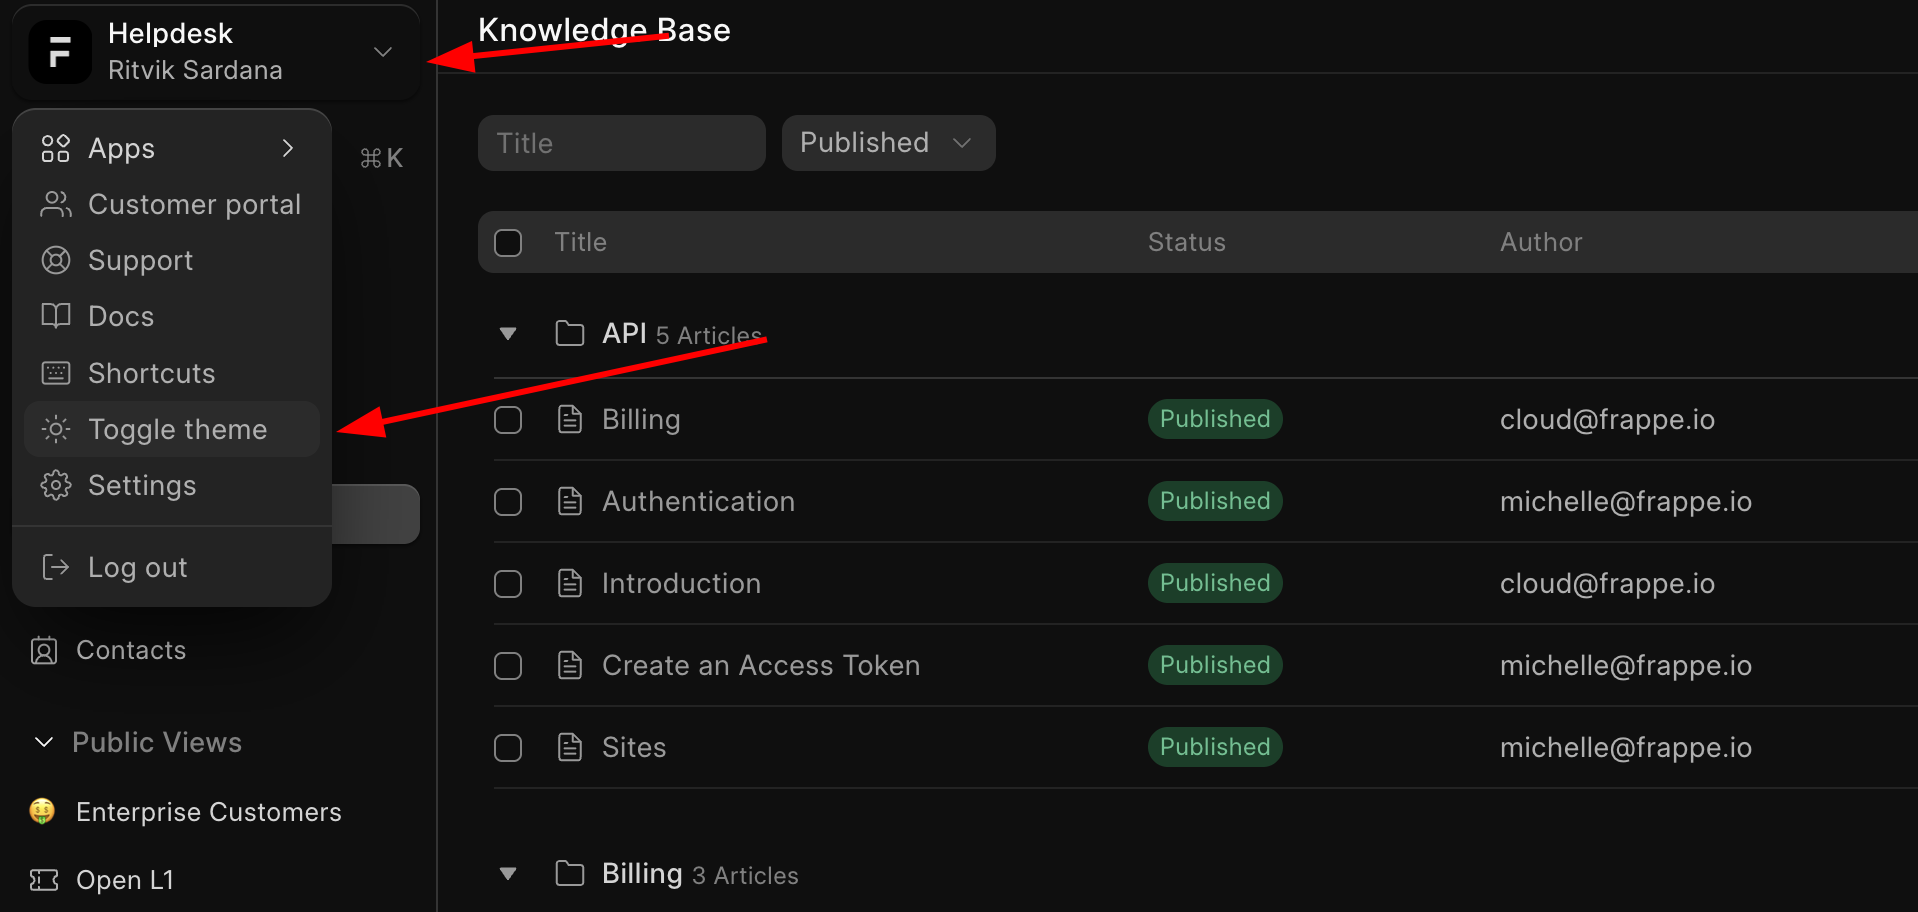
Dark Mode
Helpdesk also supports dark mode.
To toggle the theme:
- Click on User Dropdown at the top left corner.
- Click on Toggle Theme
Naming Series of Ticket
(Changing the naming of your ticket).
By default the naming series in Helpdesk is "0001" -> "0002" and so on.
If you wish to alter it to something like "INCD-0001" or "ISS-01" or something else, it is totally possible. Here is a step by step procedure
- Go to the URL /desk/hd-ticket
- Click on overflow menu on the right (triple dots)
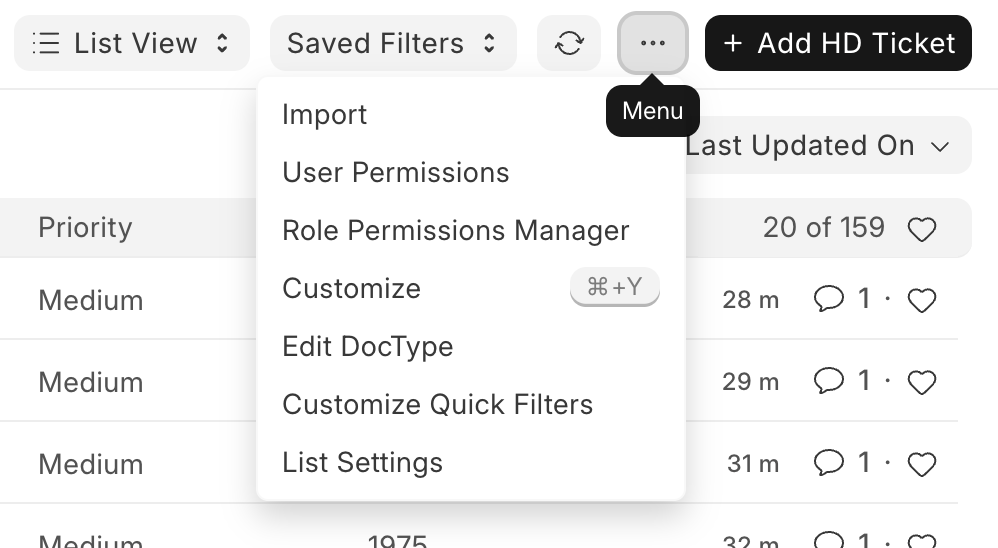
- Customize
- Click on "Details" Tab at the top
- Click on Naming
- Change Naming Rule to "Expression".
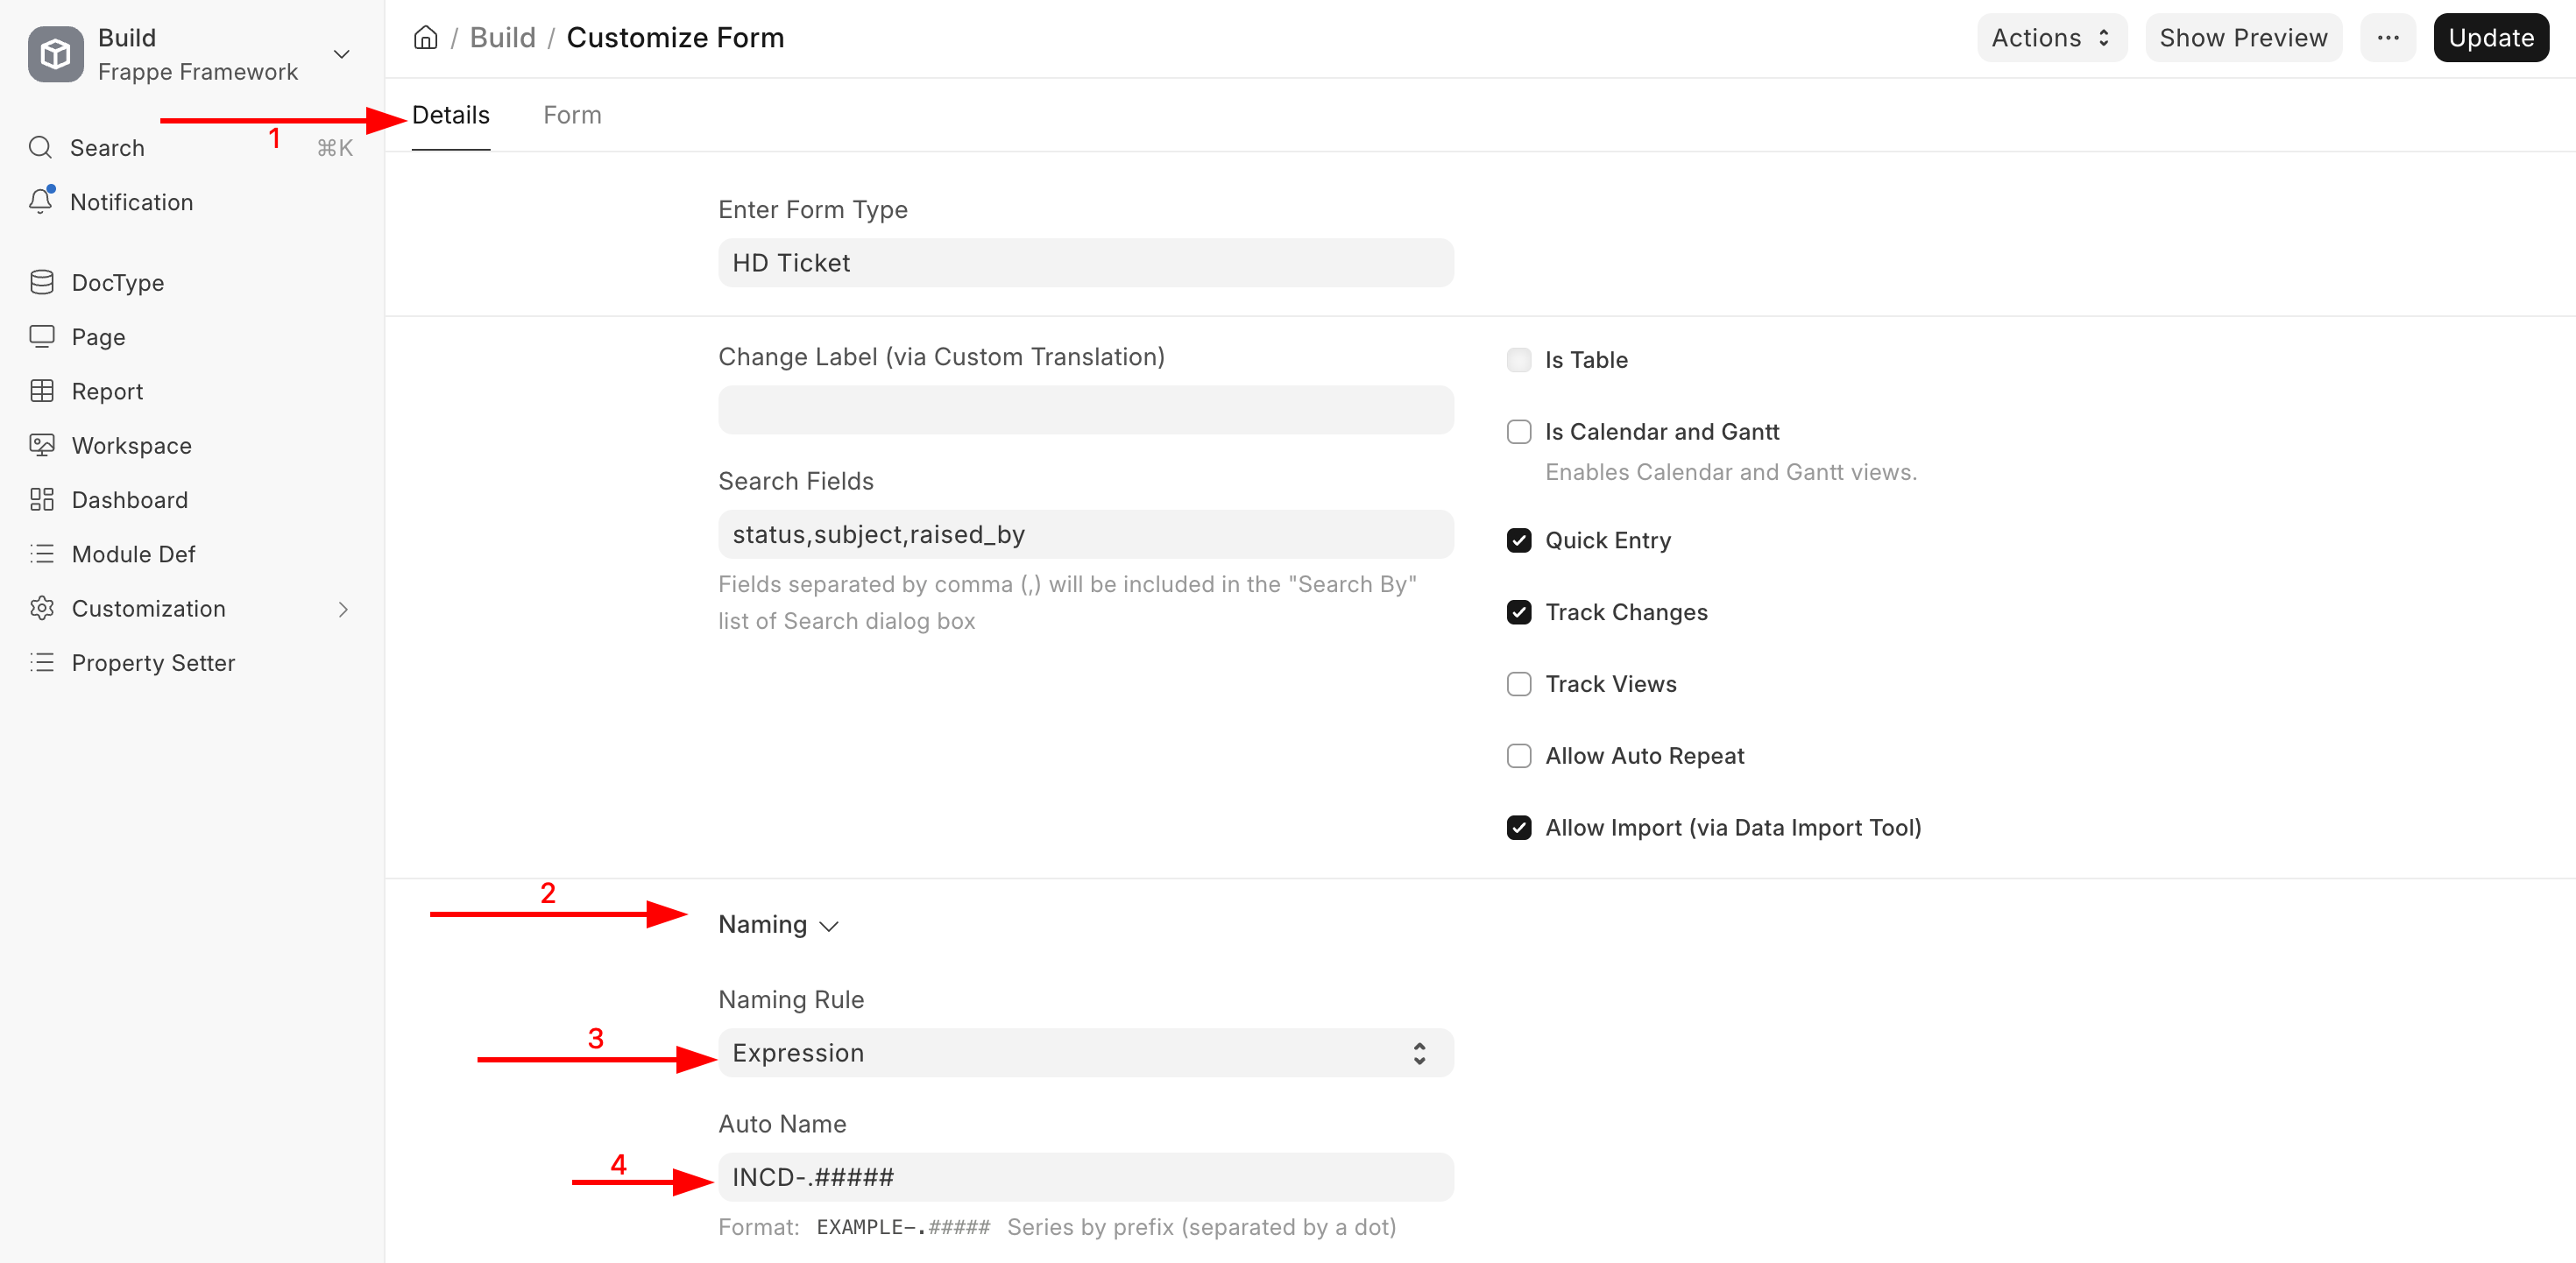
Update Auto Name field to "INCD-.#####". Where ##### represent the digits to be followed after the INCD key word. So for e.g. if the naming series is "INCD-.###" then the ticket name would be "INCD-001" and so on.
There are multiple ways to name your Ticket. You can read about it from here.