E-Invoicing under GST
Introduced in version 13
E-Invoicing has been introduced to standardize the invoicing process. All ERPs and software have to accommodate the invoice format defined by GSTN. It also provides a level of automation in filling GSTR reports.
Under the new e-invoicing system, businesses with turnover higher than ₹50Cr are supposed to get all business to business (B2B) invoices electronically authenticated with GSTN by generating a unique Invoice Reference Number (IRN).
To help automate the E-Invoicing process, we have integrated ERPNext with a GST Suvidha Provider (GSP) so you can easily authenticate ERPNext Sales Invoices with GSTN.
1. Prerequisites
- You must have a registered account on E-Invoice portal
- GST Accounts must be set in the "GST Settings".
- Addresses of Company & Customers must have proper GSTIN & State set.
Note: Using this integration for automatic process involves additional charges. Contact ERPNext Sales Team for more information.
2. Setting up E-Invoicing
2.1 Getting Credentials
- Login into E-Invoice portal with your username and password. Register with a username and password if you haven't created an account already.
- Click on "API registration" on the sidebar.
- Click on "User Credentials" from the expanded list.
- Click on "Create API User".
- Click on "Through GSP" and select "Adequare Info Private Limited".
- Enter a new Username.
- Enter a new Password.
2.2 Setting Up ERPNext
Go to "E Invoice Settings" and click on the "Enable" checkbox.
- GSTIN: GSTIN by which your company is registered on the e-invoice portal.
- Username: Username created in the previous step.
- Password: Password created in the previous step.
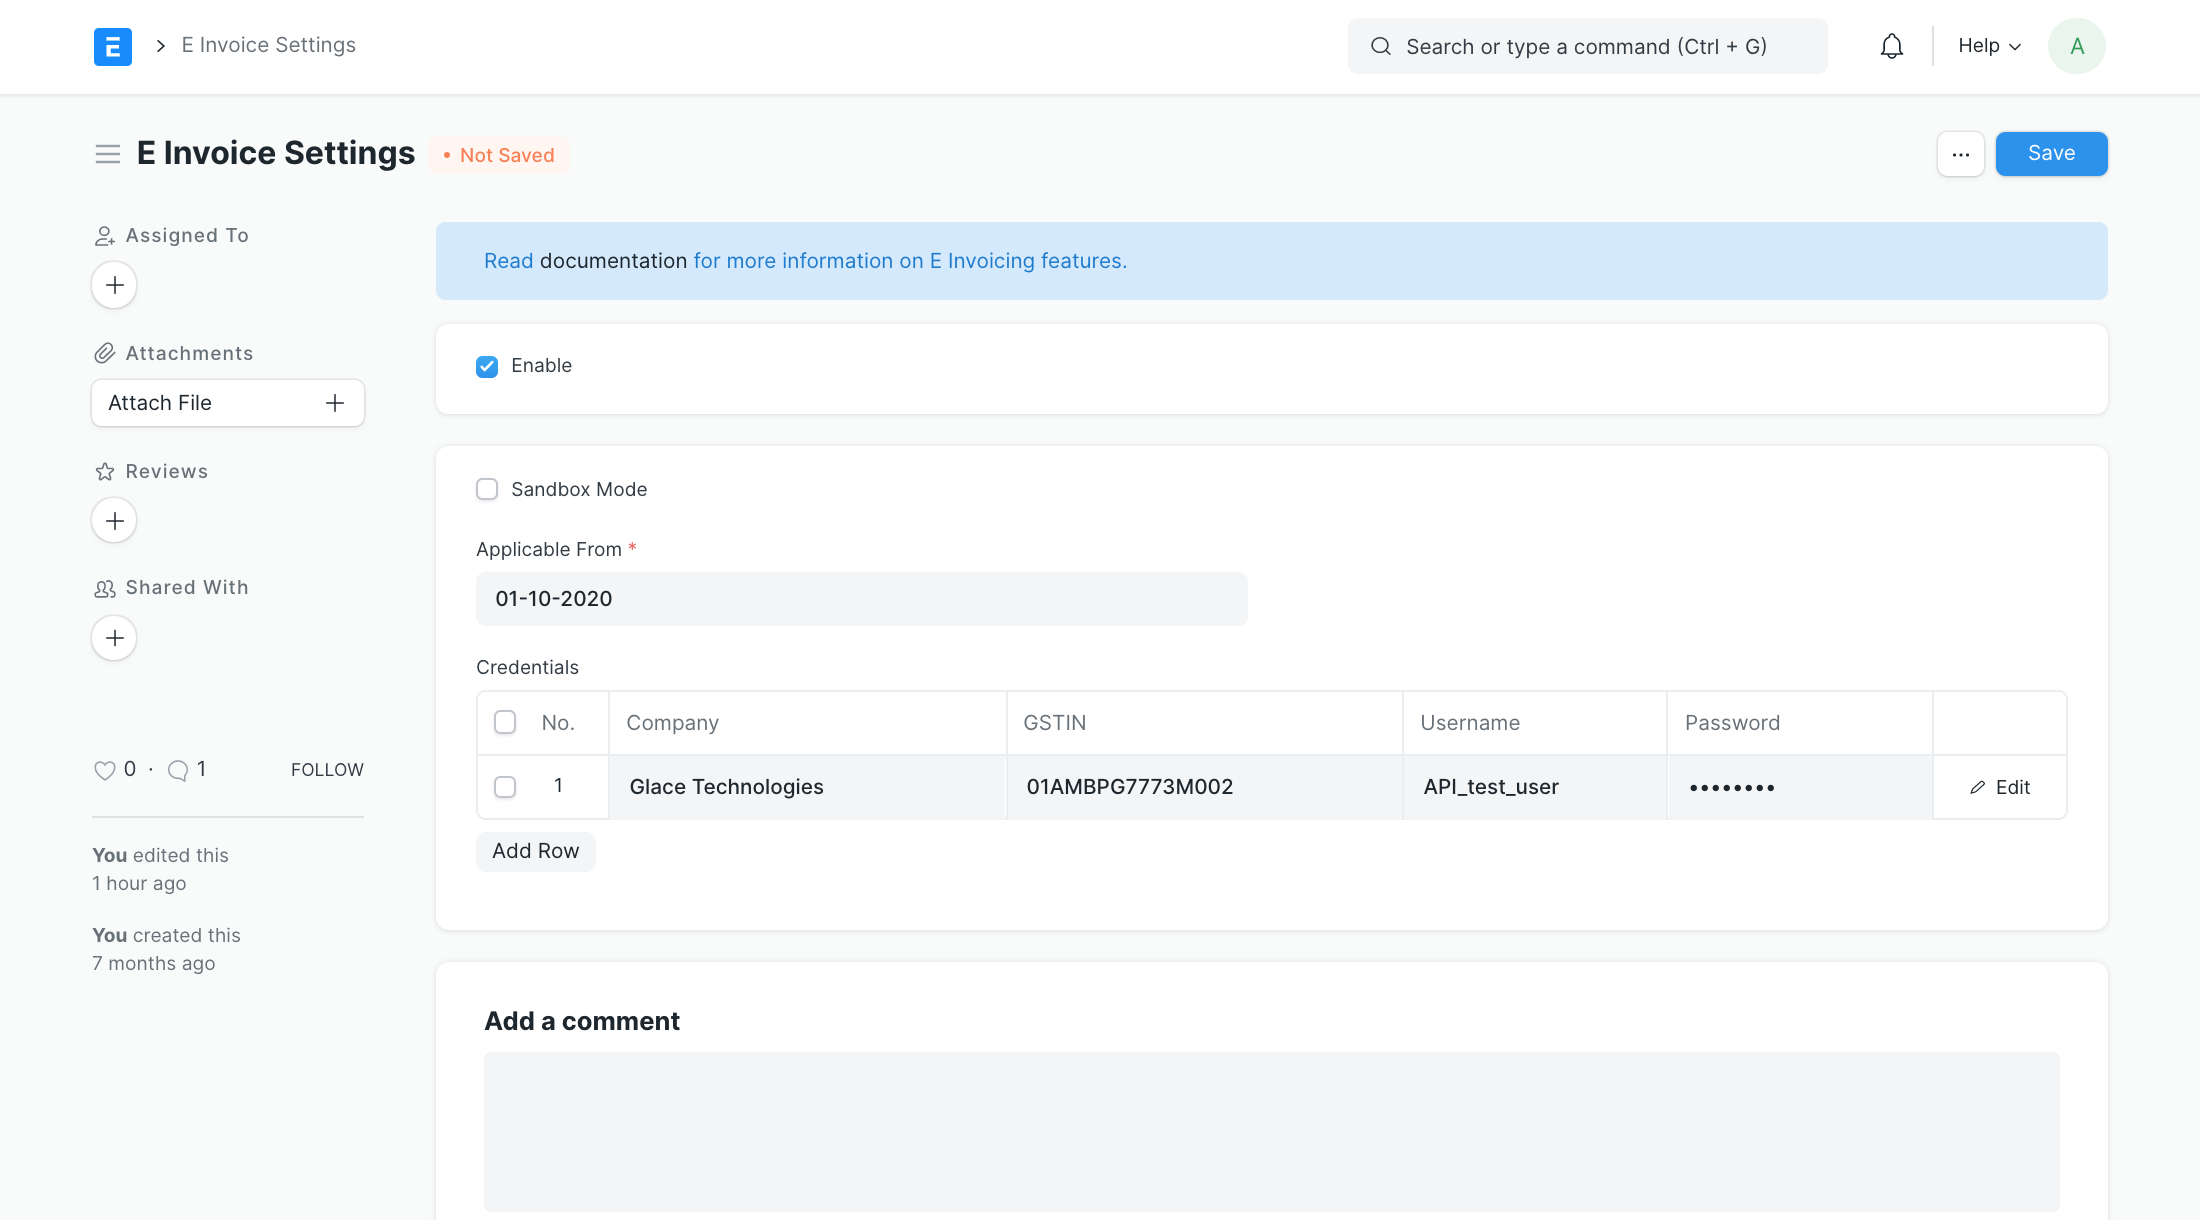
Note. In E Invoice Settings, you must not enter the username/password that is used to login into e-invoice portal.
2.3 Generating IRN
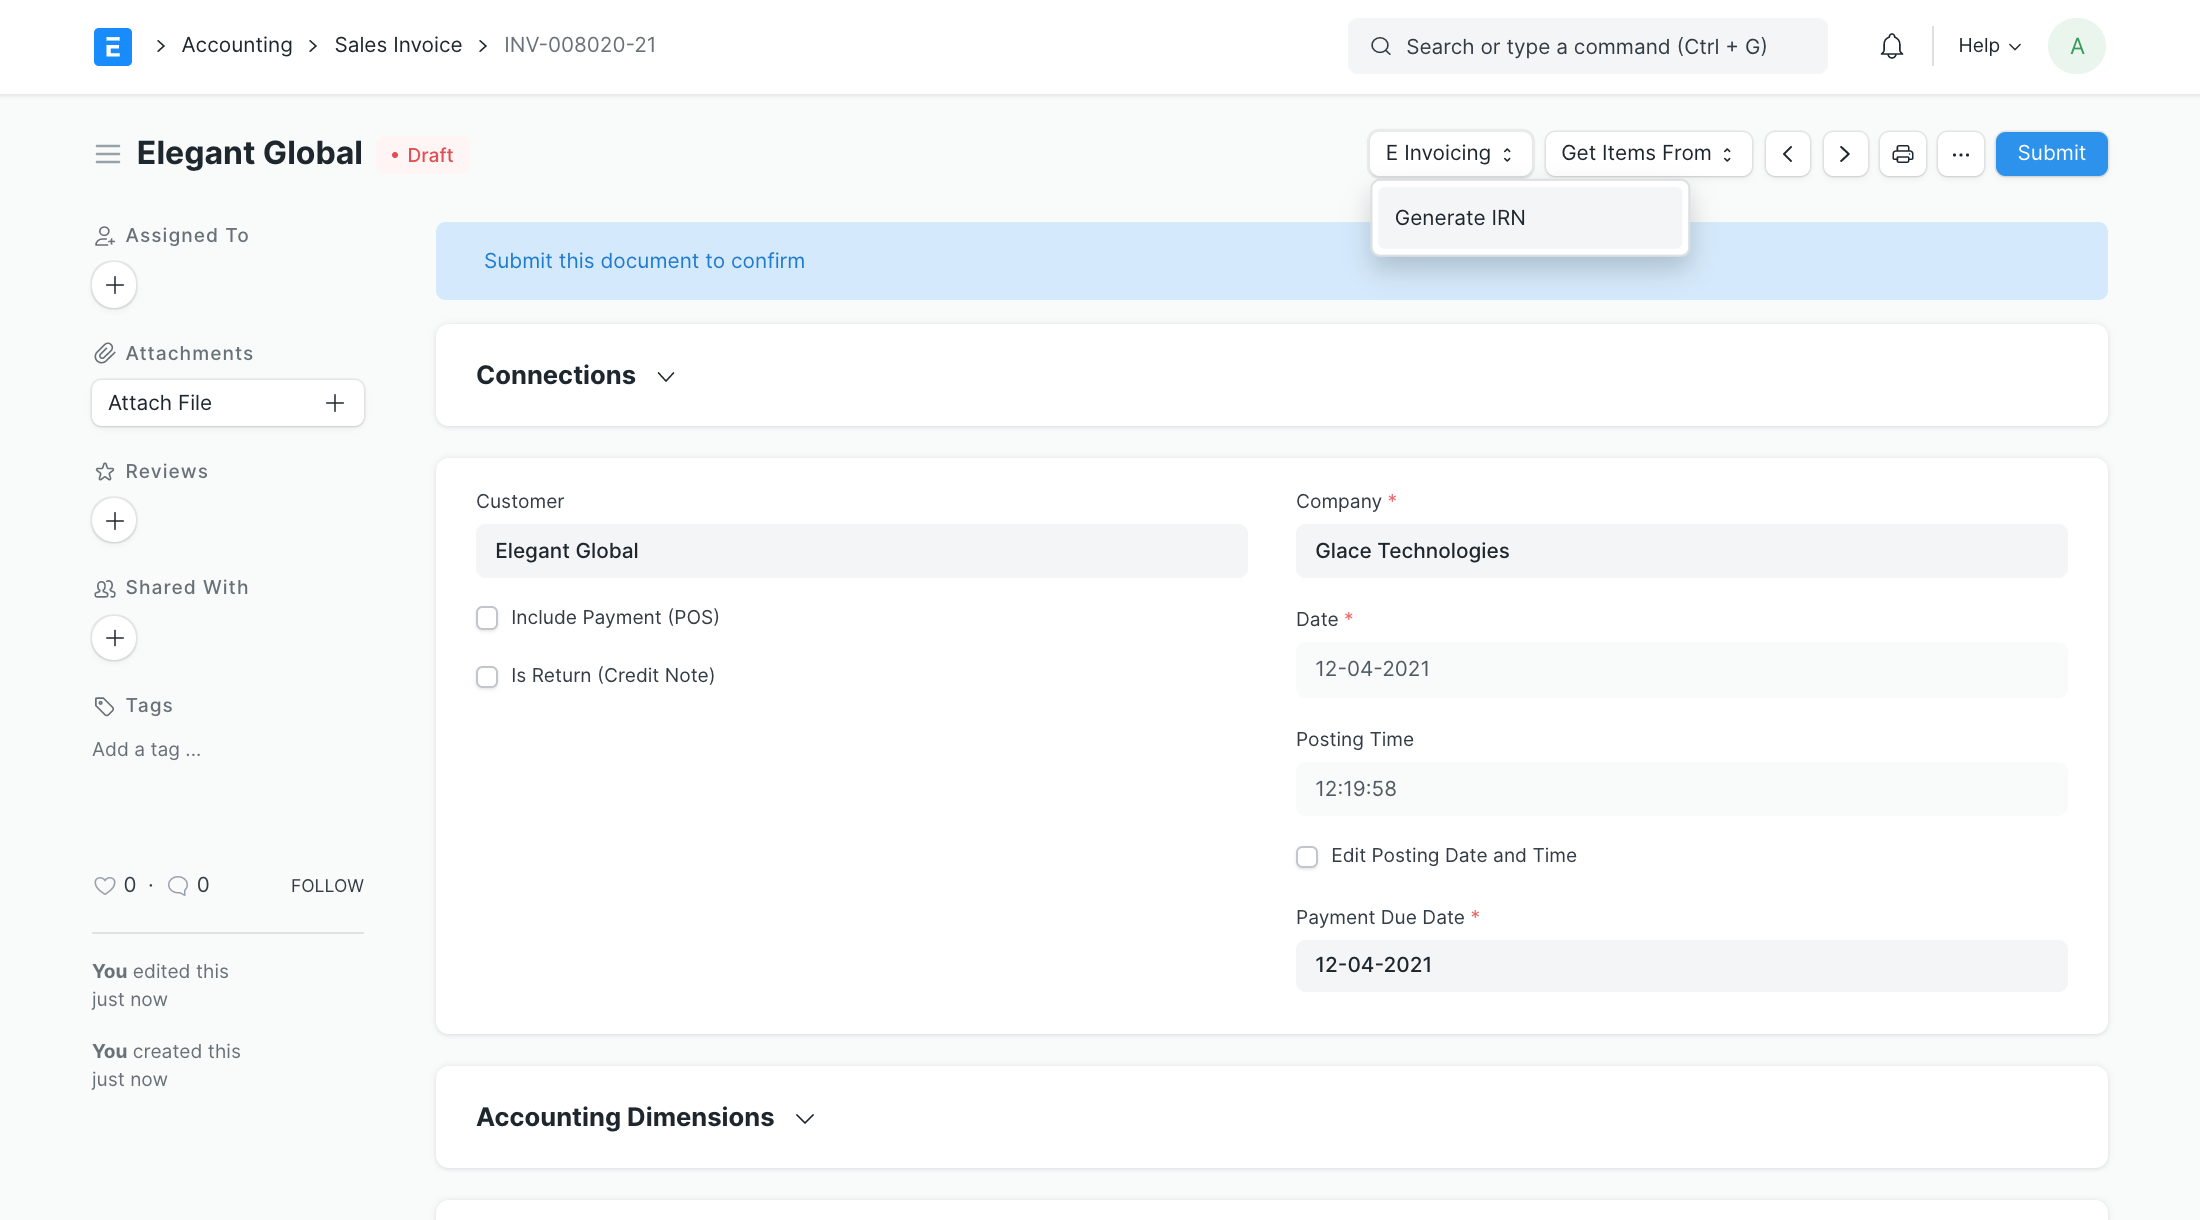
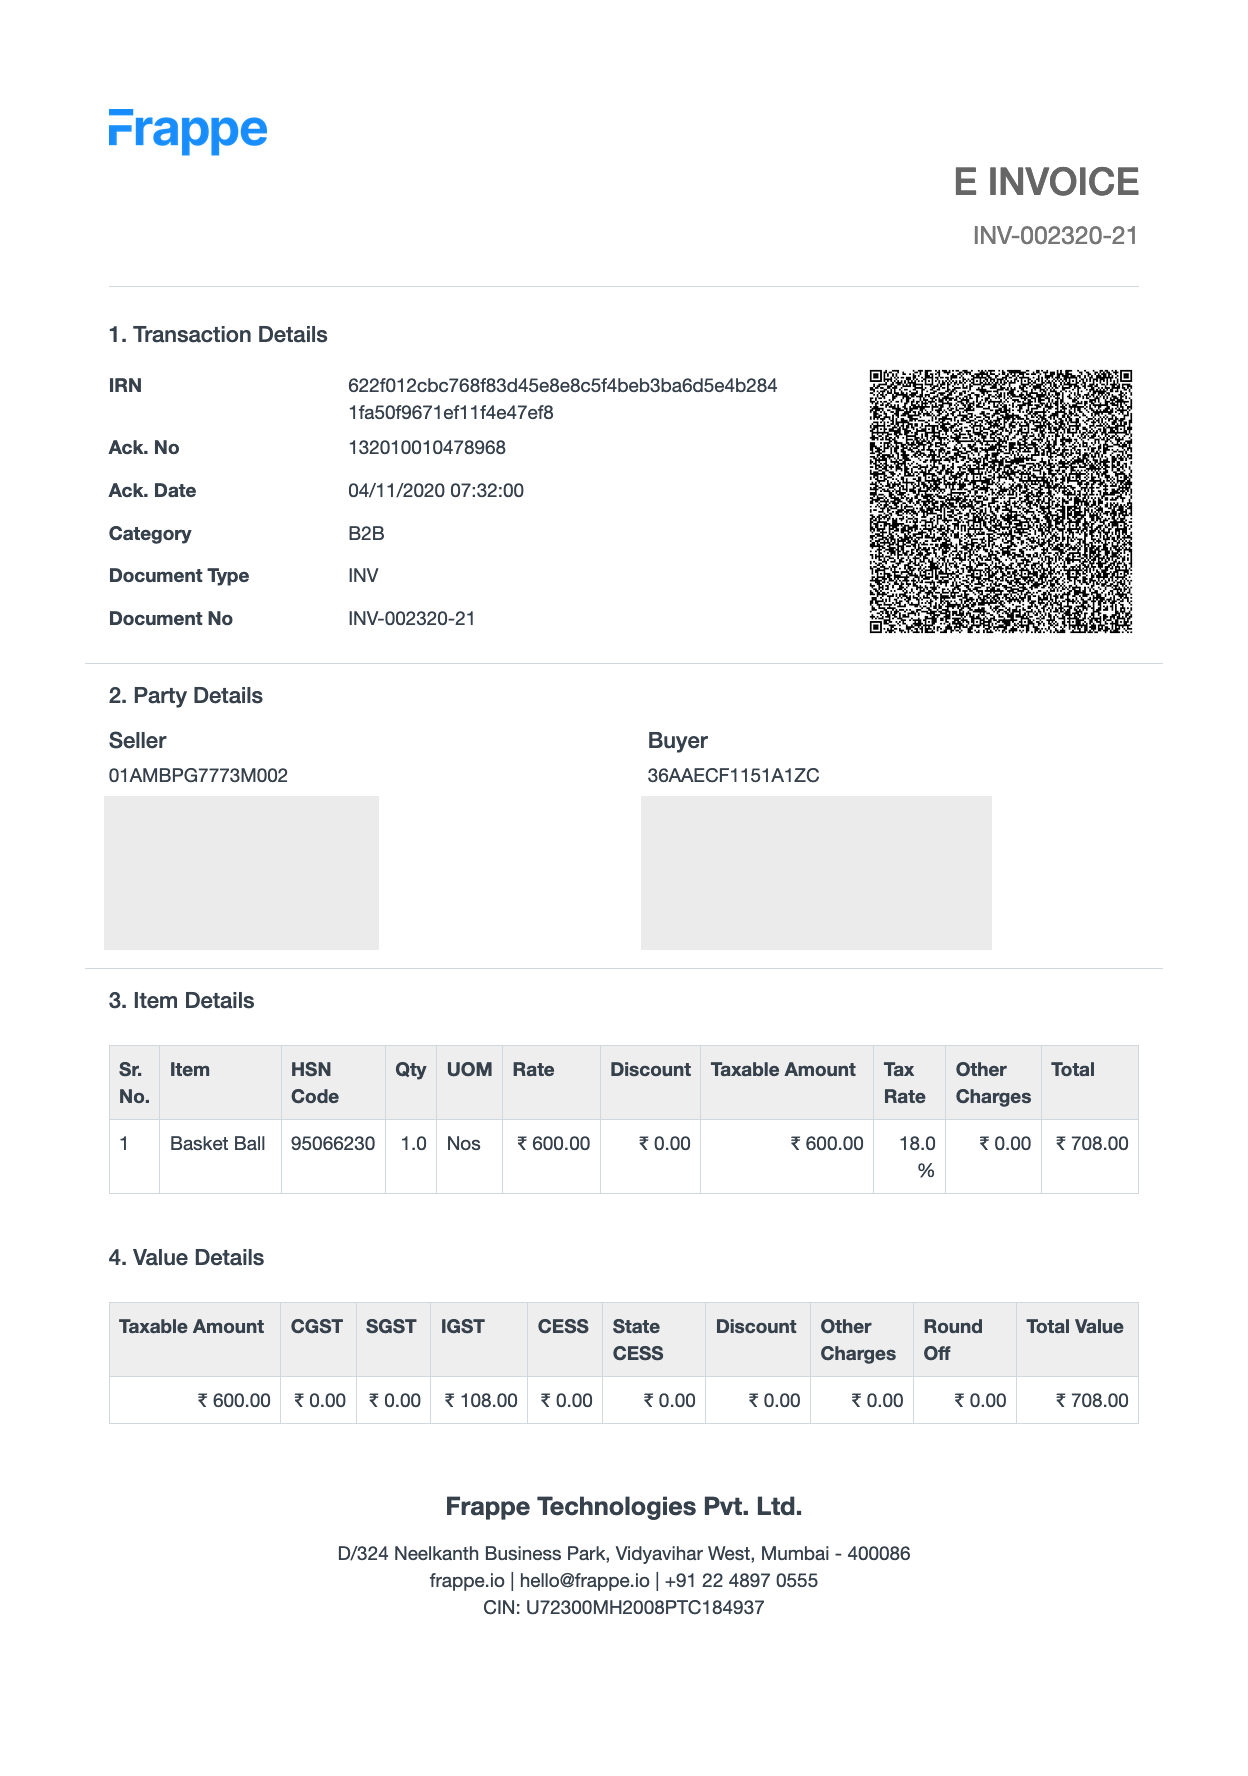
Create a Sales Invoice and keep it in the Draft state. Click on the E-Invoicing button group and then on Generate IRN. If the Sales Invoice doesn't have any validation errors, IRN will be generated and updated in the Sales Invoice. You can now submit the invoice and print the E-Invoice with QRCode image by selecting "GST E-Invoice" Print Format while printing.
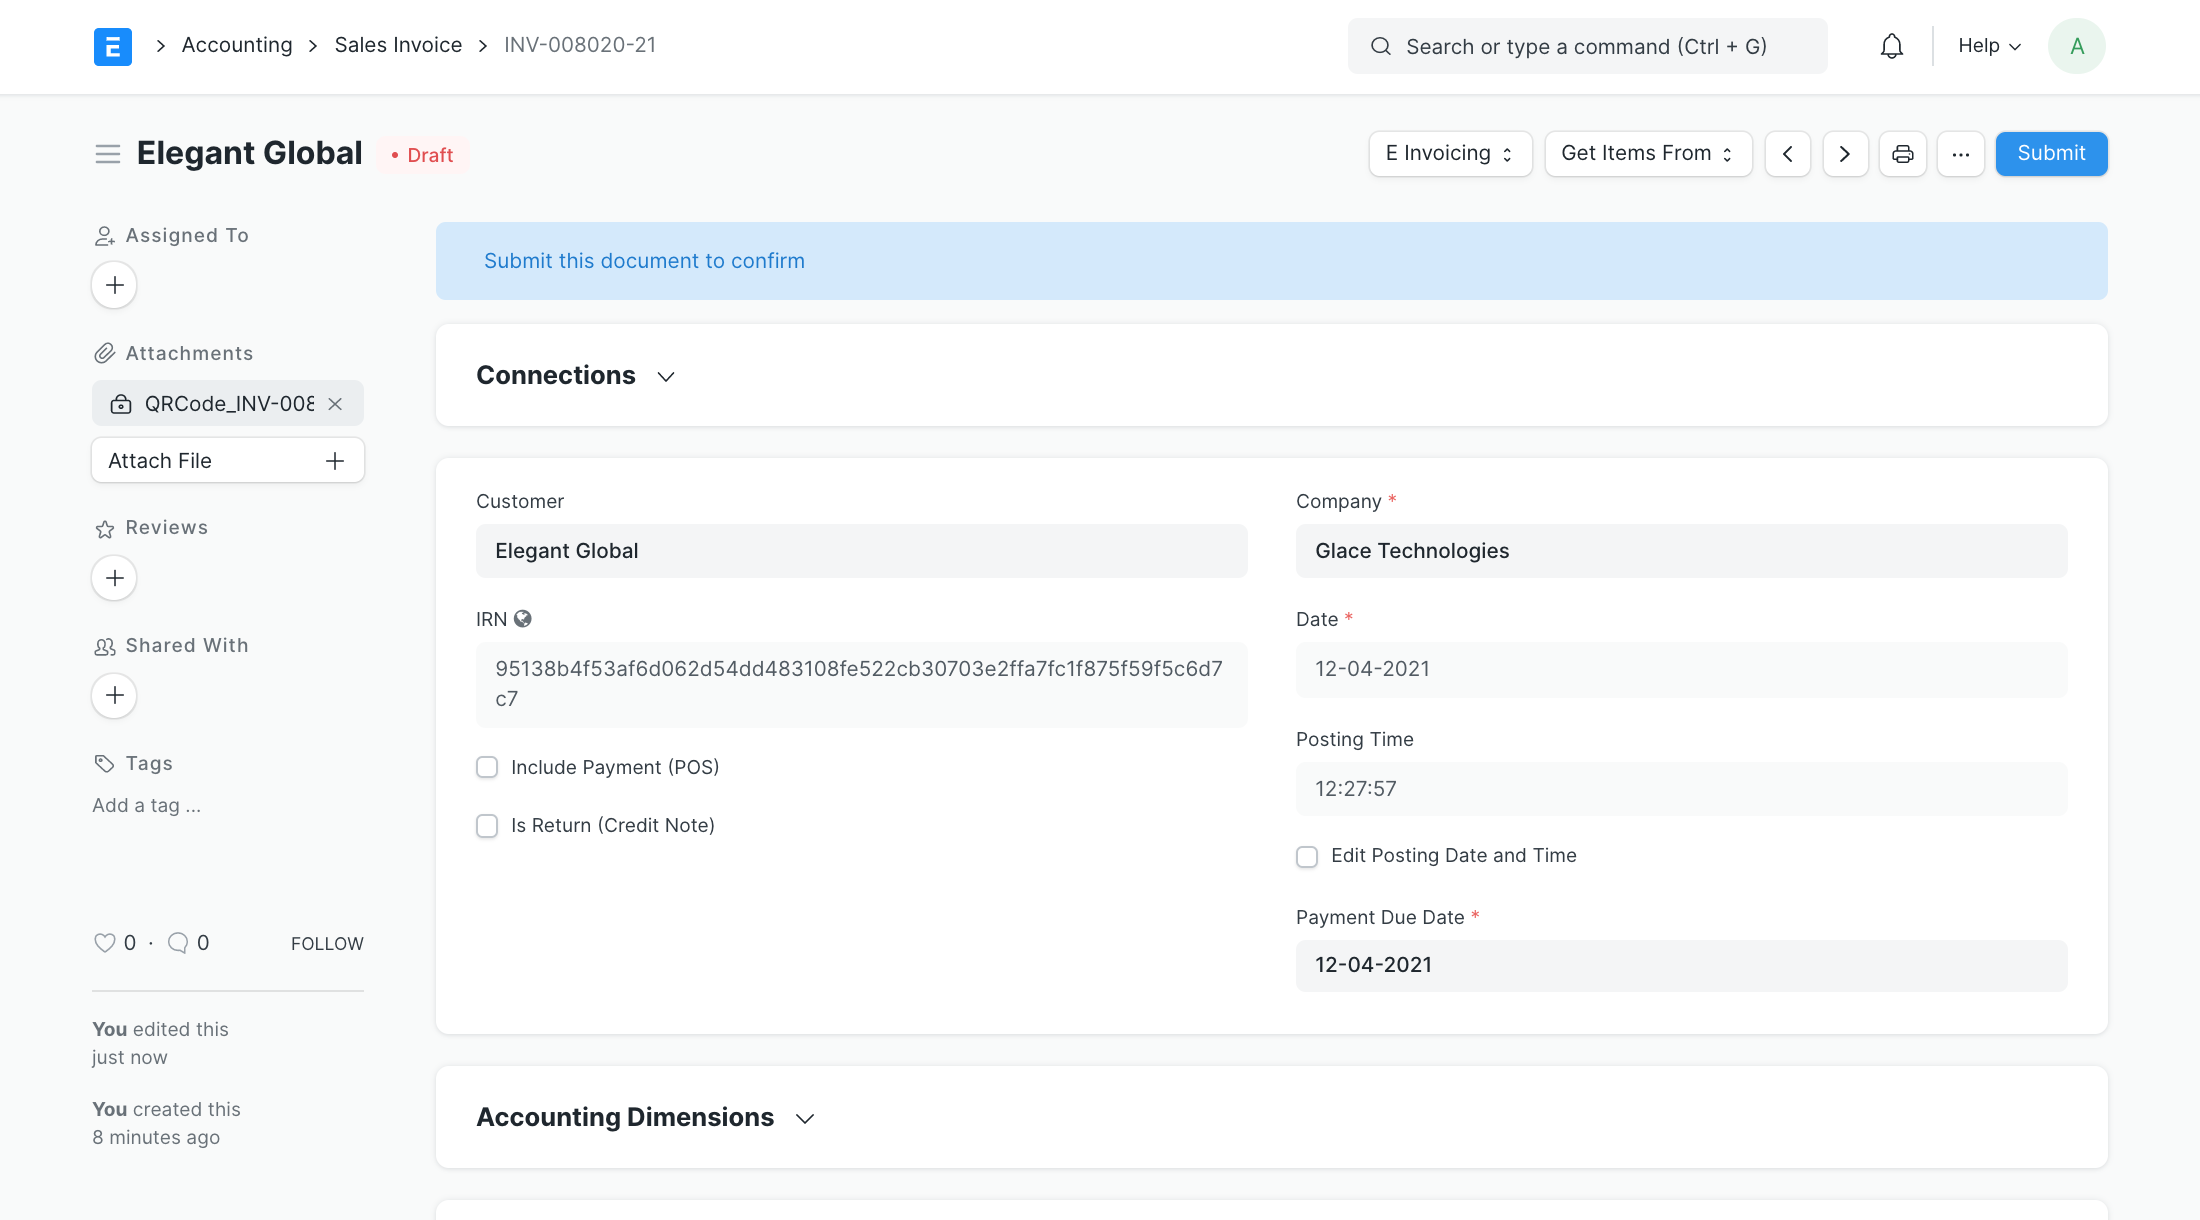
Once IRN is generation process is successful, QRCode and IRN will be stored in the Sales Invoice. Once these are generated, Sales Invoice fields cannot be edited.
You can print the E-Invoice using the default GST E-Invoice Print Format. Or you can manually edit your own print format to include e-invoice fields.
2.4 Cancel IRN
If you have generated IRN for an invoice with faulty data then, you can cancel it with the Cancel IRN button under the E-Invoicing button group. Clicking on it will open up a popup which will ask for the reason for cancellation and remark.

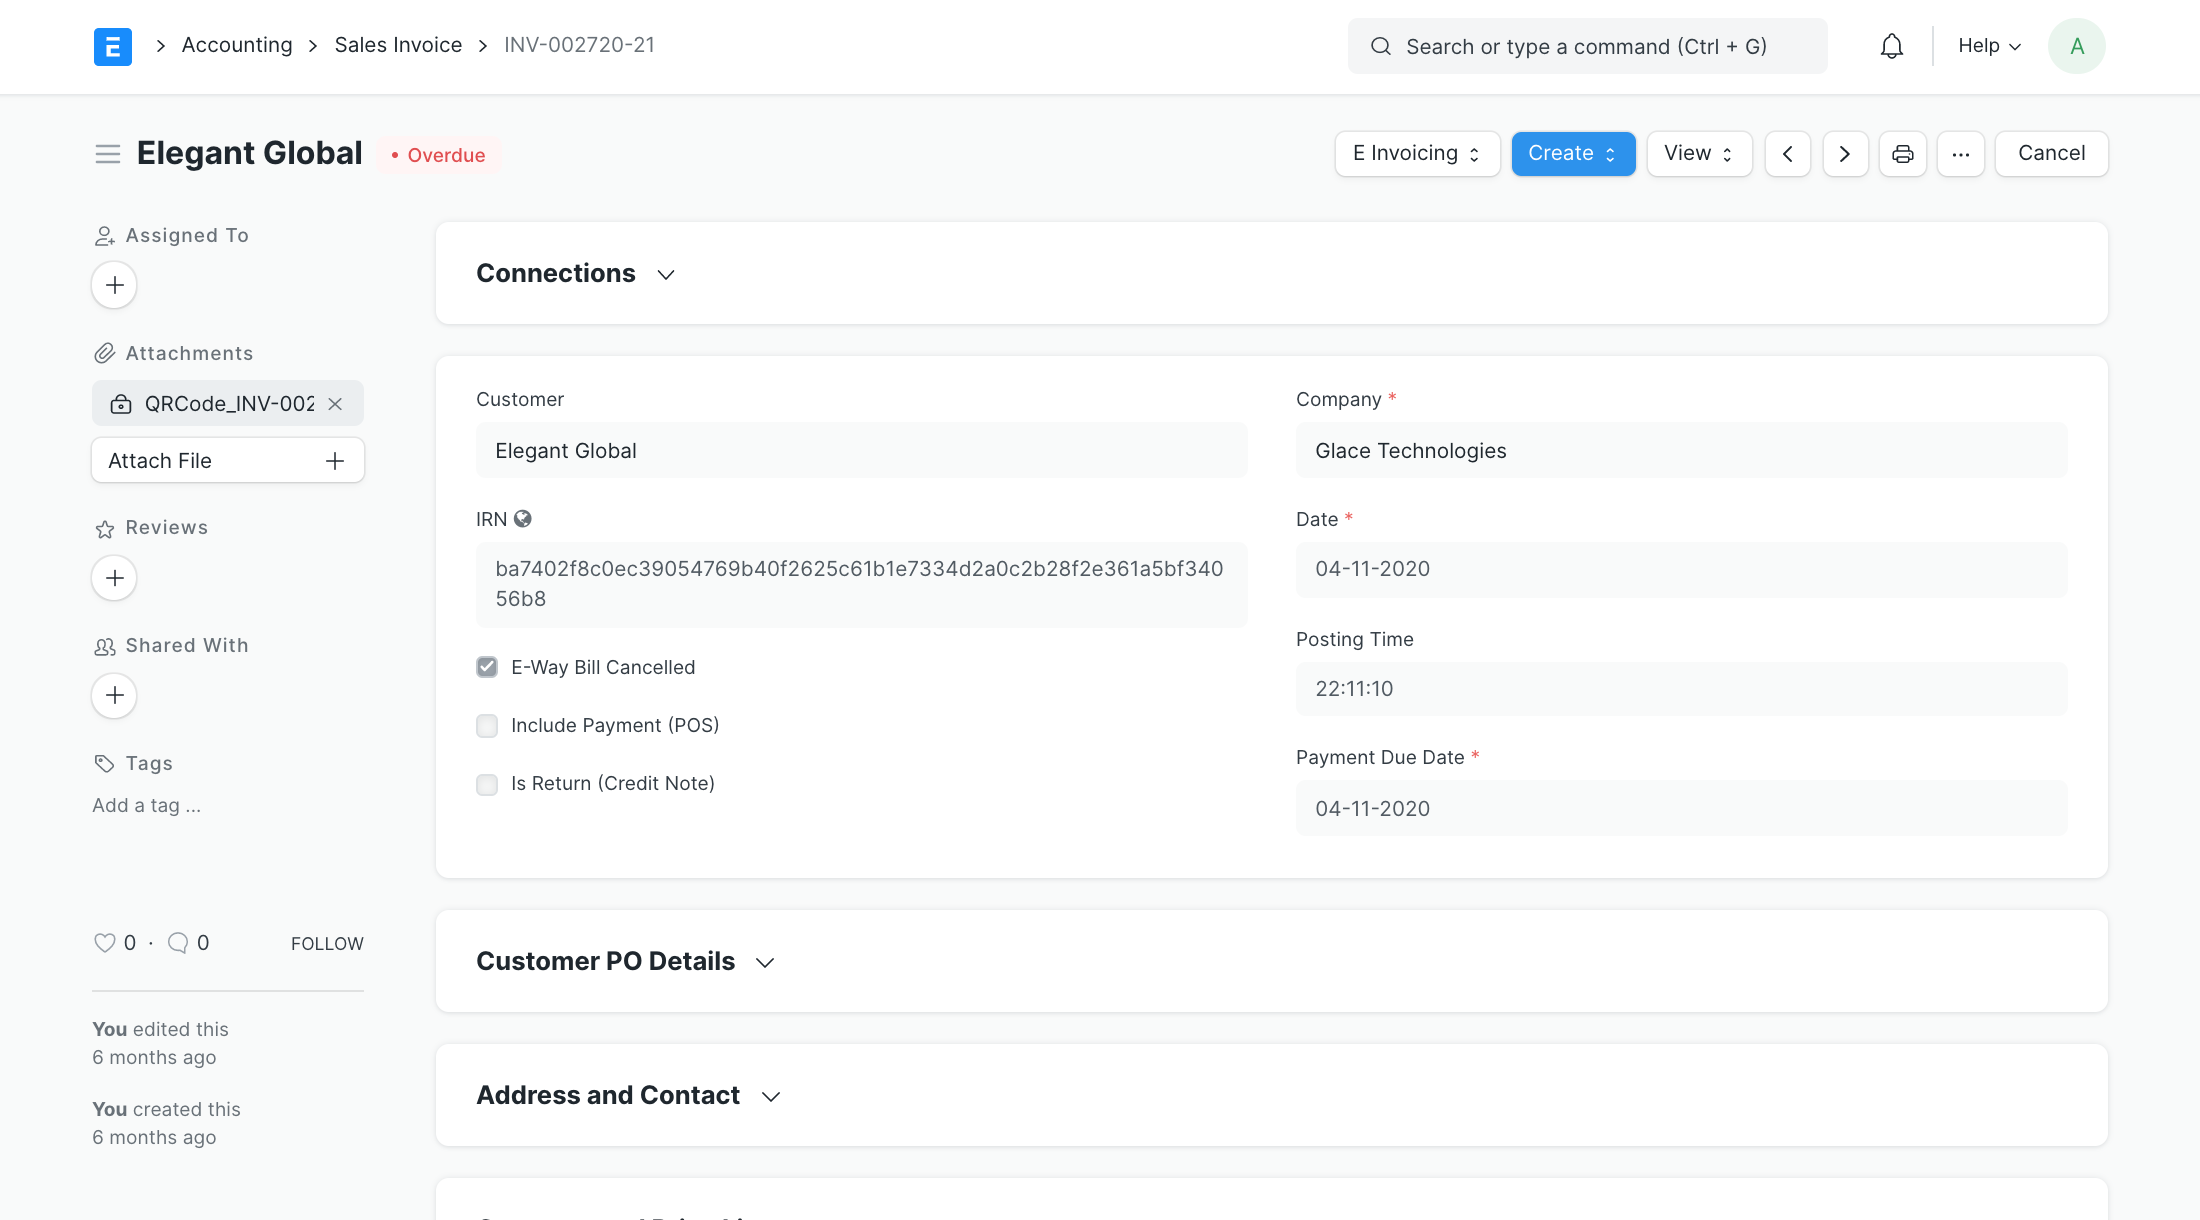
Once you cancel the IRN, the invoice will look something like this.

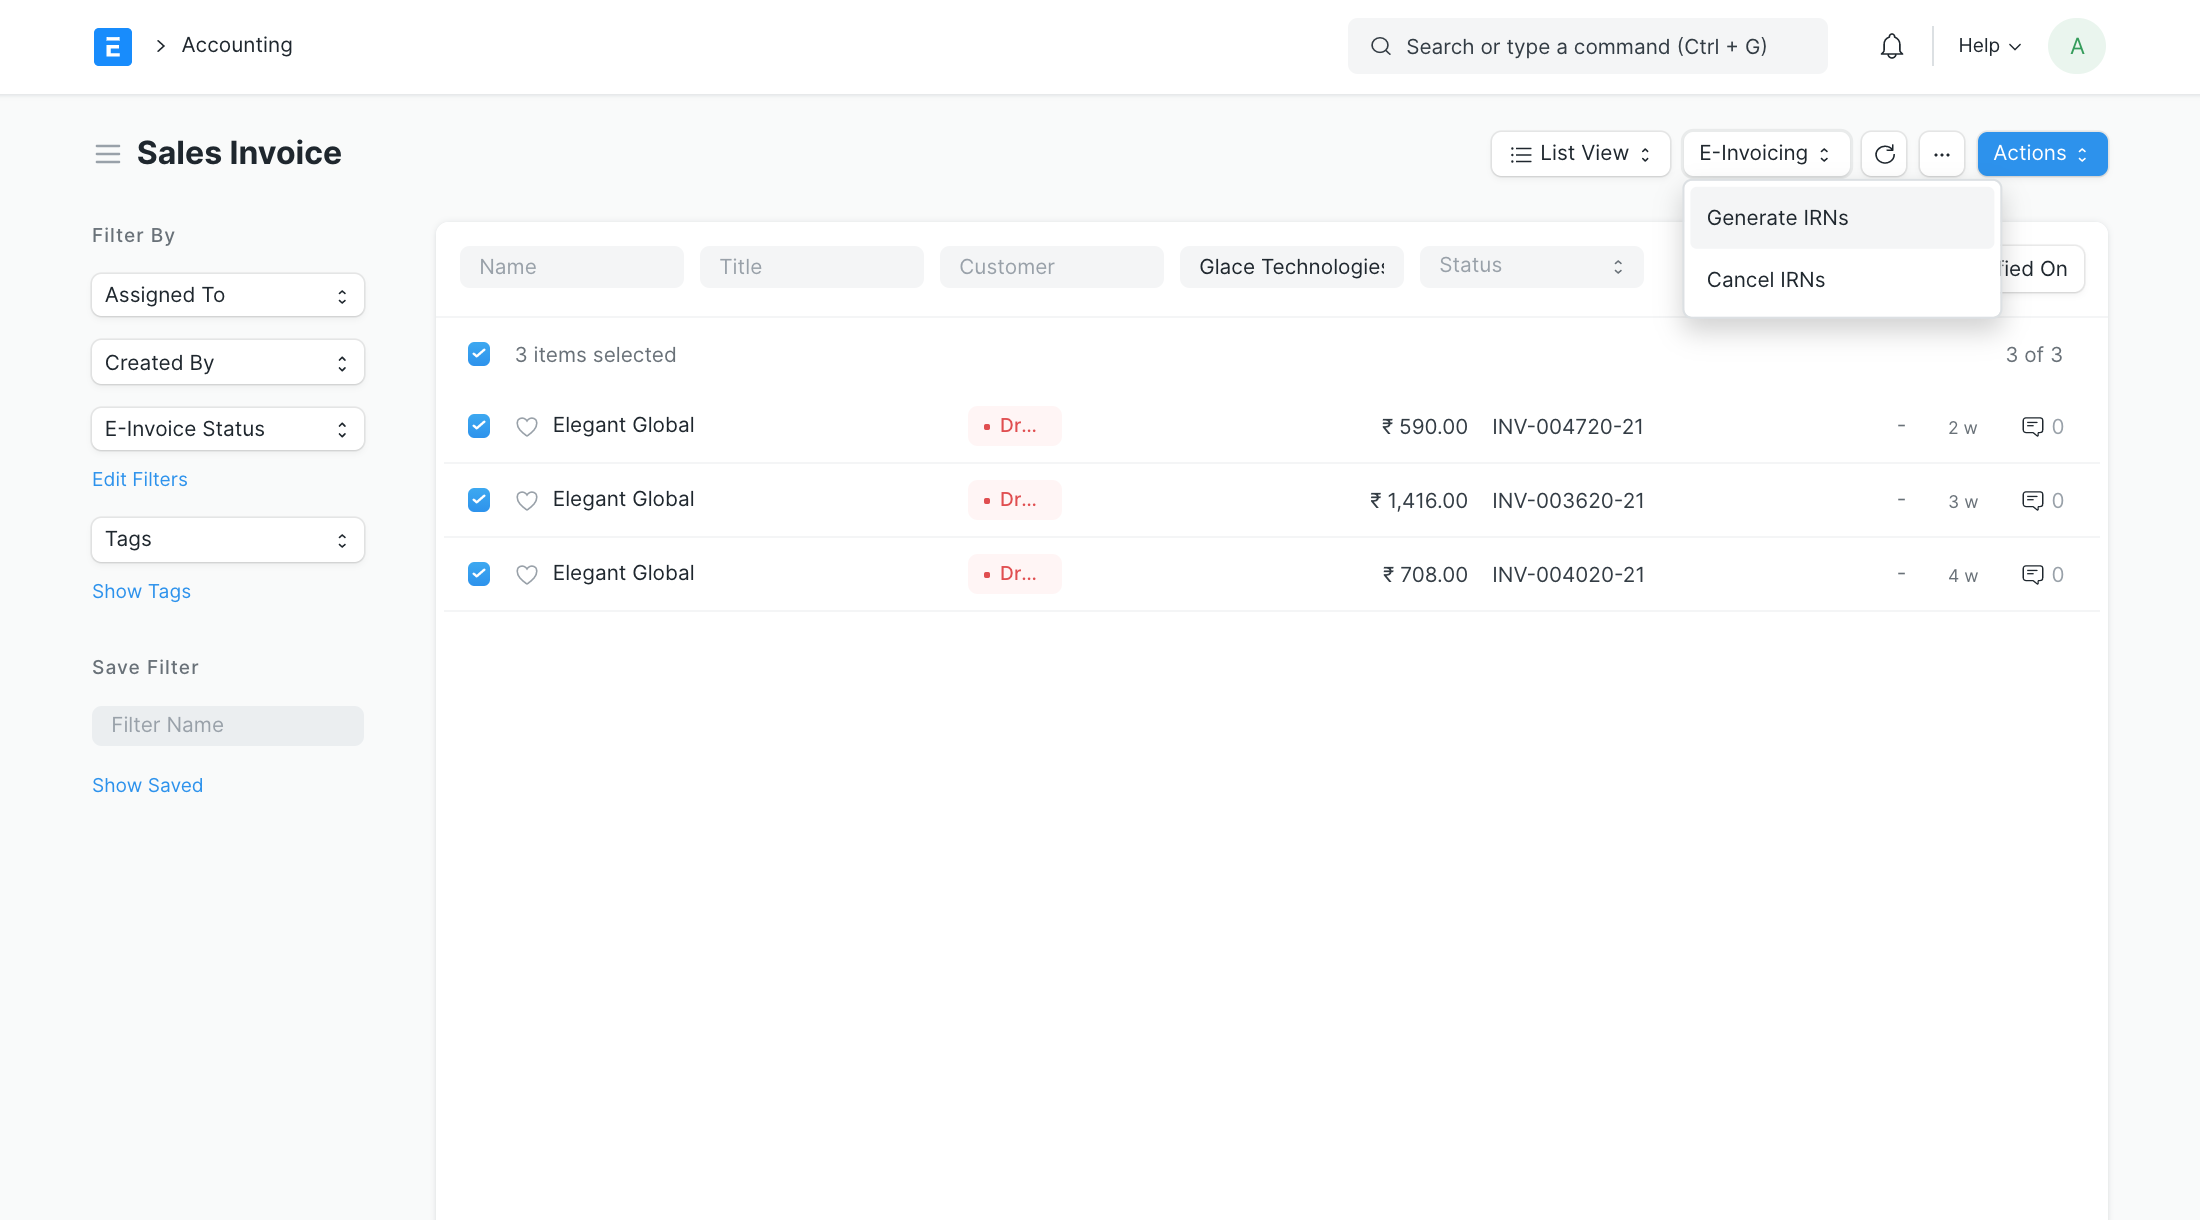
You can also Generate/Cancel IRN in bulk using the Bulk IRN Generation/Cancellation option from the Sales Invoice List.
3. E-Way bill
3.1 Generating E-Way Bill
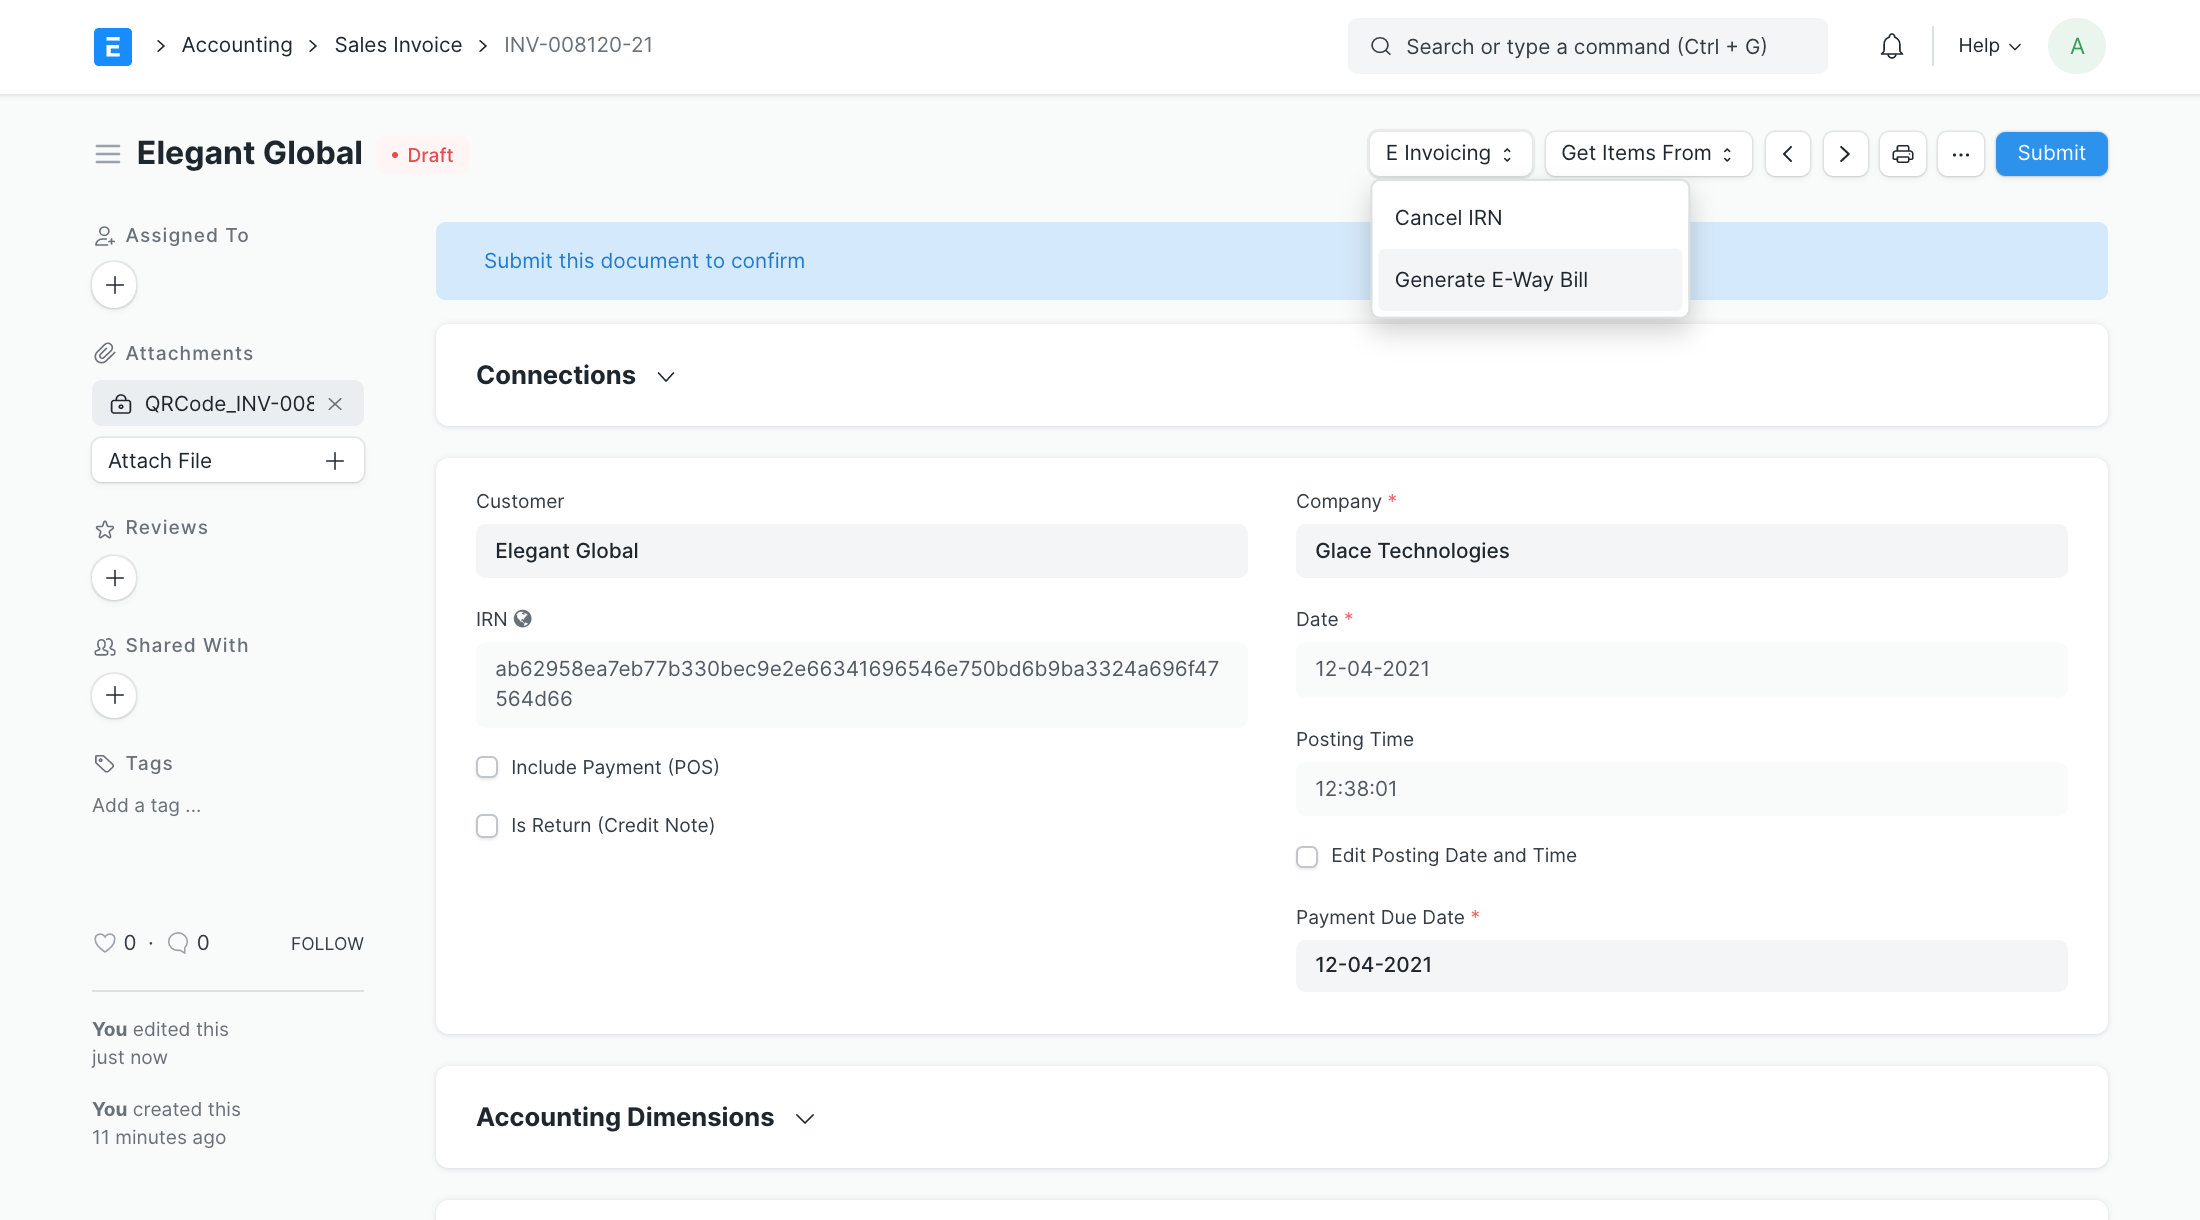
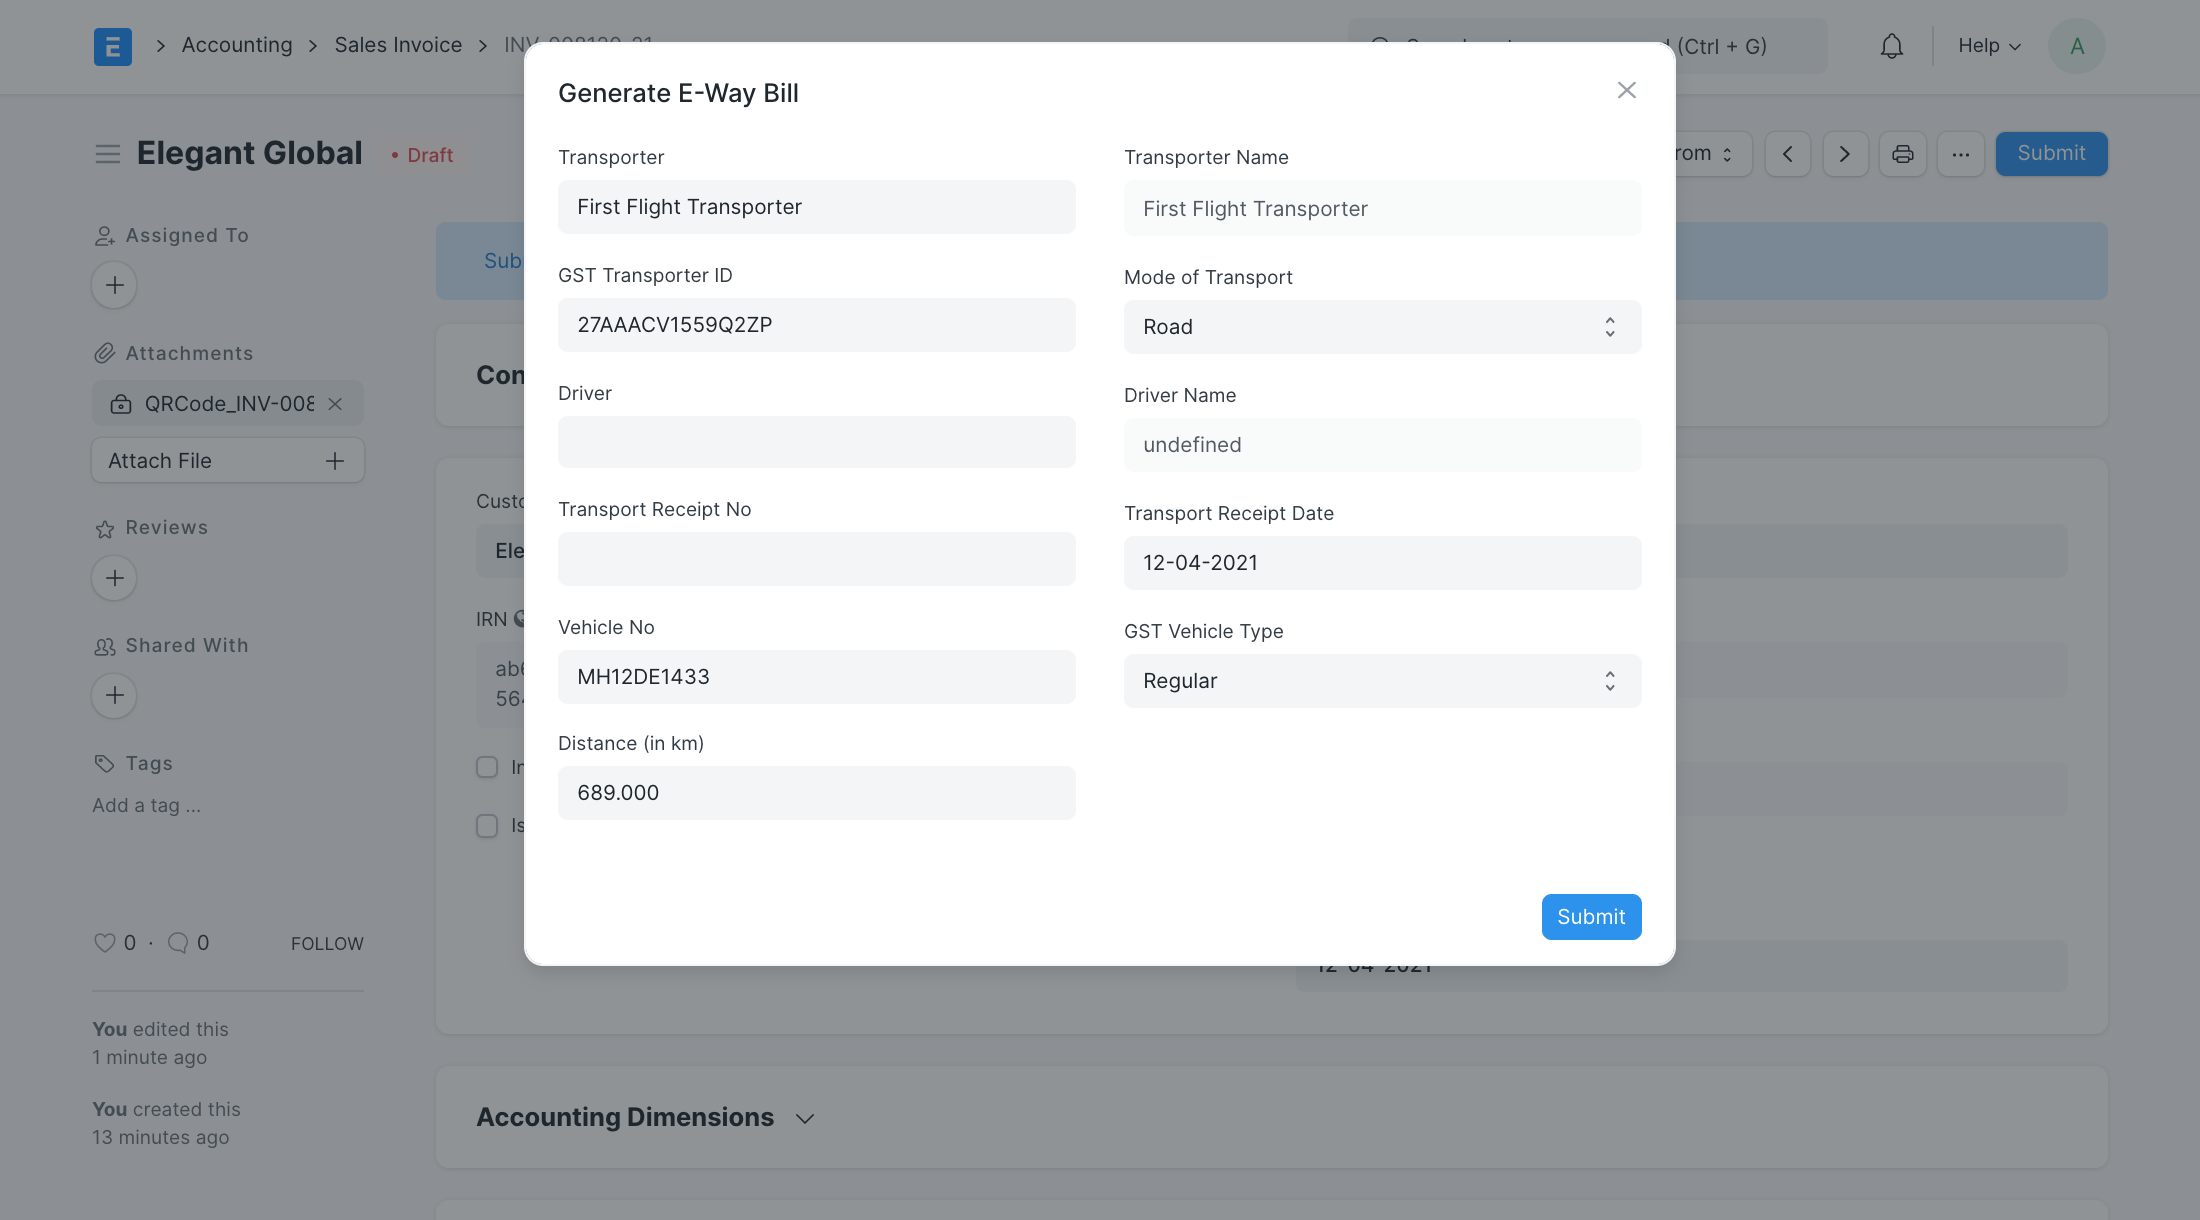
E-Invoicing reduces the additional step involved in generating E-Way Bills. Now you can provide Transporter Info along with IRN generation to generate E-Way Bill for the invoice. You can find the Transporter Info section in the bottom part of the invoice. You must select Transporter, Mode of Transport, and Distance to generate E Way Bill. You can also generate E Way Bill after generating IRN and submitting the invoice.
You will see a popup with relevant info before submitting:
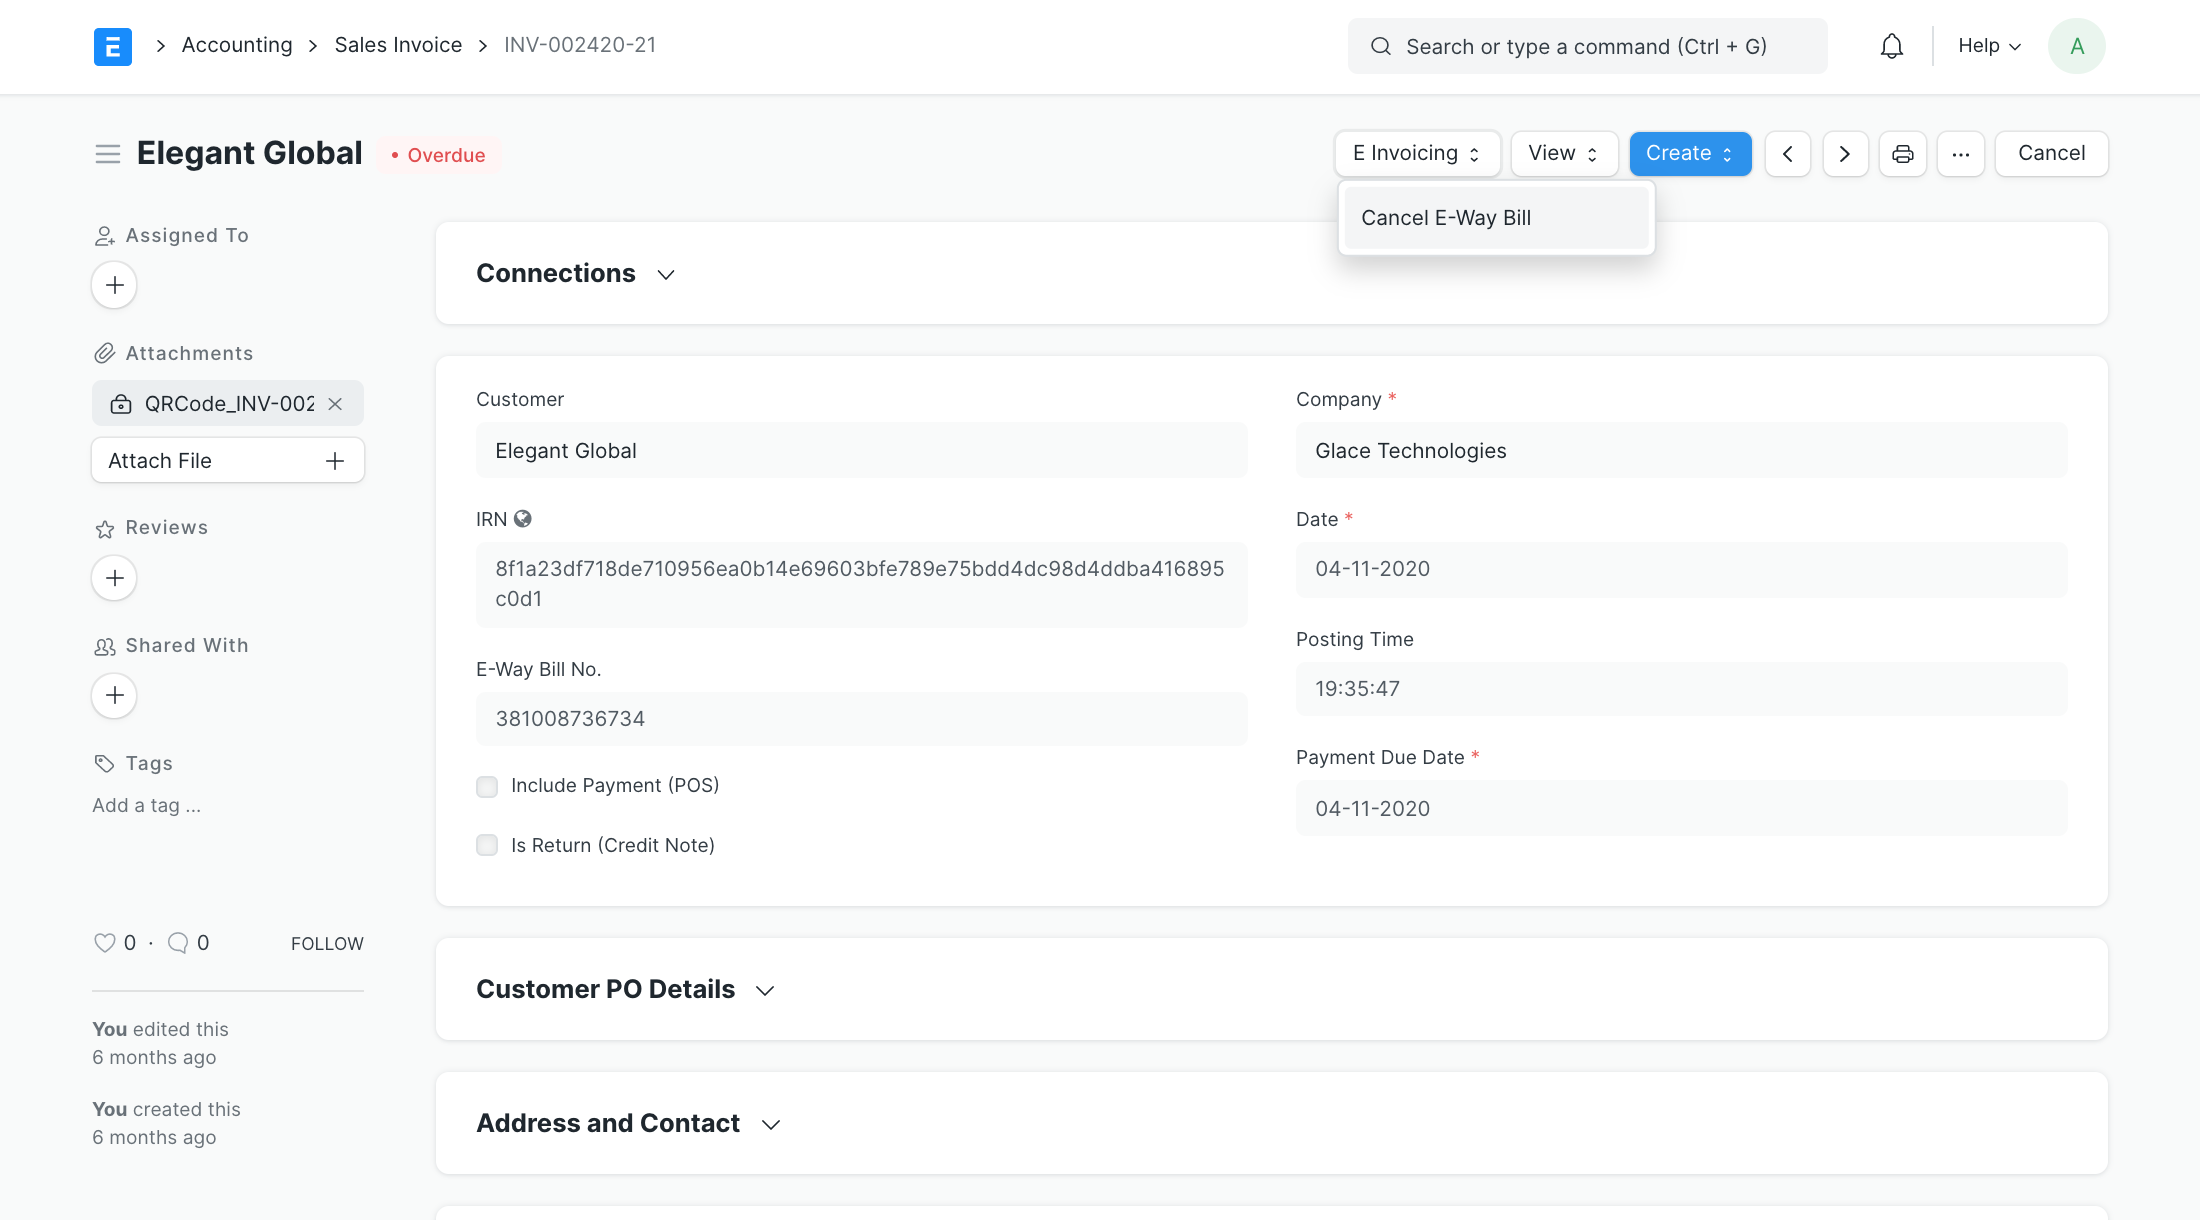
3.2 Cancelling-E Way Bill
The cancellation of the e-way bill is currently not supported. However, you can cancel the e-way bill using the e-invoice portal and then update the status in the ERPNext system, to be able to cancel IRN for the invoice.
4. E Invoice Summary Report
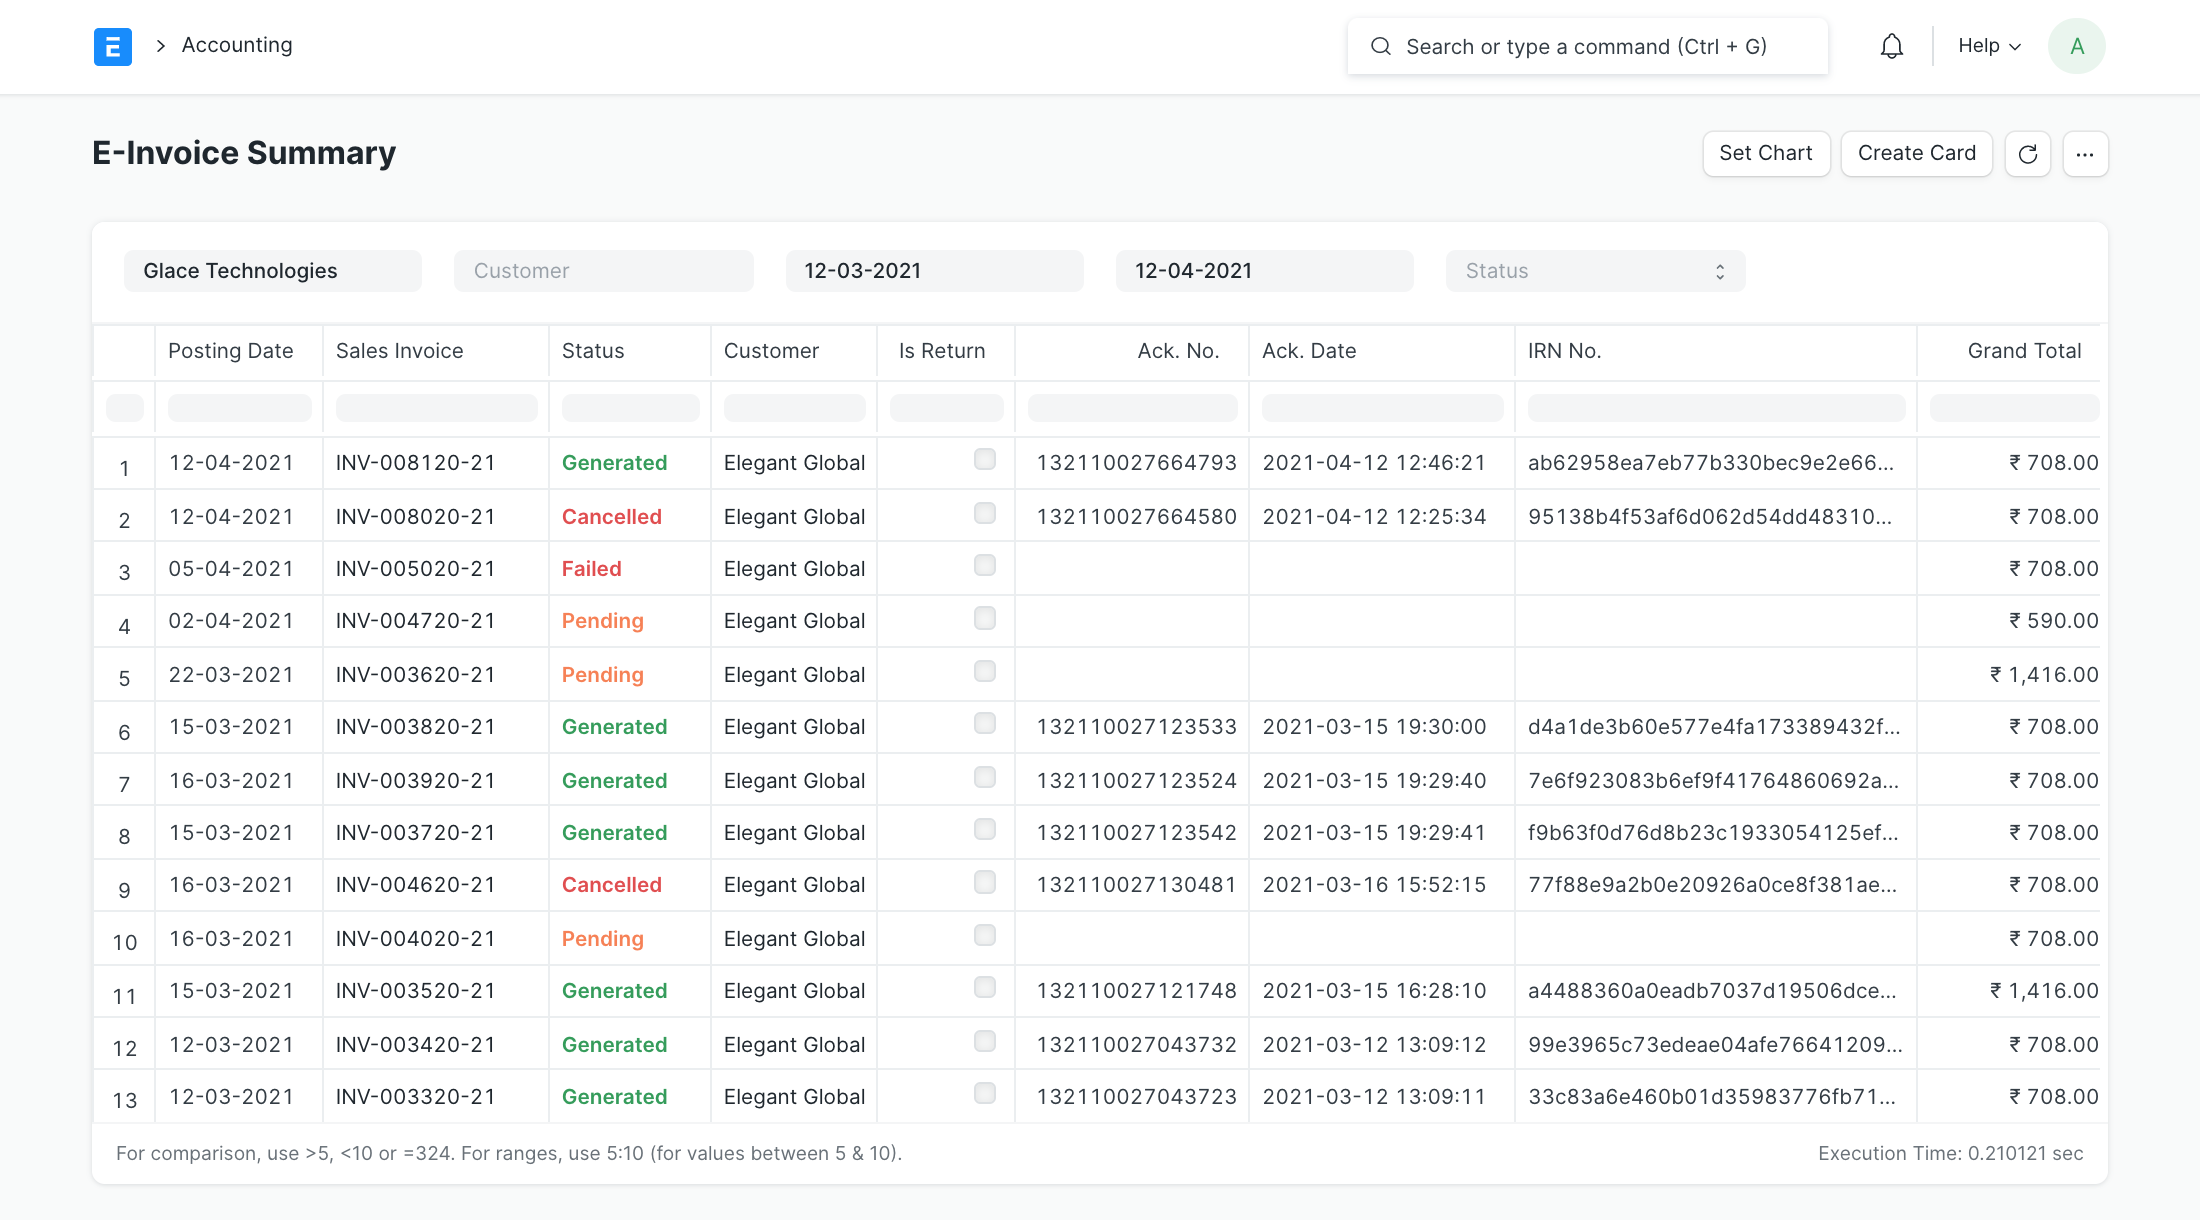
You can refer to E Invoice Summary Report to check the statuses of your eligible Sales Invoices.
