















Your First Steps with Frappe Learning
Welcome to Frappe Learning. Whether you're a school, a training team, or running your own academy and putting courses out for anyone to take, this guide gets you from a fresh site to your first learners. By the end, you'll have one course published and your first learners enrolled in it.
Plan for about 20 minutes.
How it all fits together
Before you click anything, it helps to know the four building blocks.
.svg) Building blocks of Frappe Learning
Building blocks of Frappe Learning
A course is your learning material. It's split into chapters, and each chapter holds lessons. A lesson can have text, videos, PDFs, slides, quizzes, or assignments.
A batch is a group of learners going through one or more courses together, with start and end dates. Think of it as a class or a section. Batches are also where live classes, announcements, and graded work happen.
A program strings several courses together in a set order, like a semester. You don't need one to get started.
The simple way to think about it: the course is what you teach, and the batch is who you teach it to. If you've used Google Classroom or Moodle, a batch is your class. If you've used Teachable or Thinkific, most of your courses will be self-paced, and batches are for when you run a cohort.
The path you'll follow
.svg) Journey in Frappe Learning
Journey in Frappe Learning
Steps 1 to 4 are the same for everyone. At step 5 you pick how learners get in: on their own, at their own pace, or as a class through a batch.
Finding your way around
When you log in, you land in the Learning portal. This is where you and your learners do everything. Settings opens from the menu under your name at the top left.
The sidebar also shows a short checklist that tracks your setup. It follows the same steps as this guide, so you can use either.
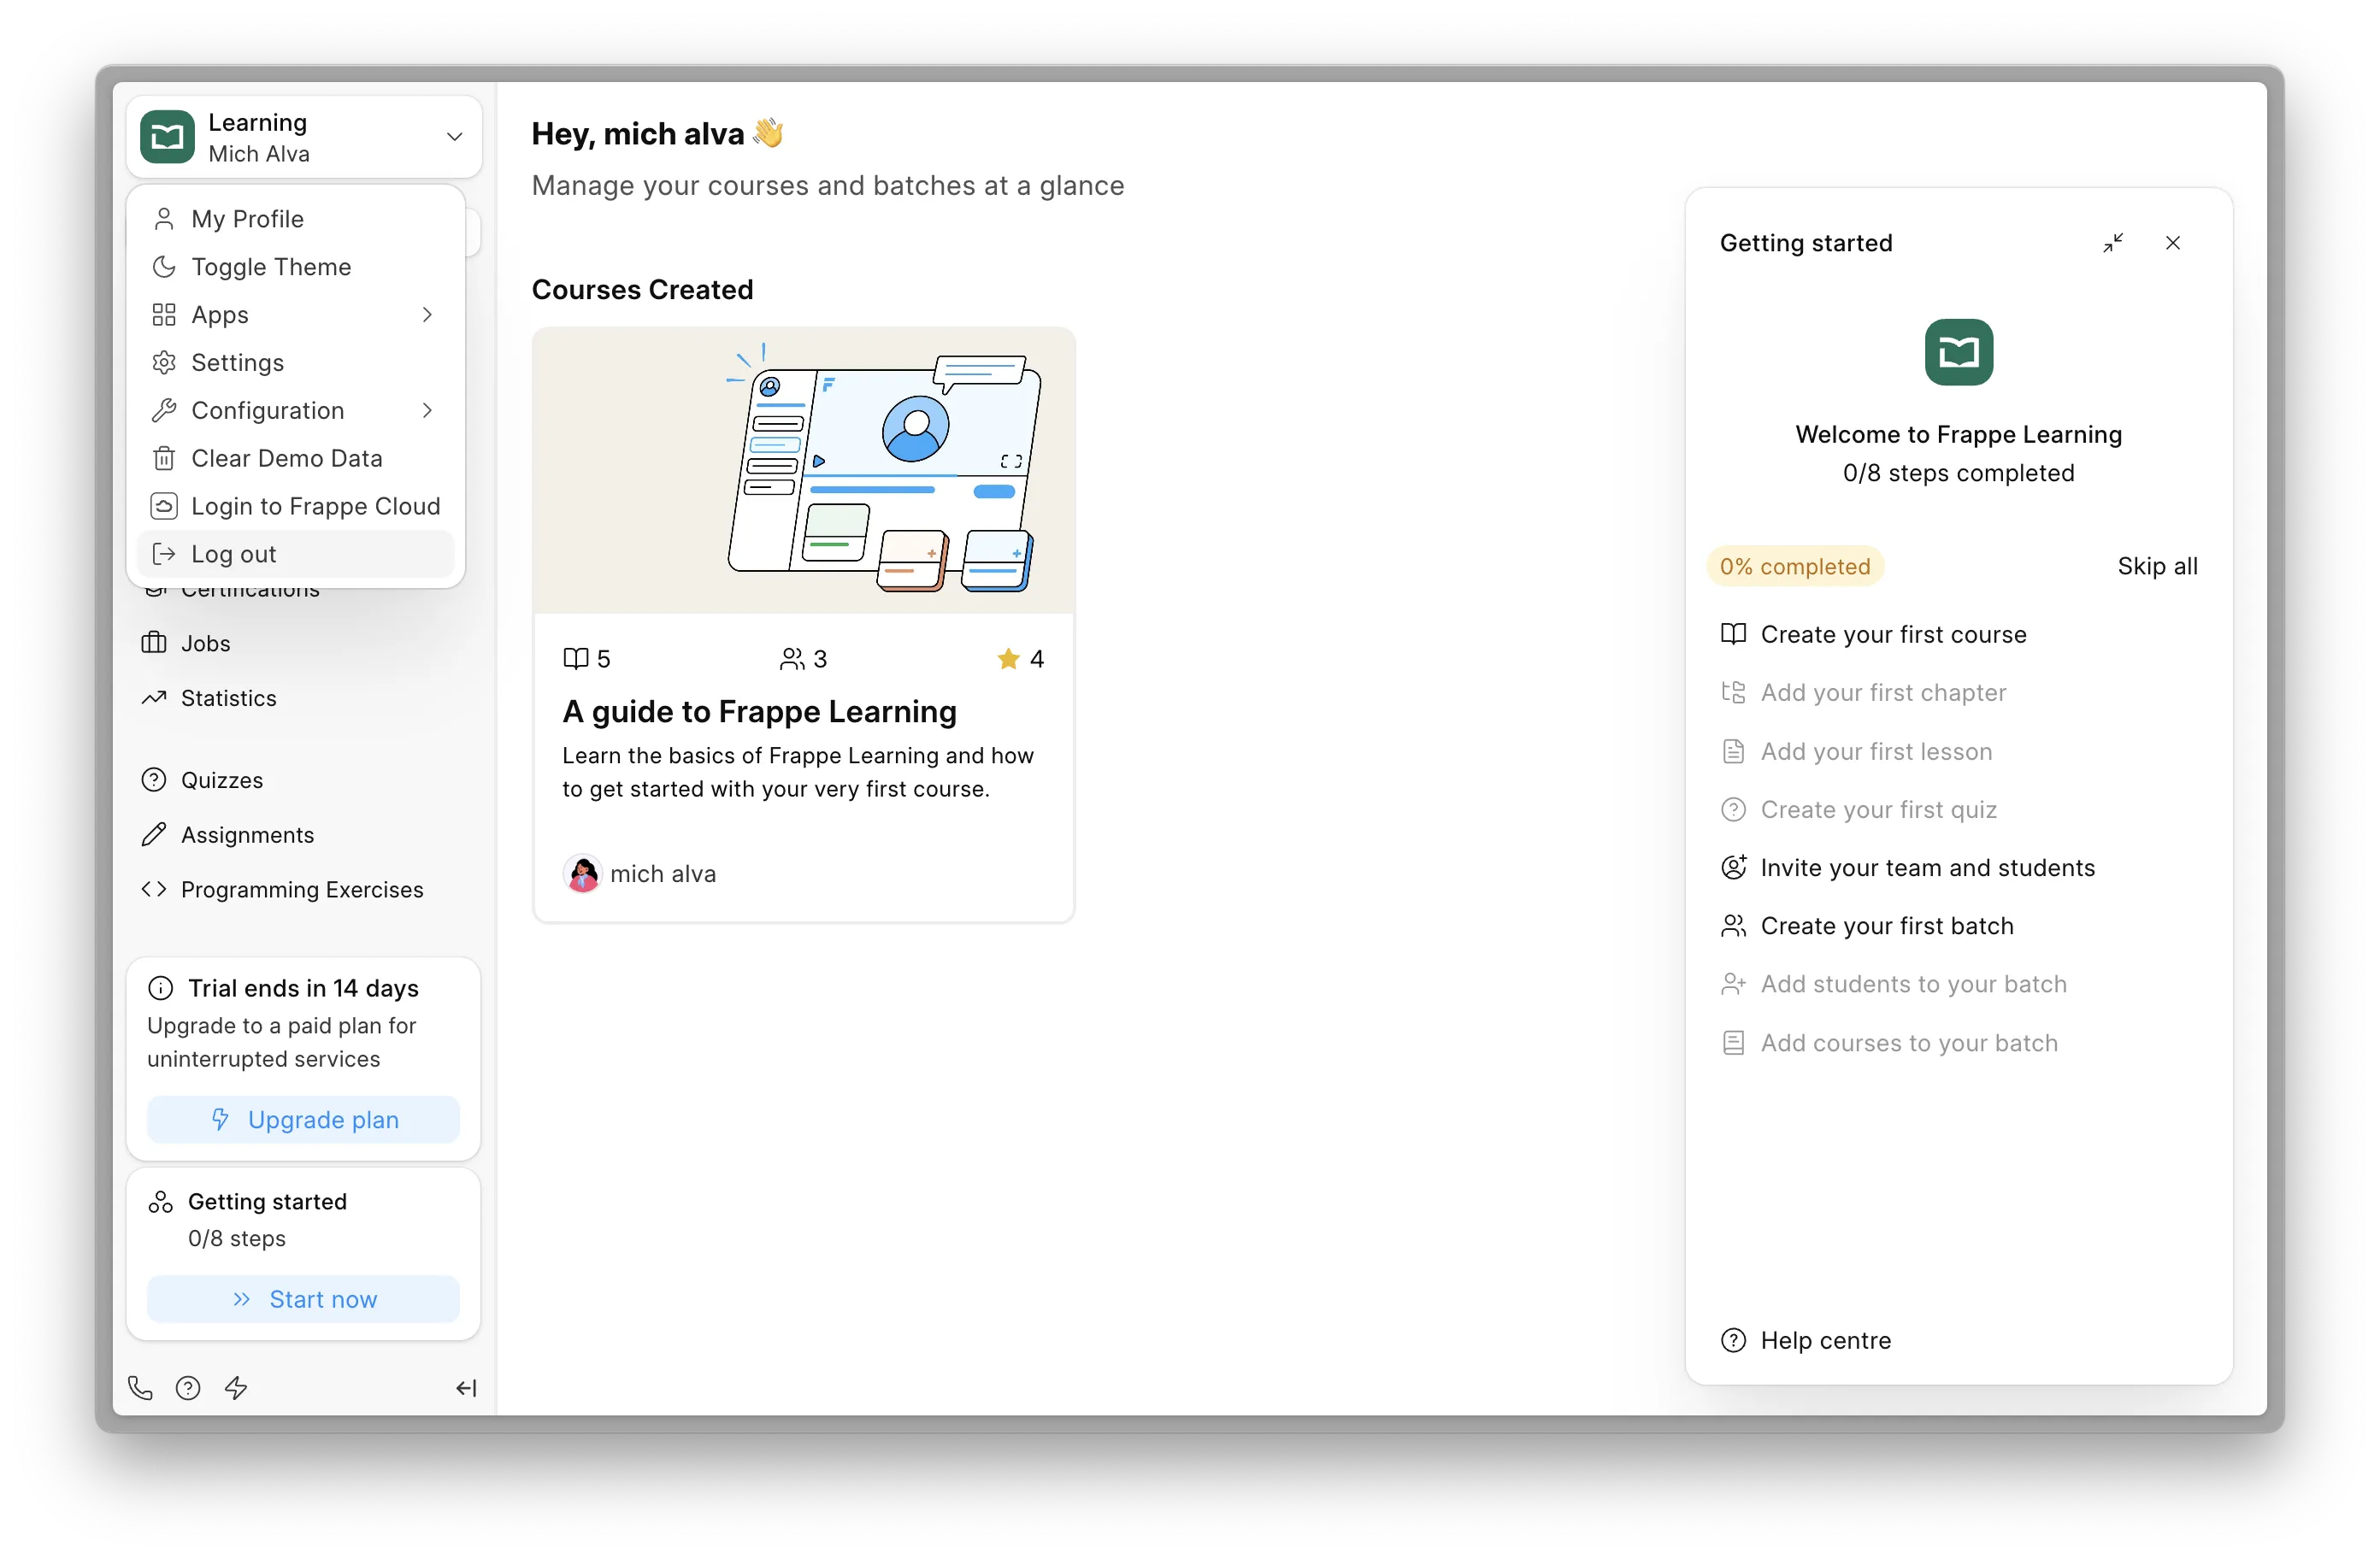 Learning portal with sample data and onboarding checklist
If your site came with sample courses, you can remove them anytime from the same menu under your name, using Clear Demo Data.
Step 1: Make it yours
Go to Settings → Branding and add your institution's name, logo, and favicon. The name shows up in the sidebar for everyone.
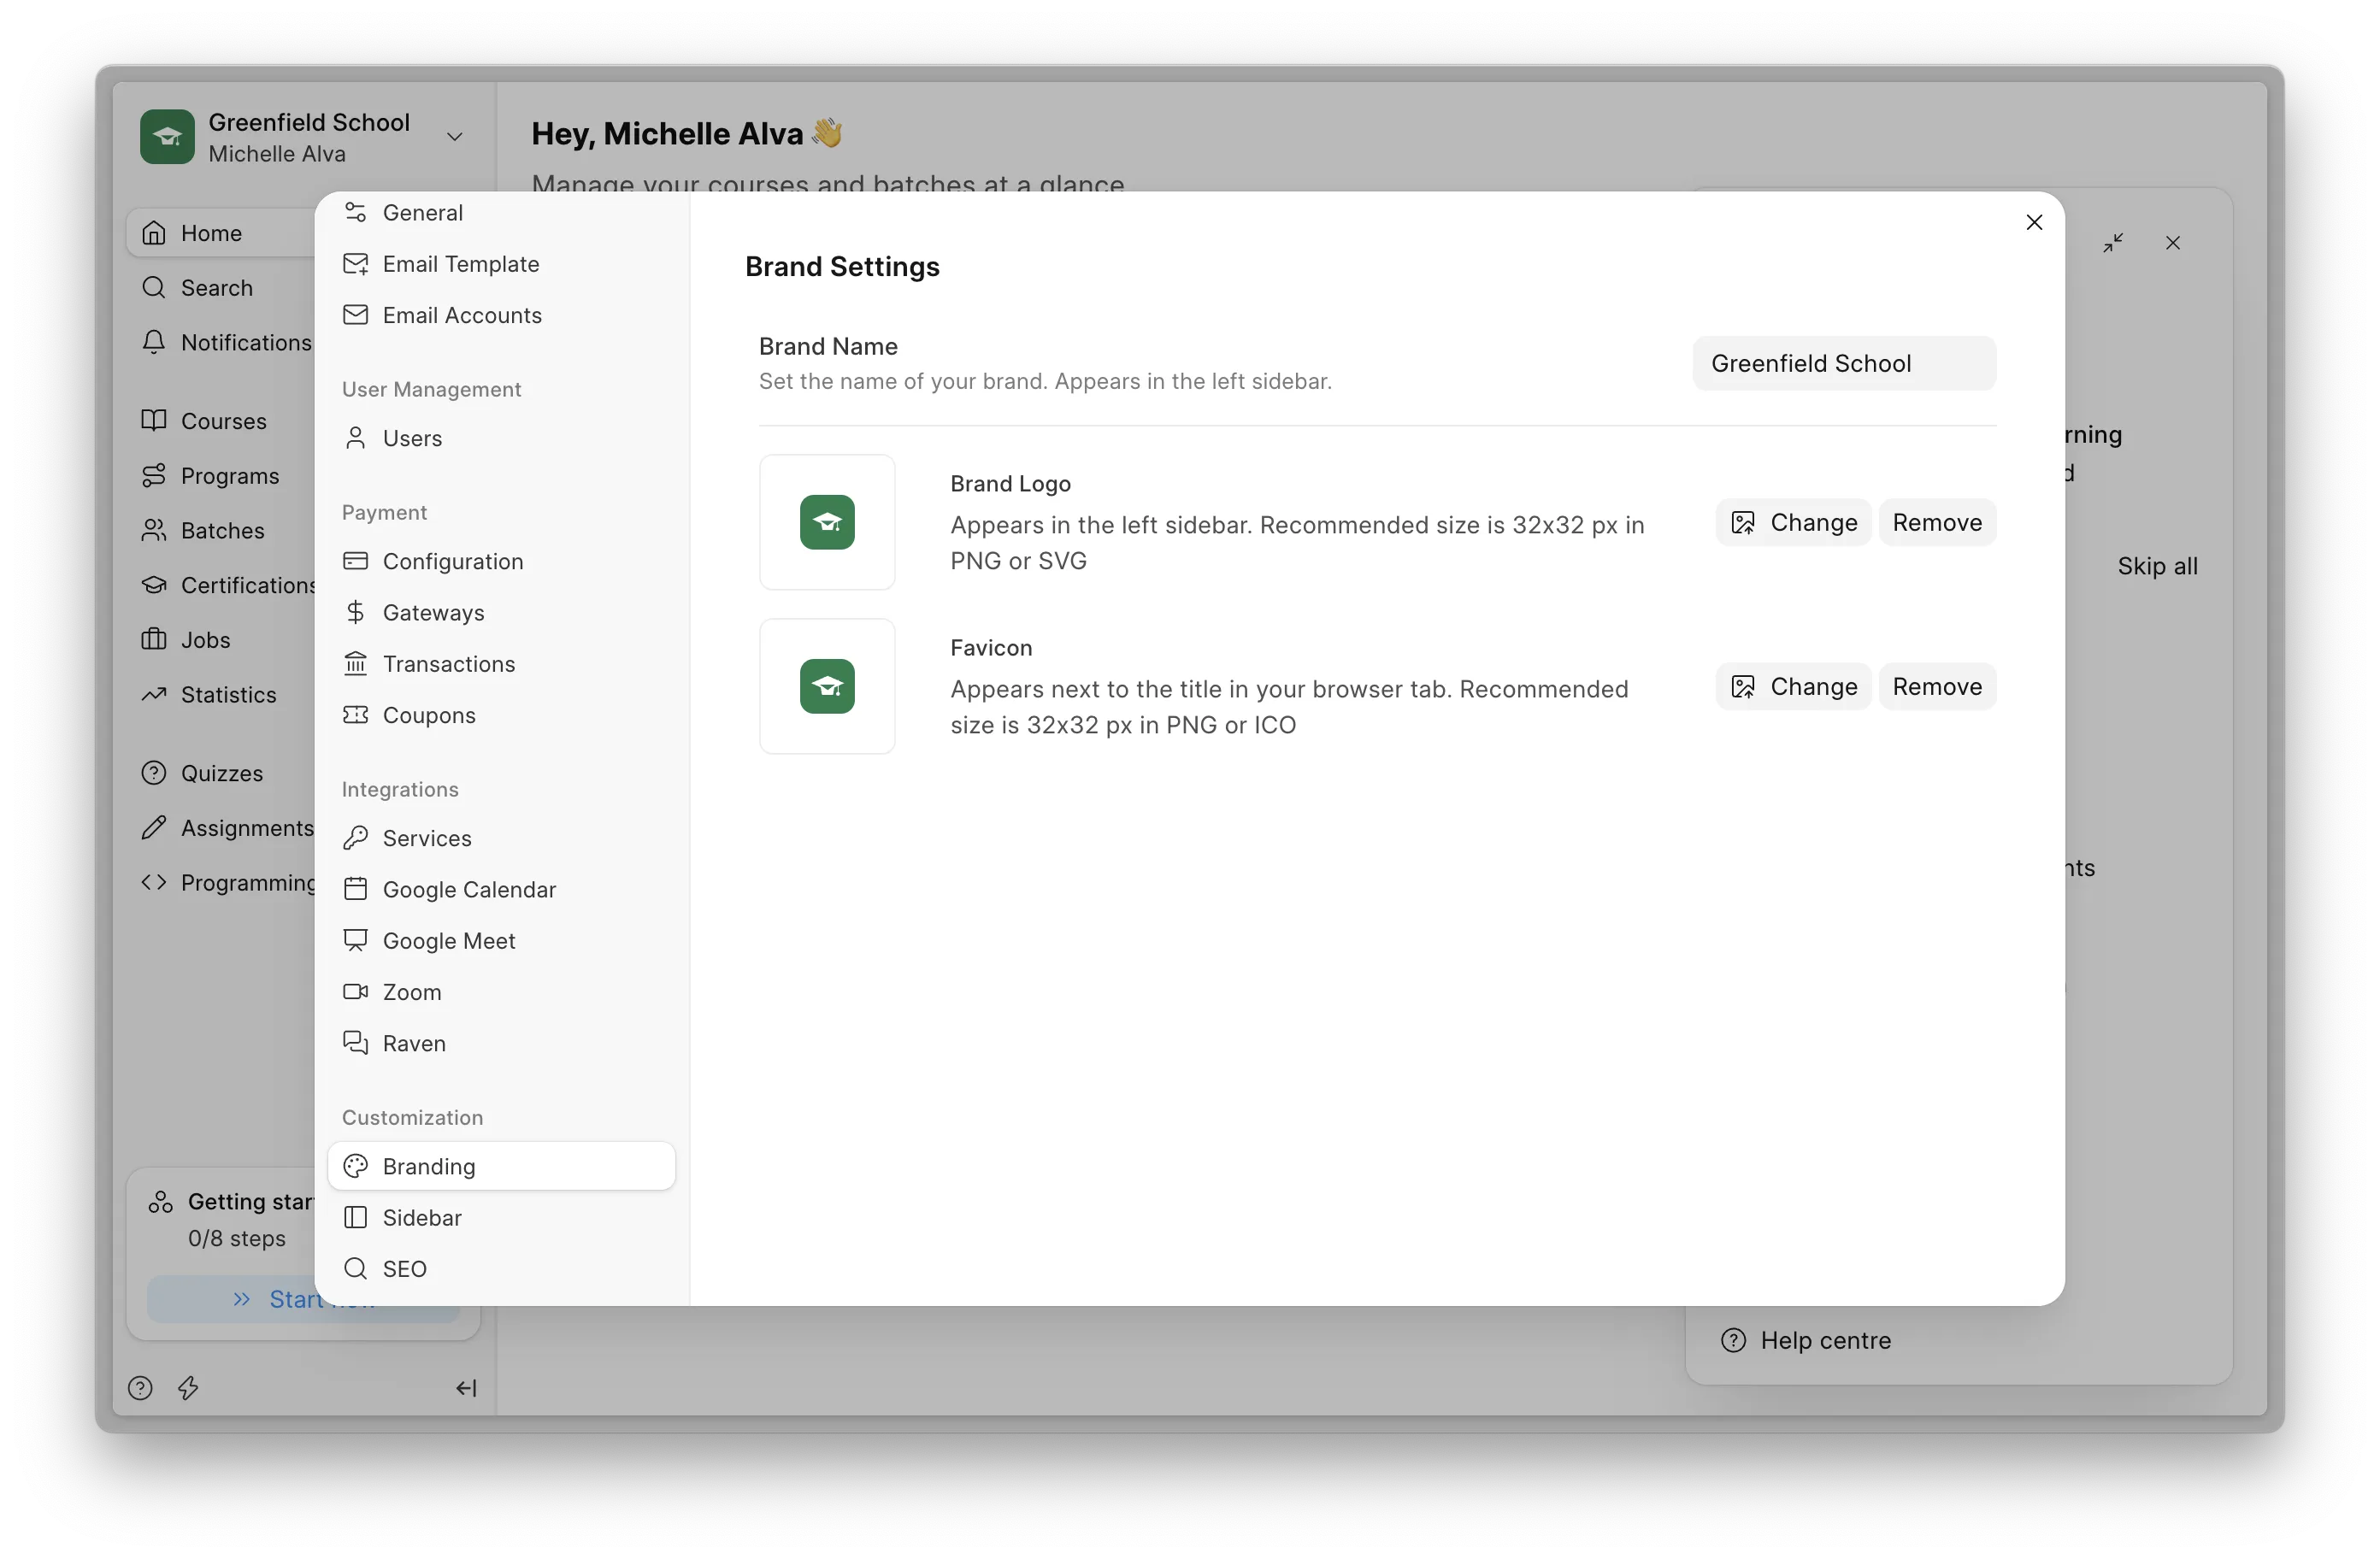 Branding
While you're in Settings, open Sidebar and switch off anything you won't use. If you're not running a job board, hide Jobs, for example. A cleaner sidebar makes things easier for students.
Step 2: Add your people
Go to Settings → Users and click New. Enter an email address and name, tick a role, and save. Each person gets an email to set their password.
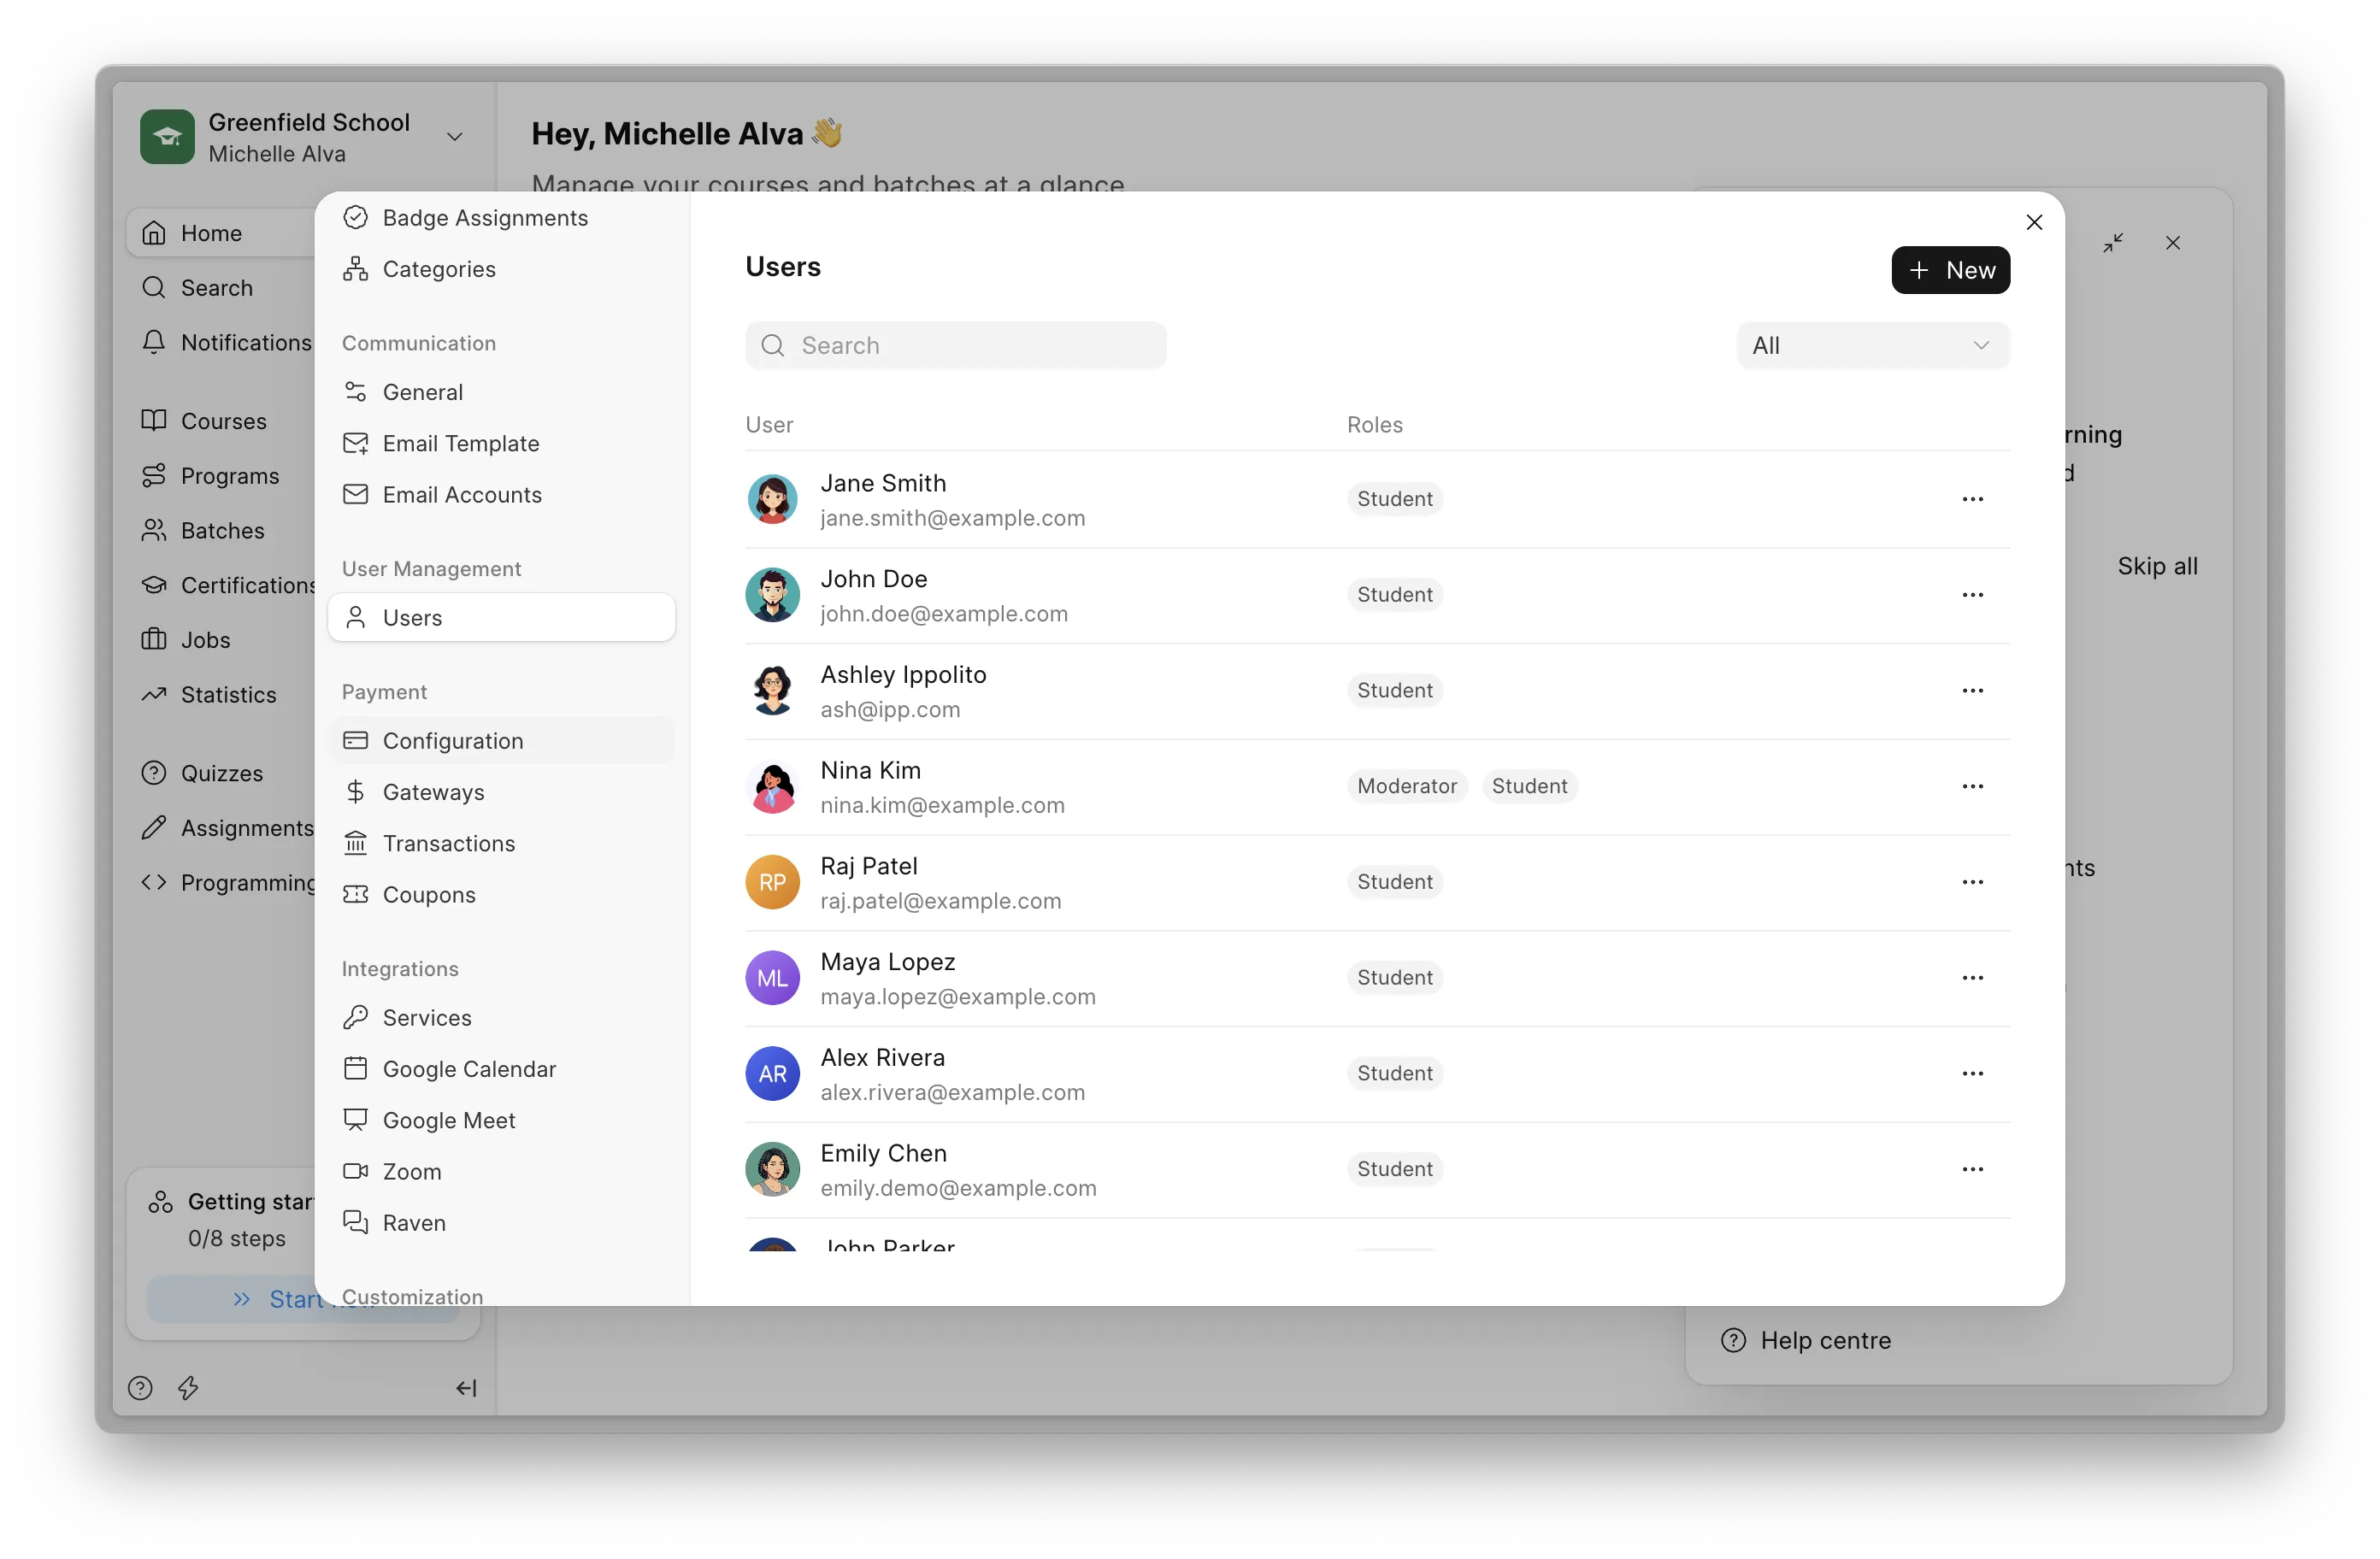 Users List
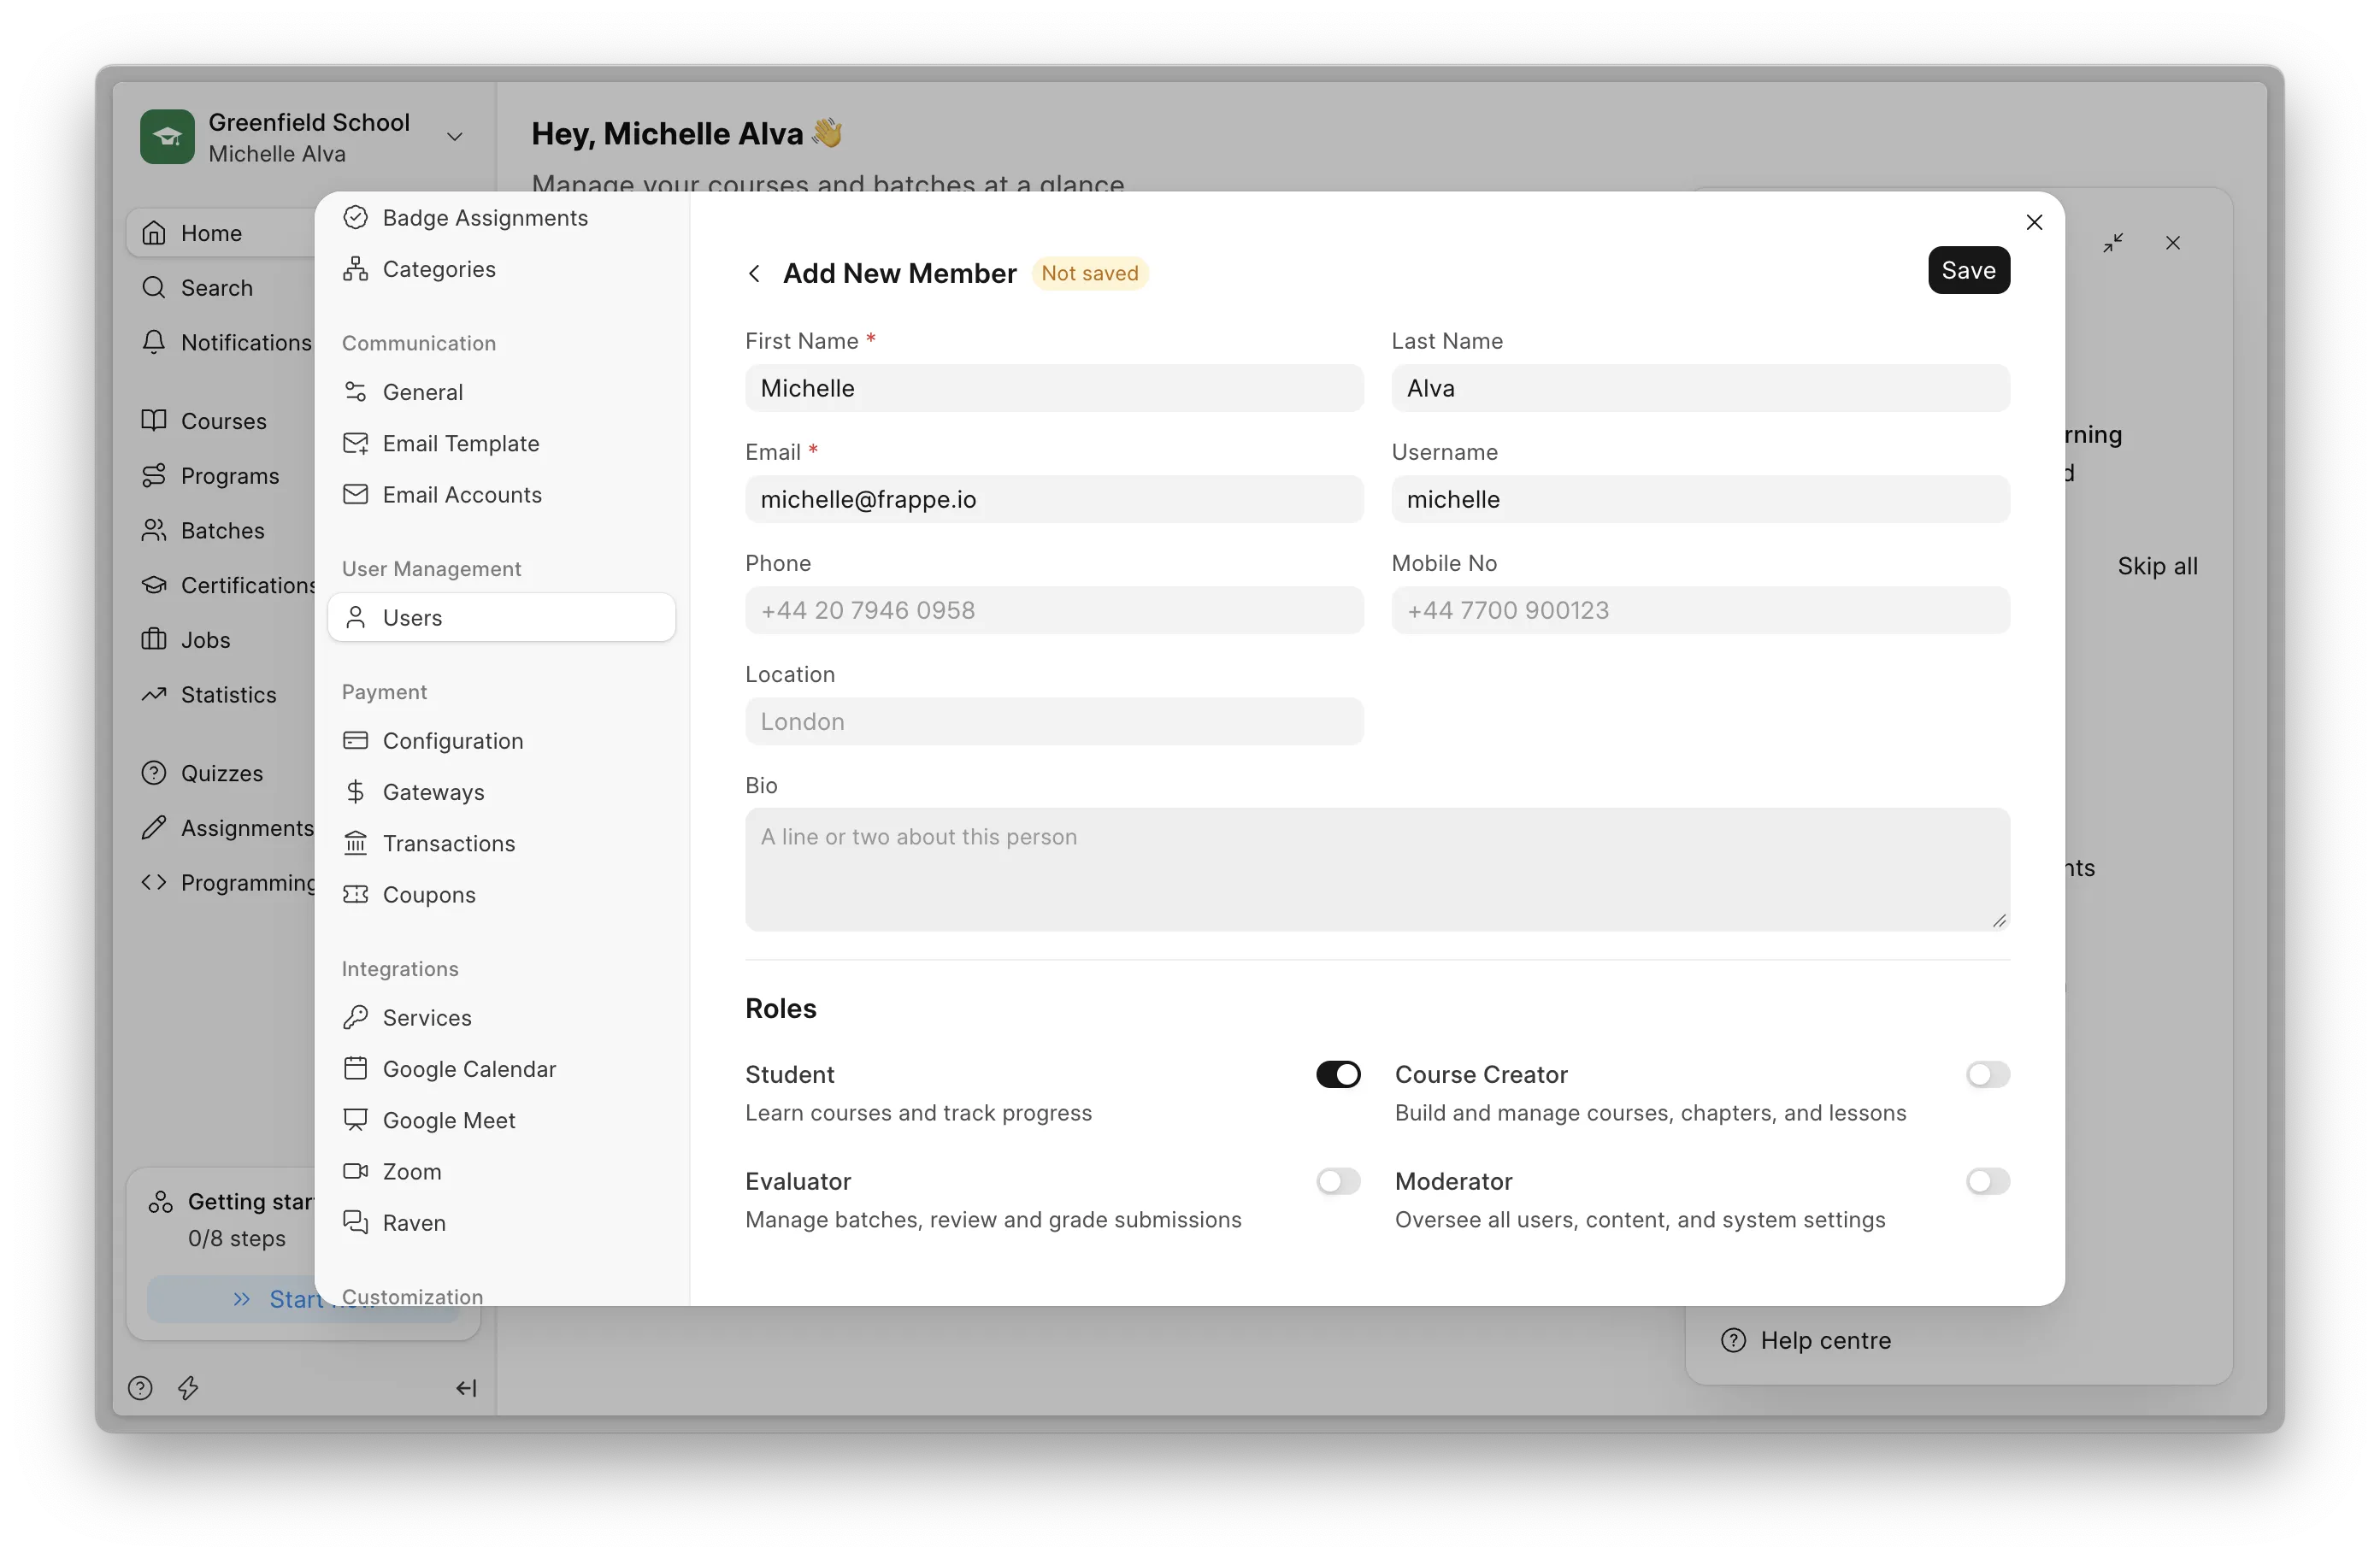 Adding a new user and giving roles
There are four roles:
| Role | What they can do |
|---|---|
| Student | Take courses and join batches |
| Instructor | Create and edit courses |
| Evaluator | Review quizzes and assignments, run evaluations |
| Moderator | Everything, including publishing courses and managing batches |
Only Moderators can publish a course. If your teachers build courses, make sure someone on your team has the Moderator role to publish them.
Add your instructors first so they can start building. Students can come in once there's a course ready for them. They can also sign up on their own from your site's login page, unless you turn that off in Settings → Signup. If your courses are open to the public, this is how most learners will arrive.
Step 3: Build your first course
Go to Courses and click New Course. Add a title, a short introduction, a description, and a thumbnail. Pick the instructors who'll teach it, then save.
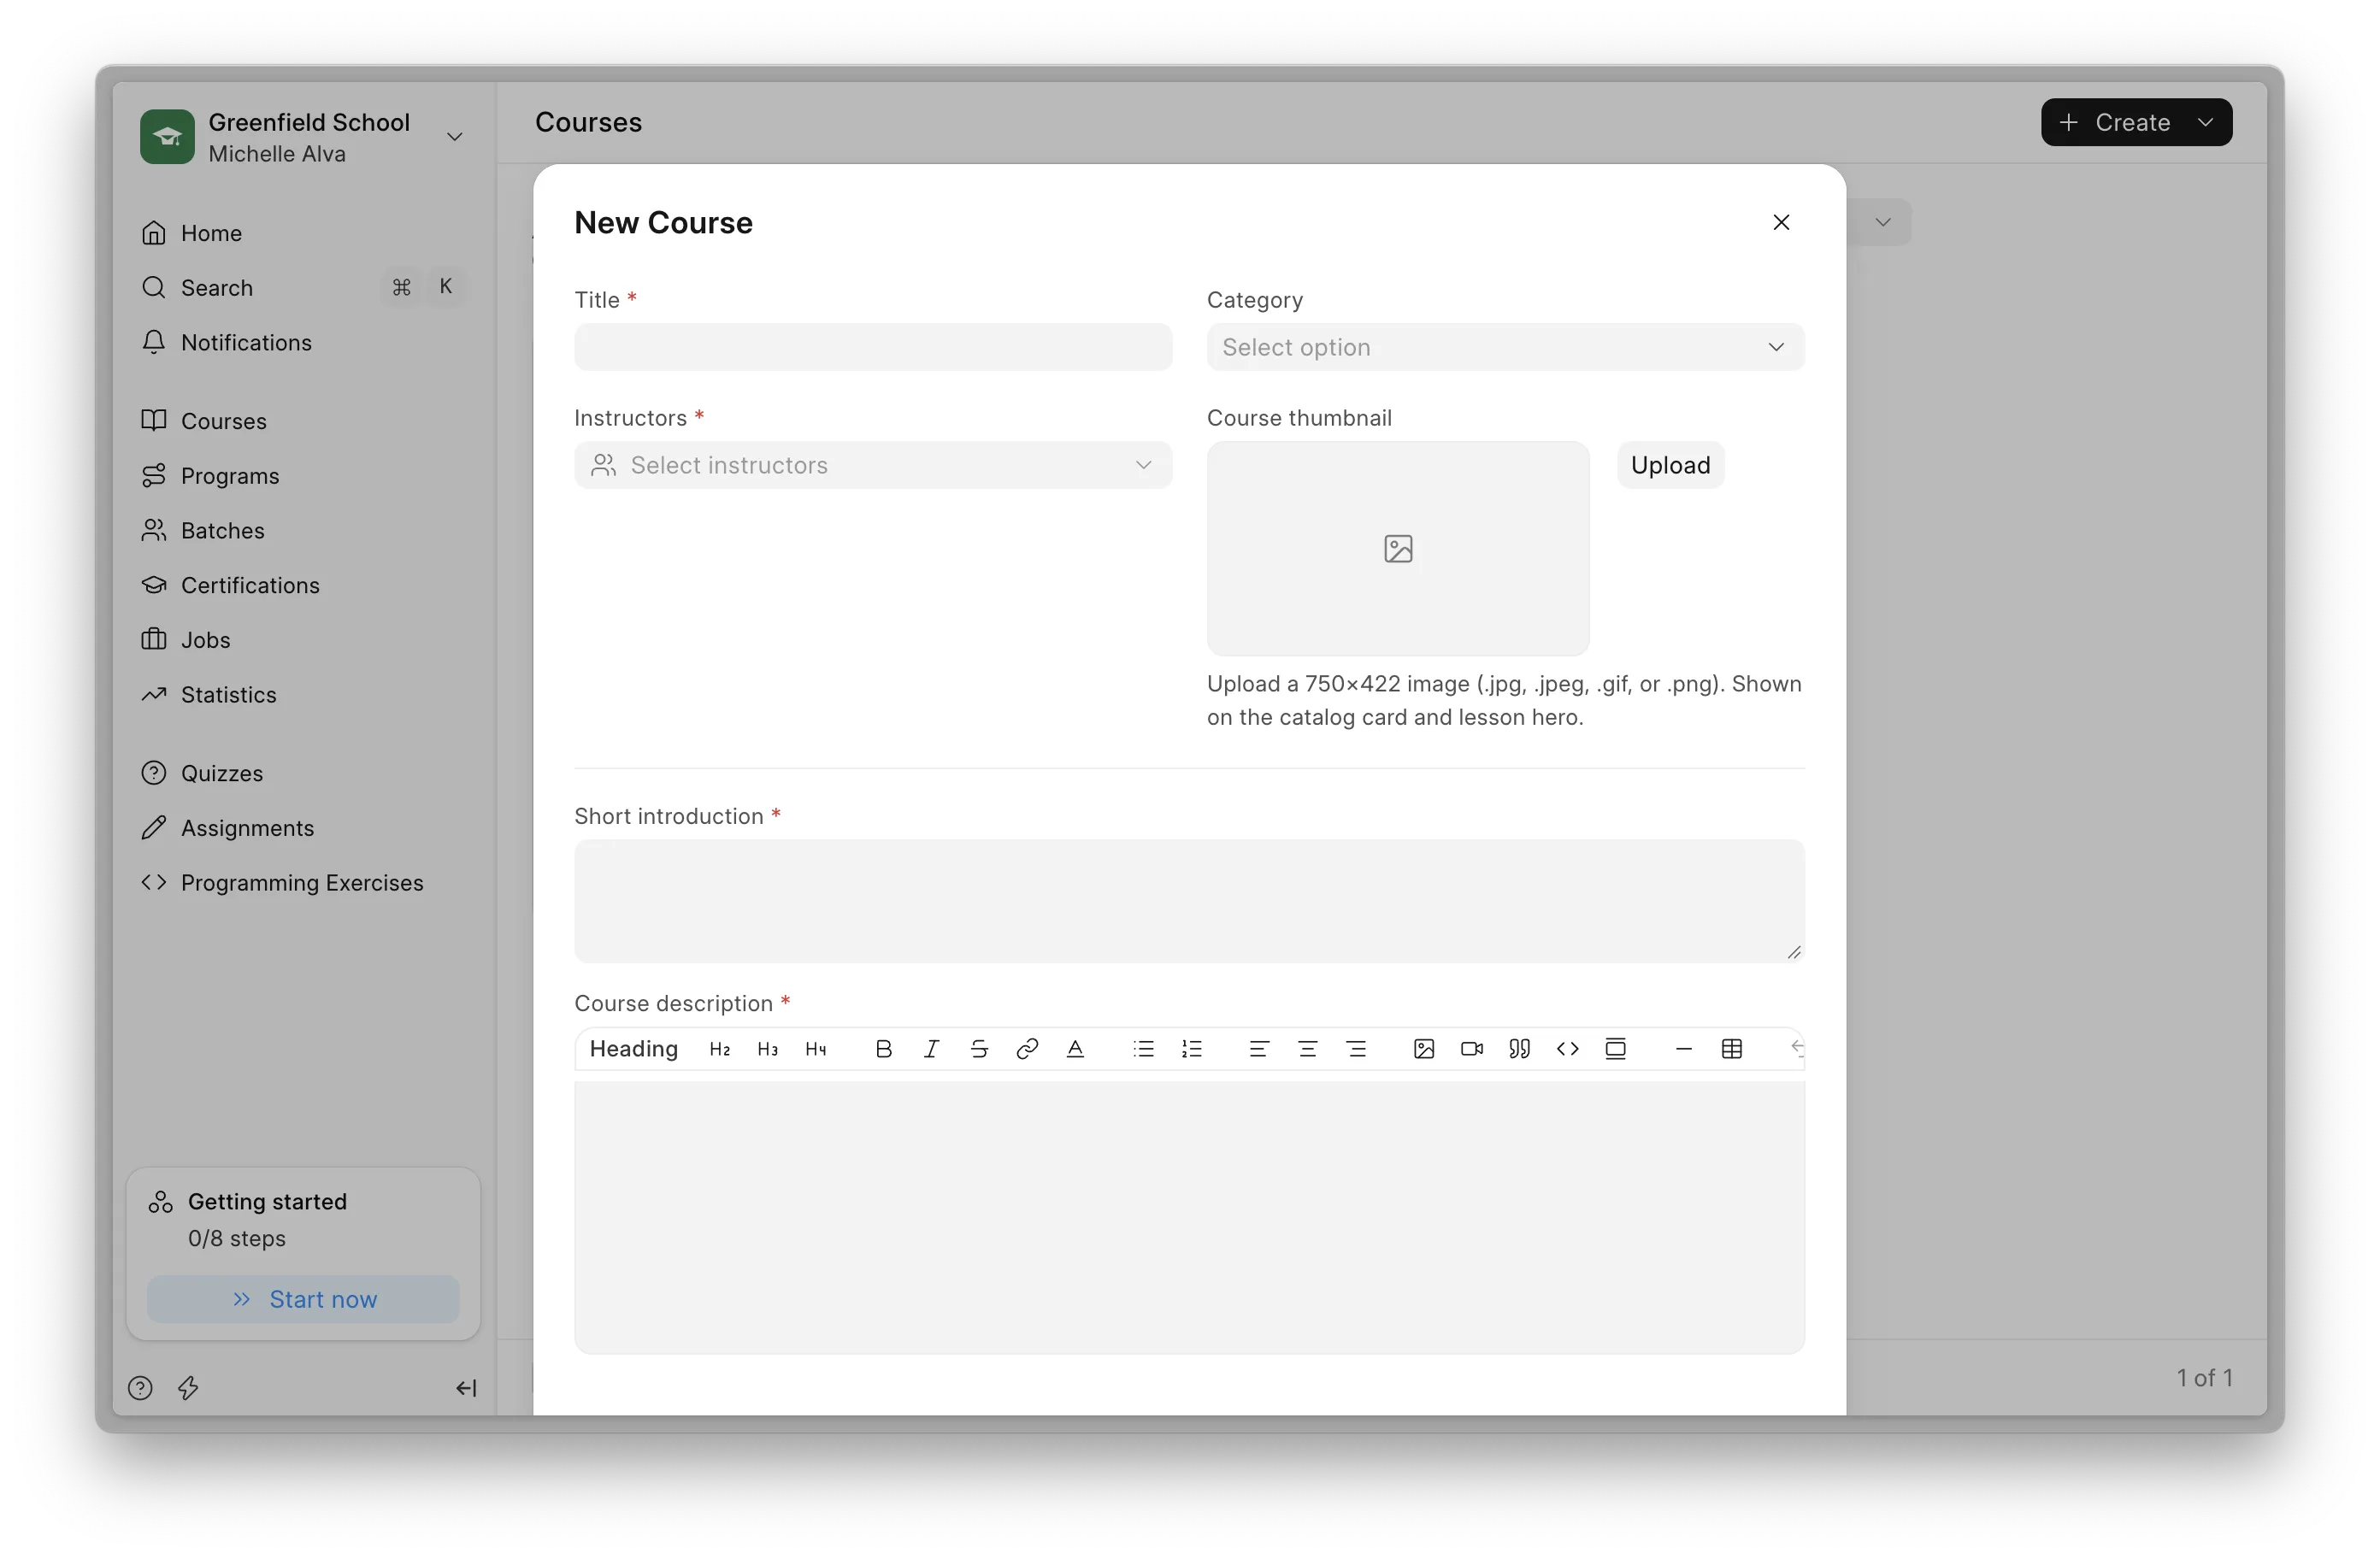 Creating a new Course
Your course now has four tabs: Overview, Dashboard, Course editor, and Settings. Open Course editor to add content.
- Click Add Chapter and give it a name, like "Week 1" or "Introduction".
- Inside the chapter, click Add Lesson.
- Write or paste your content. To add a video, PDF, quiz, or assignment, click the + in the editor. For YouTube or Vimeo, just paste the link.
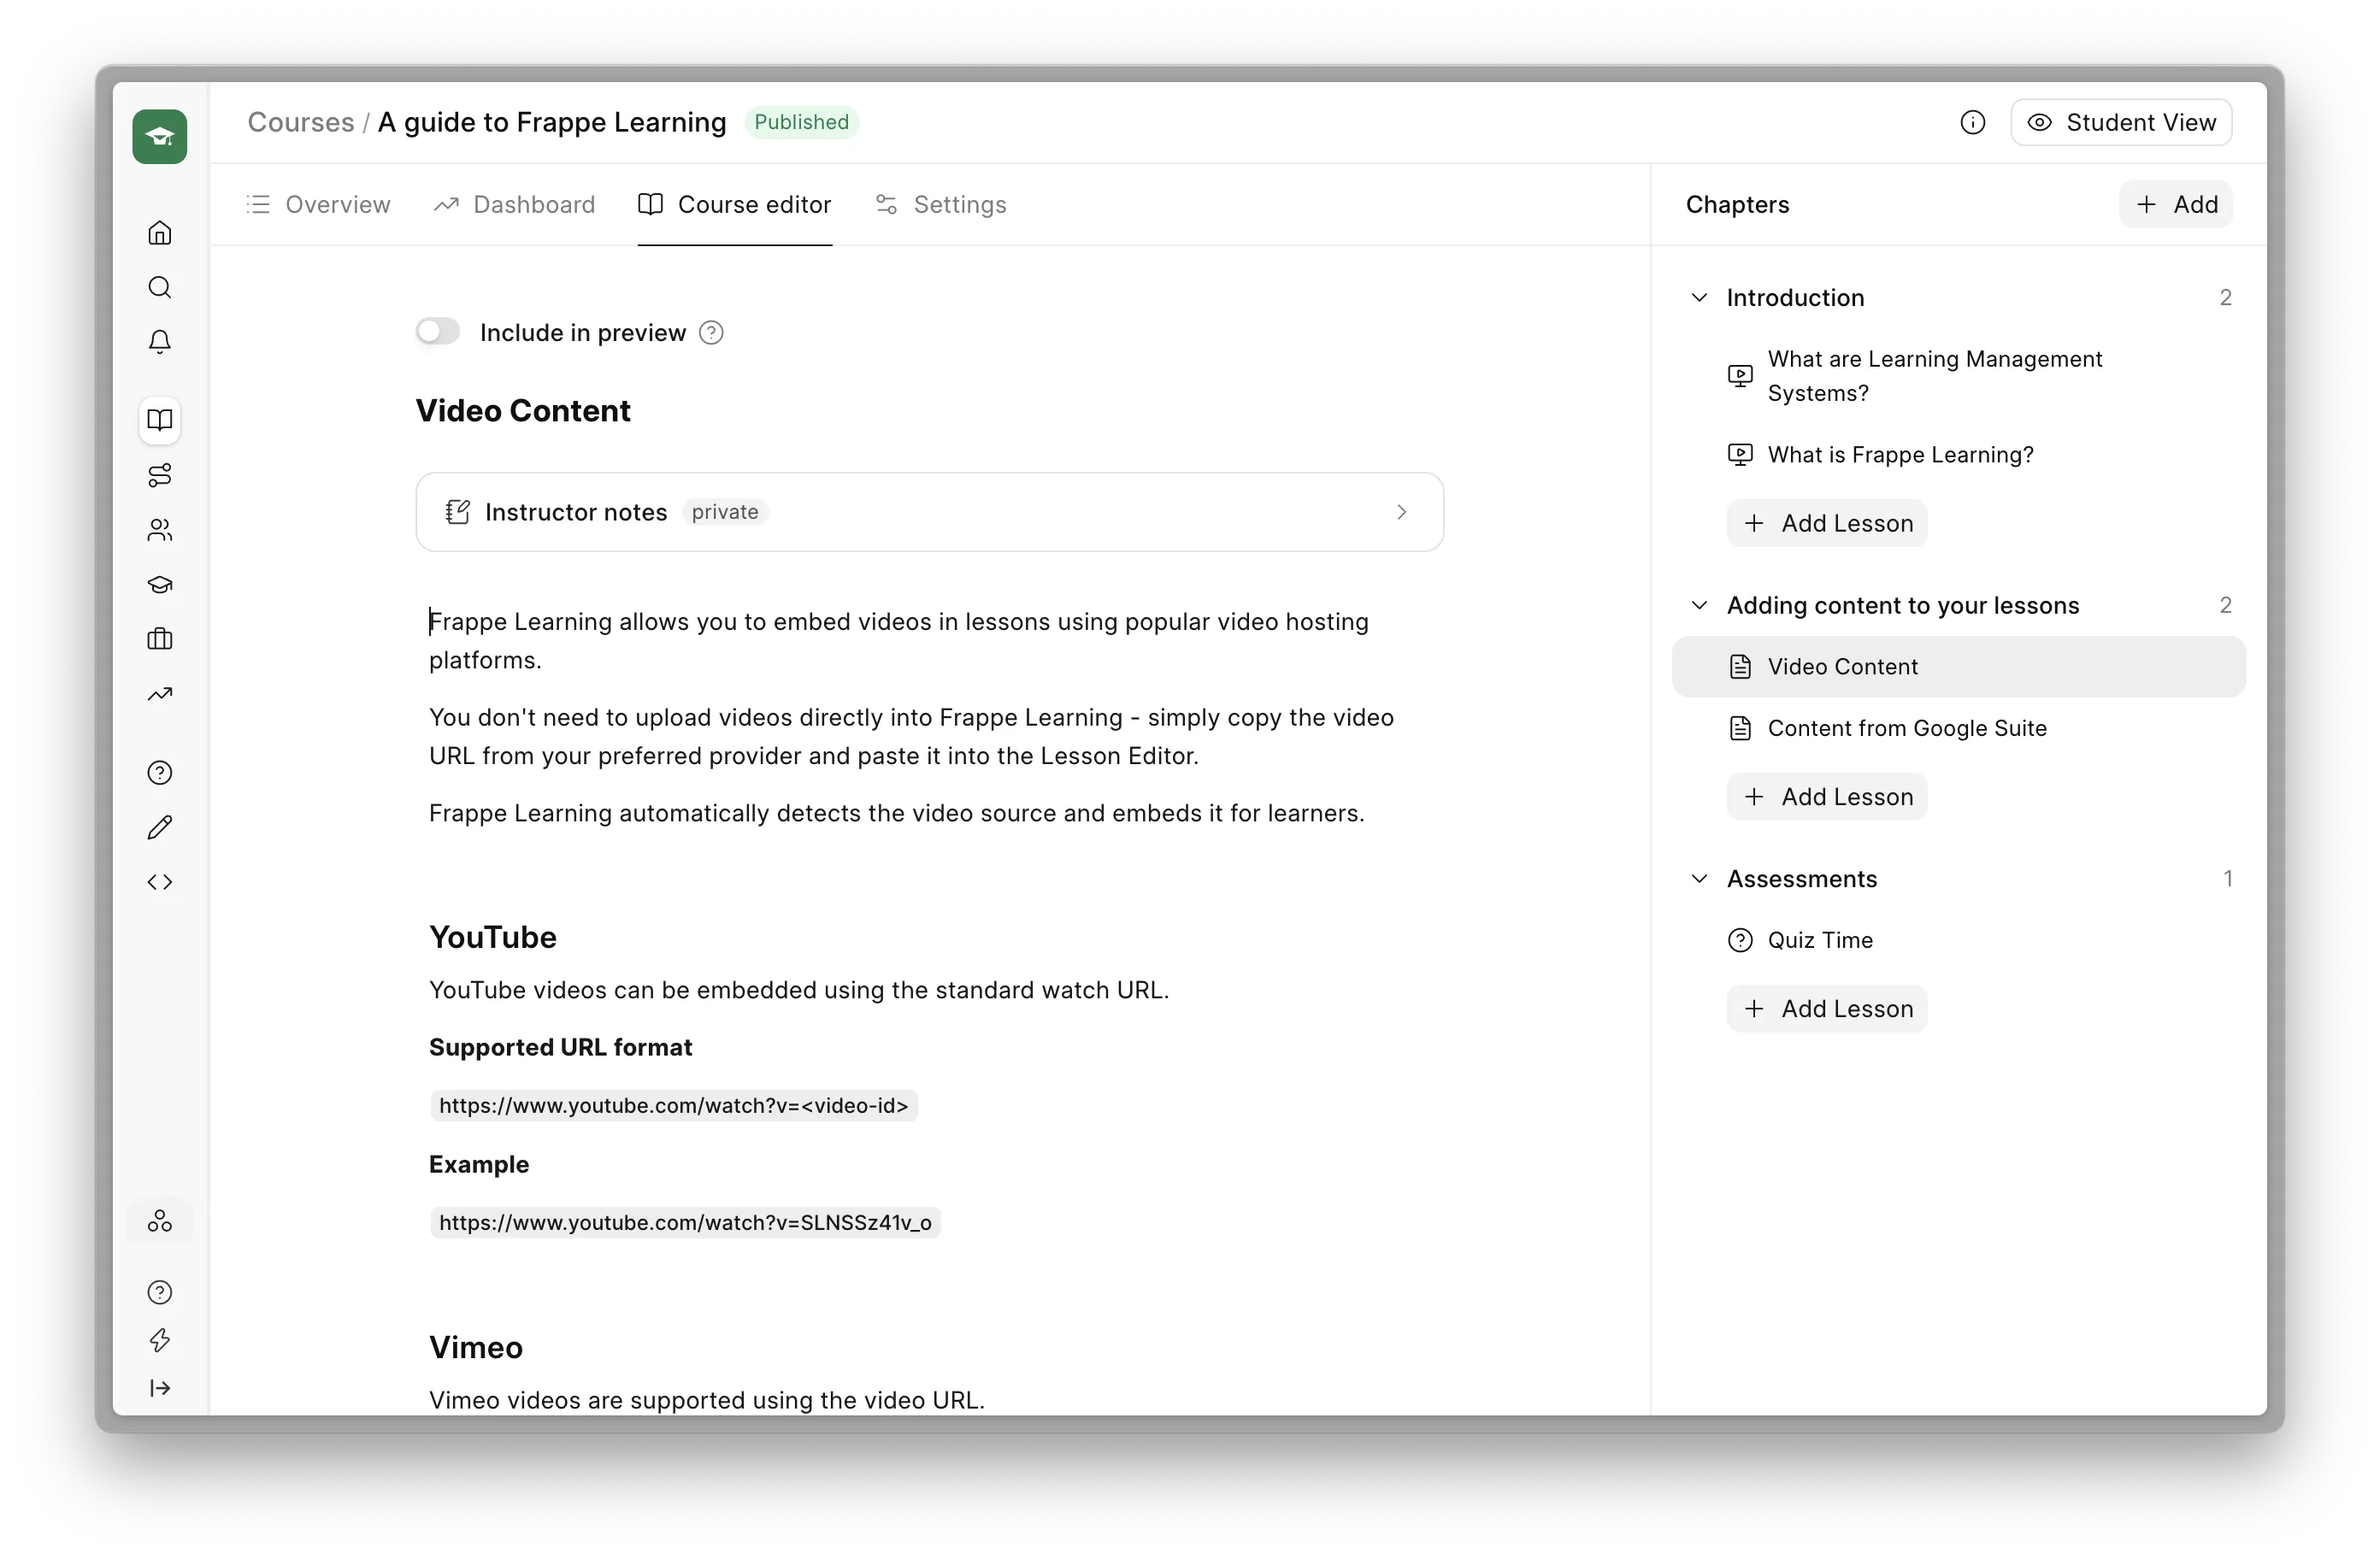 Course Editor
Not sure how something works? The How to edit a lesson button at the top has short videos. Student View shows you the lesson exactly as a learner will see it.
Start small. One chapter with two lessons is plenty for now. You can keep adding once learners are in.
Already have content? If you're moving from another LMS, you can upload a SCORM package as a chapter. If the course came from another Frappe Learning site, use New Course → Import via ZIP.
Step 4: Publish it
Open the course's Settings tab. A few things worth checking:
- Self enrollment lets learners join the course on their own. Leave it off if you want to control who gets in.
- Enforce lesson completion makes learners finish each lesson before the next one opens.
- Completion certificate gives learners a certificate when they finish.
Save your changes, then click Publish at the top right.
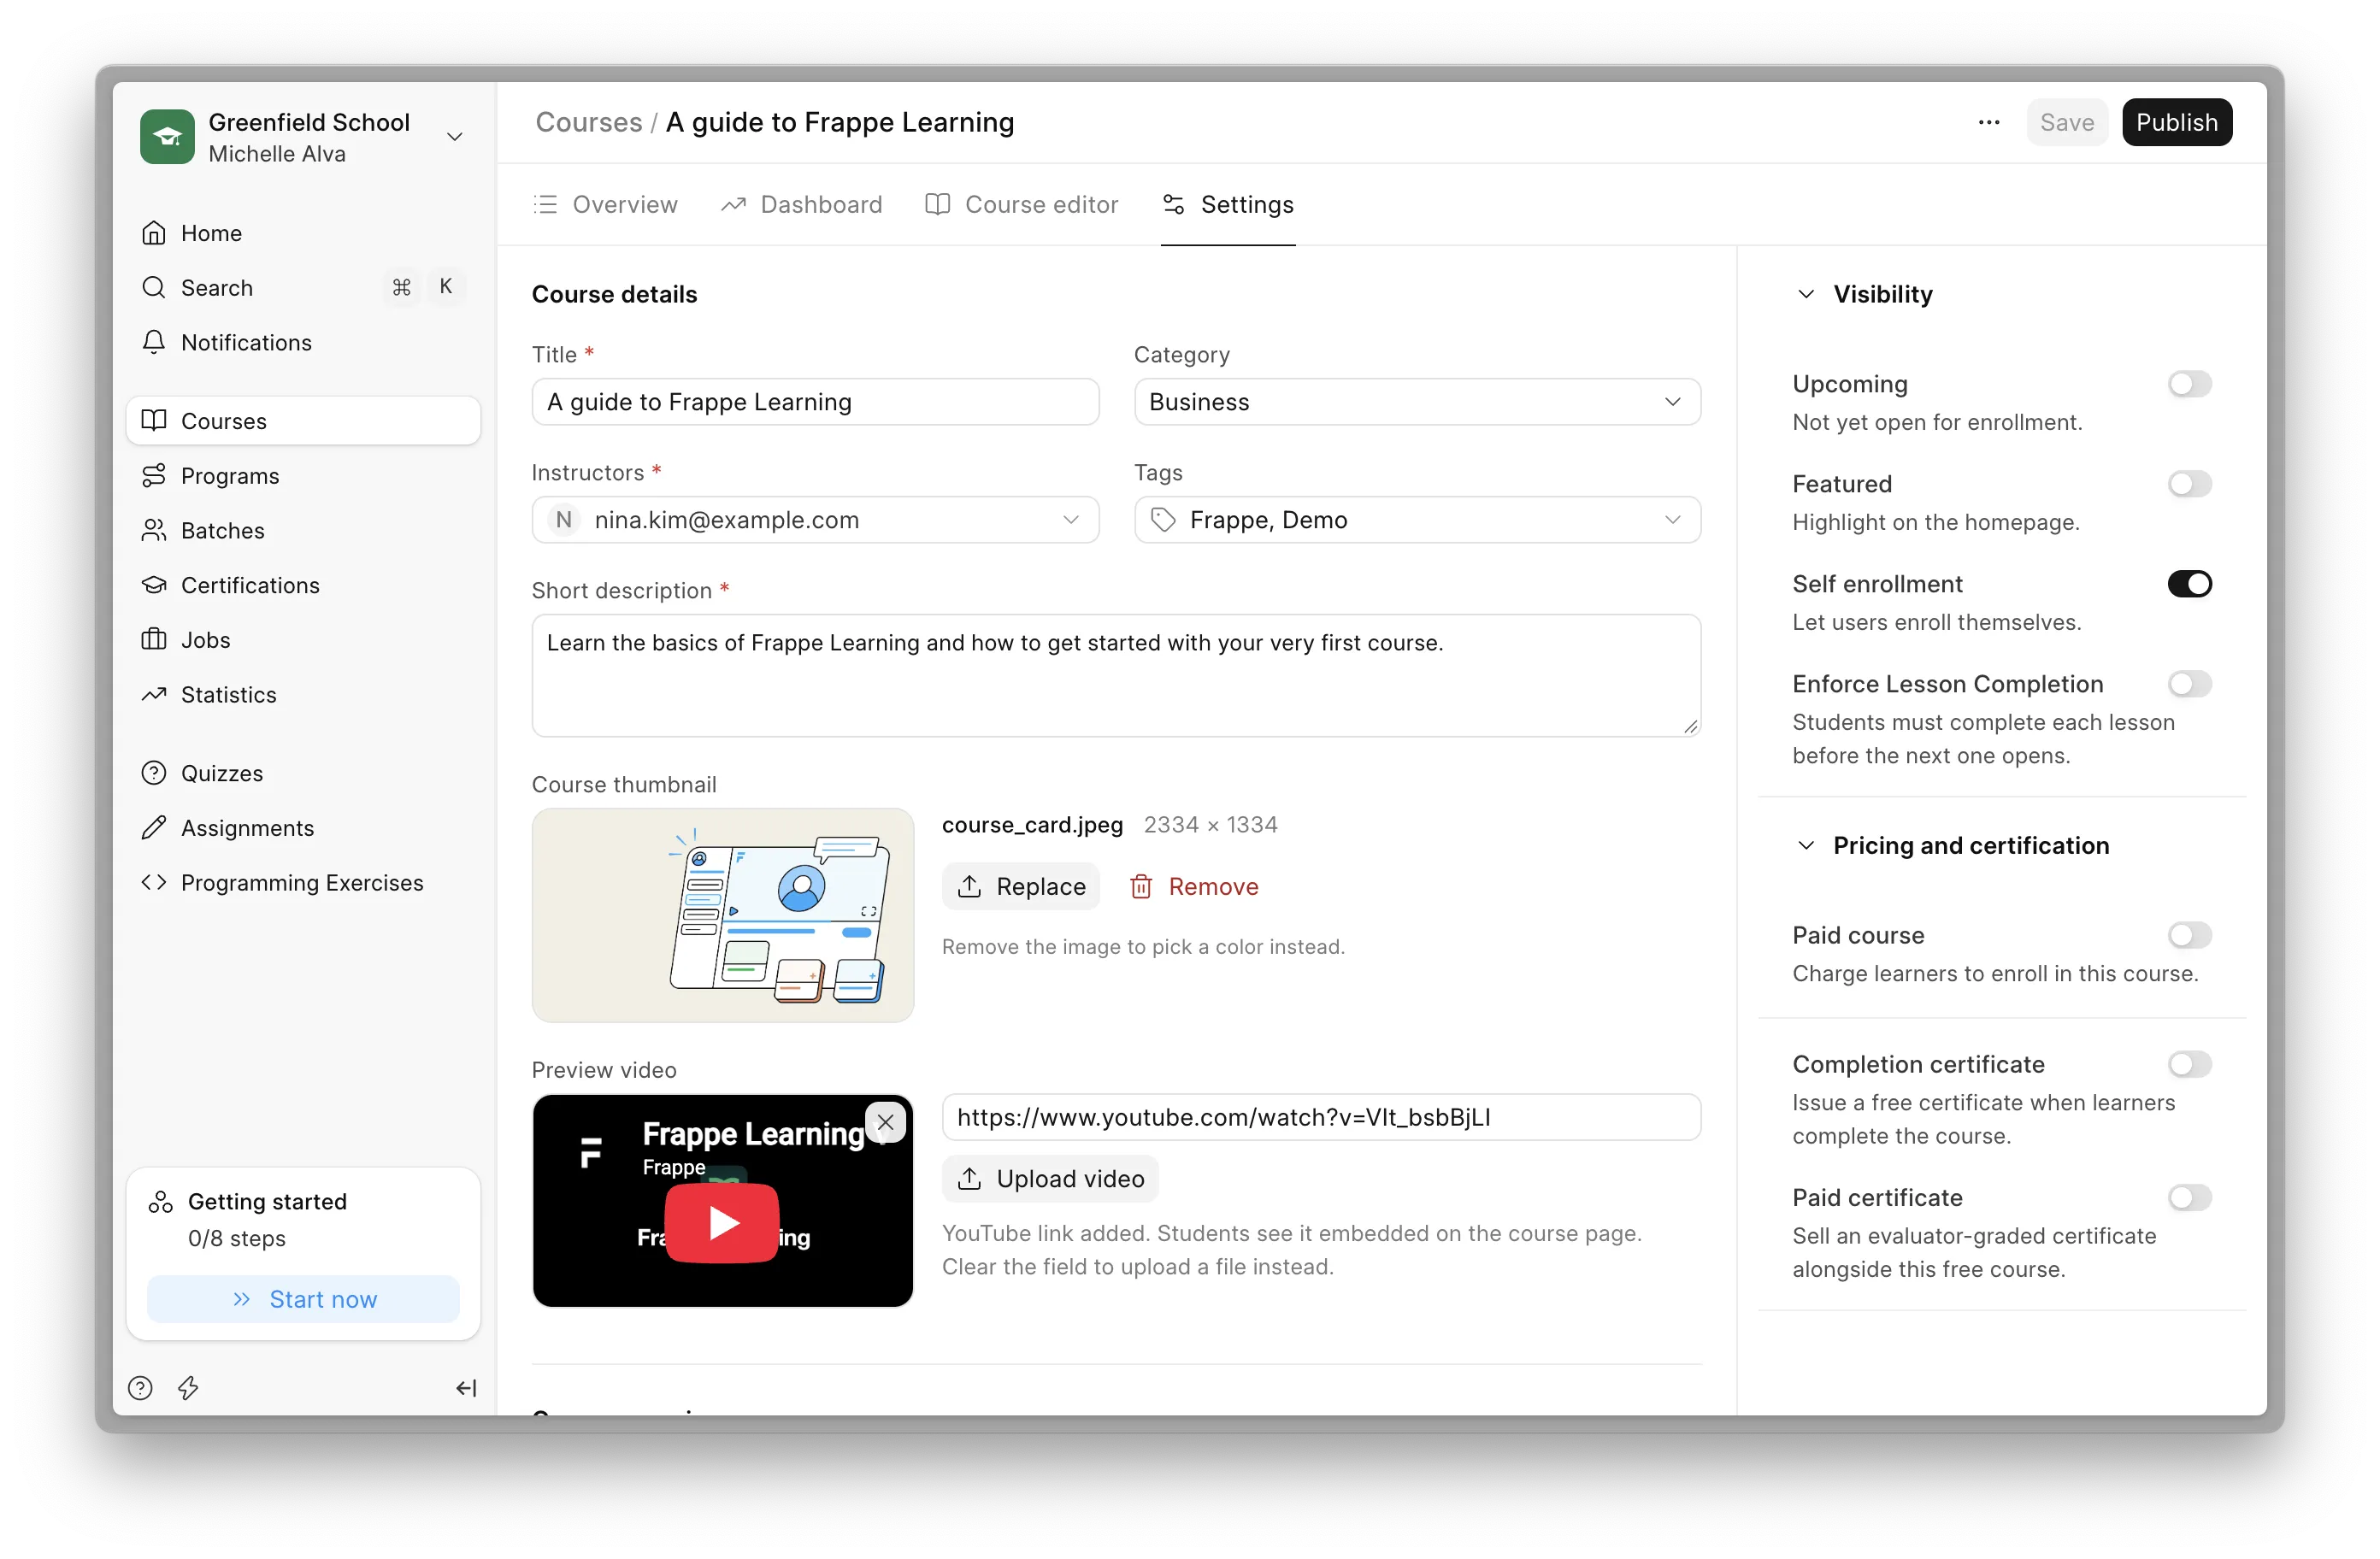 Course Settings tab with Publish button
Step 5: Get your learners in
This is where the two paths split. Pick the one that matches how you teach. You can always use both later.
Self-paced: enroll learners in the course
Open the course's Dashboard tab, click Enroll, and pick a student. Repeat for each learner. If you turned on self-enrollment (it's a toggle in the Settings tab of Course), you can share the course link and let learners join on their own.
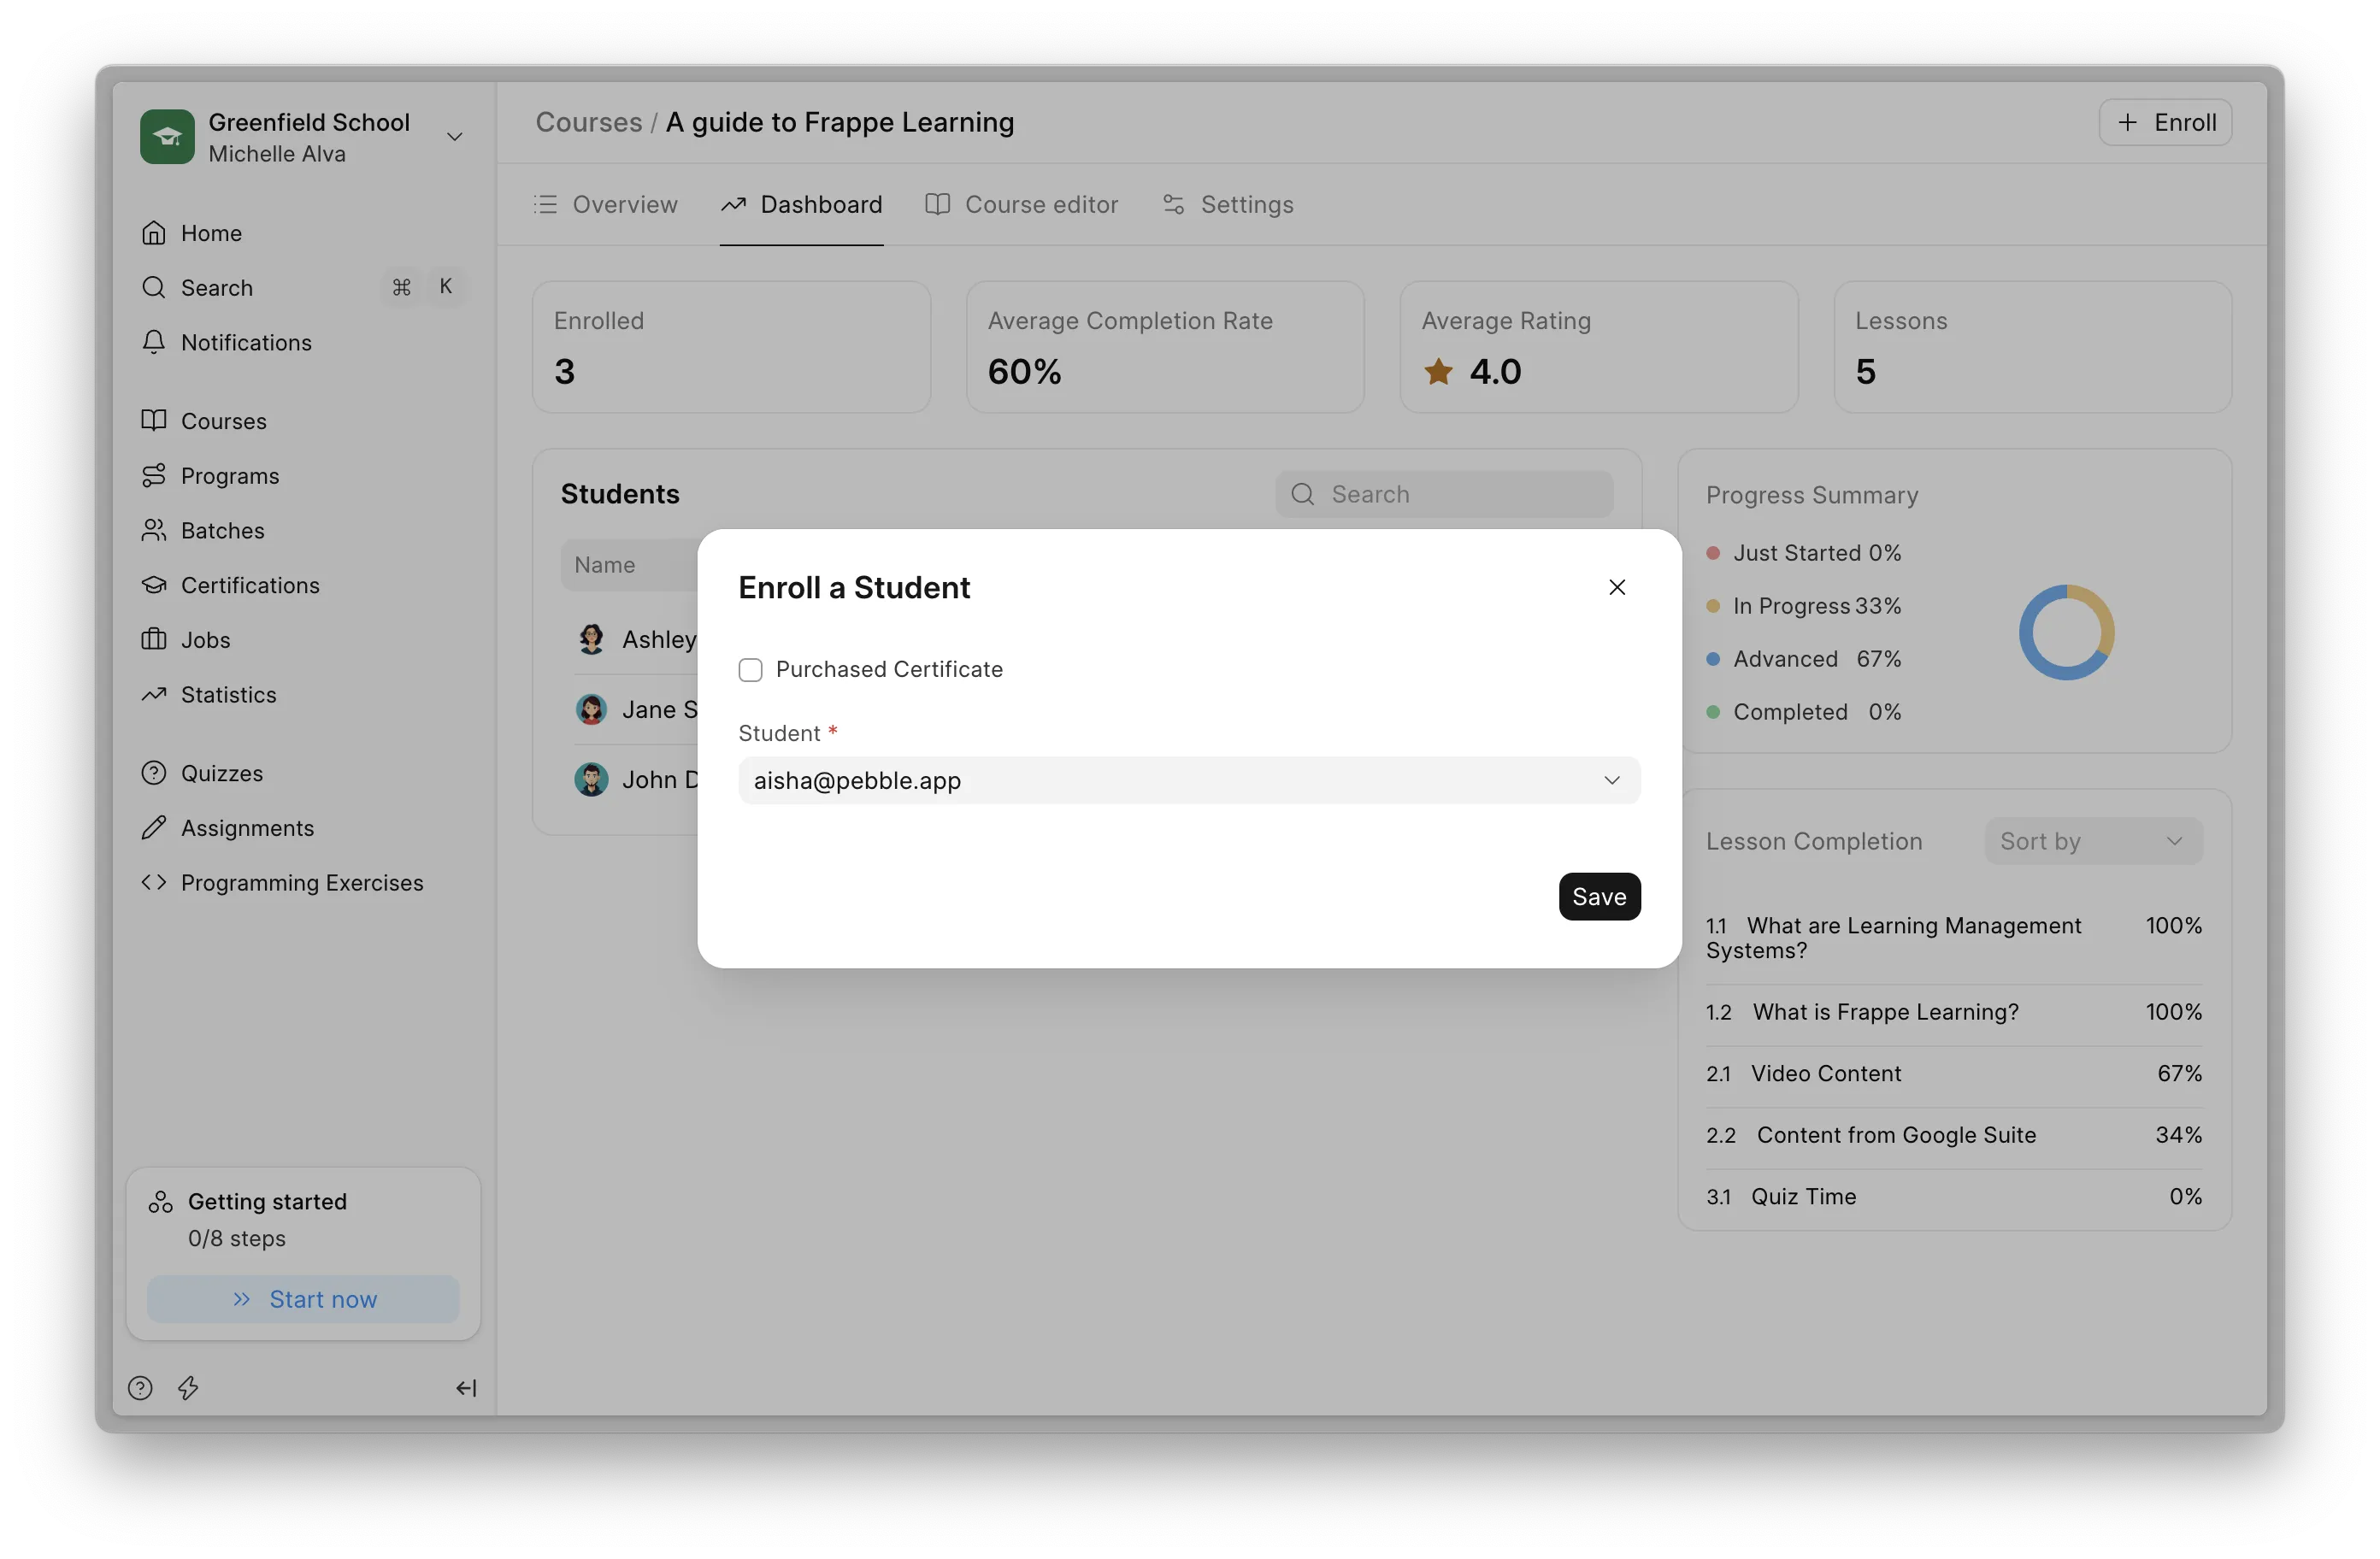 Enrolling a student manually
Opening your courses to the public? Go to Settings → General and turn on Allow Guest Access, so people can browse your courses before they sign up. Turn on self**-**enrollment for the course, then share the link wherever your audience is. People sign up, join, and start learning without you doing anything.
Class or cohort: use a batch
Go to Batches and click New Batch. Add a title, start and end dates, class timings, timezone, and whether it's online or offline. Set a seat count if you want to cap it, add instructors, and save.
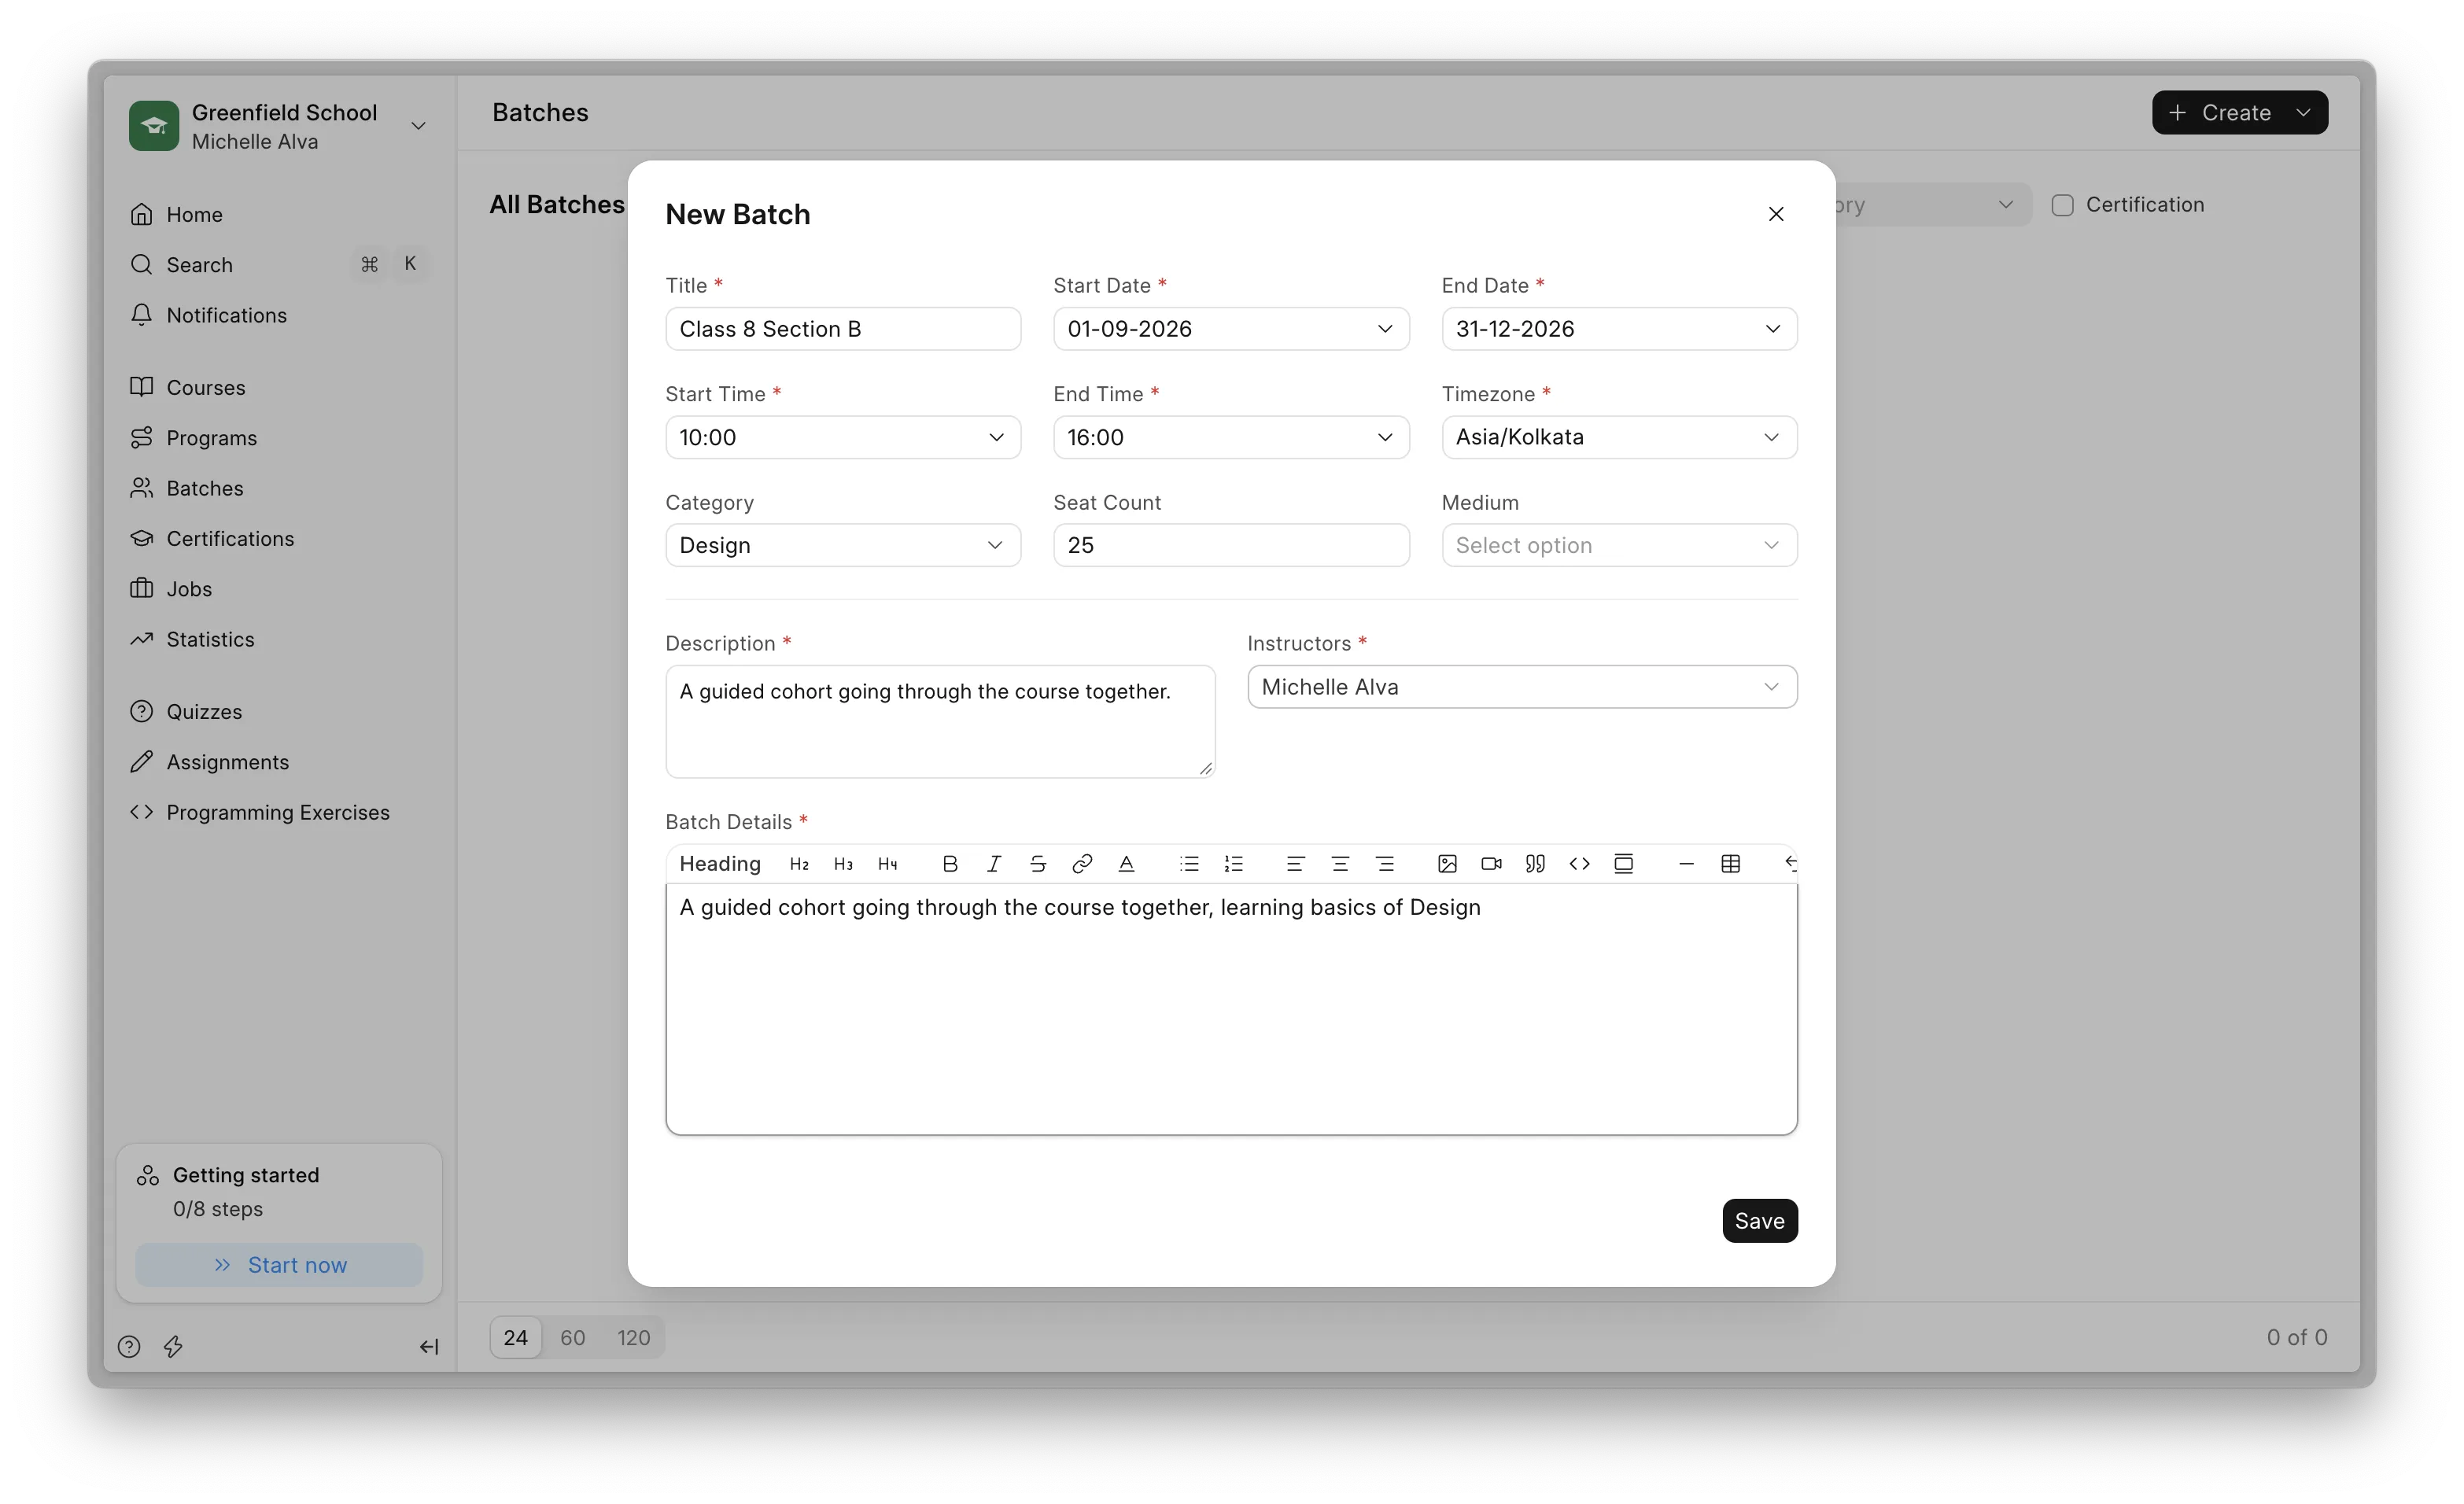 Creating a new batch
Inside the batch, add your course first, then add your students. Everyone you add to a batch gets enrolled in all of its courses automatically, so you don't have to enroll them one course at a time.
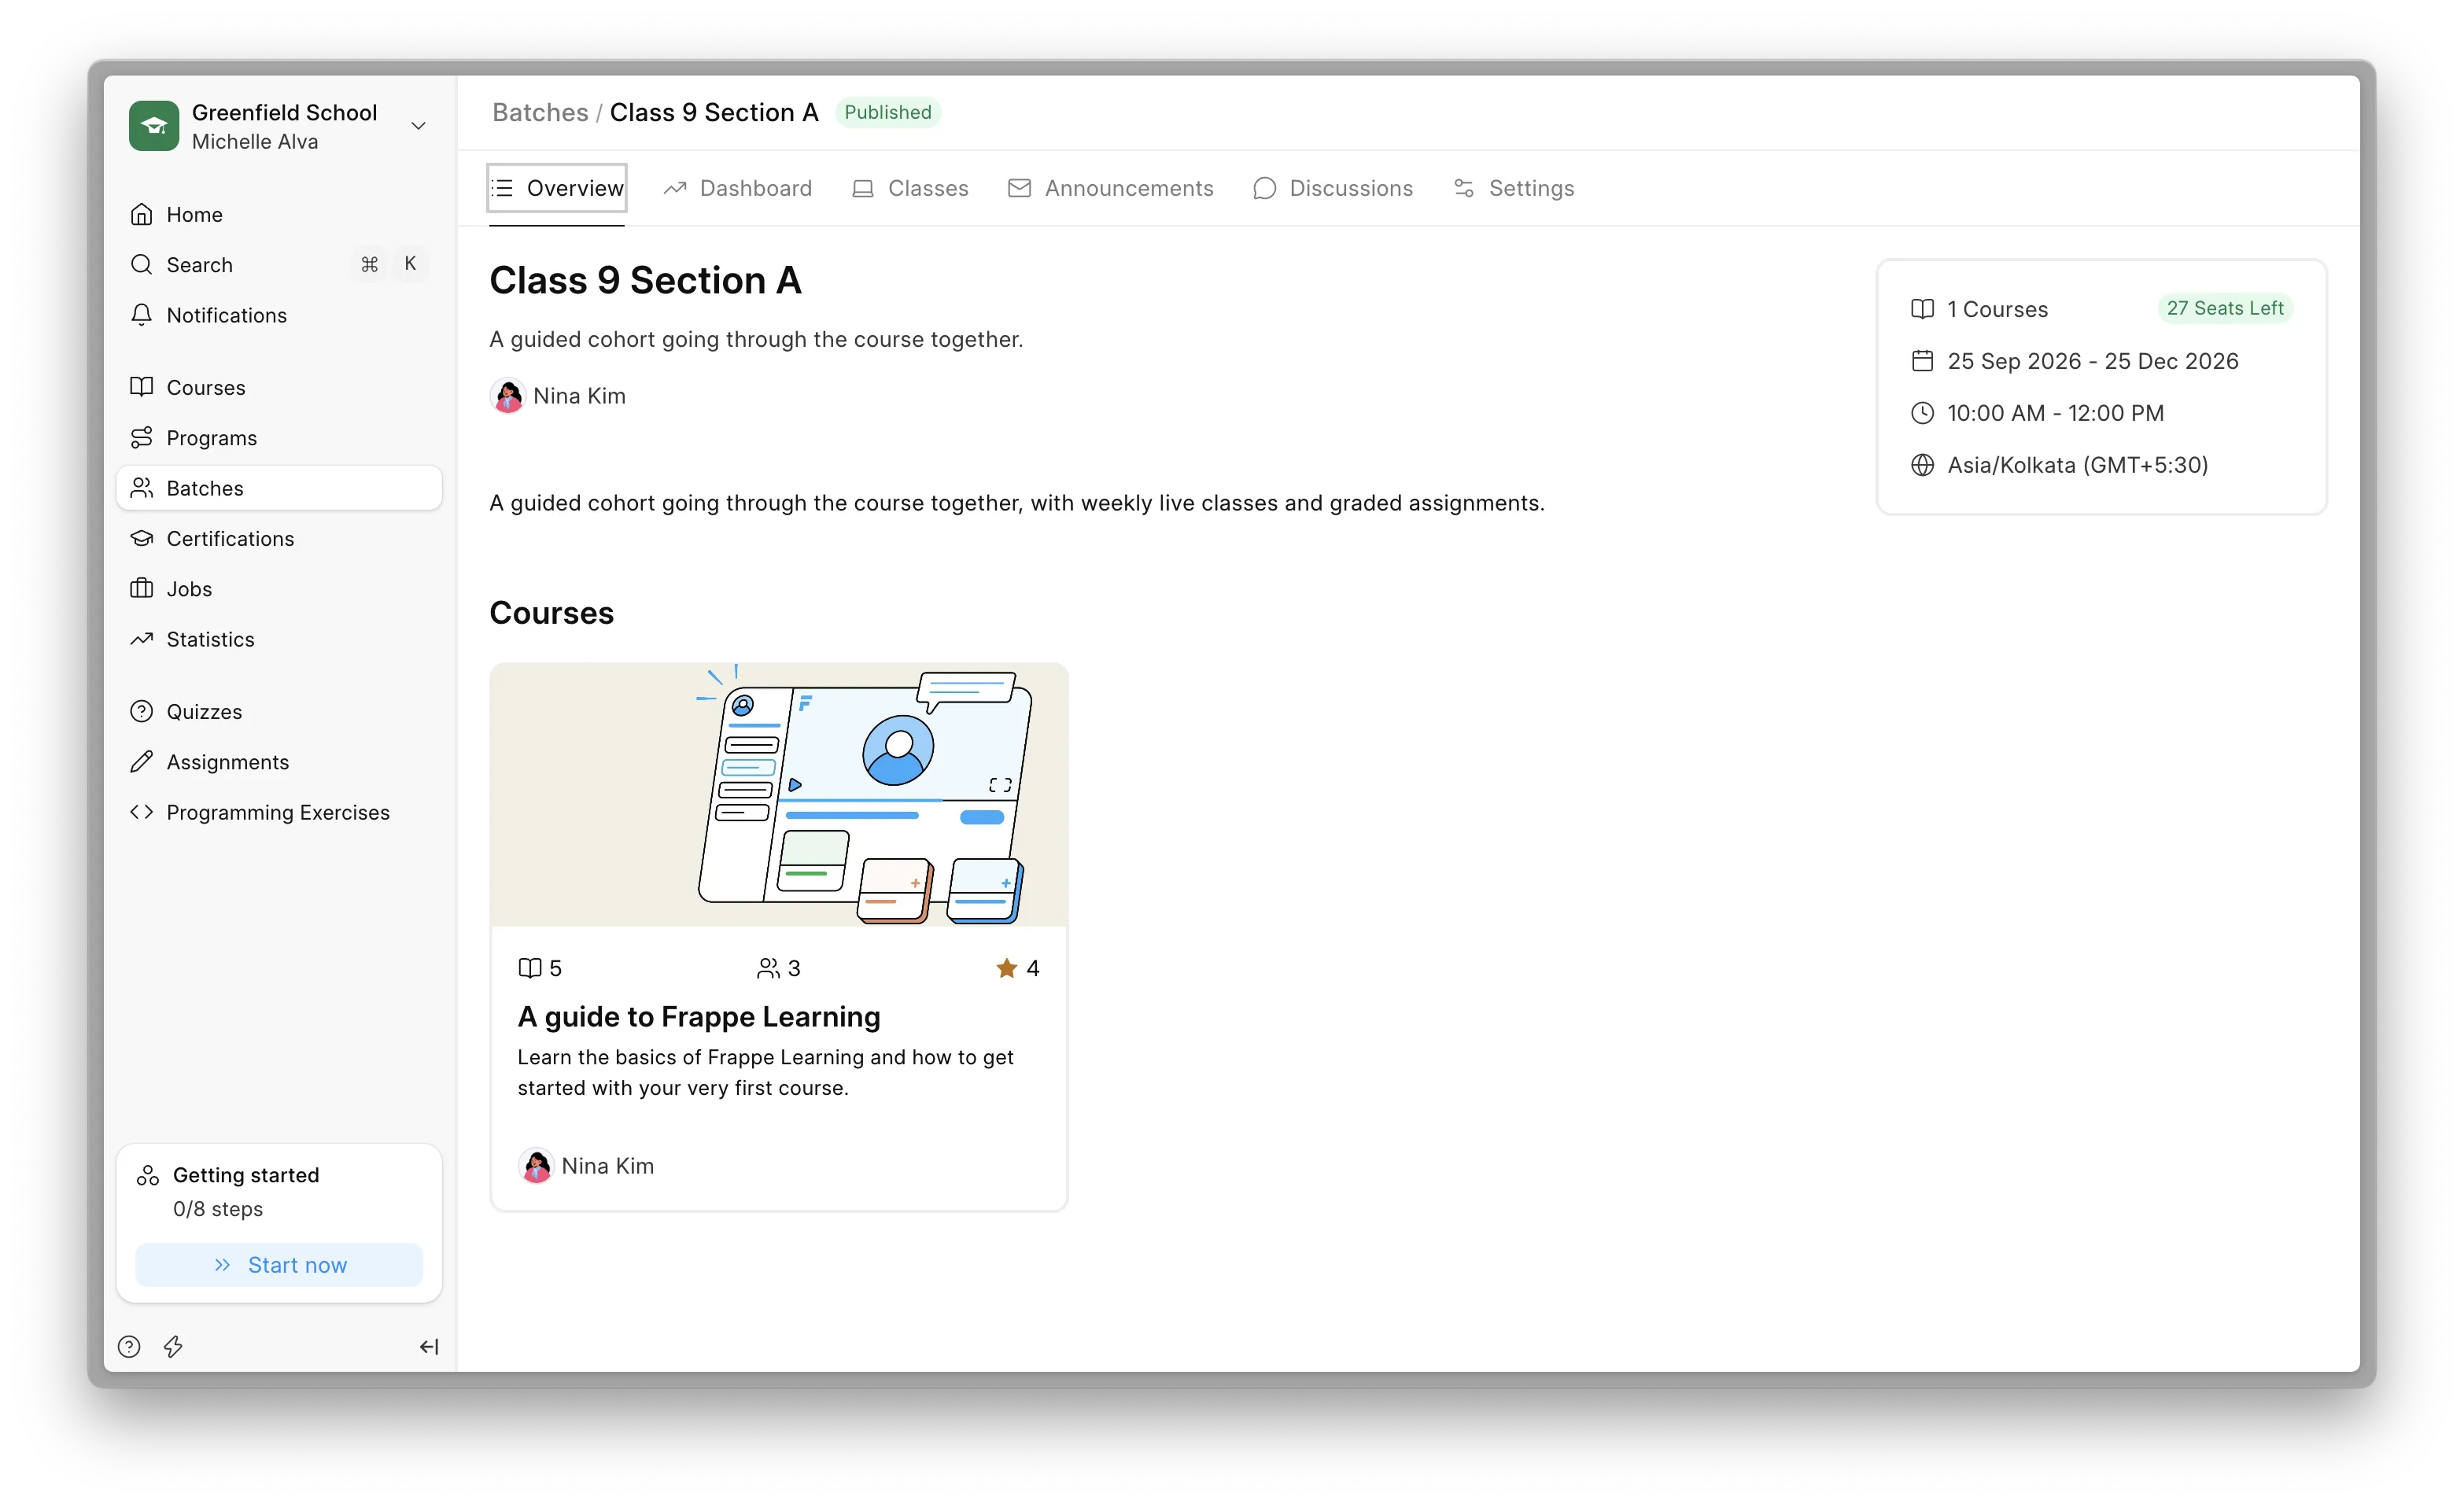 Created batch with courses
You're set
Once a learner is in, your course's Dashboard starts showing who's enrolled and how far each person has got. That's your sign things are working.
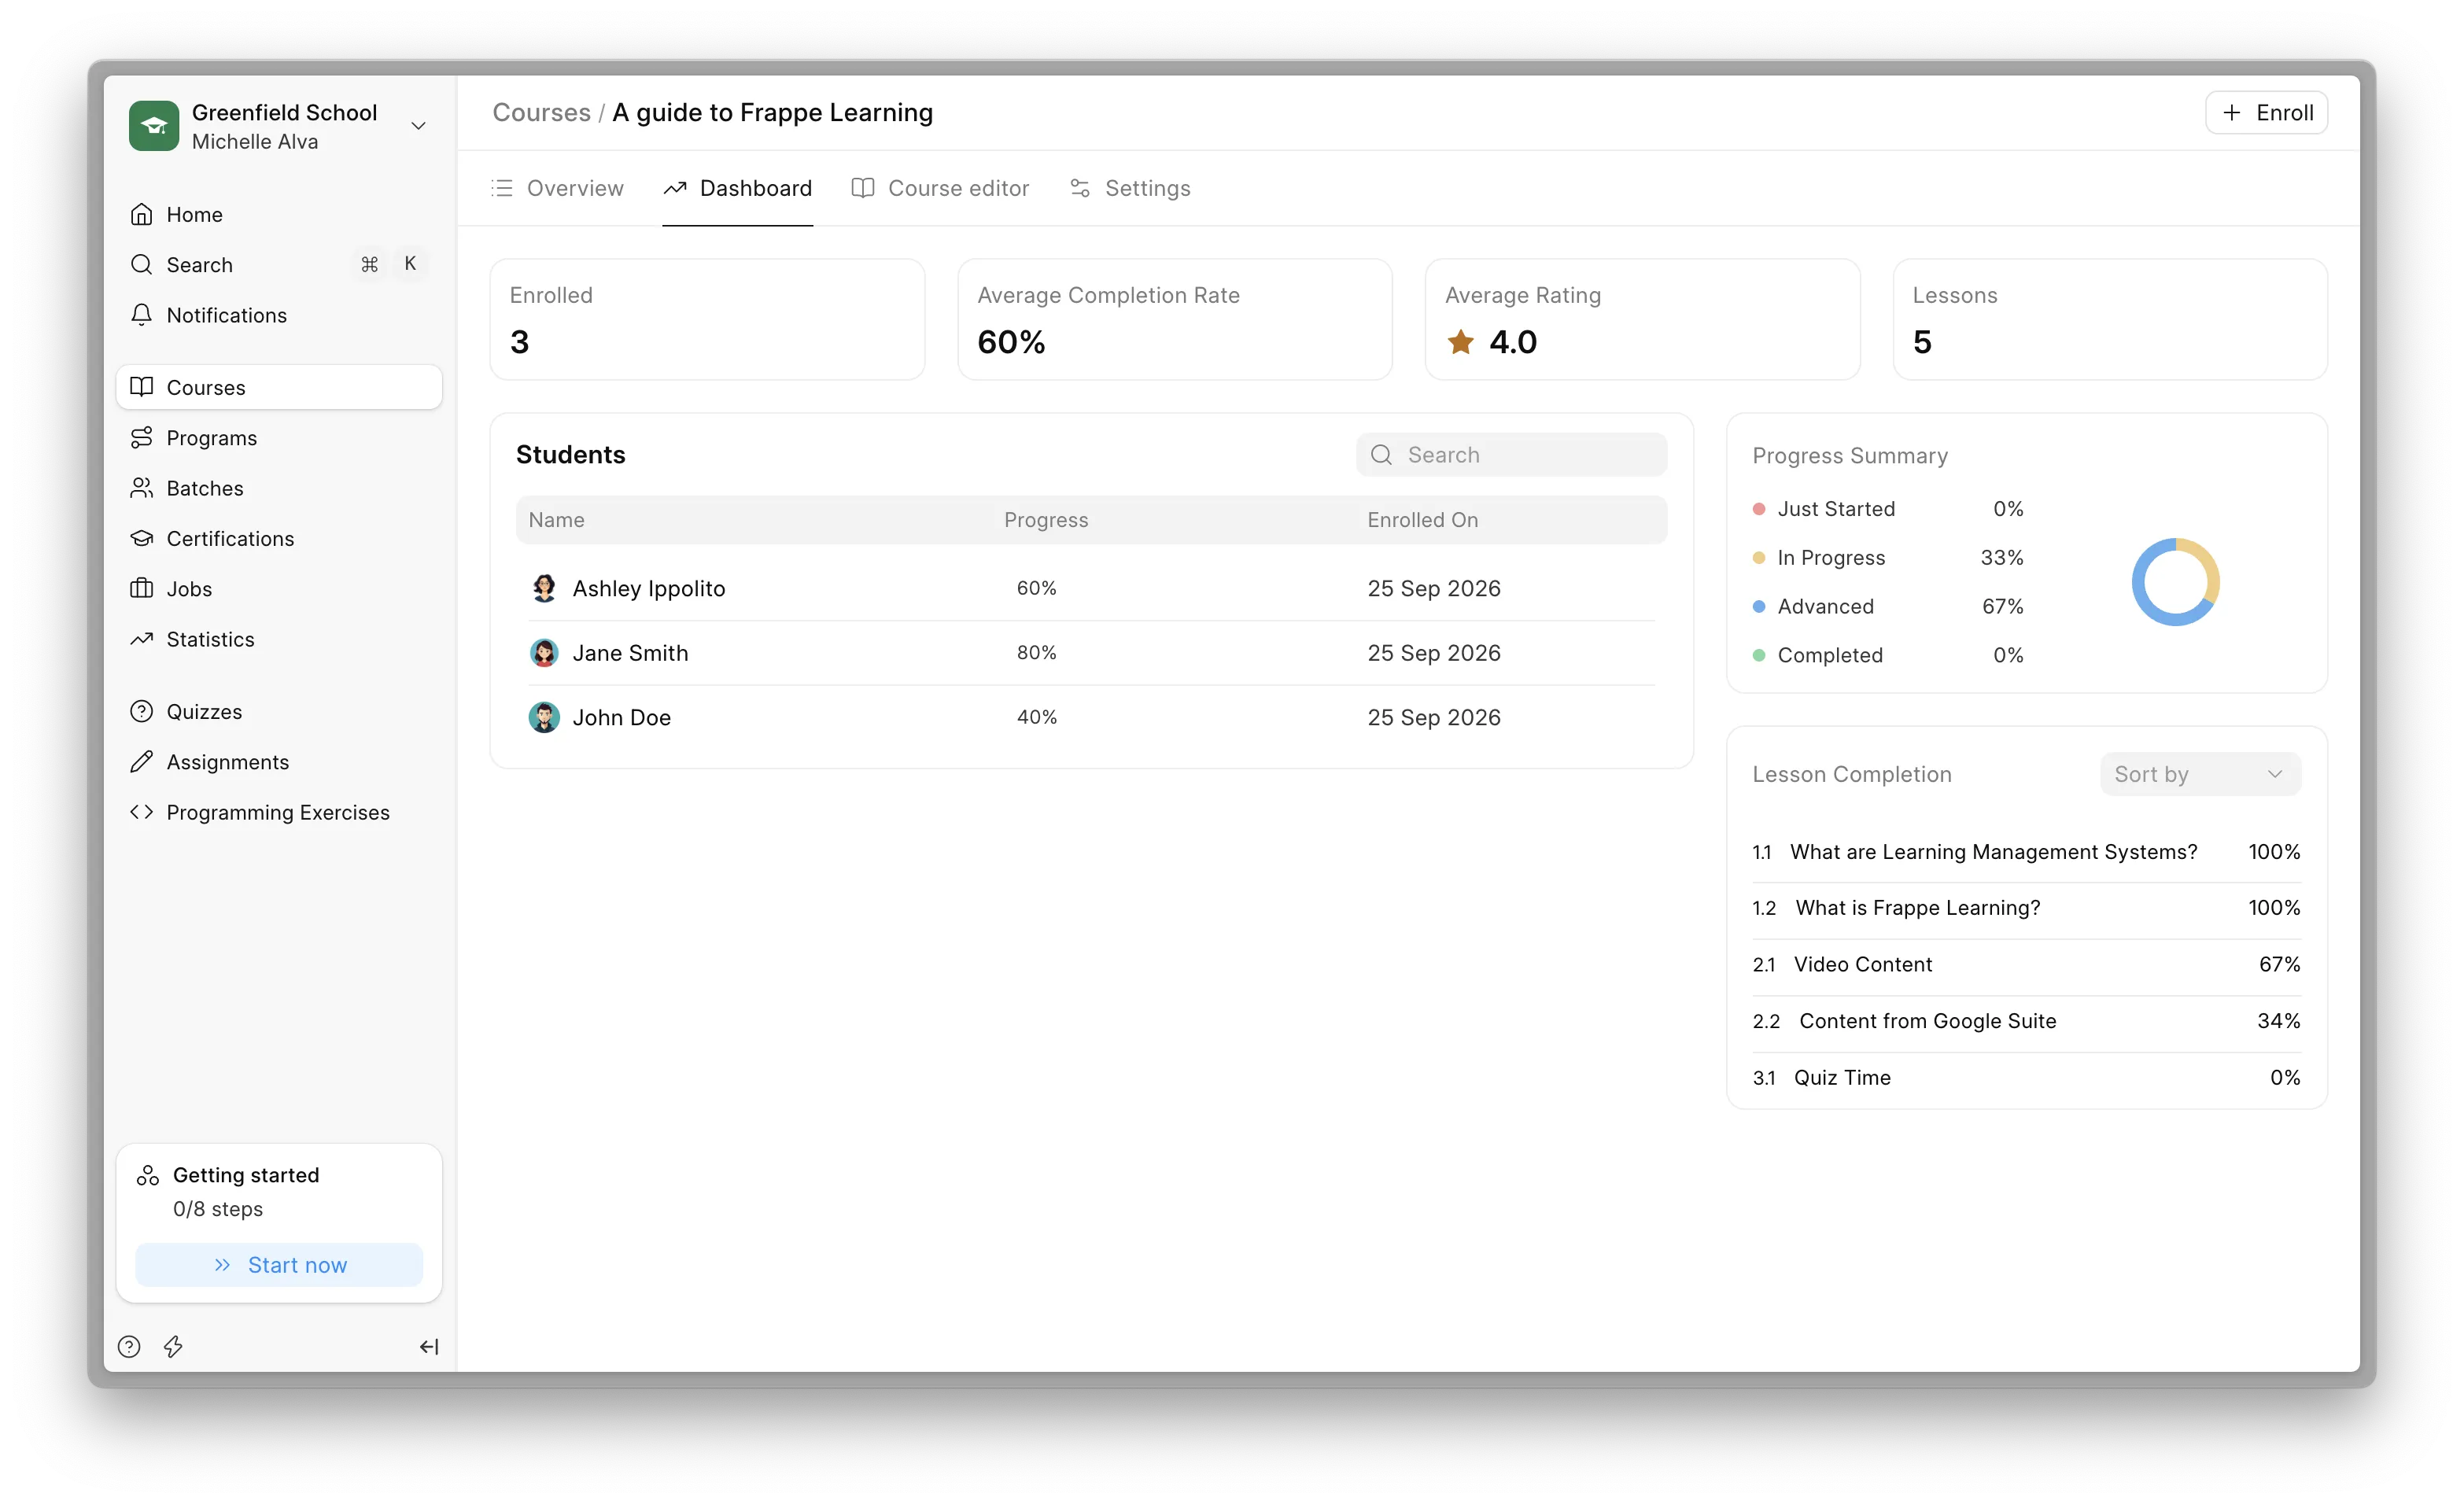 Course dashboard
Good to know
A few things you don't need on day one but will likely want soon:
- Live classes: Schedule classes for a batch using Zoom or Google Meet. Connect your account in Settings → Conferencing.
- Quizzes and assignments: Build them from the Quizzes and Assignments pages, then drop them into any lesson. Evaluators review submissions.
- Certificates: Issue them automatically on course completion, or in bulk for a whole batch with Generate Certificates.
- Programs: Group courses into a learning path, like a term or a certification track.
- Progress rules: In Settings → Course Progress, decide when a lesson counts as done, like making learners watch a video to the end.
- Paid courses and batches: Charge for a course, a batch, or just the certificate. Set up a payment gateway in Settings → Payment, then turn on Paid course in the course's Settings tab.
- Notifications: Tell your members by email or in the app whenever a new course or batch goes live. Set this in Settings → General.
You can explore these anytime in the docs. For now, you're good to go.
Need help?
- Documentation: Step-by-step guides for every feature
- Videos: How to videos that guide you through every step
- Support: Reach out if you get stuck
- Other Frappe products: Open-source tools for the rest of your work