Introduced in version 13
The ERPNext Shipping app helps you compare shipping rates being offered by multiple service providers, generate labels, and track your shipments' status.
Integration with the following service providers is available:
To avail these features, the ERPNext Shipping app will have to be installed on your site. You can the avail the app on GitHub, on Frappe Cloud Marketplace or you can contact your hosting platform.
1. Setting Up
For the app to work smoothly, you will have to generate an API key from at least one of the platforms listed above. Here is a guide to set them up:
1.1 Packlink API
- Register on Packlink PRO.
- Follow these steps to generate an API Key.
- Search for Packlink in the awesomebar.
- Add the API Key to the Packlink DocType, check the 'Enabled' field.
- Save.

1.1 Sendcloud API
- Register on Sendcloud.
- Follow these steps to generate a Public Key and a Secret Key.
- Search for SendCloud in the awesomebar.
- Add the Public Key in the 'API Key' field and the Secret Key in the 'API Secret' field of the SendCloud DocType.
- Check the Enabled field.
- Save.

1.1 LetMeShip API
- Register on LetMeShip.
- Follow these steps to generate an API ID and API Password.
- Search for LetMeShip in the awesomebar.
- Add the API ID and API Password to the LetMeShip DocType. Check the Enabled field.
- Save.

2. Features
2.1 Comparison of Shipping Rates
Once a Shipment is submitted, if the app is installed, the button Fetch Shipping Rates will appear. On clicking, you will get a list of services along with their service providers and rates.
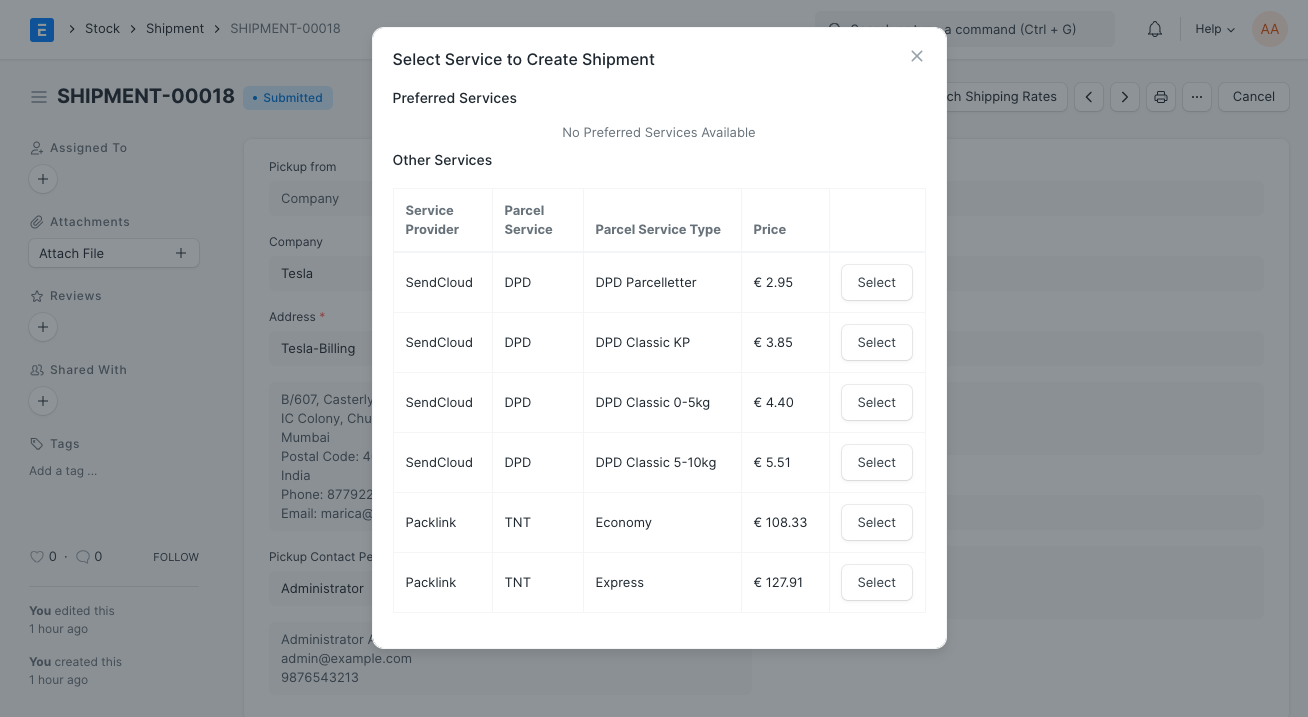
You can also add frequently used services to your Preferred Services using Parcel Service Type:
- Assuming the highlighted service is our frequently used service, let us add it to our Preferred Services
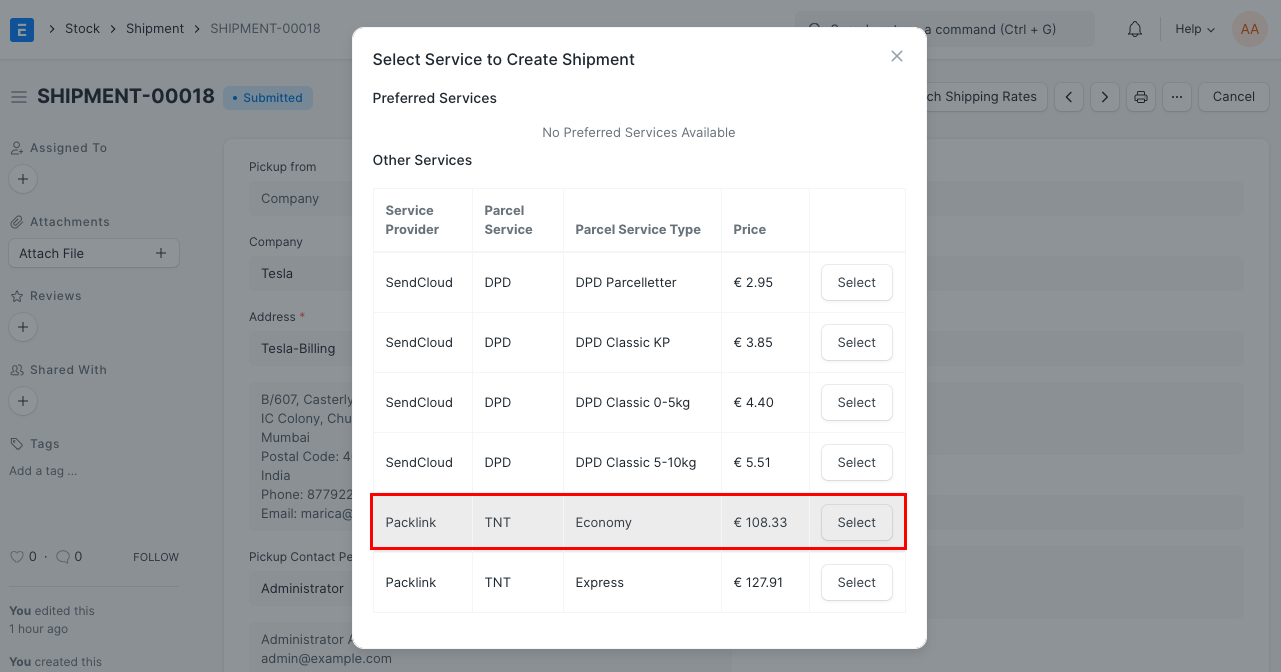
- Go to Parcel Service Type > New. Create a new Parcel Service. In our case, it is 'TNT'.
- Add a Parcel Service Type. In our case, it will be 'Economy'.
- Add 'Economy' to the Parcel Service Type Alias table as well.
- Add a description (optional).
- Enable the Show in Preferred Services List field. Save.
Now when you click on the Fetch Shipping Rates button, you will always see the previously highlighted service under Preferred Services.
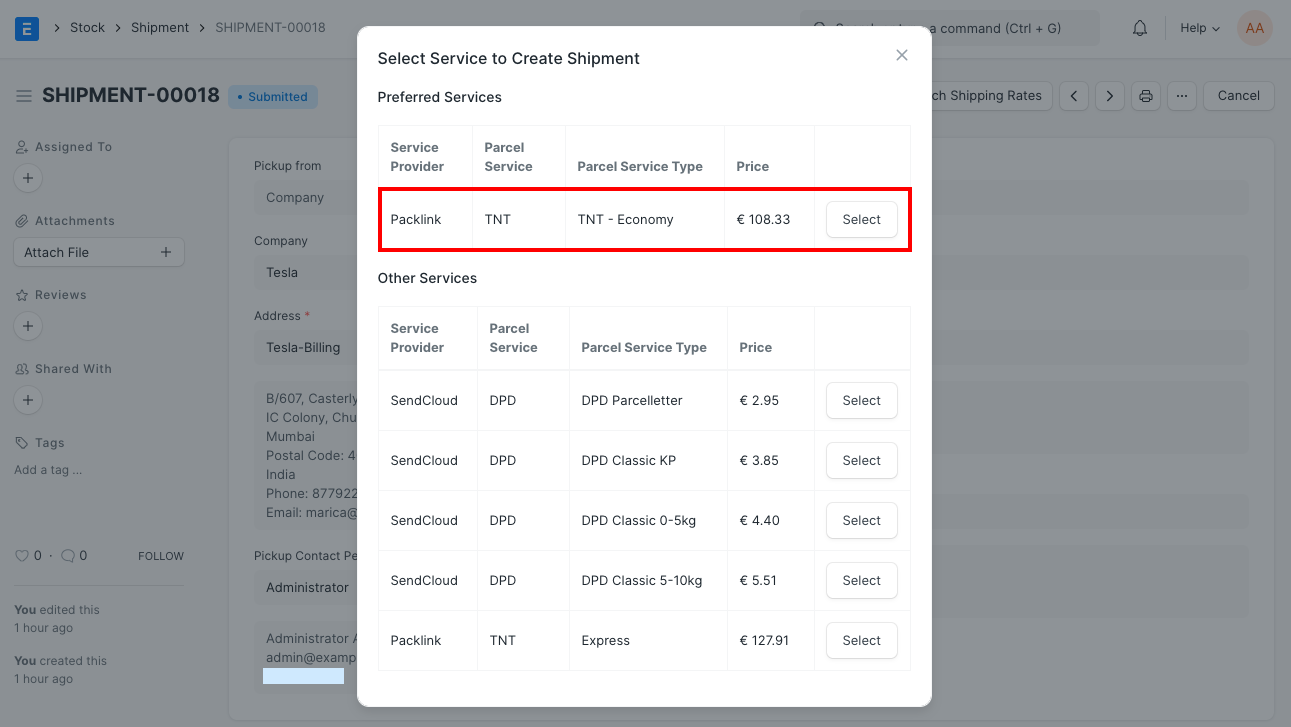
2.2 Creation of Shipment
After comparing rates, you can proceed with any one of the services by clicking Select against the appropriate service row. On clicking, a Shipment is automatically created on your service provider's platform.
You will notice that the Shipment Information section is updated automatically, based on the Shipment created.
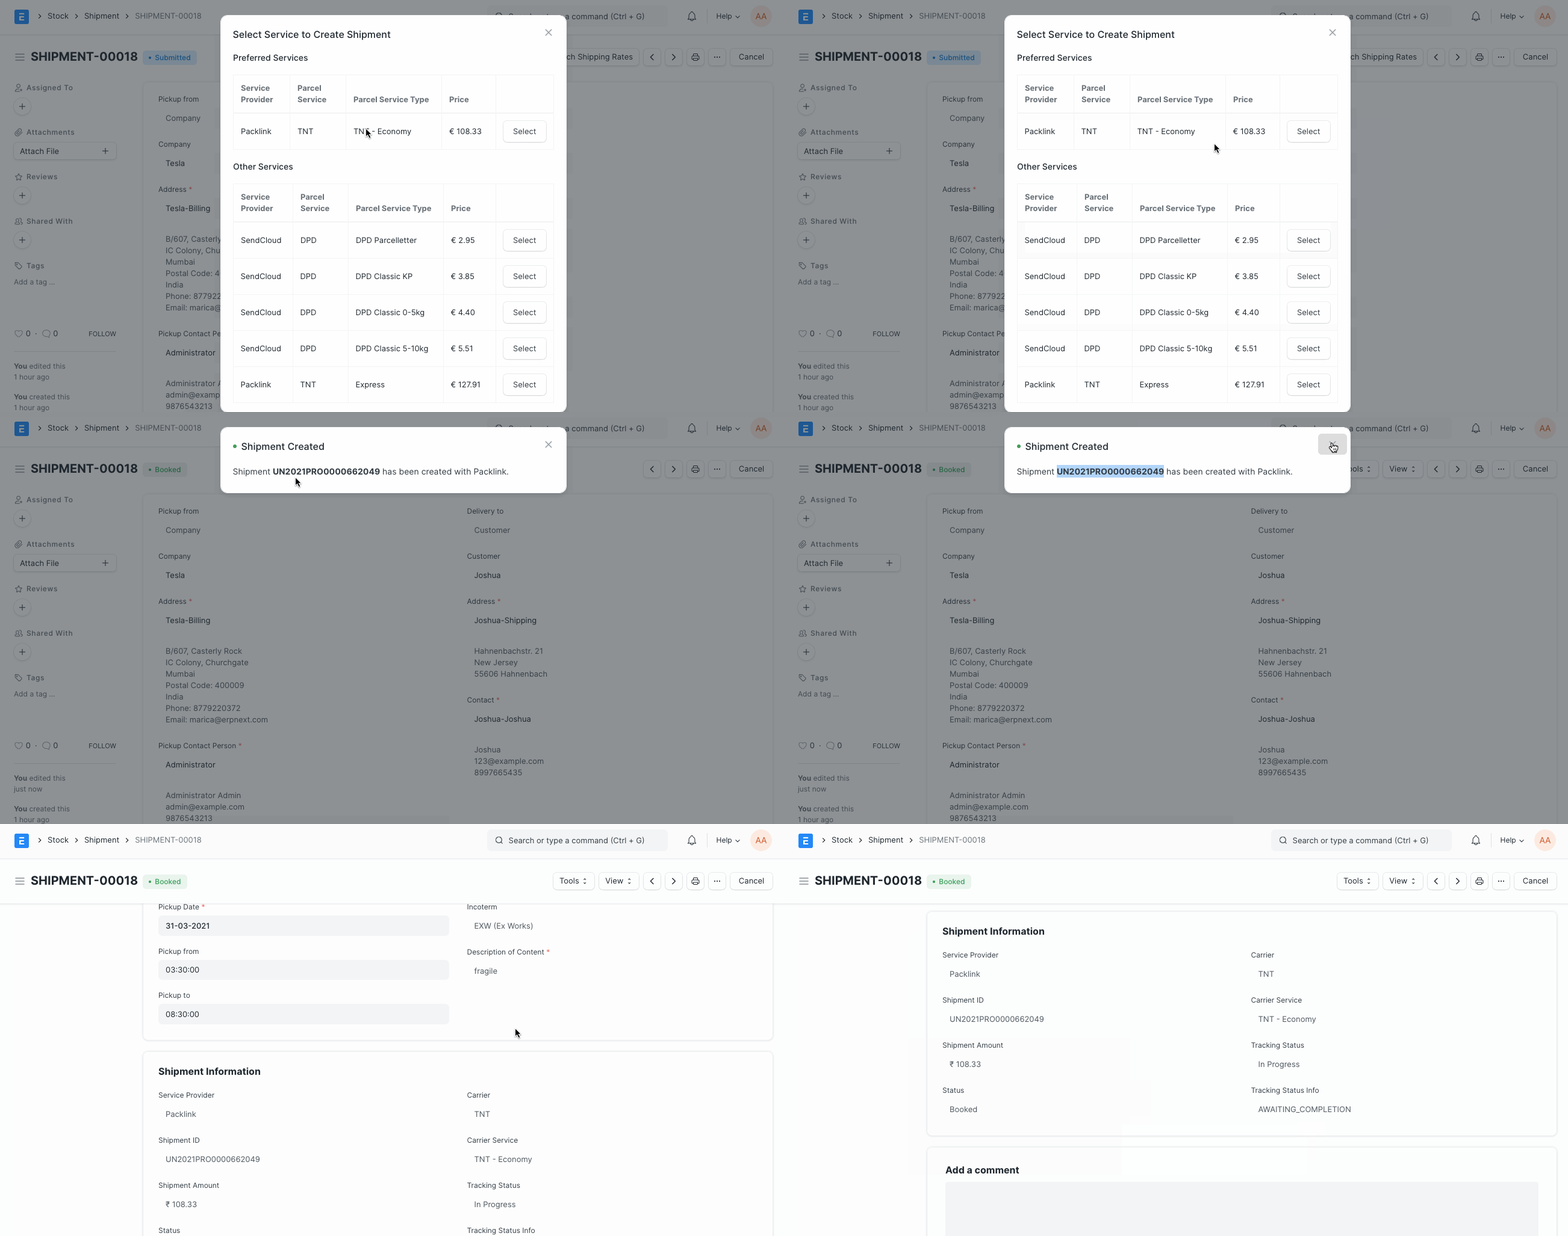
You can also search for your transaction on your service provider's platform using the Shipment ID field.

2.3 Printing Labels
To avail the Print Shipping Label button, the Shipment ID must be generated in the current record.

You can then click on it and generate your shipping label.
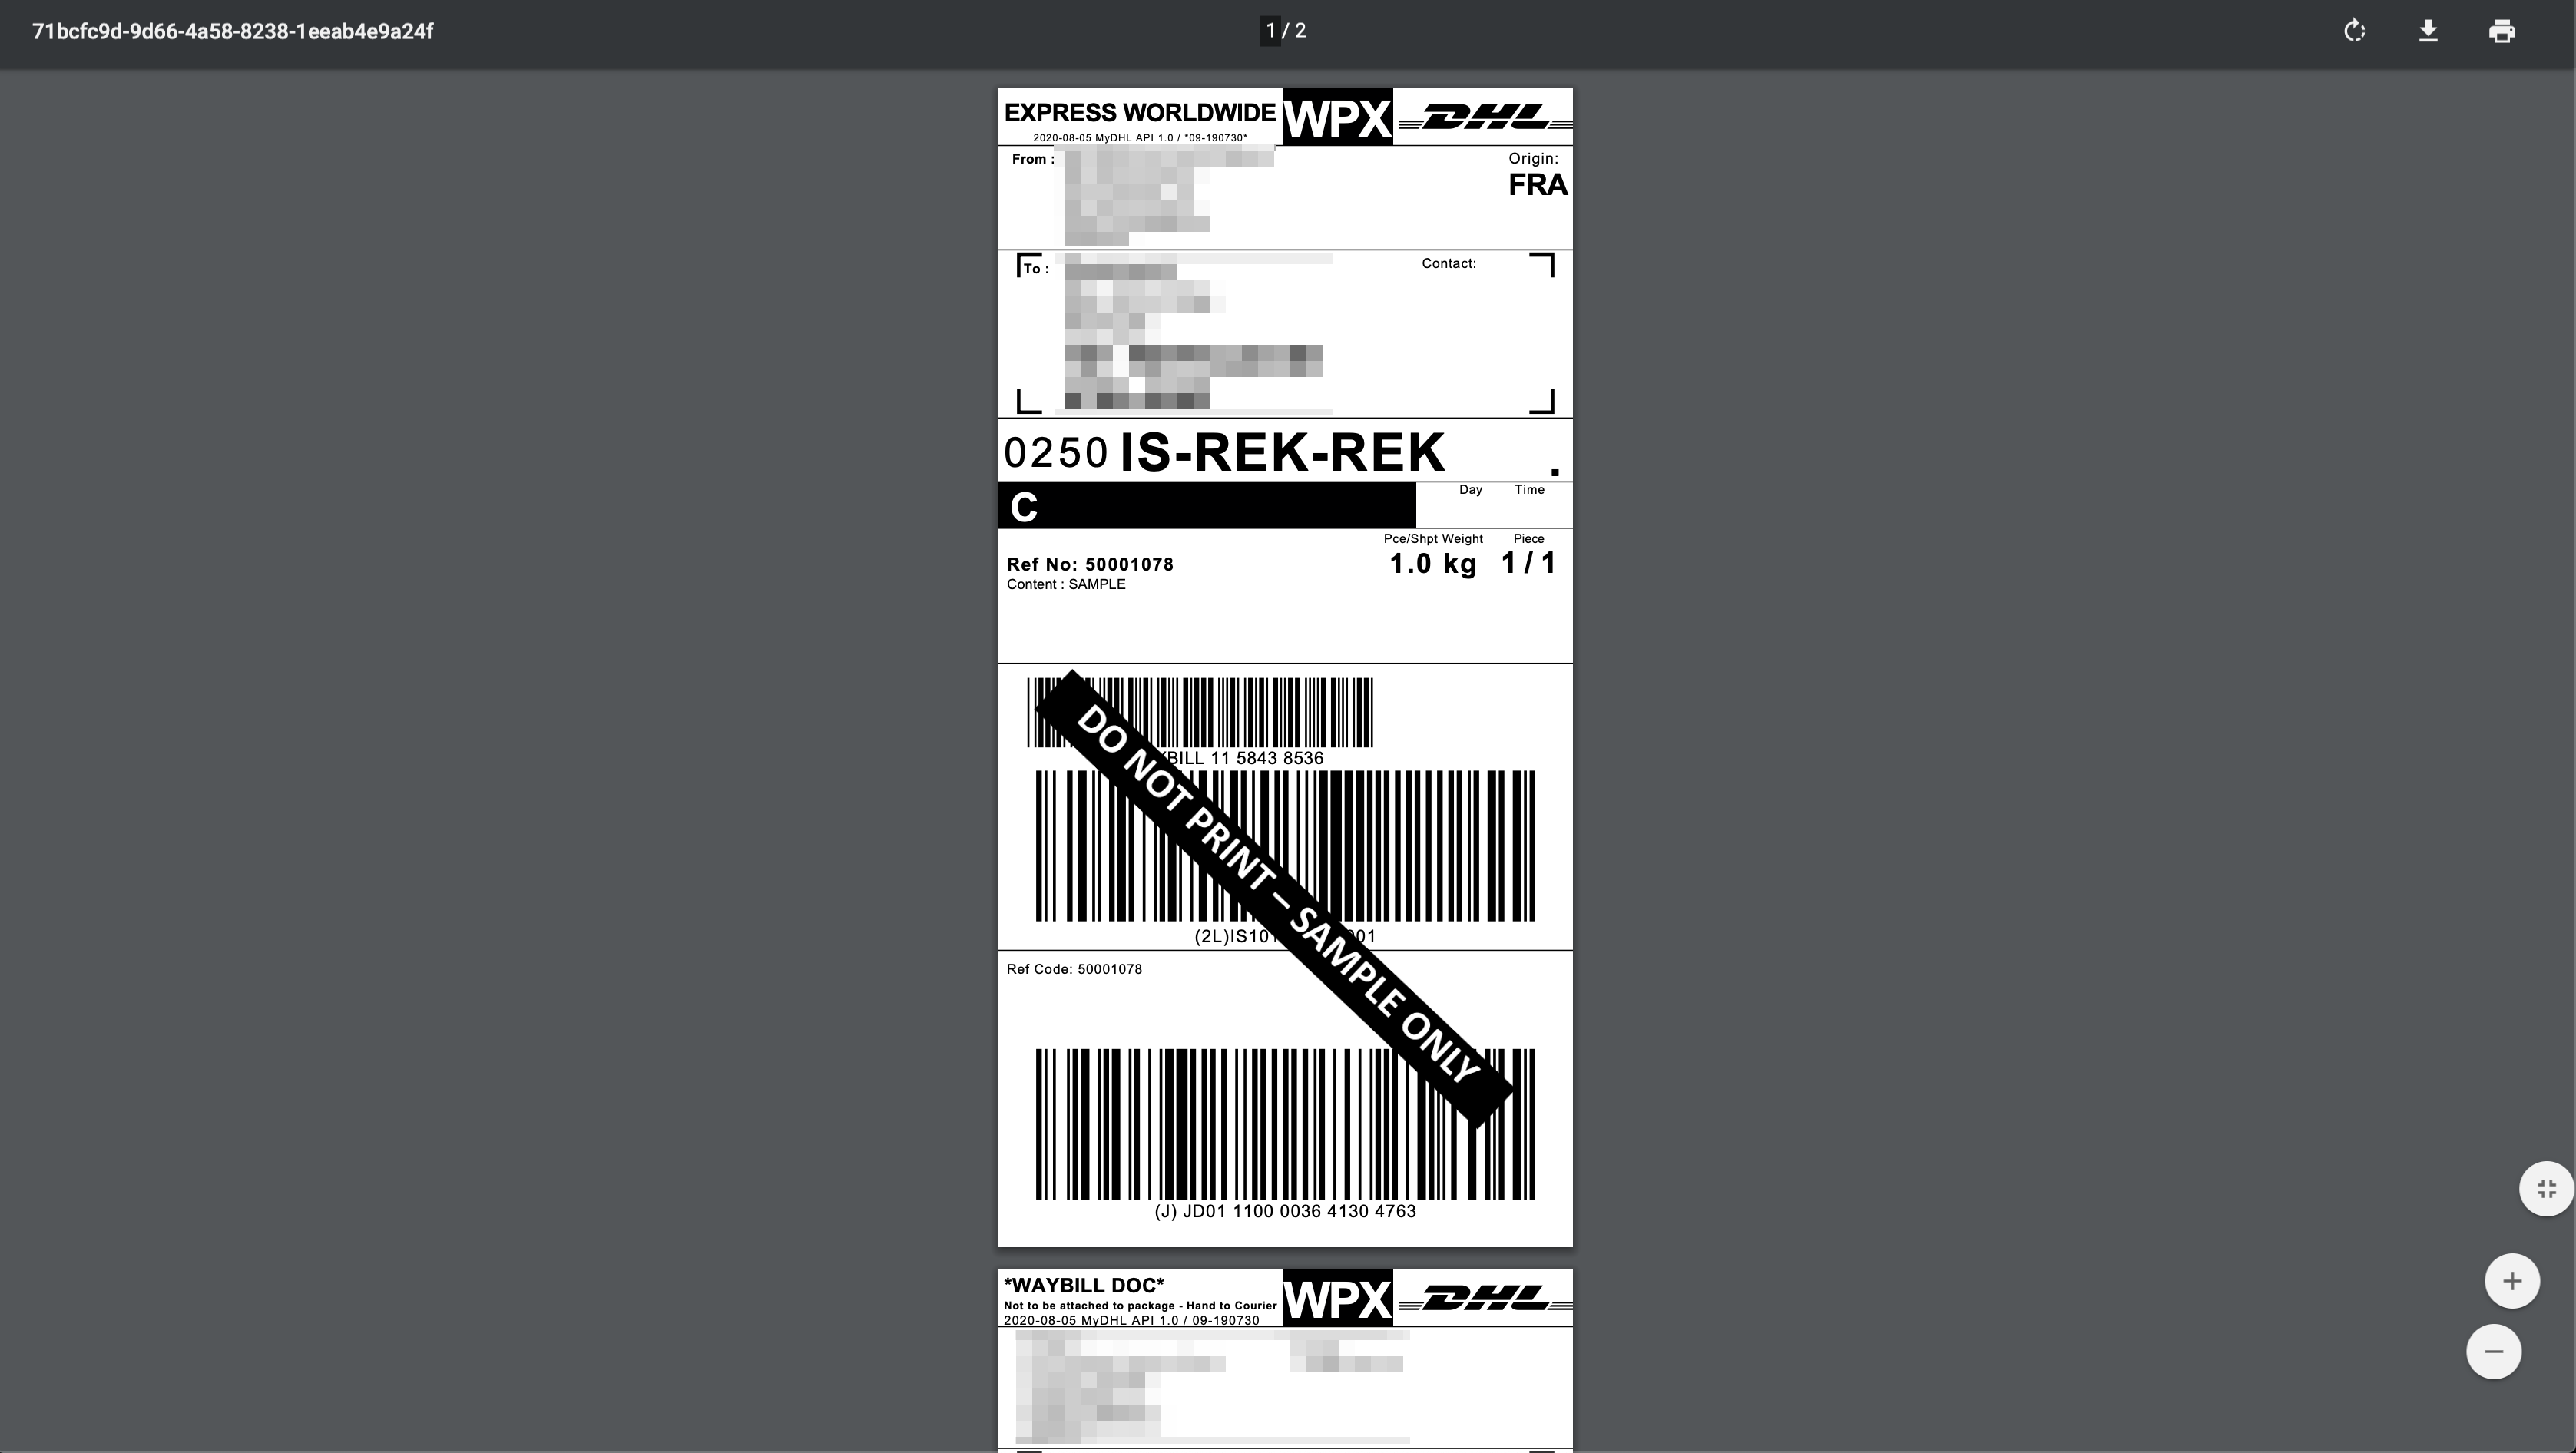
You can also track your shipment's status by clicking on View > Track Status.
Note : The currently integrated platforms may not serve your region. Please visit the links attached against them to know more.