Suppliers are companies or individuals who provide you with products or services.
To access the Supplier list, go to:
Home > Buying > Supplier > Supplier
1. How to create a Supplier
- Go to the Supplier list and click on New.
- Enter a name for the supplier.
- Select the supplier group whether Pharmaceutical, Hardware etc.
- Save.

The options to Warn RFQs, POs, Prevent RFQs, POs will be available once you create a Supplier Scorecard and transactions are made.
2. Features
Fields in future transactions will be auto-populated if the 'Default' fields like Default Bank Account, Default Payment Terms Template etc., are set in Supplier.
2.1 Tax details
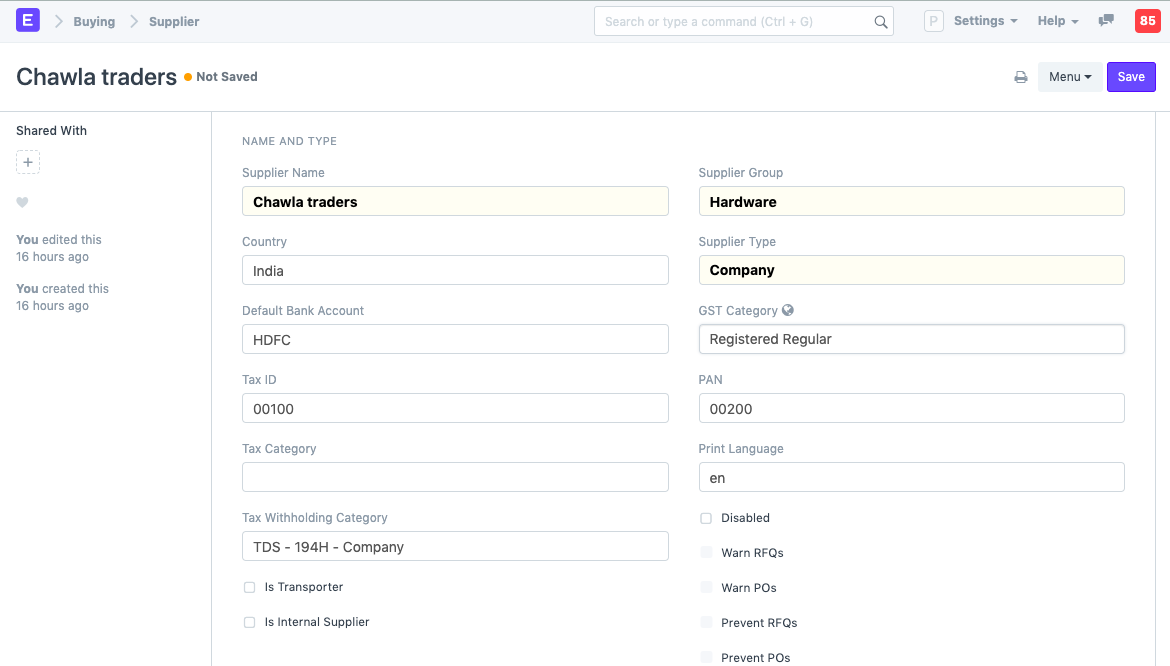
- Country: If the supplier is from another country, you can change it here.
- Tax ID: Tax identification number of the supplier.
- Tax Category: This is linked to Tax Rule. If a Tax Category is set here, when you select this supplier, the respective Purchase Tax and Charges template will be applied. This template is linked to the Tax Rule and the Tax Rule is linked with a Tax Category. Tax Category can be used to group suppliers to whom same tax will be applied. For example: Government, commercial, etc,.
- Print Language: The language in which the document will be printed.
- Tax Withholding Category: For India, TDS category for the Supplier. On setting a category here, it will be fetched into the Purchase Invoice. For more information, visit the Tax Withholding Category page.
- Disabled: Disables the Supplier and they won't be shown in the Supplier List.
- Is Transporter: If the supplier is selling your transport services, tick this box. 'GST Transporter ID' field will be visible if this field is ticked.
- Internal Supplier: If the supplier is from a sister or parent/child company, tick this field and select the company which they represent.
For India:
- GST Category: Select a GST Category of the supplier.
- PAN: For India, PAN (Permanent Account Number) card details of the Supplier.
2.2 Allow creation of Purchase Invoice without Purchase Order and Purchase Receipt
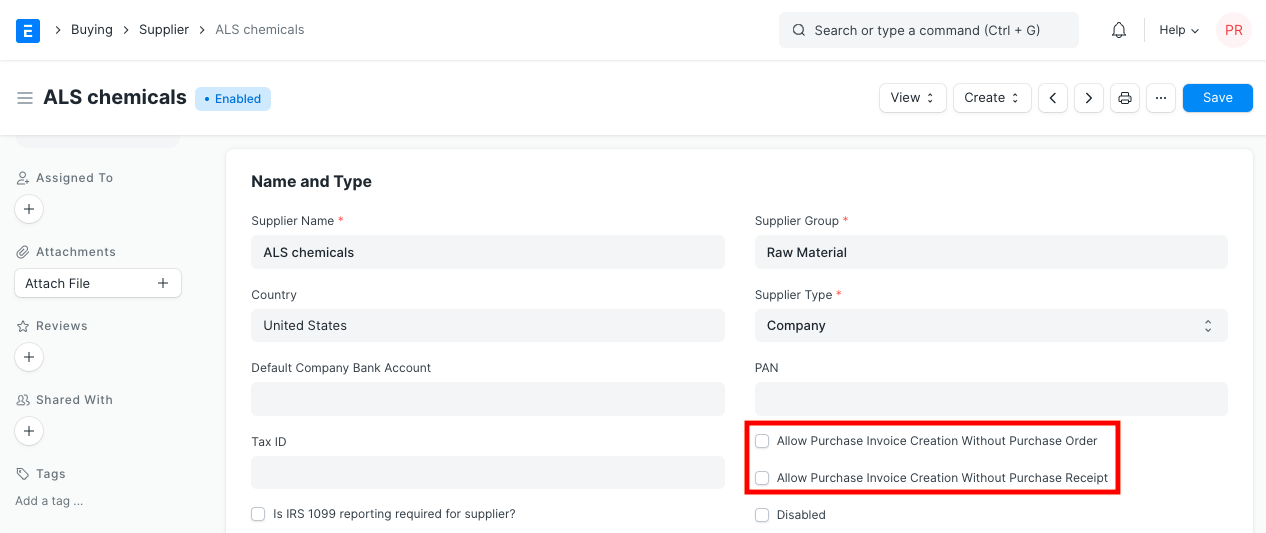
If the "Purchase Order Required" or "Purchase Receipt Required" option is configured as "Yes" in Buying Settings, it can be overridden for a particular supplier by enabling the "Allow Purchase Invoice Creation Without Purchase Order" or "Allow Purchase Invoice Creation Without Purchase Receipt" in the Supplier Master.

2.3 Currency and Price List
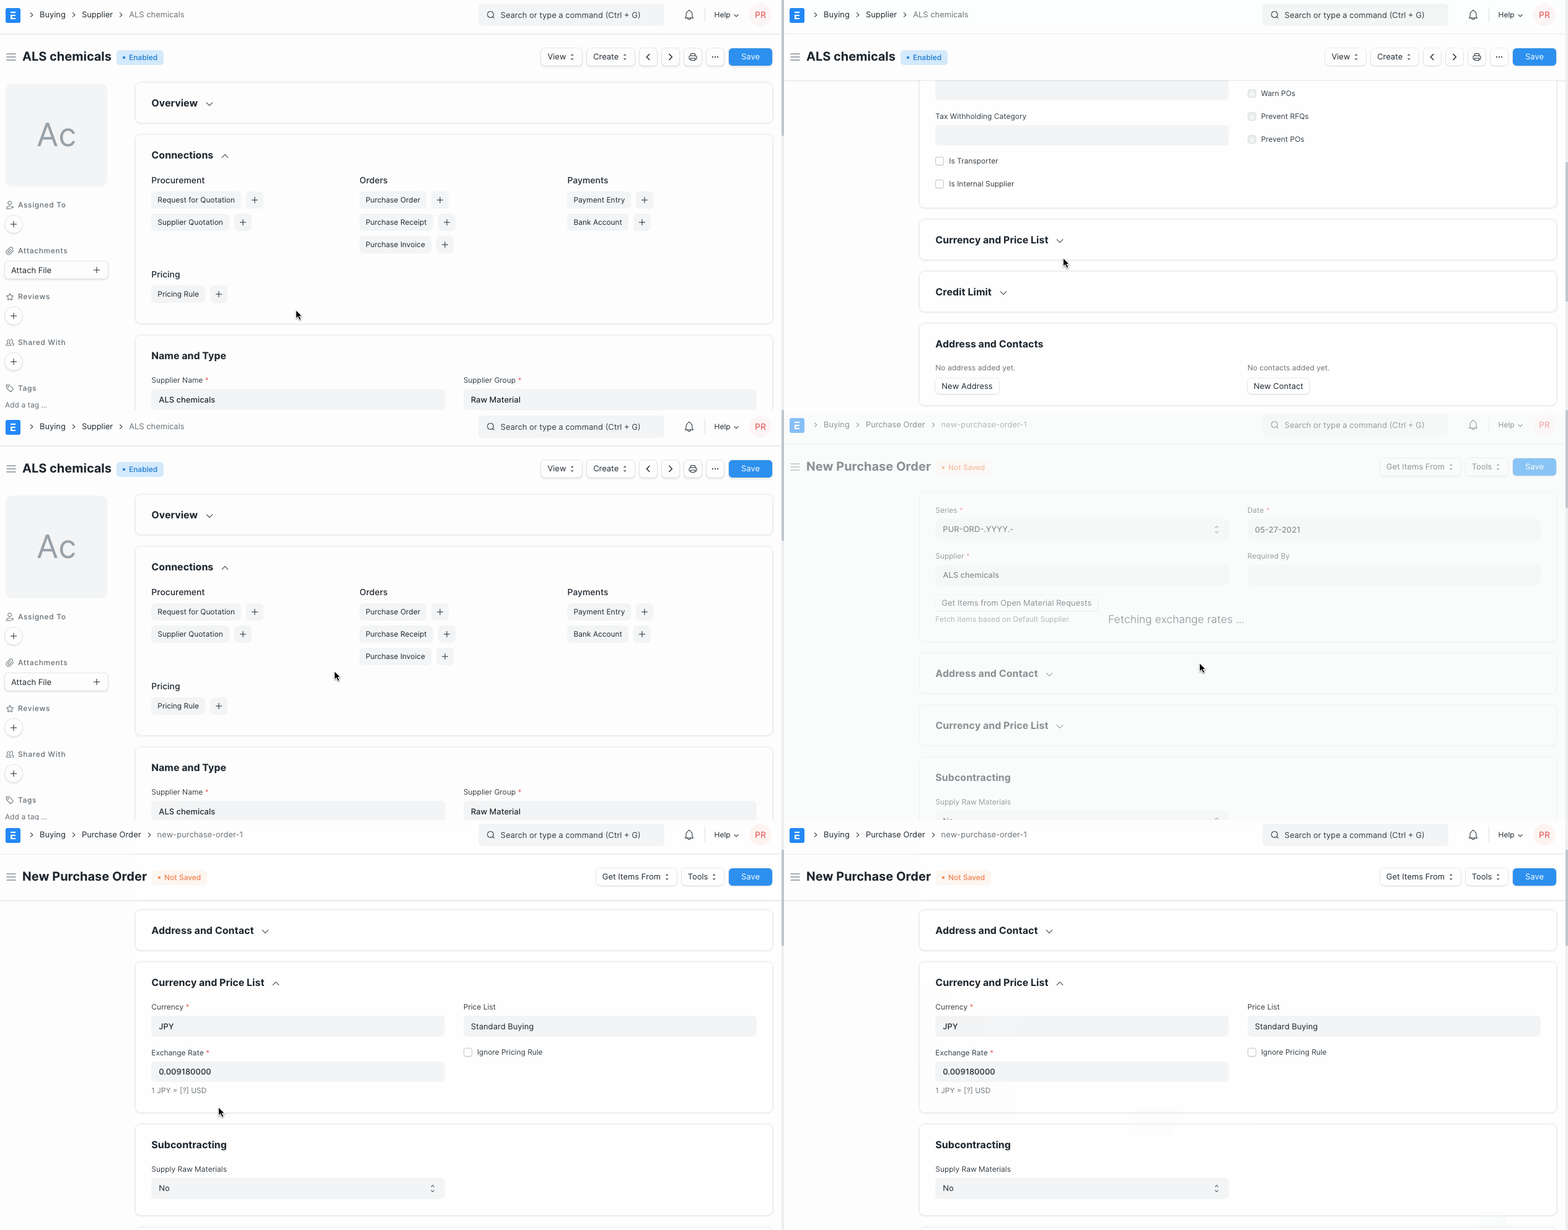
Billing Currency: Your supplier's currency can be different from your company currency. If you choose JPY for a supplier, then the currency will be filled as JPY and the exchange rate shown for future purchase transactions.

Each Supplier can have a default Price List so that every time you buy a new item from this supplier for different prices, the price list associated with the supplier would be updated as well. Under the price list comes item price, you can see the prices in Buying > Items and Pricing > Item Price.
If you select this particular supplier, then the associated Price List will be fetched in Purchase transactions.
2.4 Credit Limit
- Default Payment Terms Template: If a Payment Terms template is set here, it'll be automatically selected for future purchase transactions.
- Block Supplier: You can block invoices, payments or both from a supplier till specific date. Choose 'Hold Type', if you do not select a hold type, ERPNext will set it to "All". When a supplier is blocked, their status will be shown as 'On Hold'.
The hold types are as follows:
- Invoices: ERPNext will not allow Purchase Invoices or Purchase Orders to be created for the supplier
- Payments: ERPNext will not allow Payment Entries to be created for the Supplier
- All: ERPNext will apply both hold types above
If you do not set a release date, ERPNext will hold the Supplier indefinitely.
2.5 Default Payable Accounts
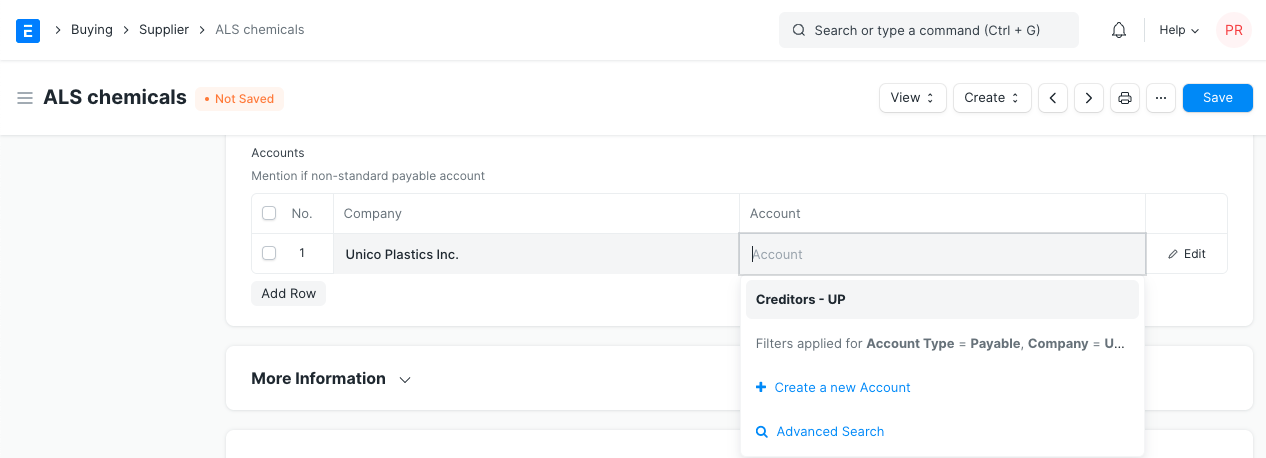
Add the default account from which invoices against this supplier will be paid. Add additional rows for more companies, you can select only one account per company.
You can integrate a supplier with an account. For all Suppliers, "Creditor" account is set as the default payable Account. When Purchase Invoice is created, payable towards the supplier is booked against "Creditors" account.
If you want to customize payable account for the Supplier, you should first add a payable Account in the Chart of Account, and then select that Payable Account in the Supplier master.

If you don't want to customize payable account, and proceed with default payable account "Creditor", then do not update any value in the Default Supplier Account's table.
Tip: Default Payable Account is set in the Company master. If you want to set another account as Account as default for payable instead of Creditors Account, go to Company master, and set that account as "Default Payable Account".
Depending on your plan, you can add multiple companies in your ERPNext instance. One Supplier can be used across multiple companies. In this case, you should define Company-wise Payable Account for the Supplier in the "Default Payable Accounts" table, i.e, add multiple rows.
2.6 More Information
You can add the supplier's website and any additional details about your supplier in this section. If you freeze a supplier with the 'Is Frozen' option, accounting entries for the supplier will be frozen. In this case the only user whose entries will surpass the 'freeze' is the role assigned in 'Role Allowed to Set Frozen Accounts & Edit Frozen Entries' in Accounting > Settings > Accounts Settings. This is useful when the supplier's name or bank details are being amended.
2.7 Address and Contacts
Contacts and Addresses in ERPNext are stored separately so that you can create multiple Contacts and Addresses for one Supplier. Once Supplier is saved, you will find the option to create Contact and Address for that Supplier.

Tip: When you select a Supplier in any transaction, Contact for which "Is Primary" field id checked, it will auto-fetch with the Supplier details.
When a Supplier gets deleted, the linked Address and Contact will get deleted as well. If an Address or Contact belongs to multiple entities, only the link to the deleted Supplier gets removed.
2.8 After saving
Once all the necessary details are filled, save the document. On saving, options to create the following will be seen in the Dashboard:
- Request for Quotation: An RFQ against this supplier.
- Supplier Quotation: Any quotations that the supplier has sent you and you have submitted into the system.
- Purchase Order: Purchase Orders you've made against this supplier.
- Purchase Receipt: Purchase receipts given by this supplier that you've saved in the system.
- Purchase Invoice: Purchase Invoices you've made against this supplier.
- Payment Entry: Payment Entries for the Purchase Invoices against this supplier.
- Pricing Rule: Any Pricing Rules linked with this supplier. See section _2.2 Currency and Price List_ to know how it works.

By clicking on the View button, you can view the Accounting Ledger or Accounts Payable directly for this supplier.
There's a button to 'Send GST Update Reminder' to the supplier. You need to have a default email account setup first.