
Setting up Outlook for Frappe Helpdesk
You can connect a Microsoft 365 / Outlook mailbox to Frappe using OAuth instead of a password. OAuth is the recommended method because Microsoft is retiring basic (password) authentication for Exchange Online, and it lets Frappe send and receive mail without ever storing your mailbox password. Setup happens in two places: you register an app in Microsoft Entra ID (Azure), then point a Connected App and Email Account in Frappe at it.
Before you begin
- Your Frappe site must be served over HTTPS (a local
localhostdev site is fine). - You need a Microsoft 365 account with admin access to Azure / Microsoft Entra ID.
- You need administrator access to your Frappe site to create a Connected App.
Part 1: Register an app in Microsoft Entra ID
Step 1: Create the app registration
- Sign in to the Azure Portal and open Microsoft Entra ID → App registrations.
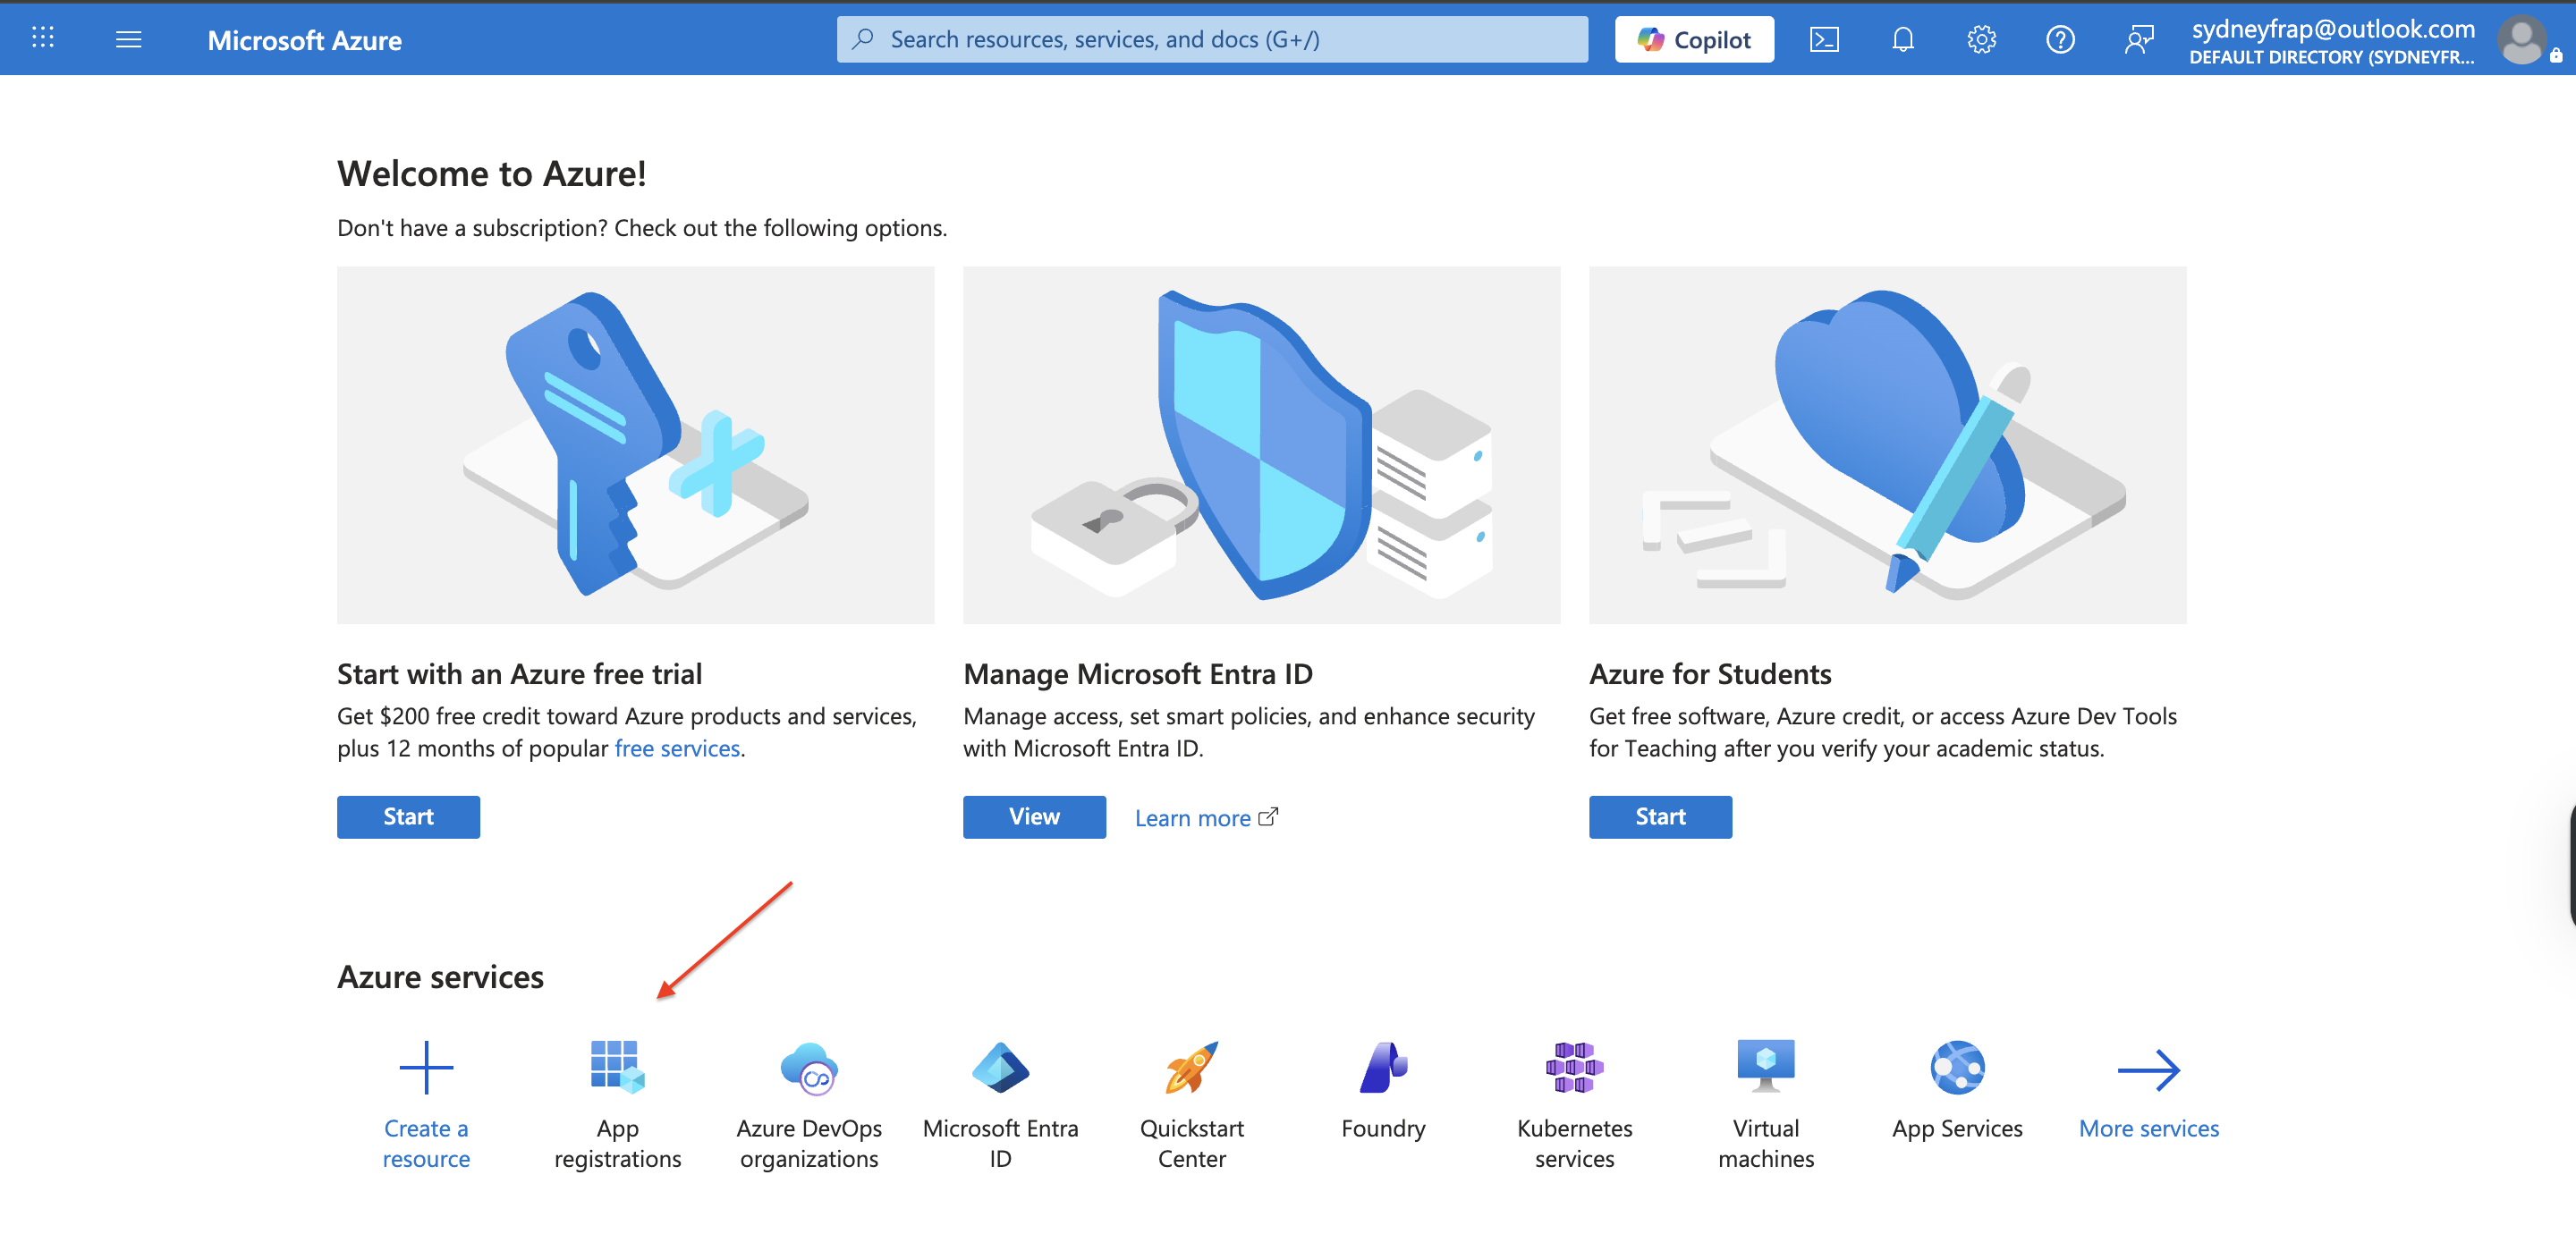
- Click New registration.
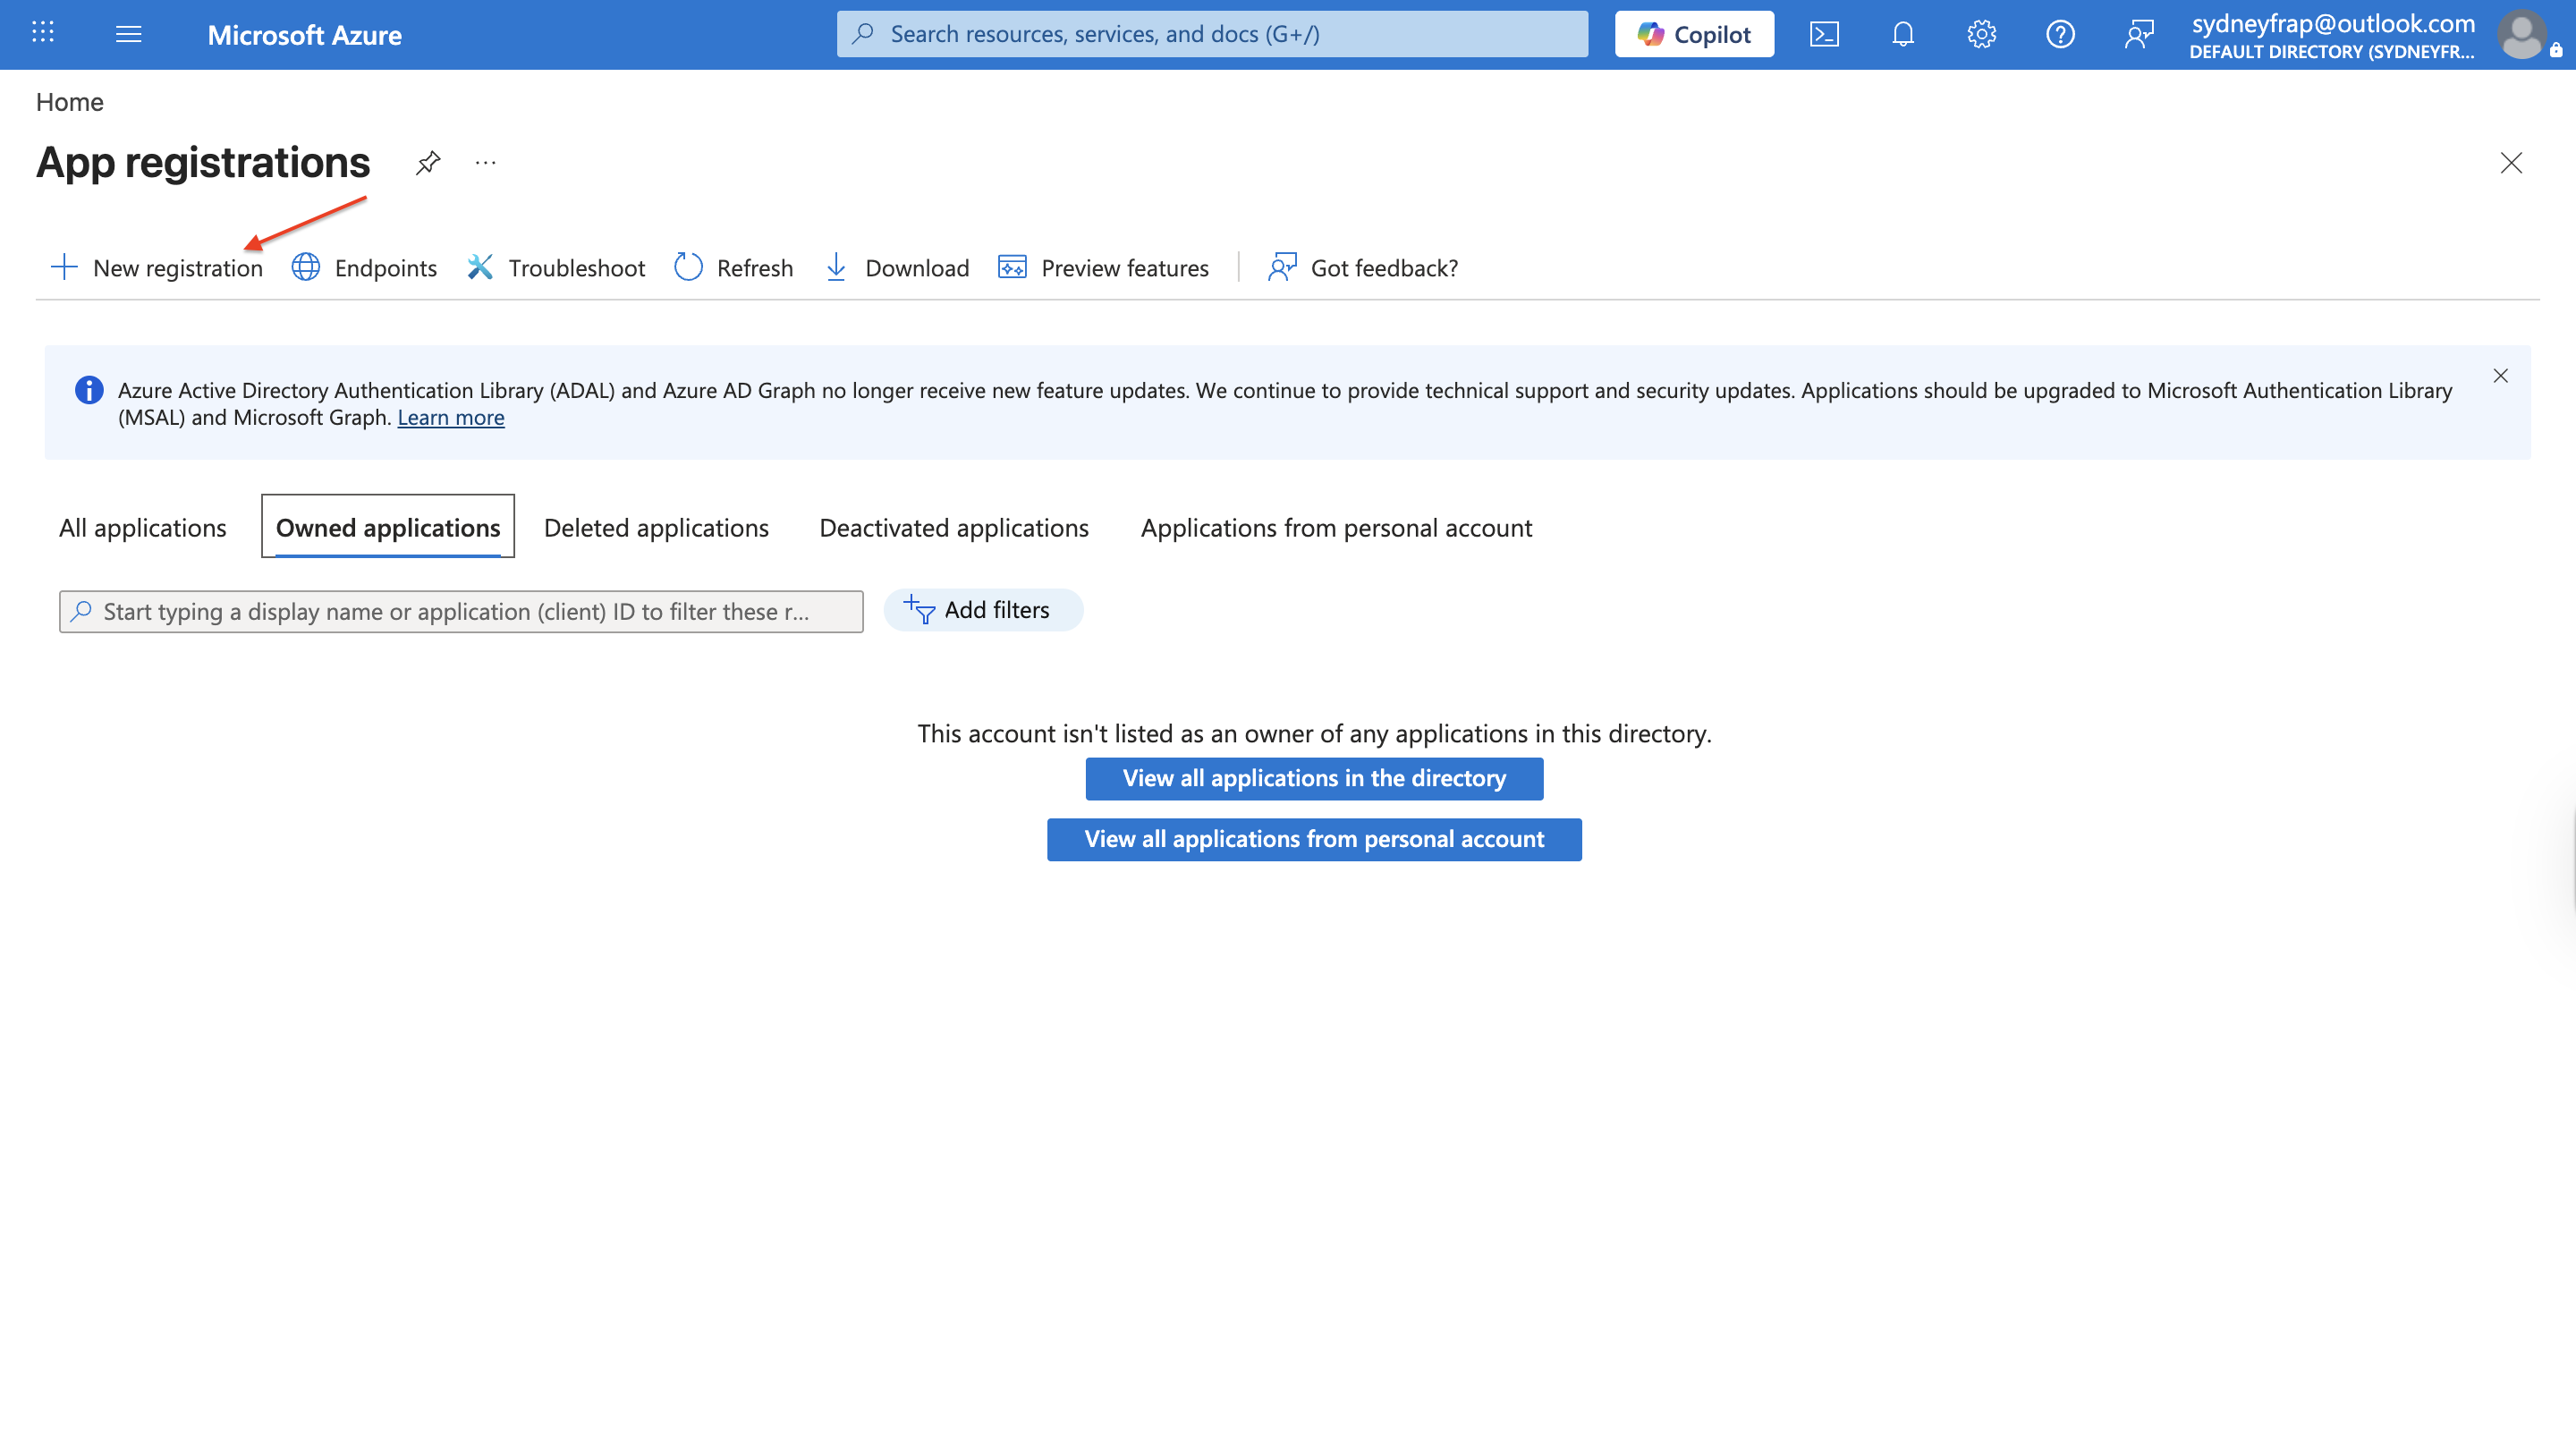
New app registration button - Give it a name (for example,
Frappe Email App), leave the supported account type as default, and click Register. You will add the redirect URI later, once Frappe generates it.
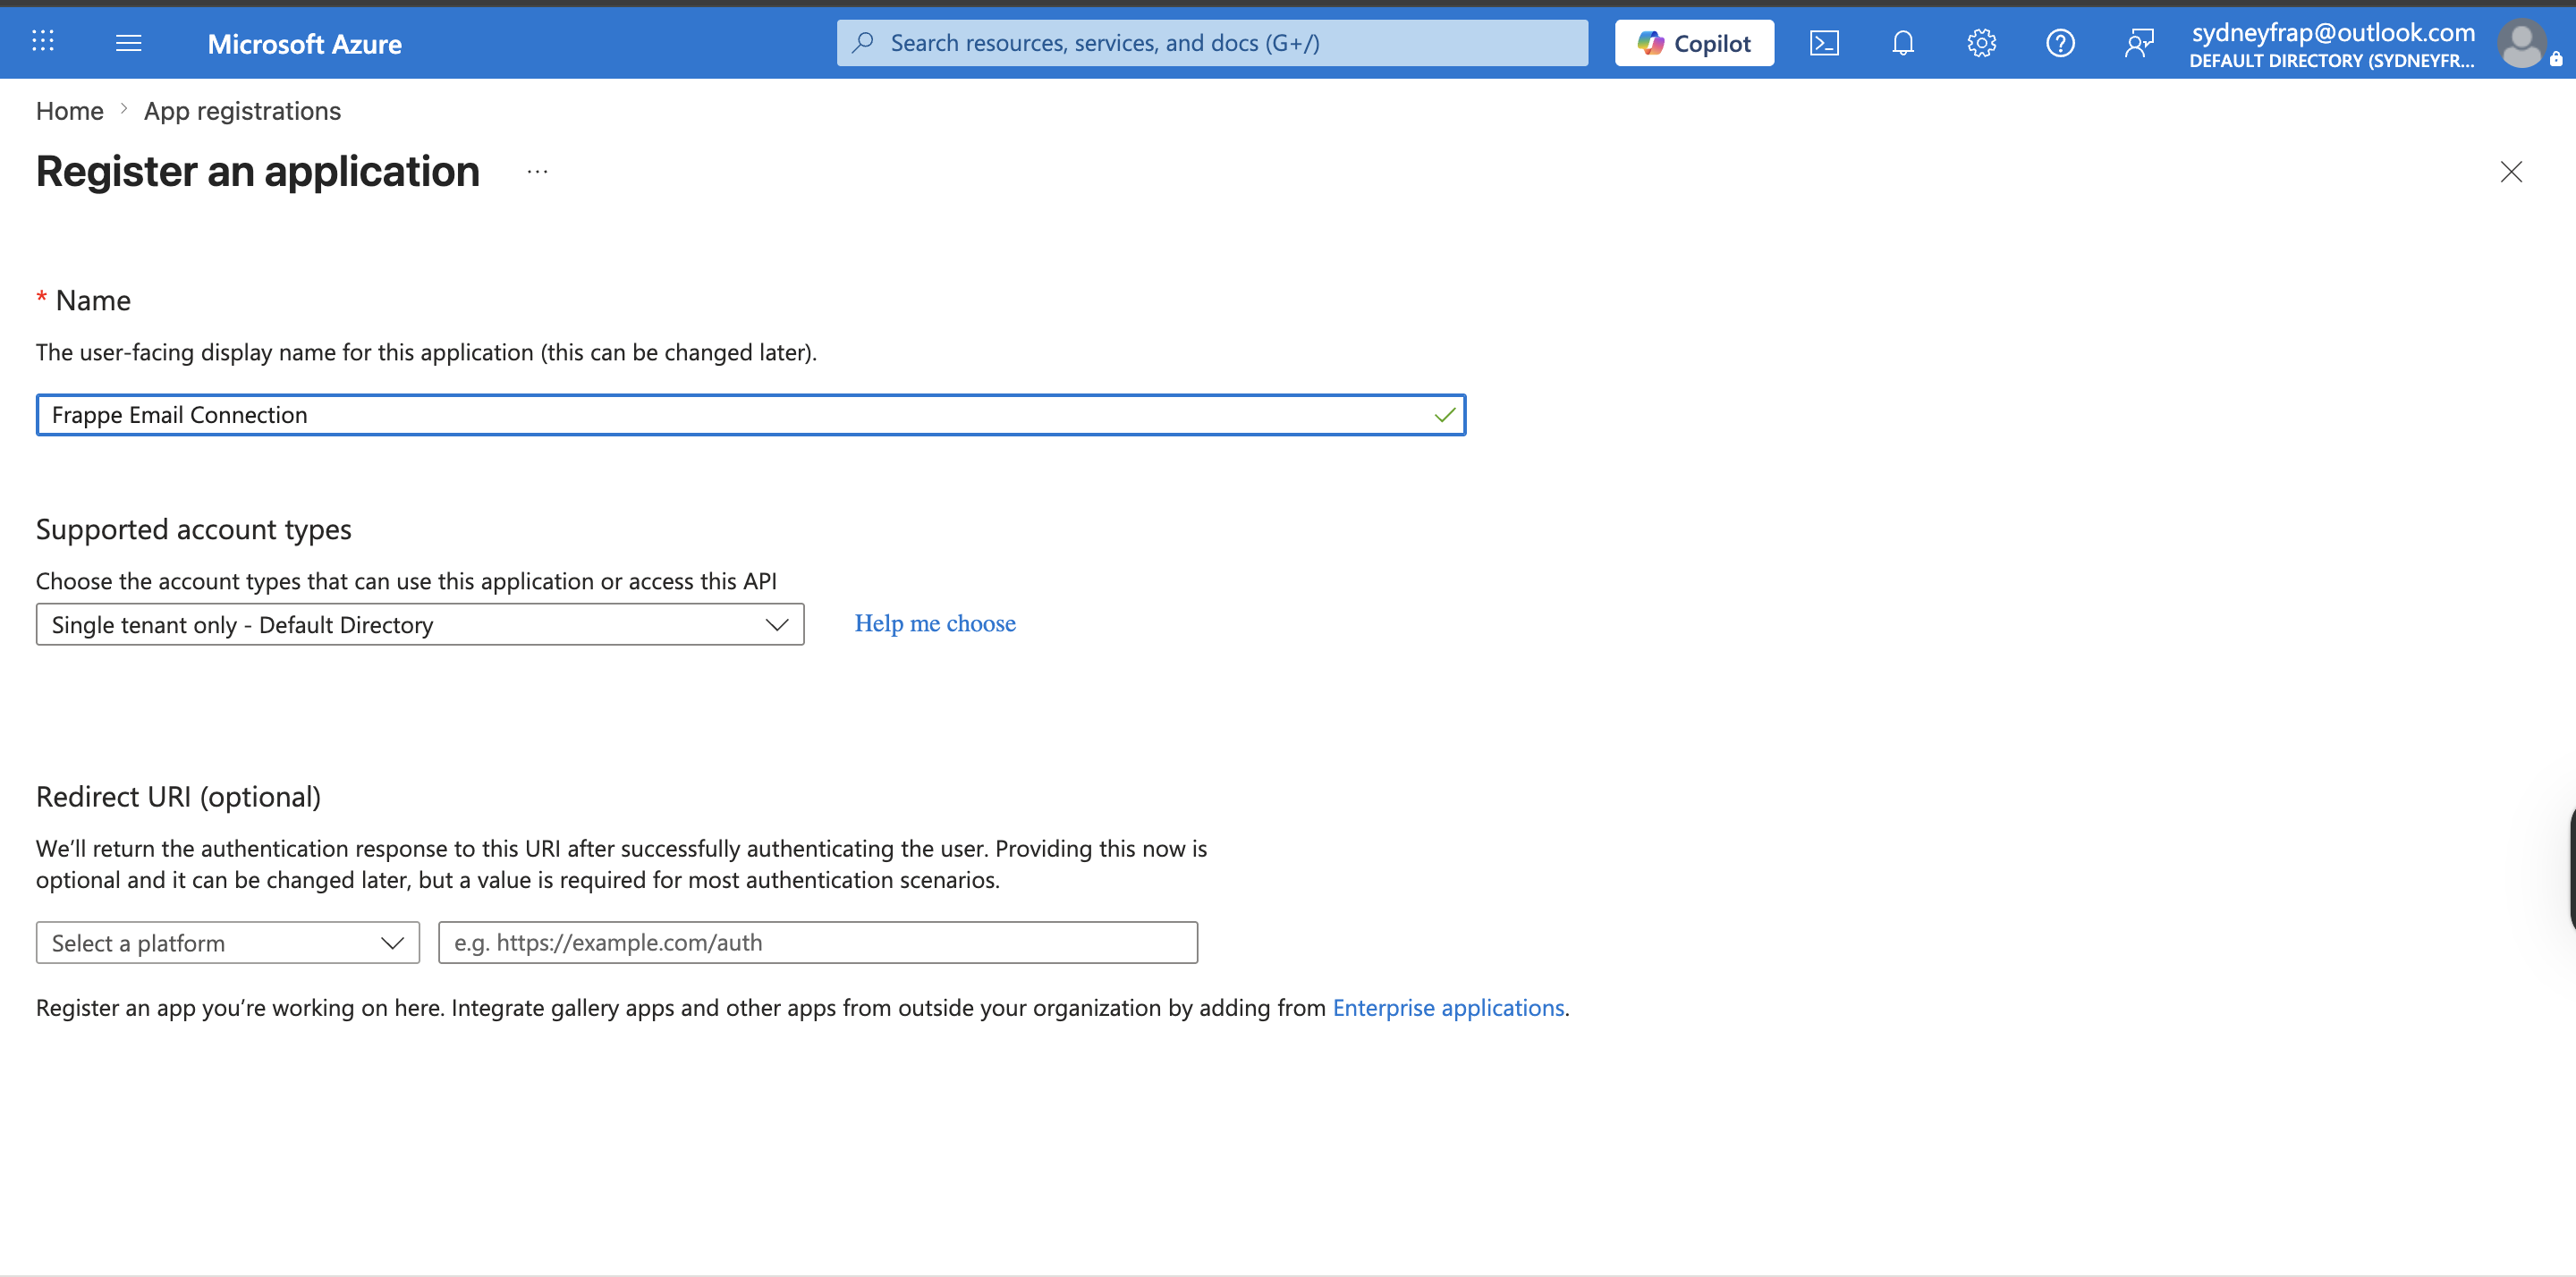
- Once done successfully click on the register button below the form.
Step 2: Add API permissions
- Open your new app and go to API permissions → Add a permission
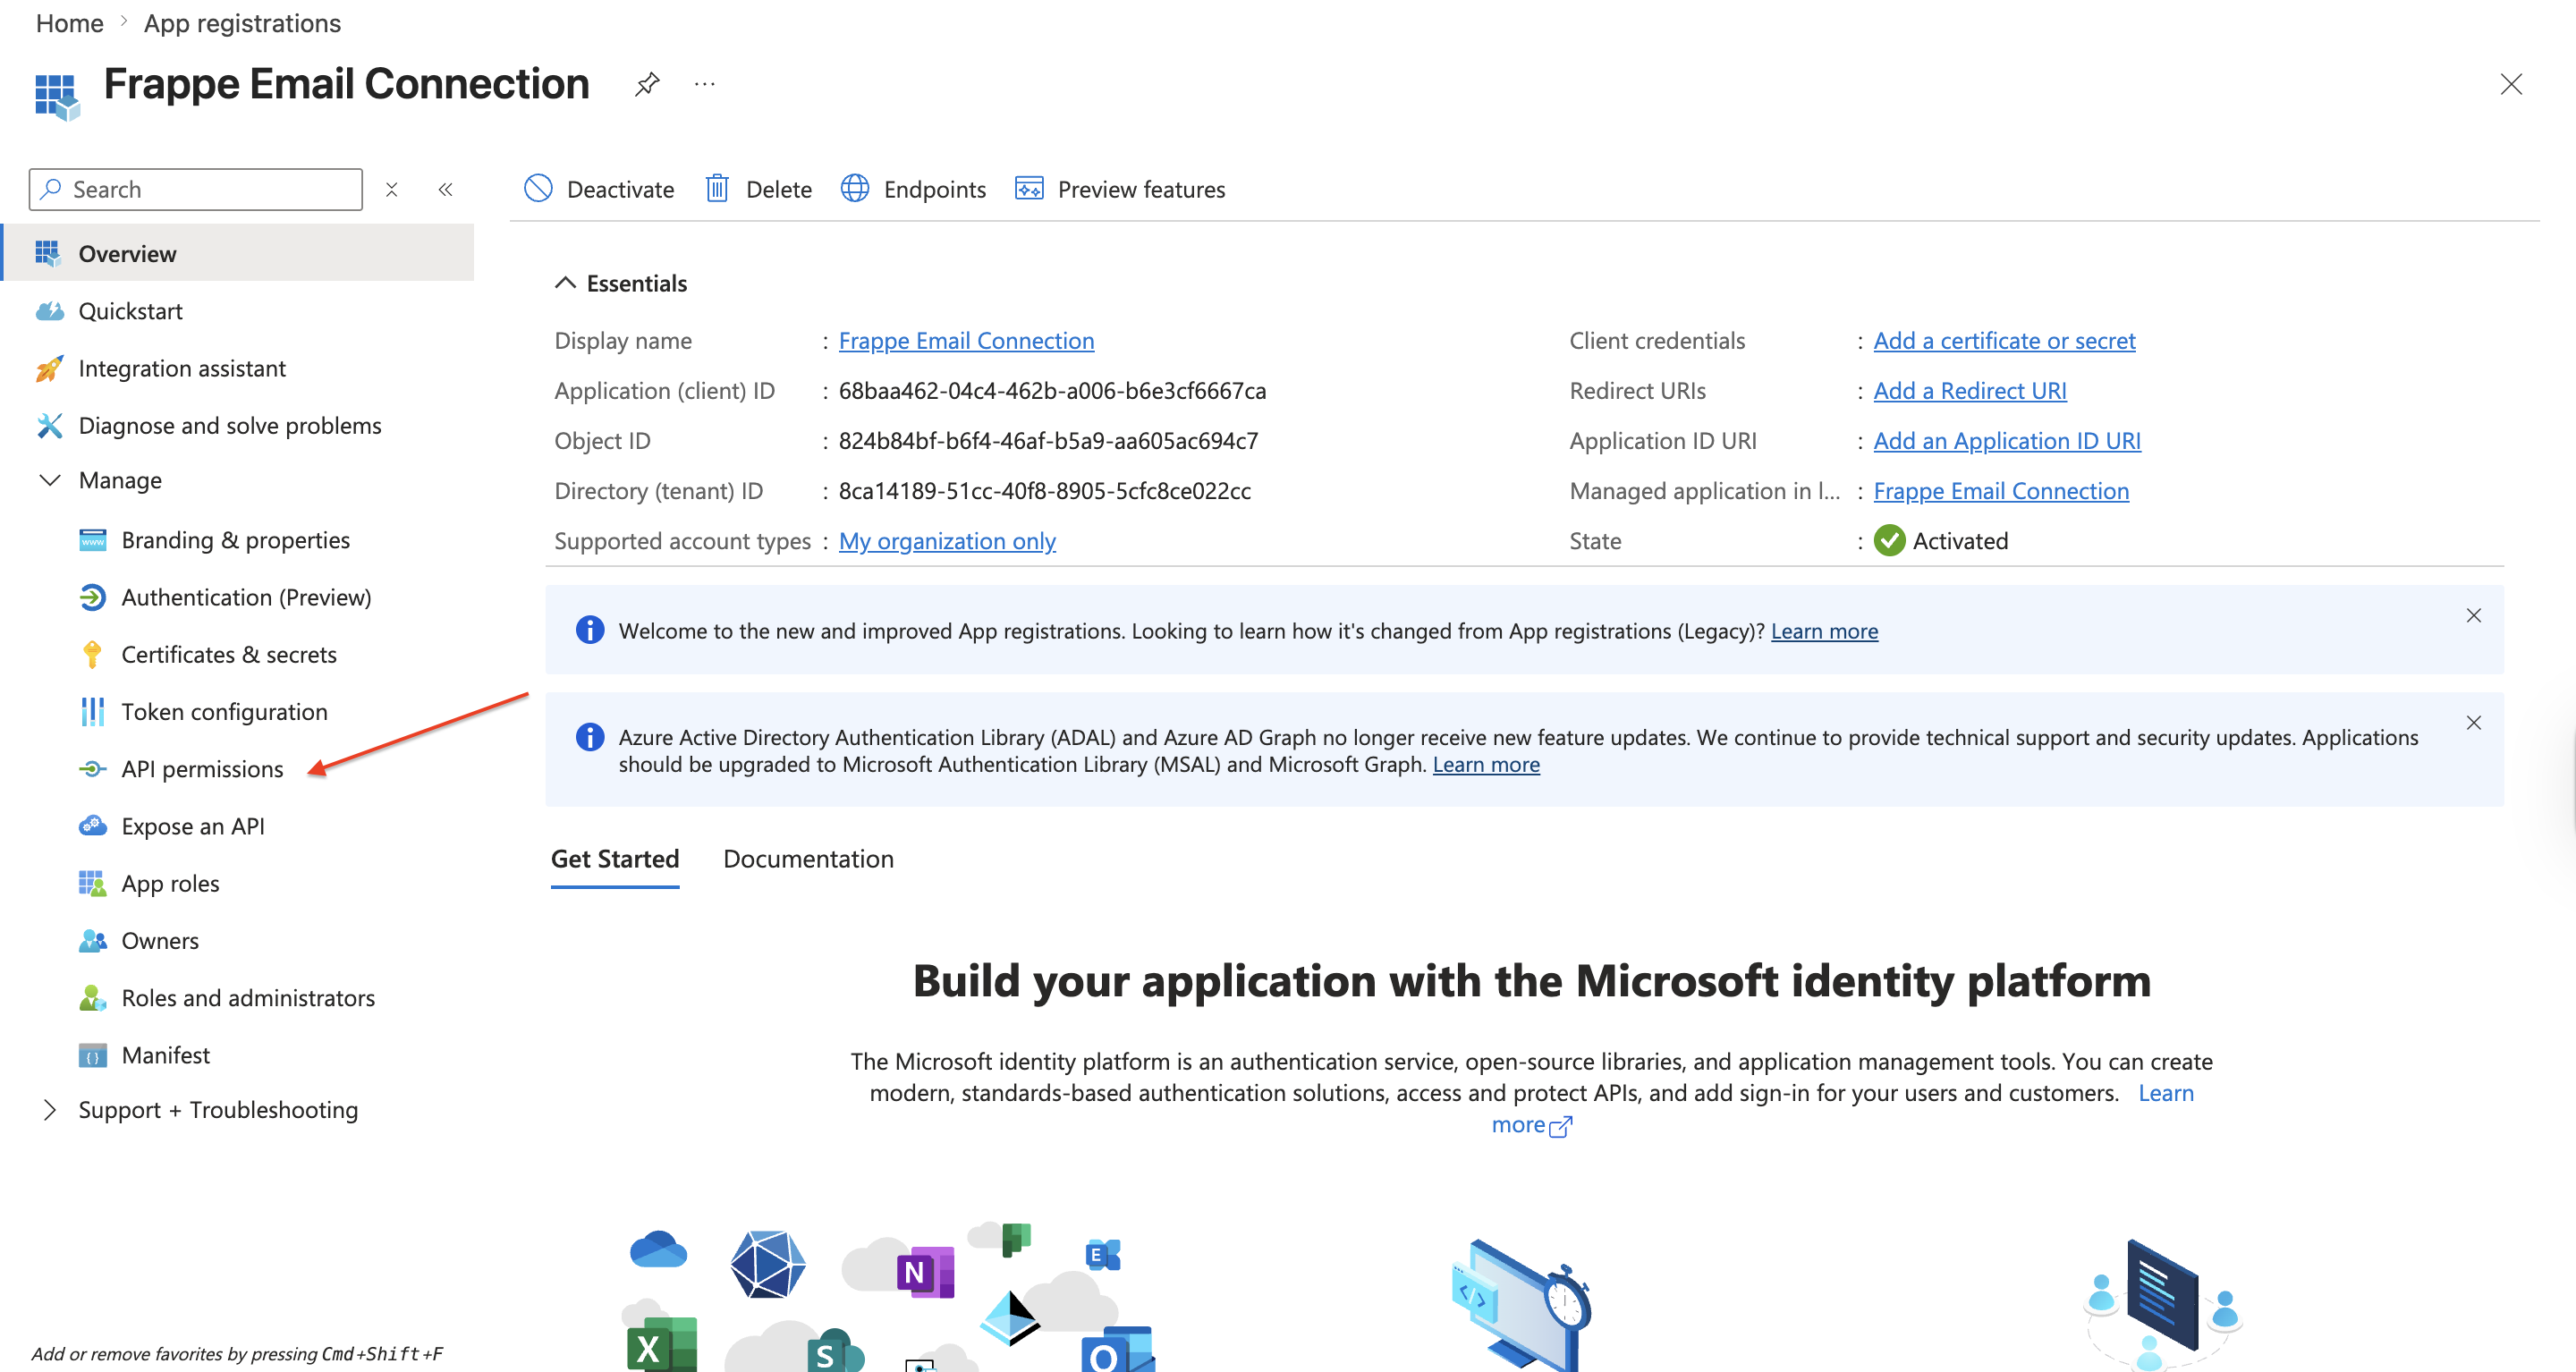
Guide to API Permissions
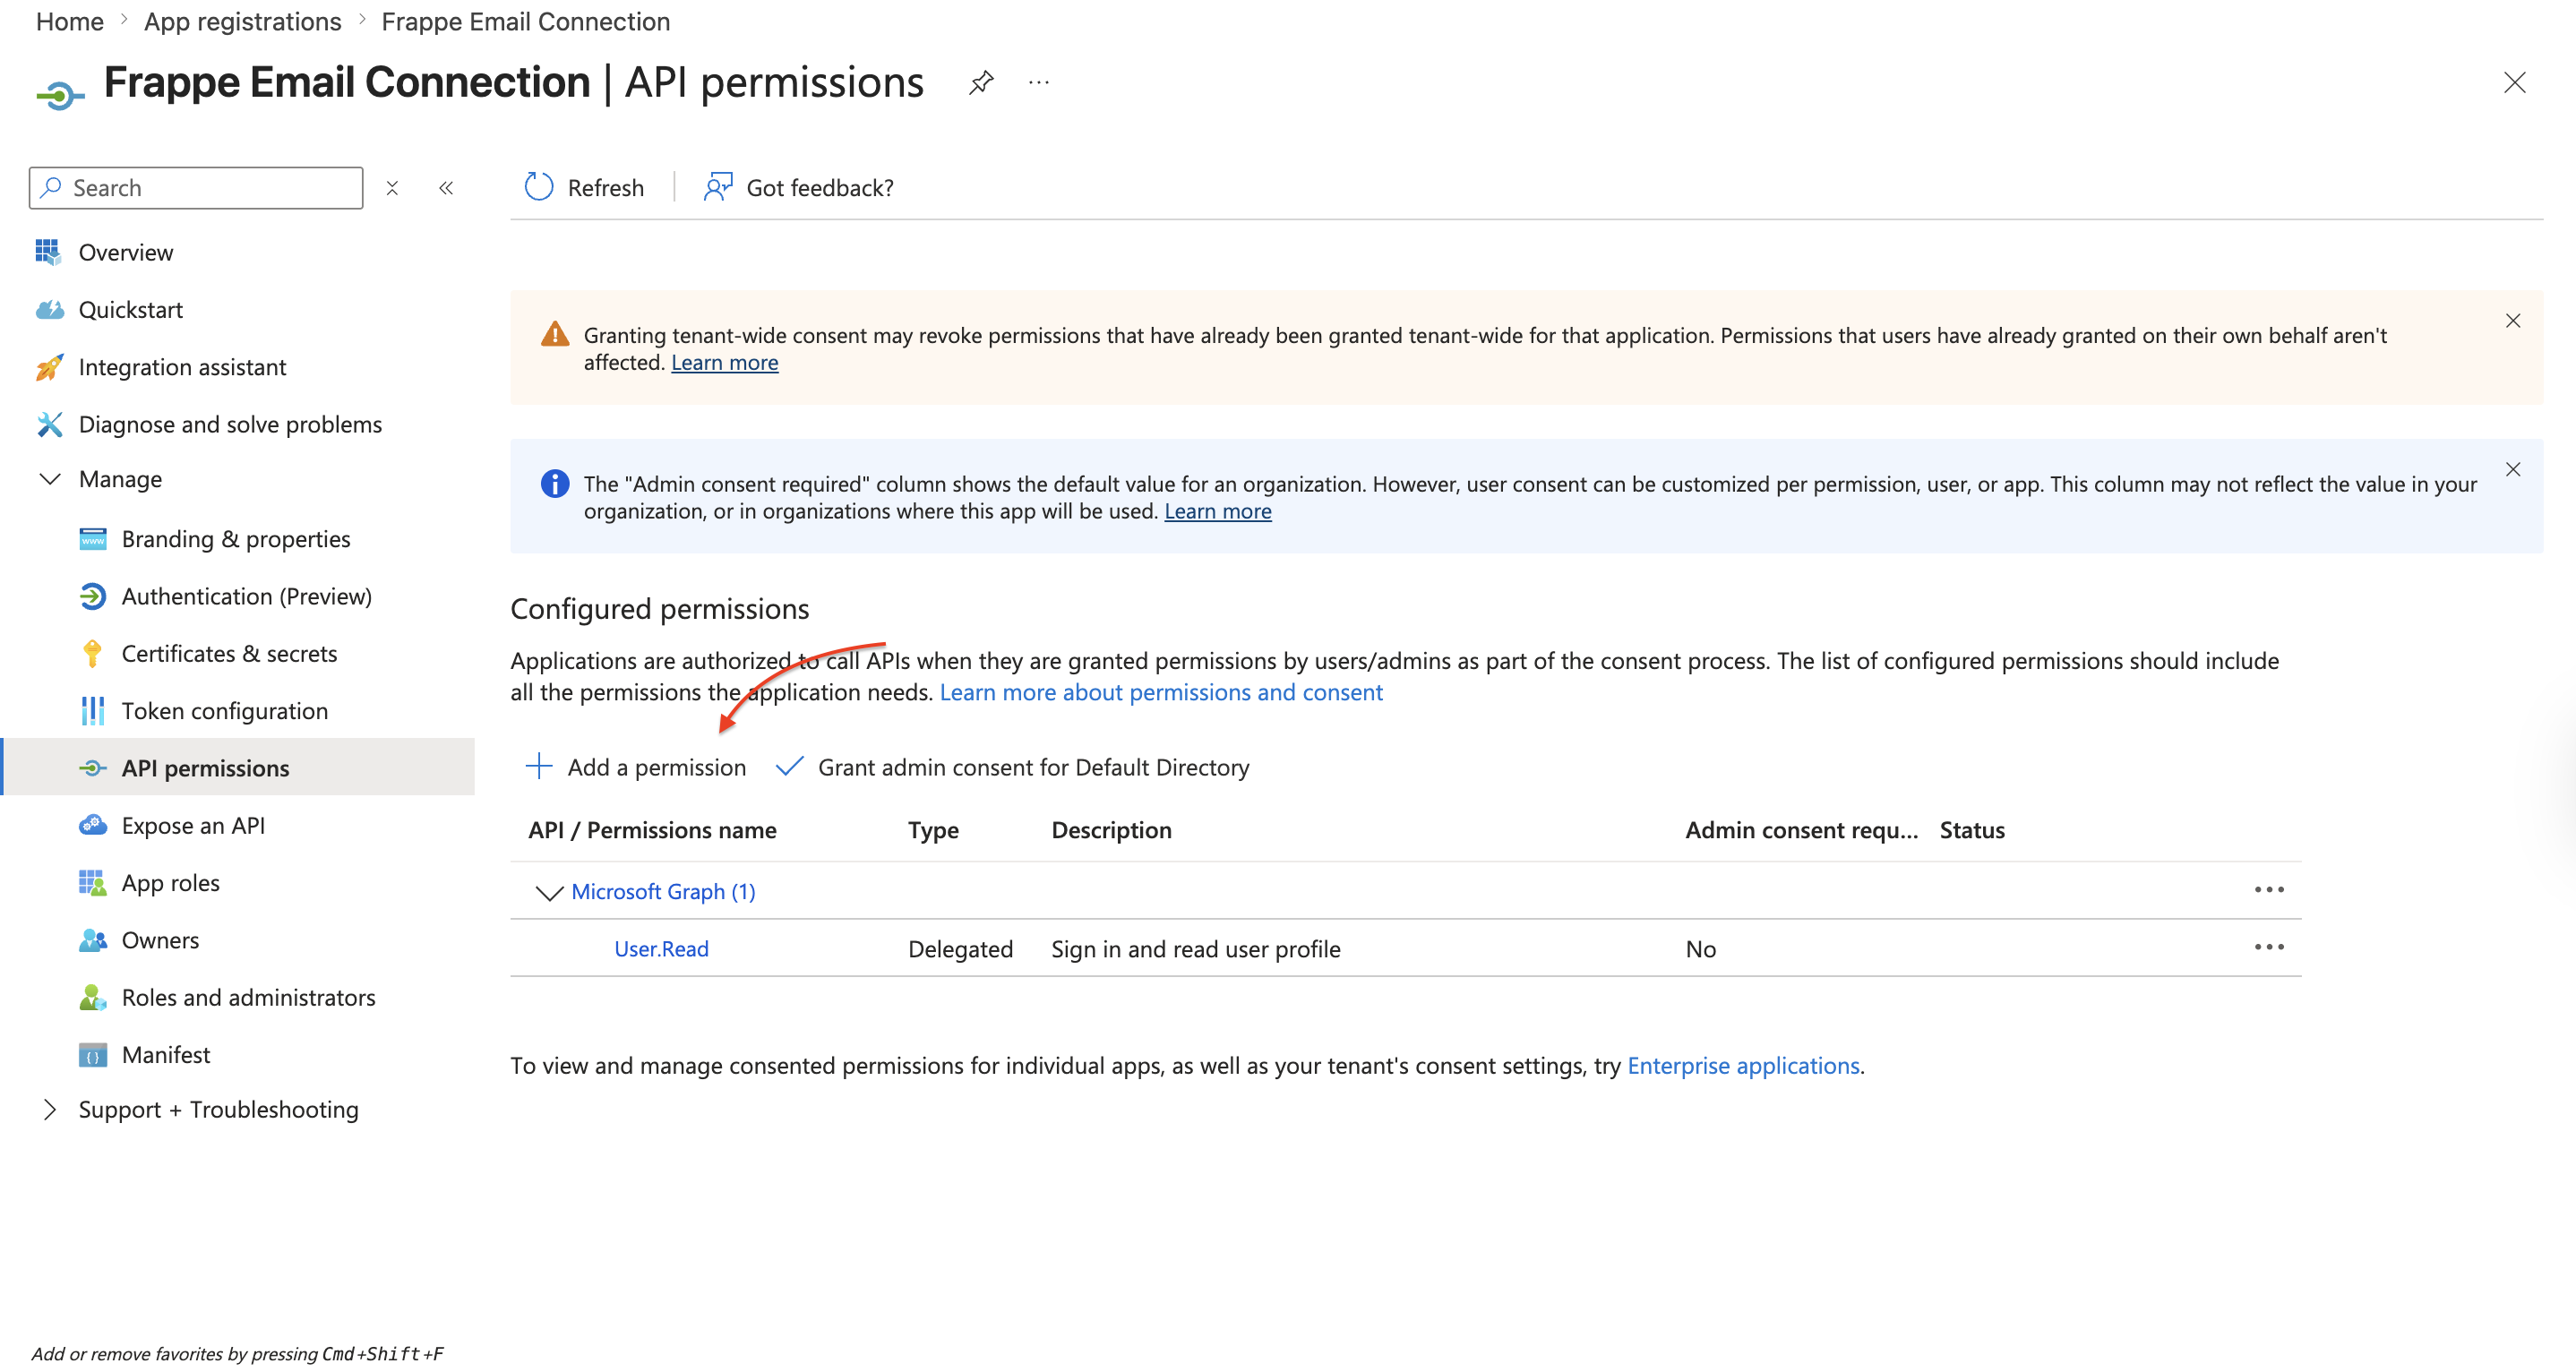
Add Permission - Add the following Permissions under select Microsoft Graph option and inside go to Microsoft Graph → Delegated permissions.
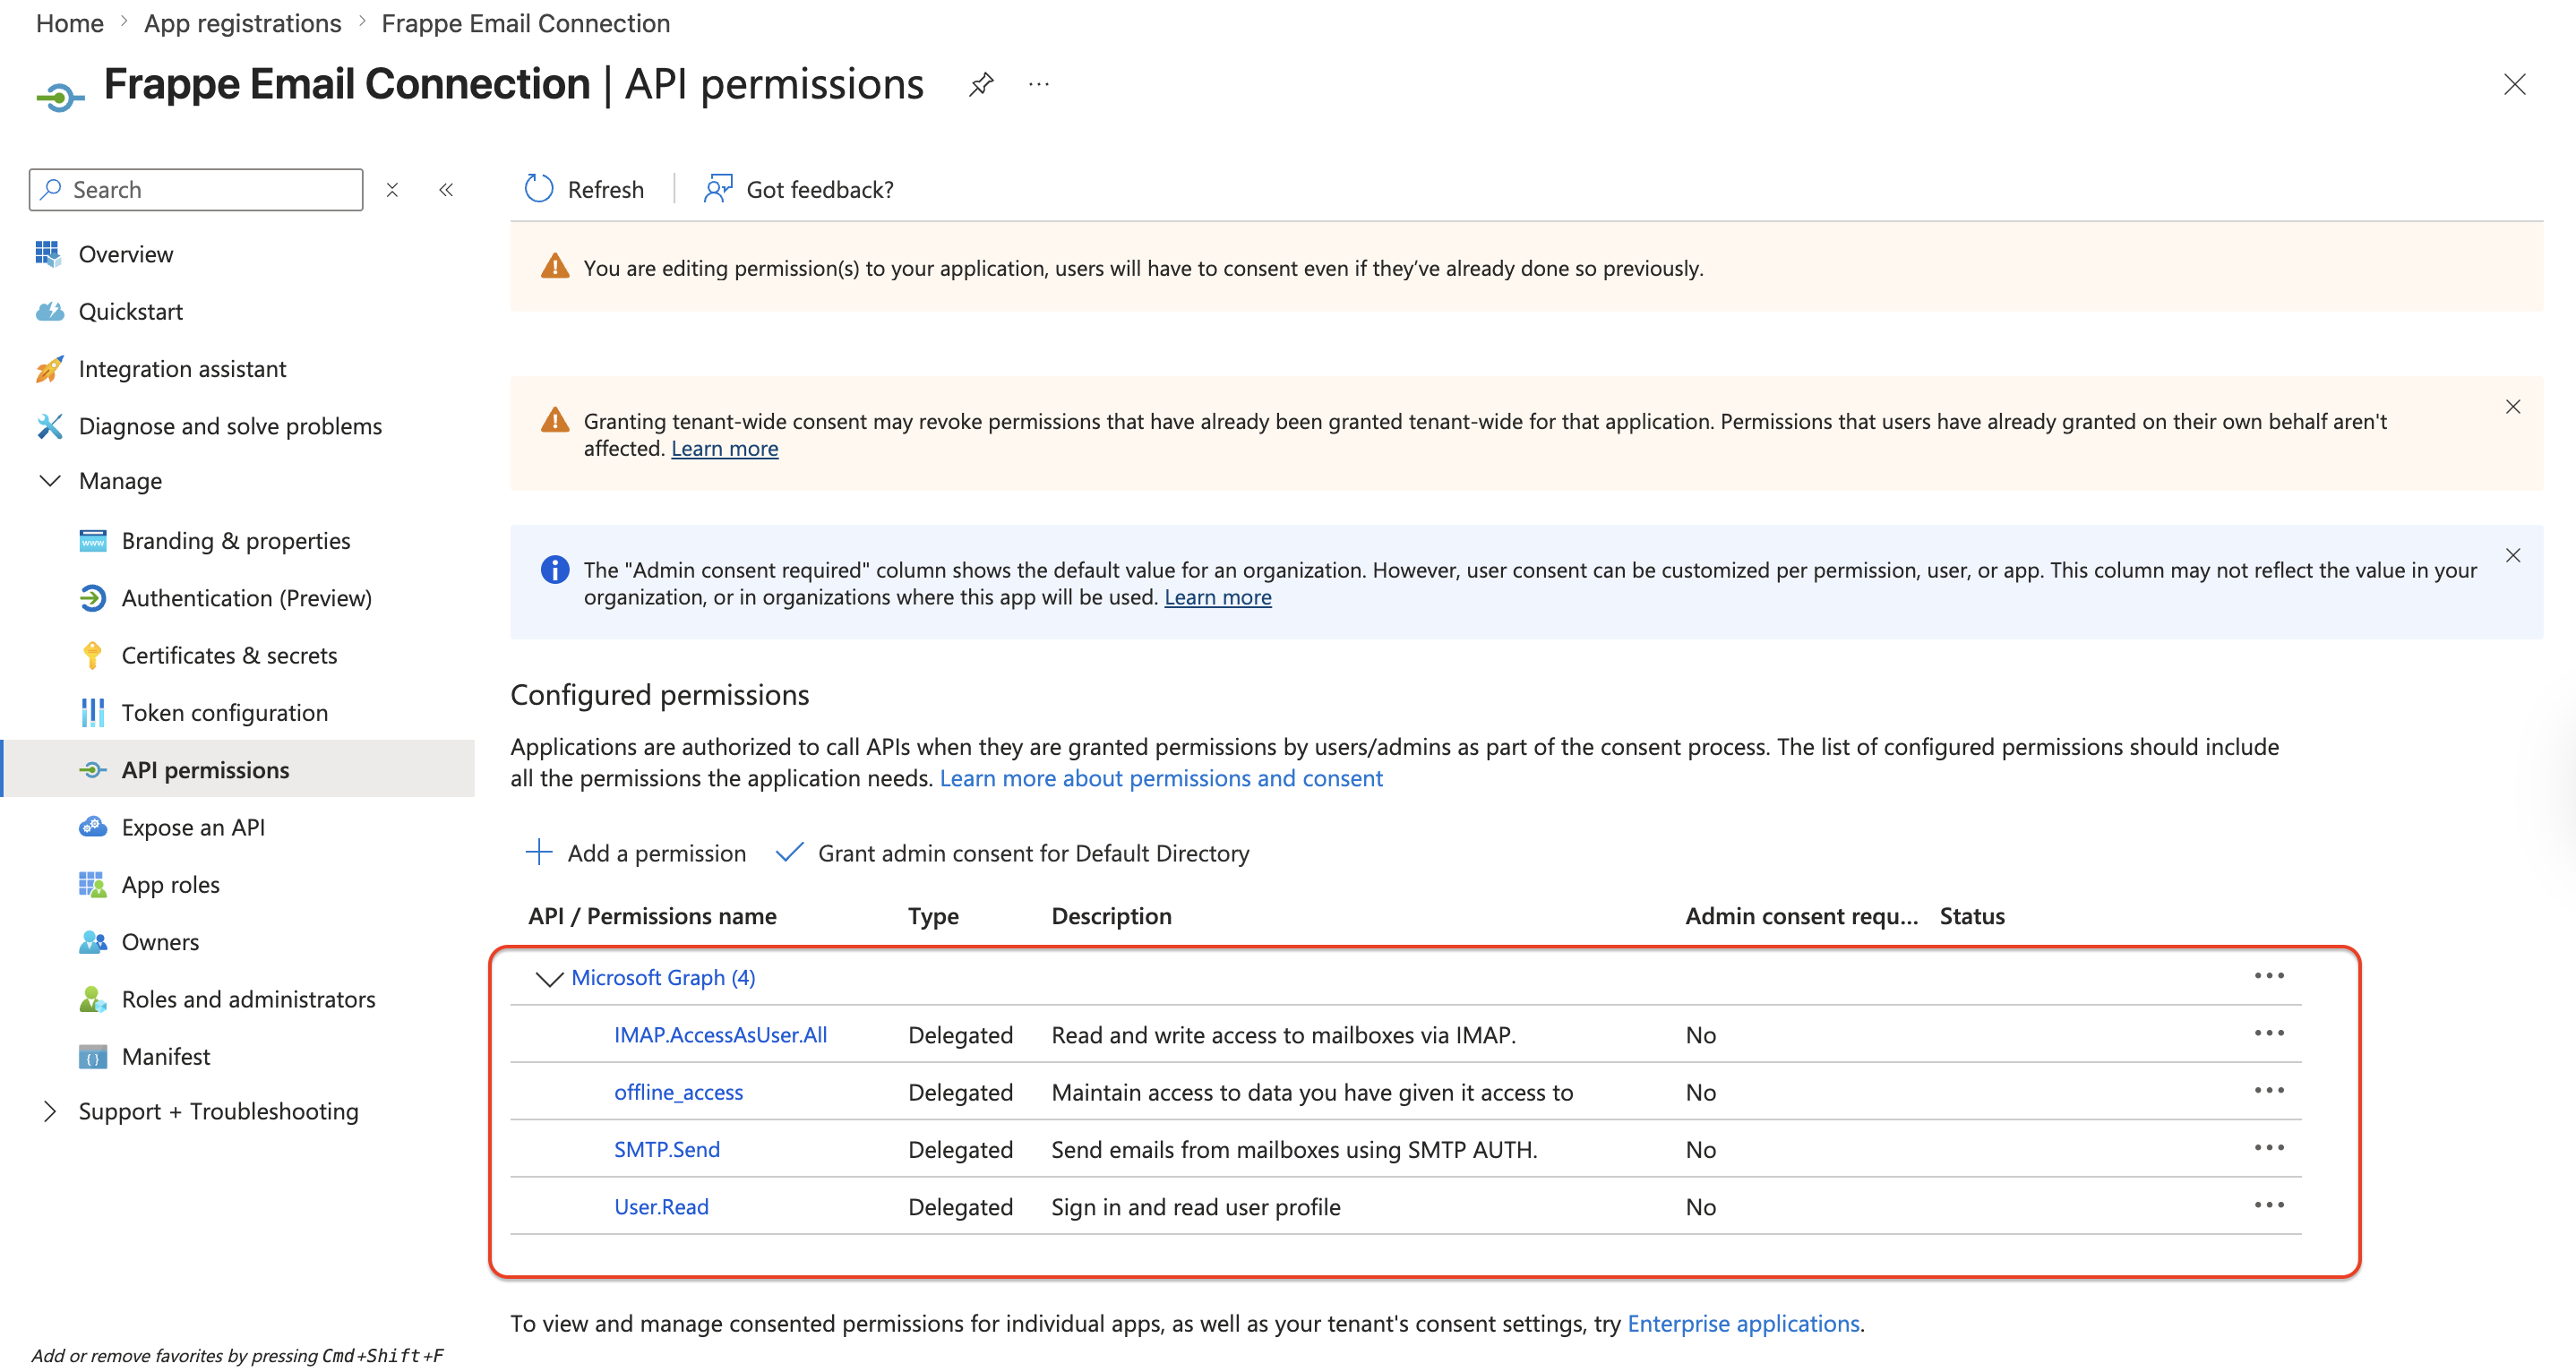
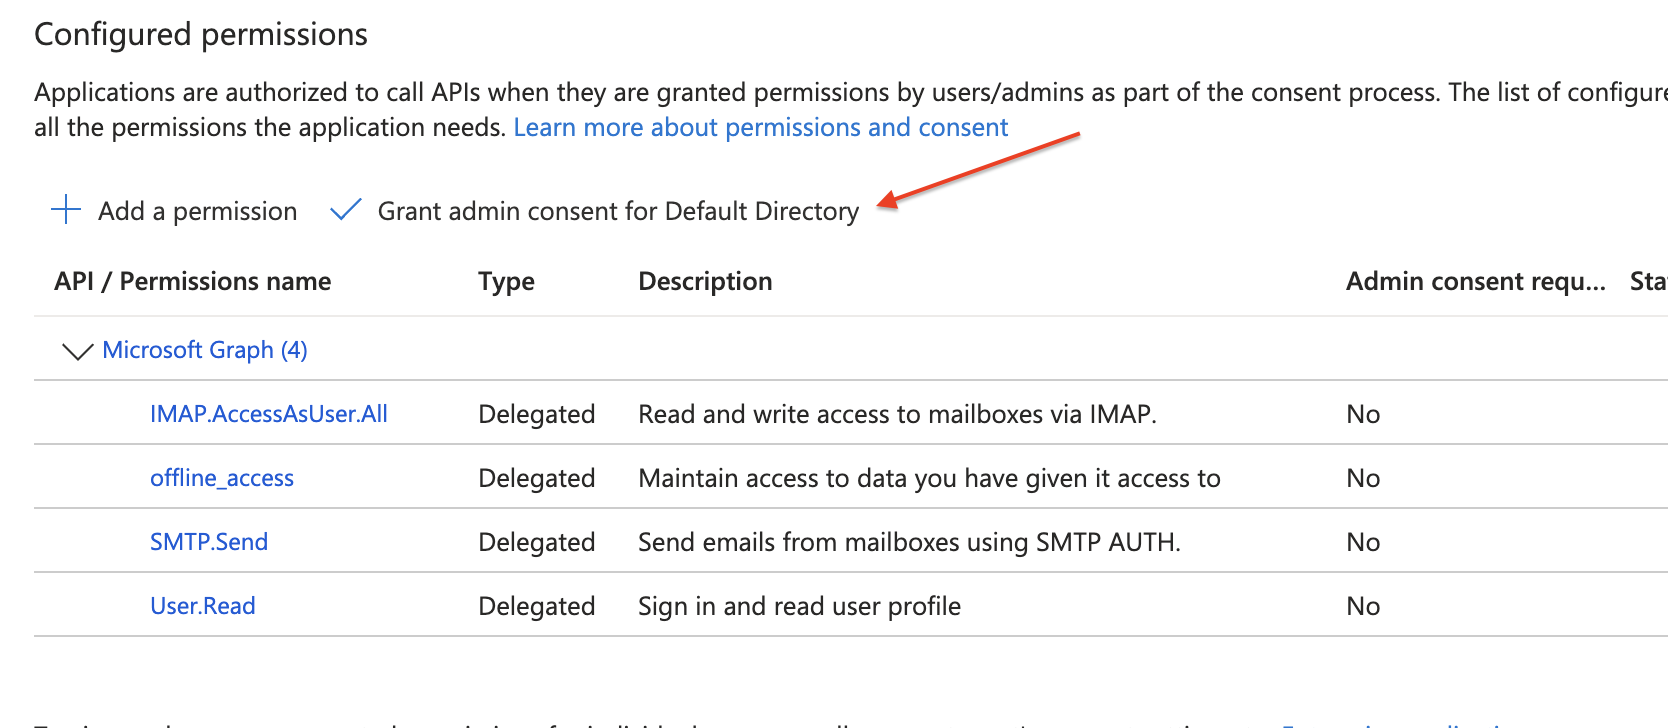
- Click Grant admin consent for and confirm. Each permission should show a green check under Status.
Click Grant admin consent
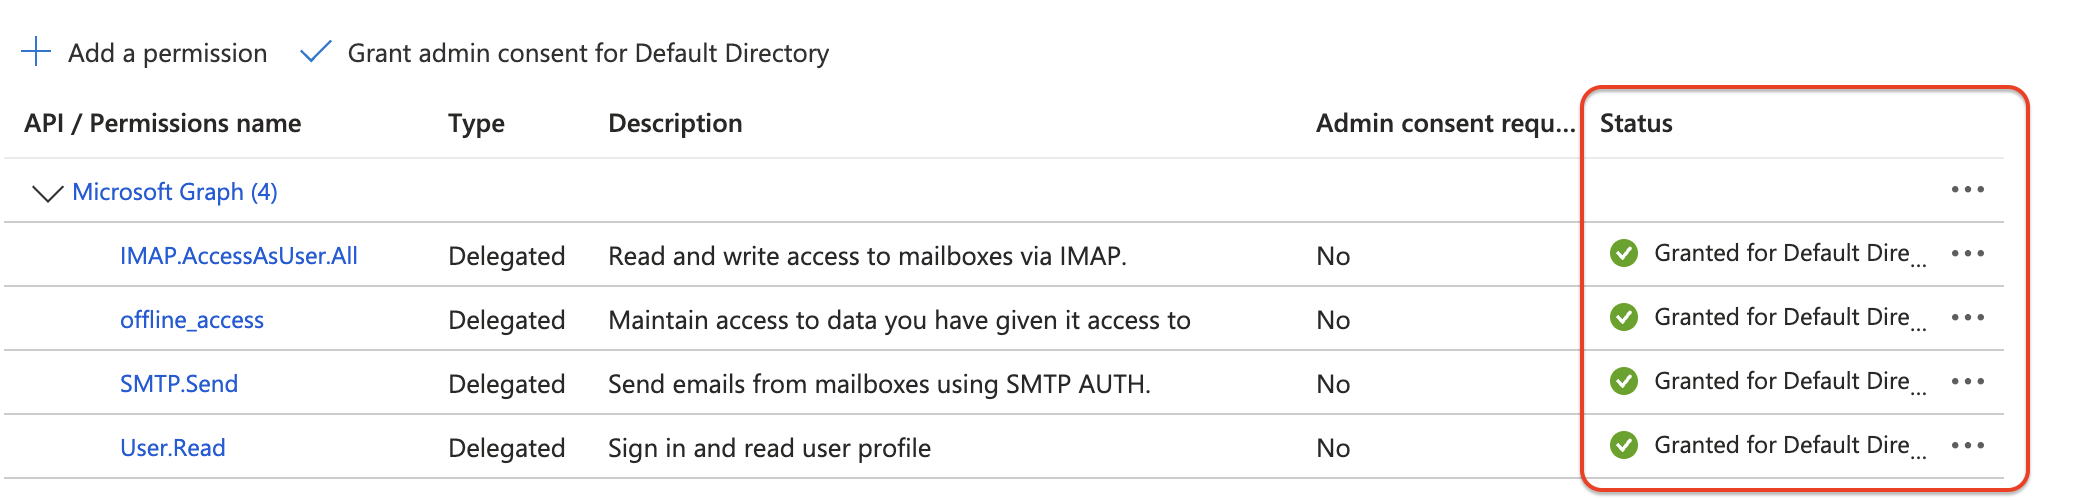
Updated status message
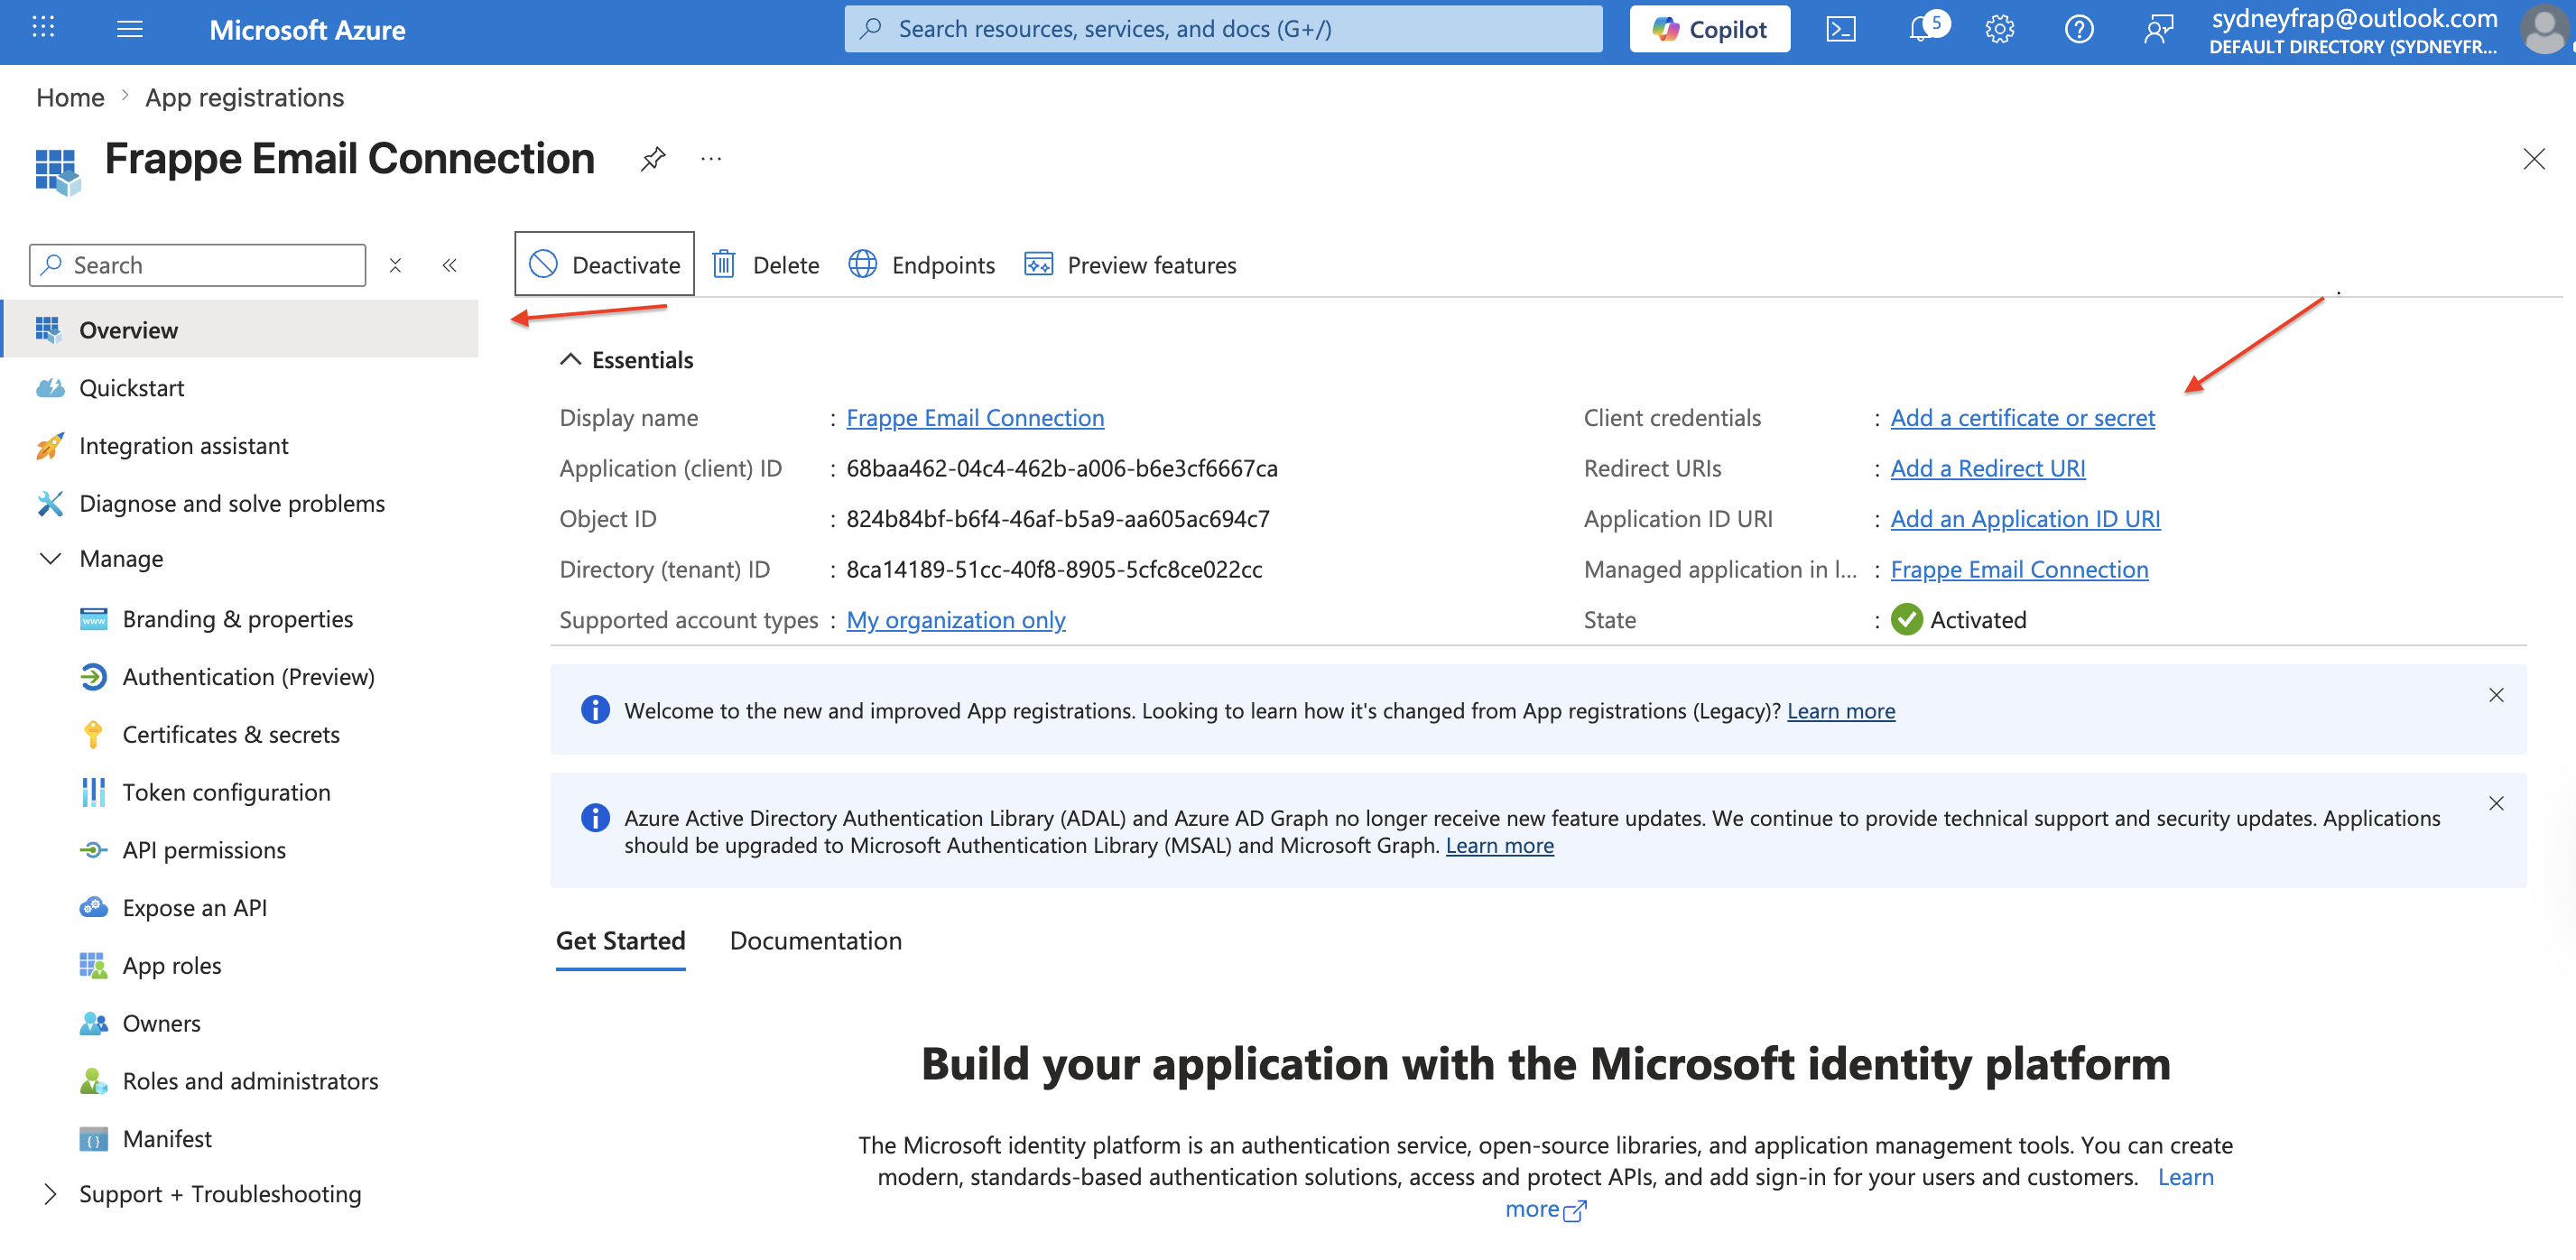
Step 3: Create a client secret
- Go to Certificates & secrets → New client secret or in Overview click Add a secret.
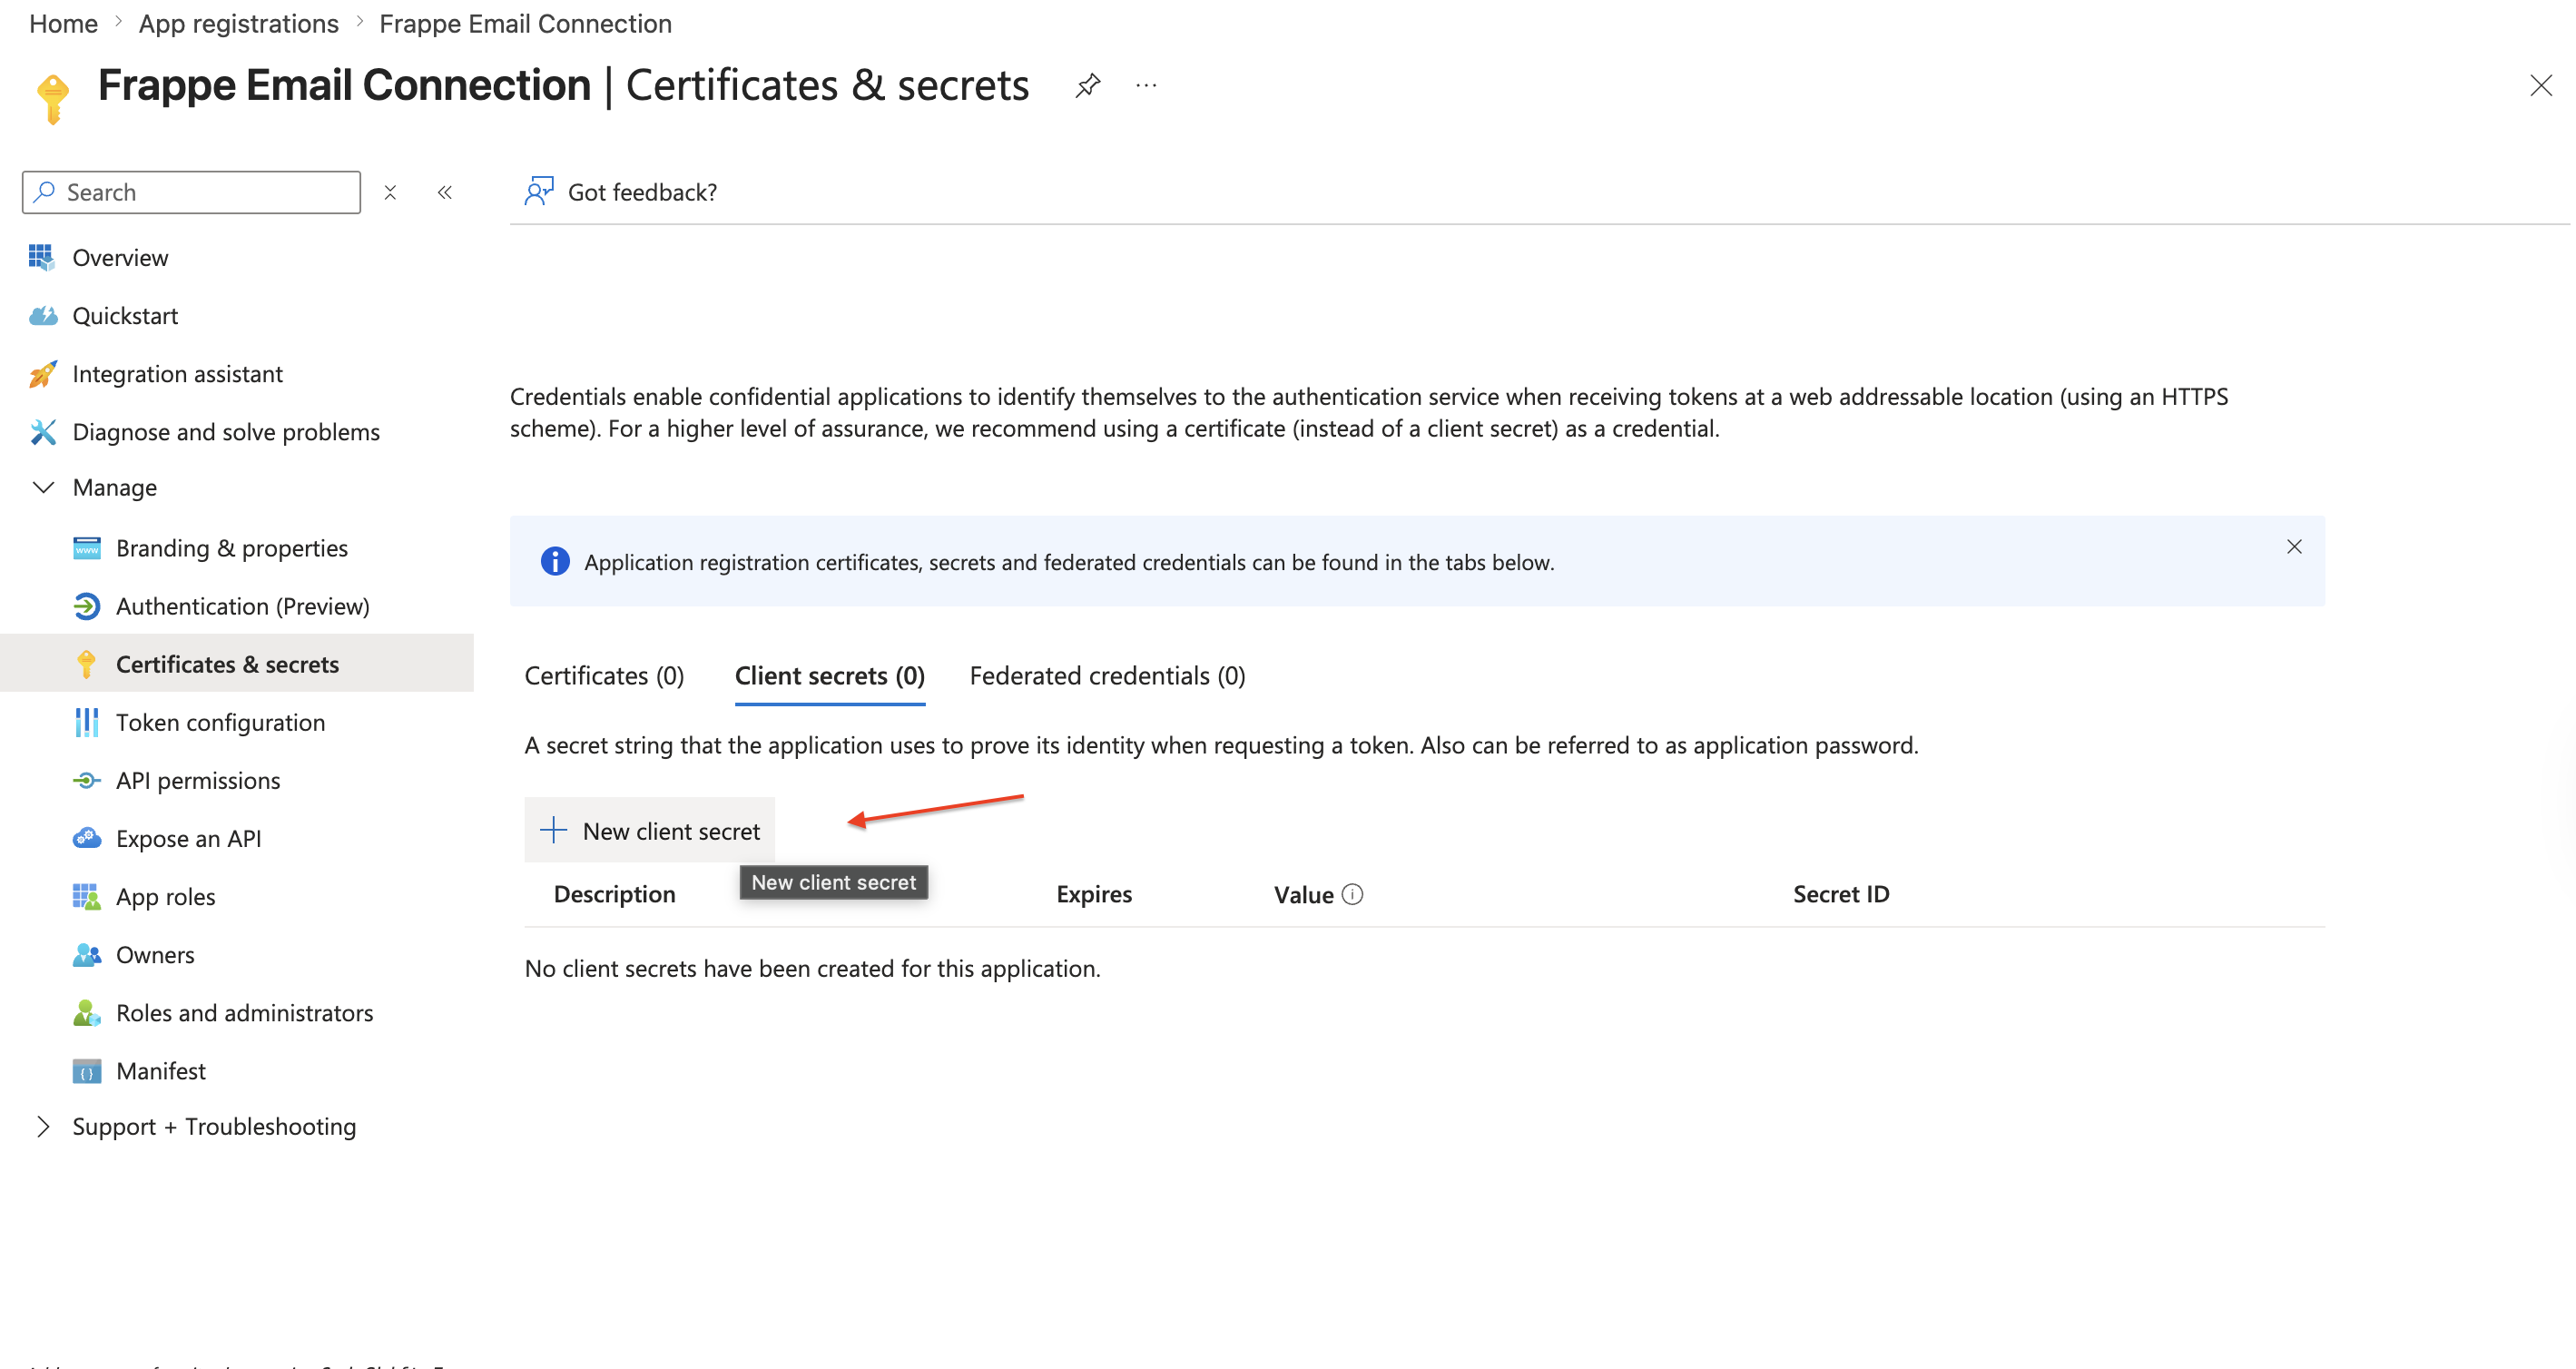
- Add a description, choose an expiry, and click Add.
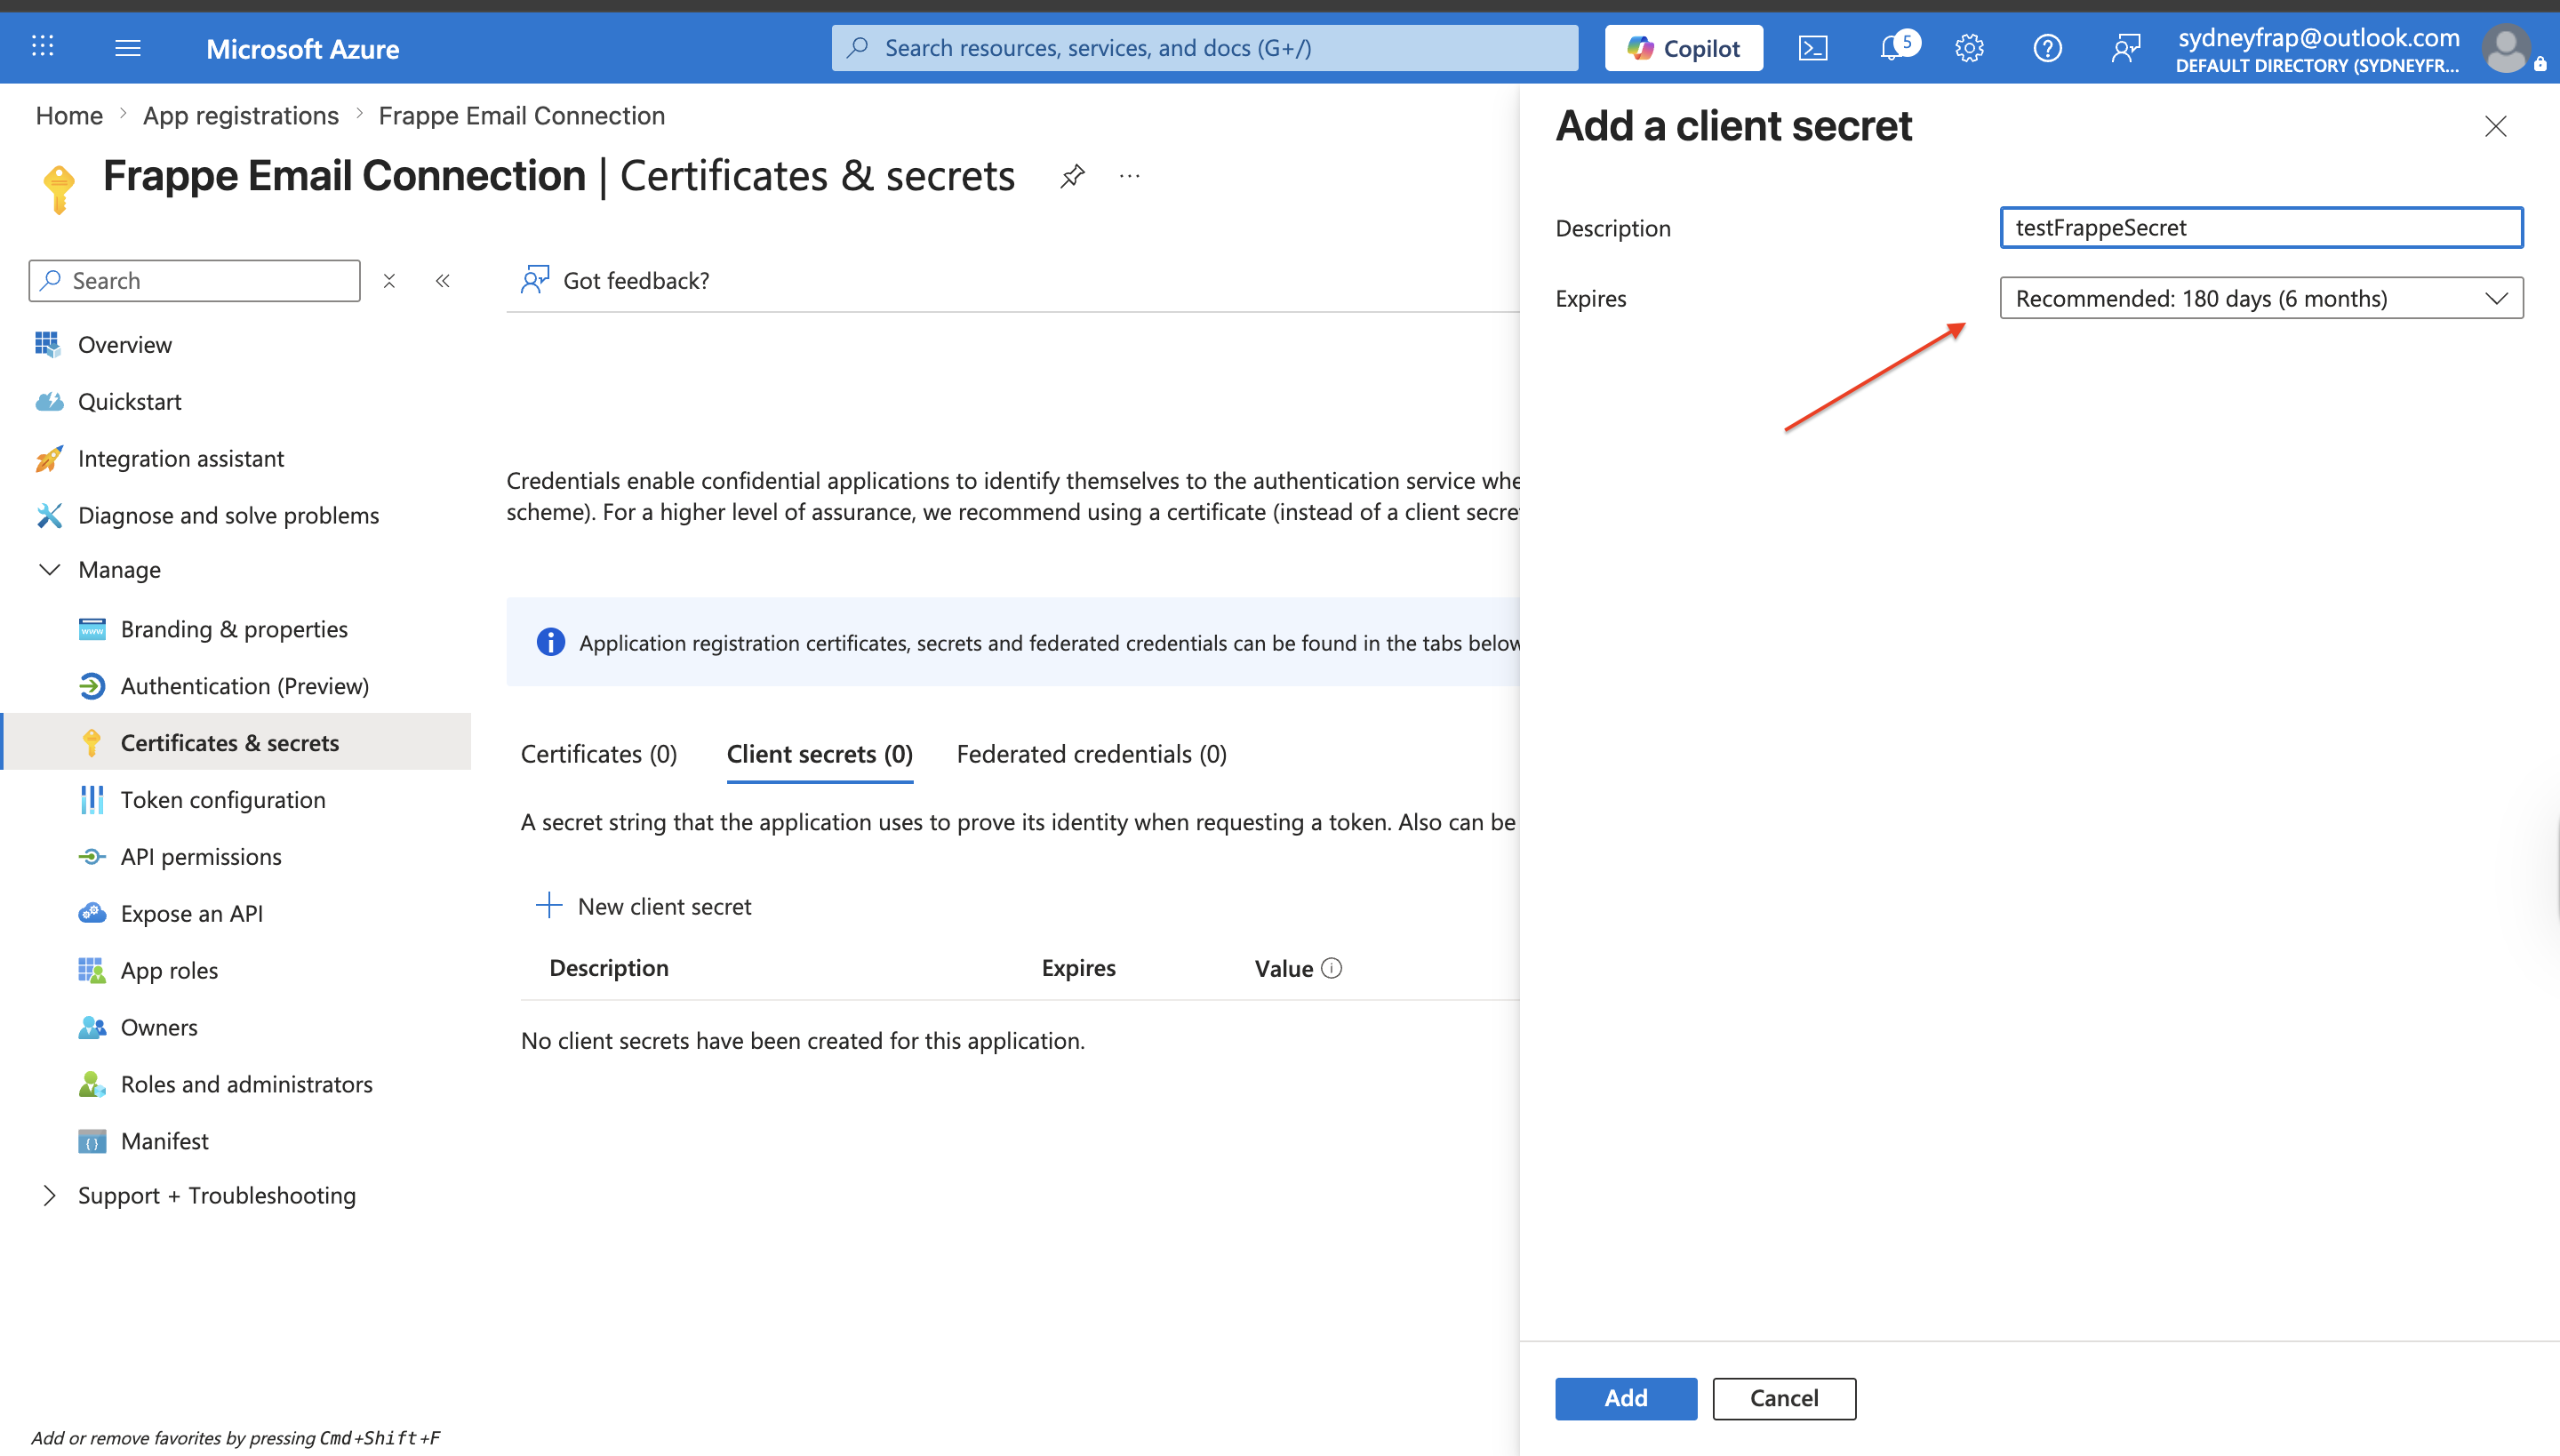
- Copy the secret Value immediately and store it safely.
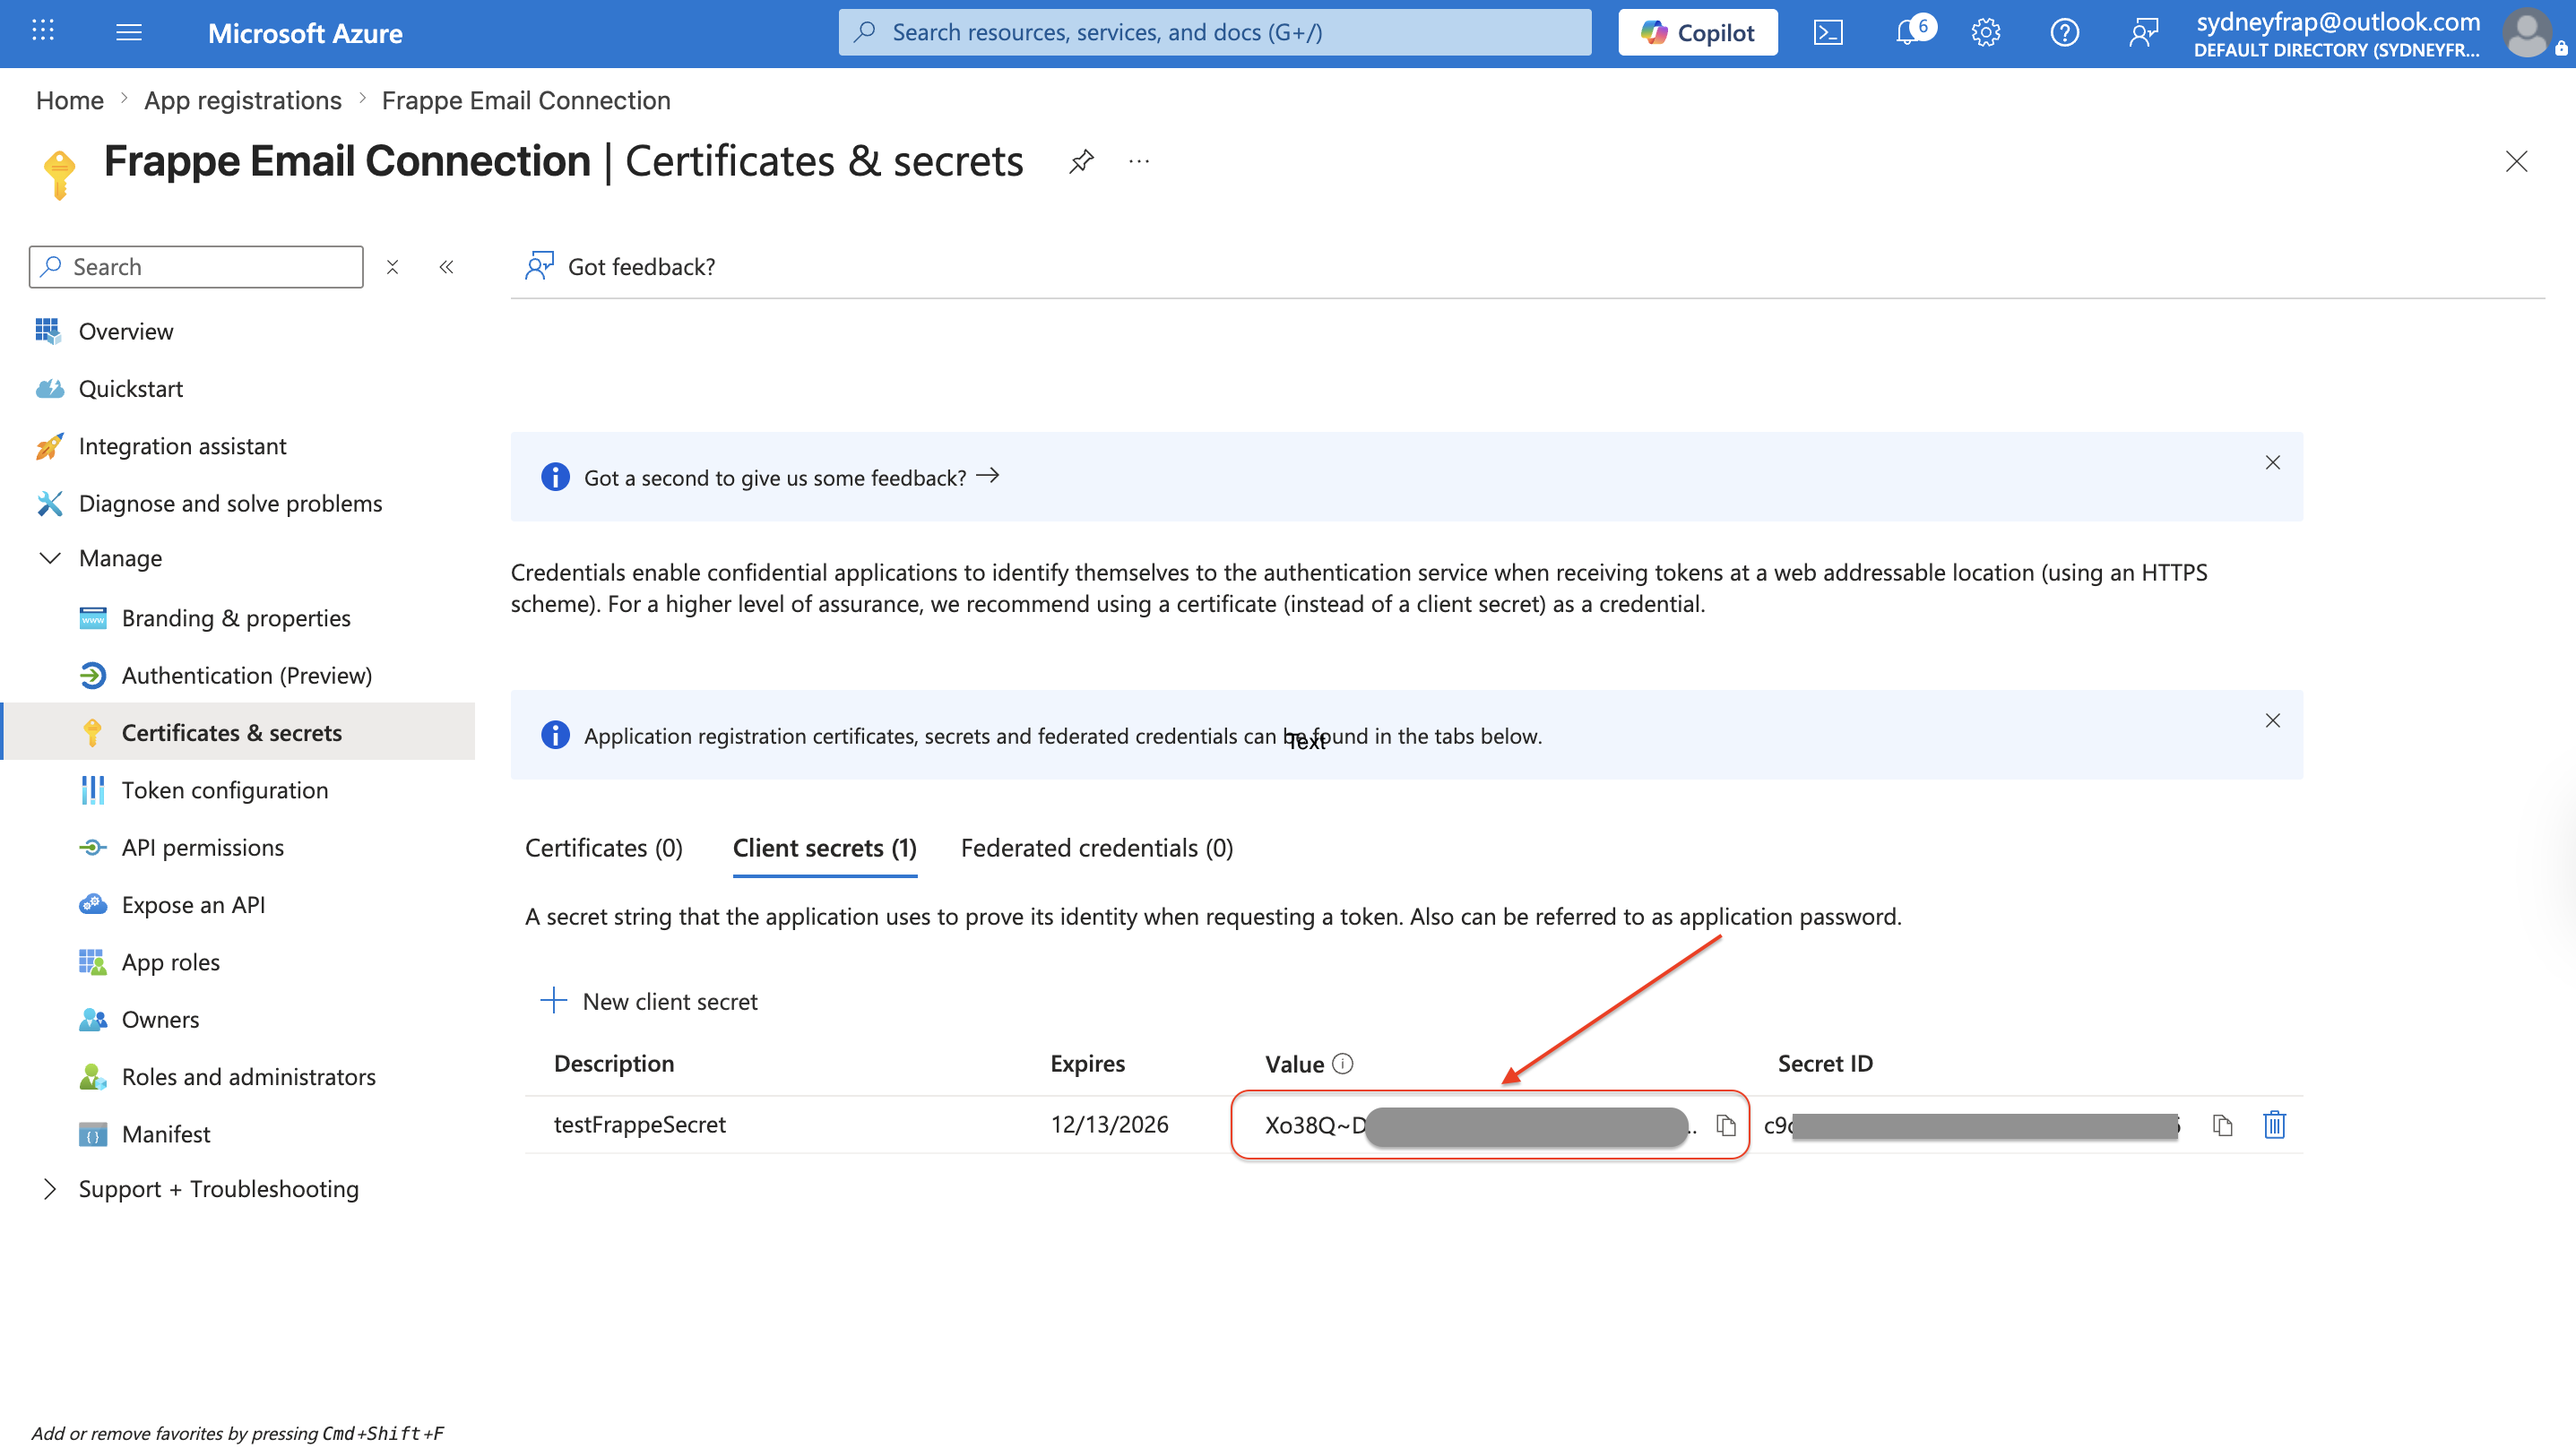
Note: Copy the Value, not the Secret ID. The value is shown only once and cannot be retrieved again after you leave the page.
Step 4: Collect your IDs and endpoint
From the app's Overview page, copy:
- Application (client) ID
- Directory (tenant) ID
- OpenID Connect Metatdata Document ID (Under endpoints)
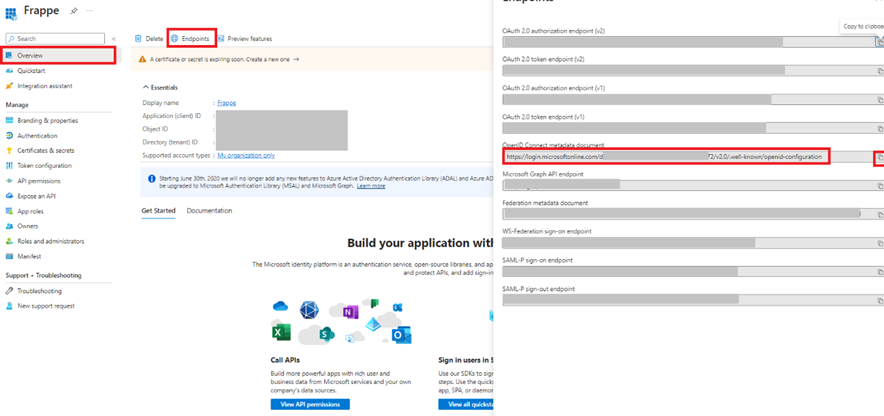
Your OpenID configuration URL follows this format — keep it for the next part:
https://login.microsoftonline.com/your_tenant_id/v2.0/.well-known/openid-configuration
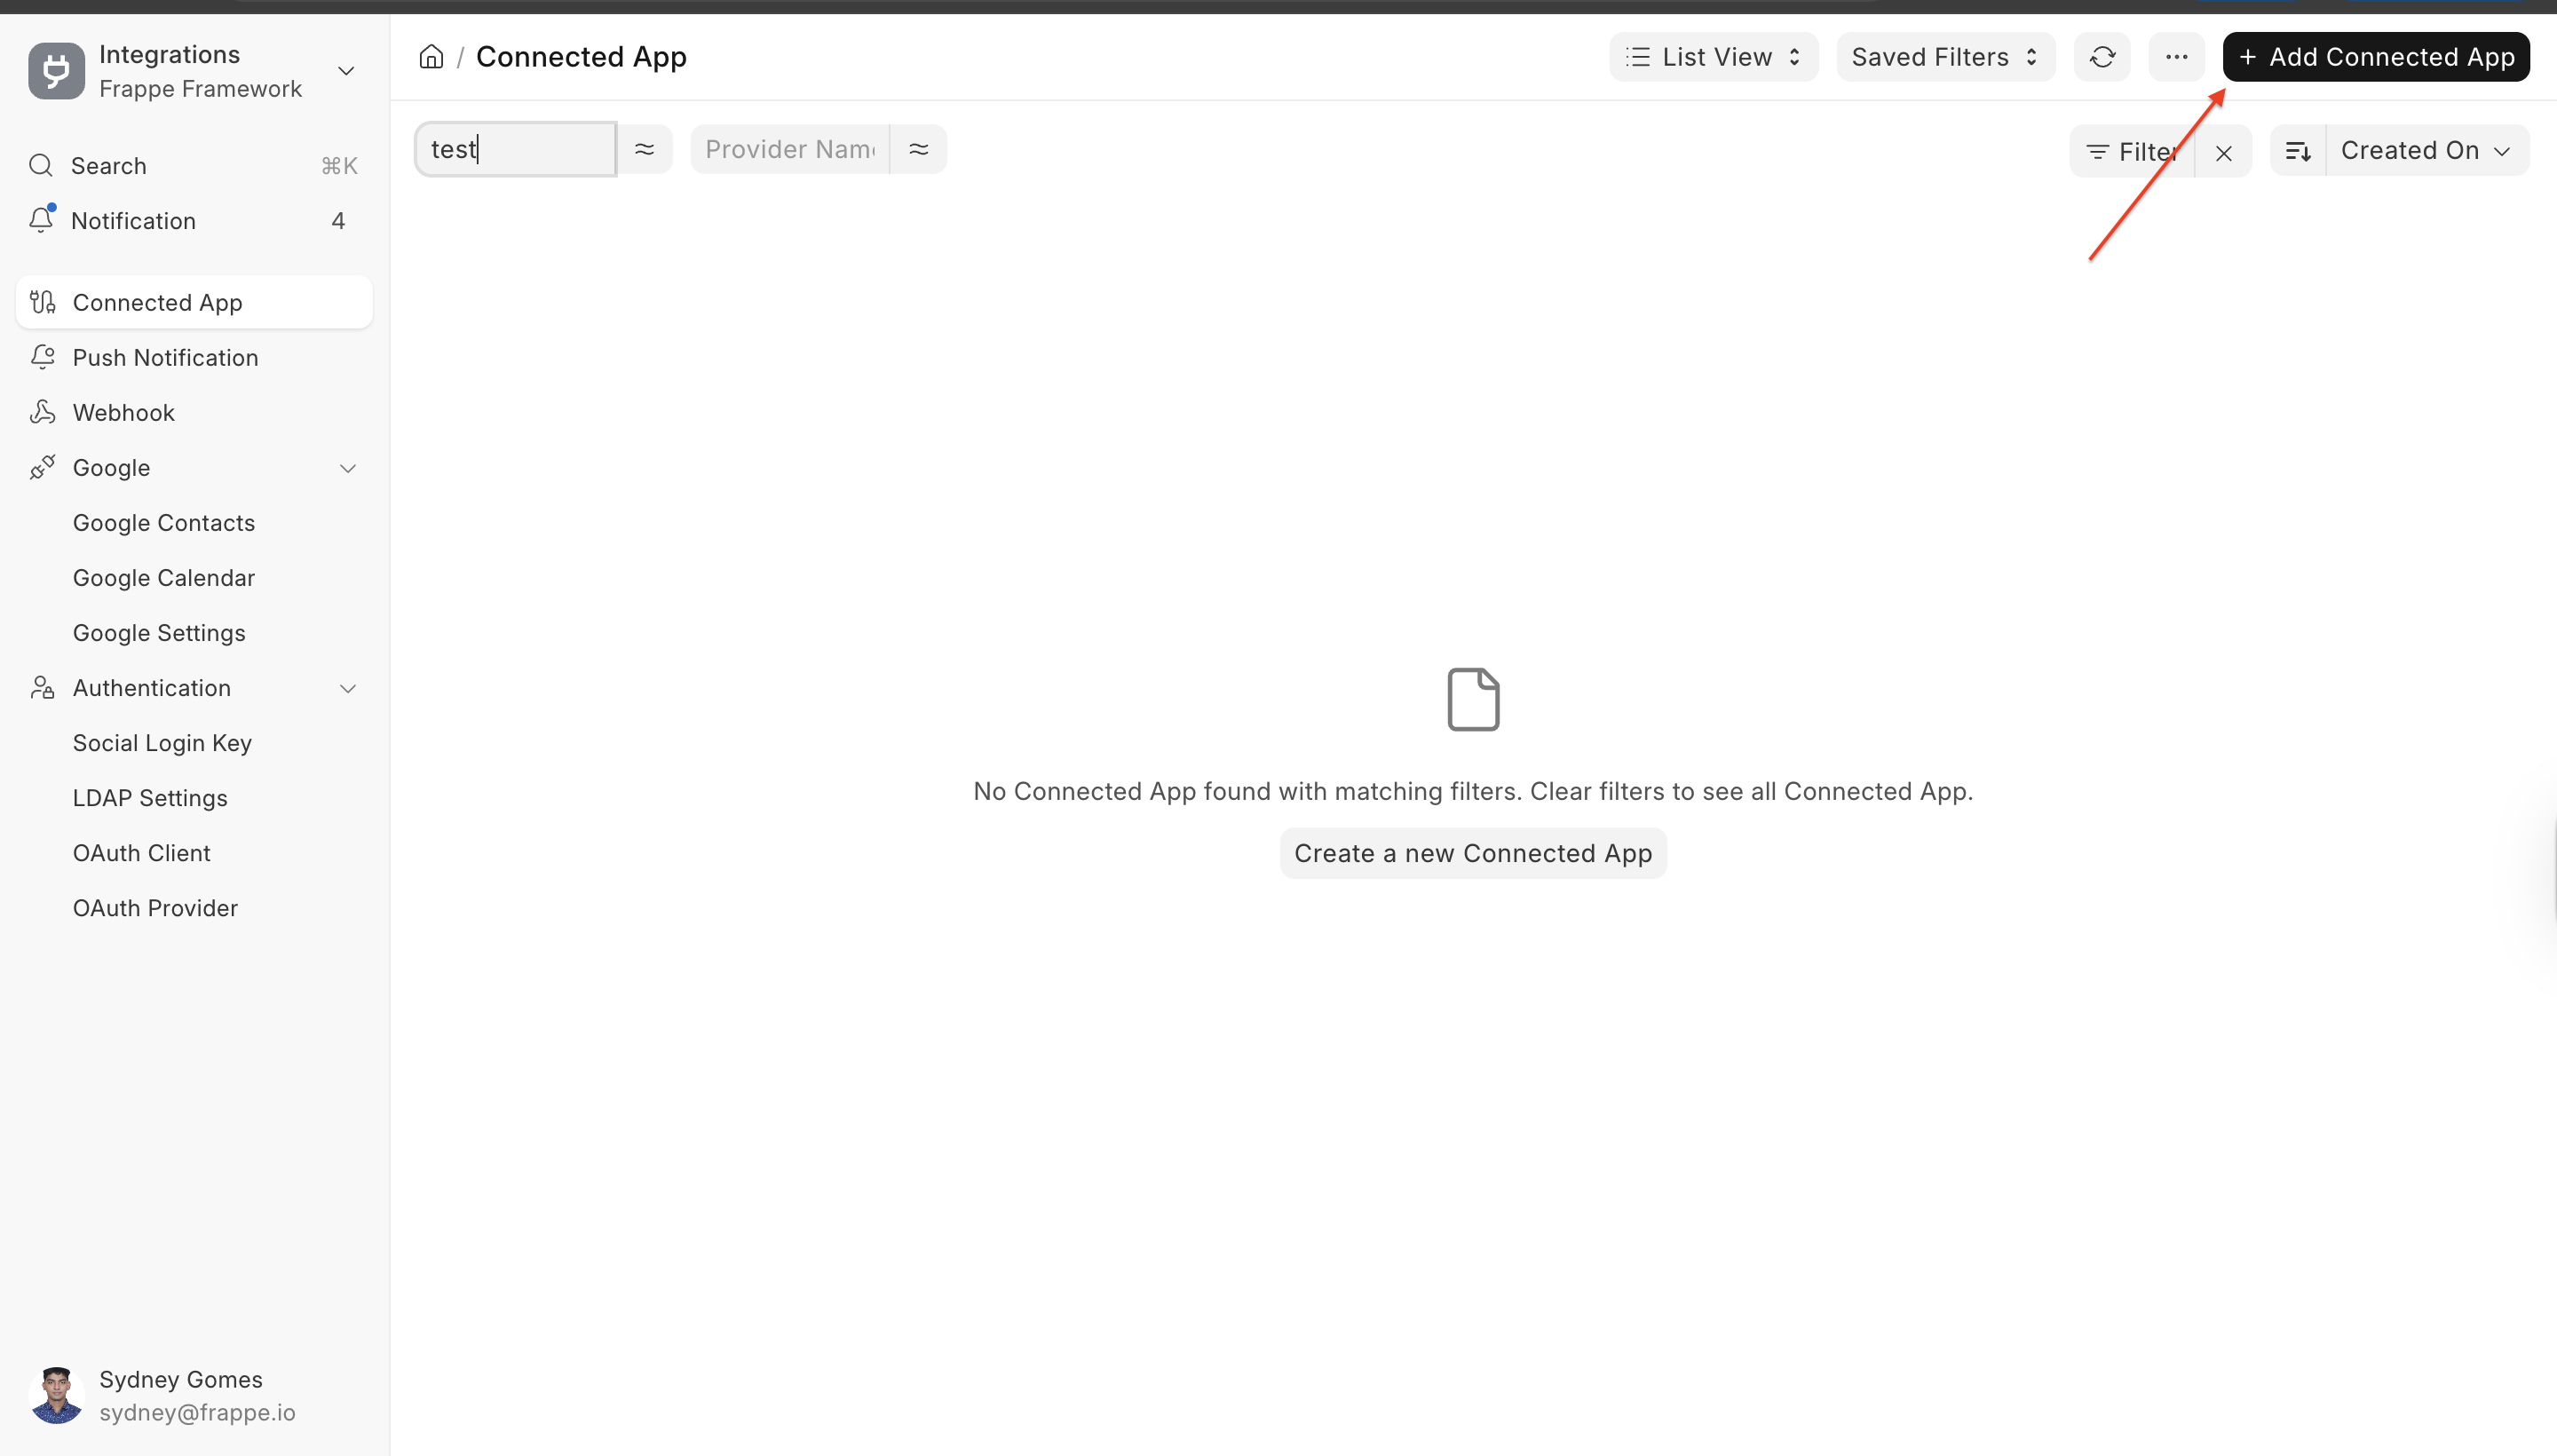
Part 2: Create a Connected App in Frappe
- In Frappe, go to Connected App and click New (
/app/connected-app/new).
- Paste your OpenID configuration URL into the OpenID Configuration field, then click Get OpenID Configuration. Frappe auto-fills the authorization, token, and revocation endpoints.

On clicking Get OpenID Configuration, the field values will be filled automatically. Add the Provider name as Outlook.

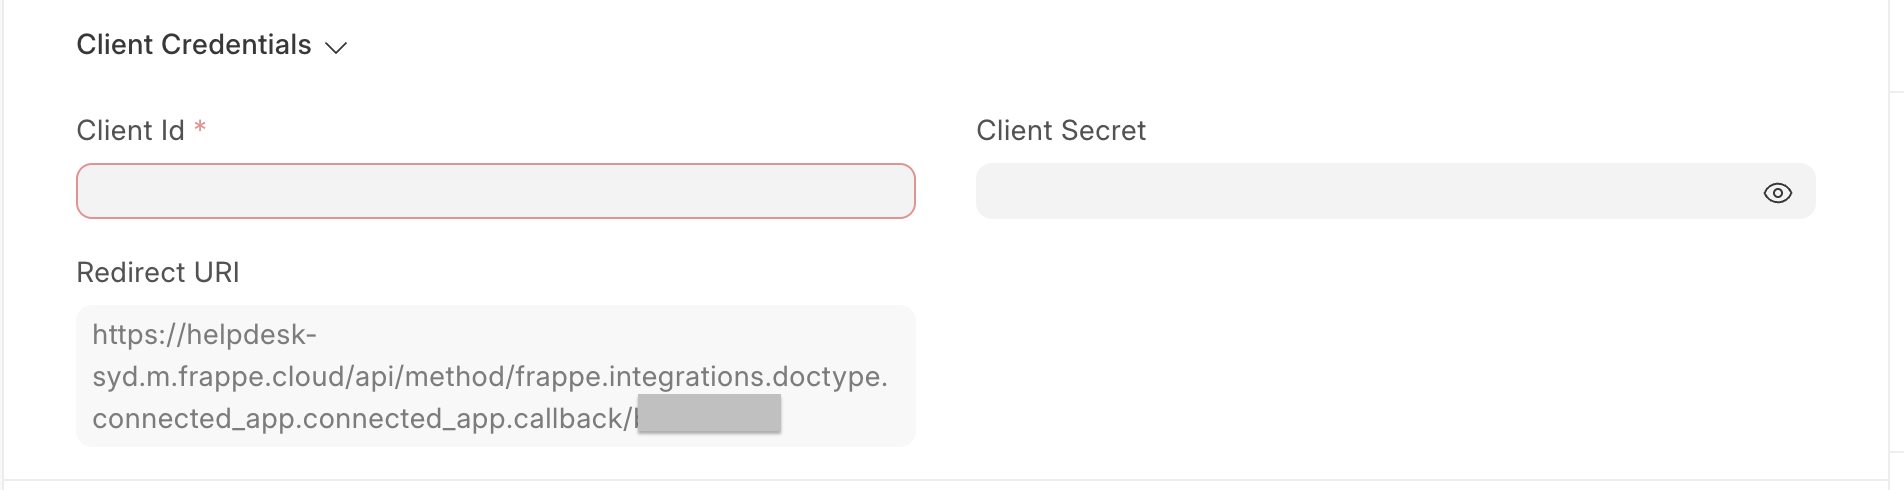
- Enter the Client ID and the client secret Value from Part 1 which you have stored from the overview section.
- Add the required Scopes:
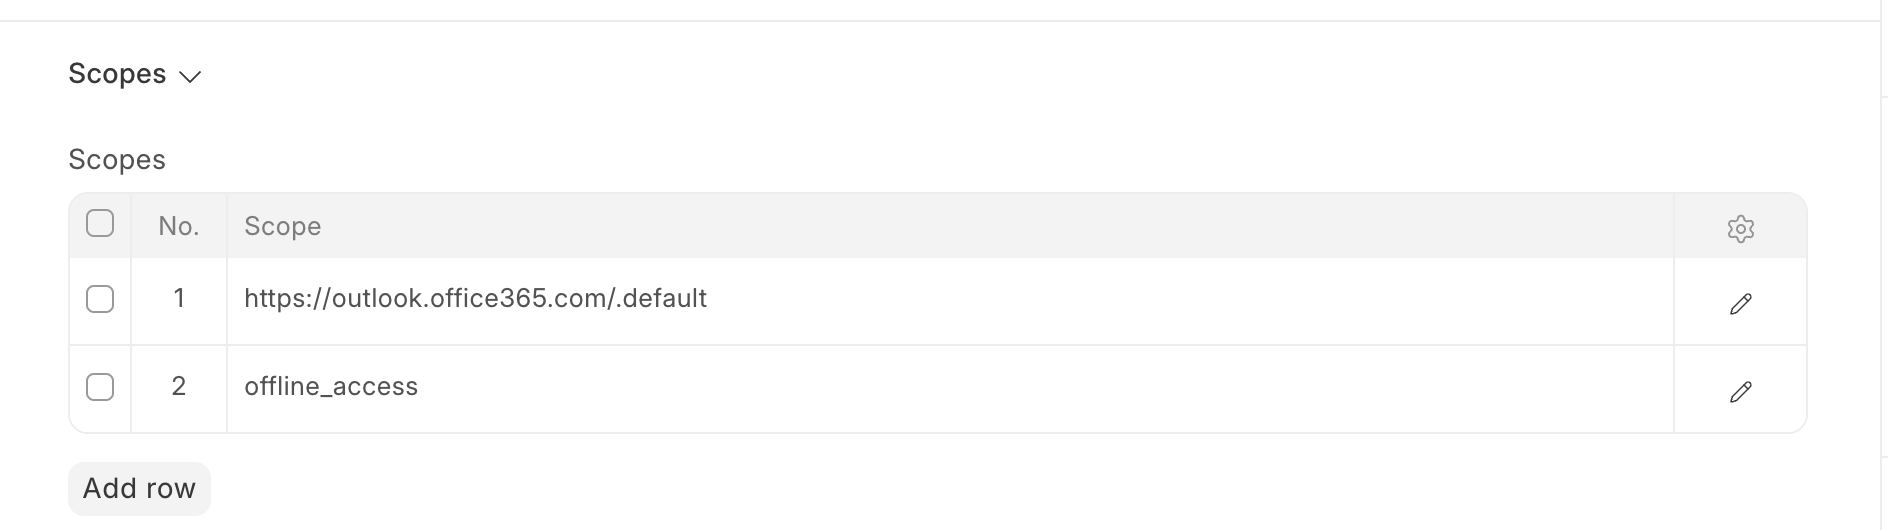
https://outlook.office365.com/.default
offline_access
- Save the Connected App.
Note: The
.defaultscope tells Microsoft to grant every permission you consented to in Step 2, so you don't have to list each one again here.
After saving, Frappe generates a Redirect URI on the Connected App. It looks like this:
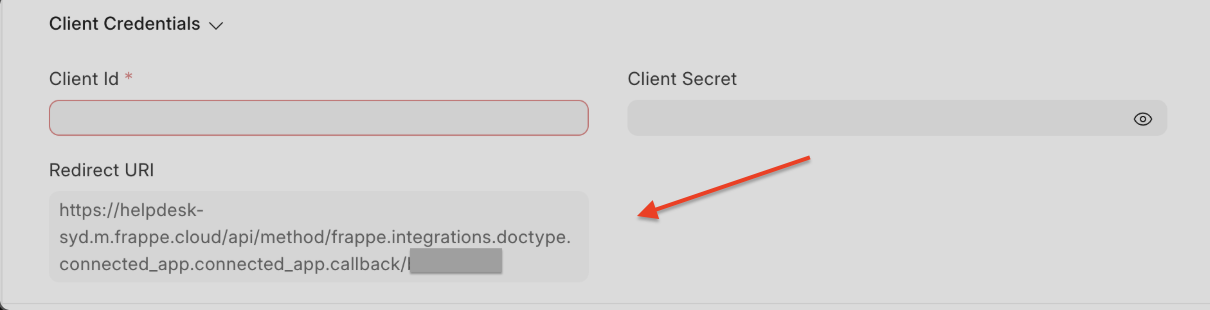
https://your_site.com/api/method/frappe.integrations.doctype.connected_app.connected_app.callback
Copy that value, go back to your Azure app, open Authentication → Add a platform → Web, paste it as a redirect URI, and Save.
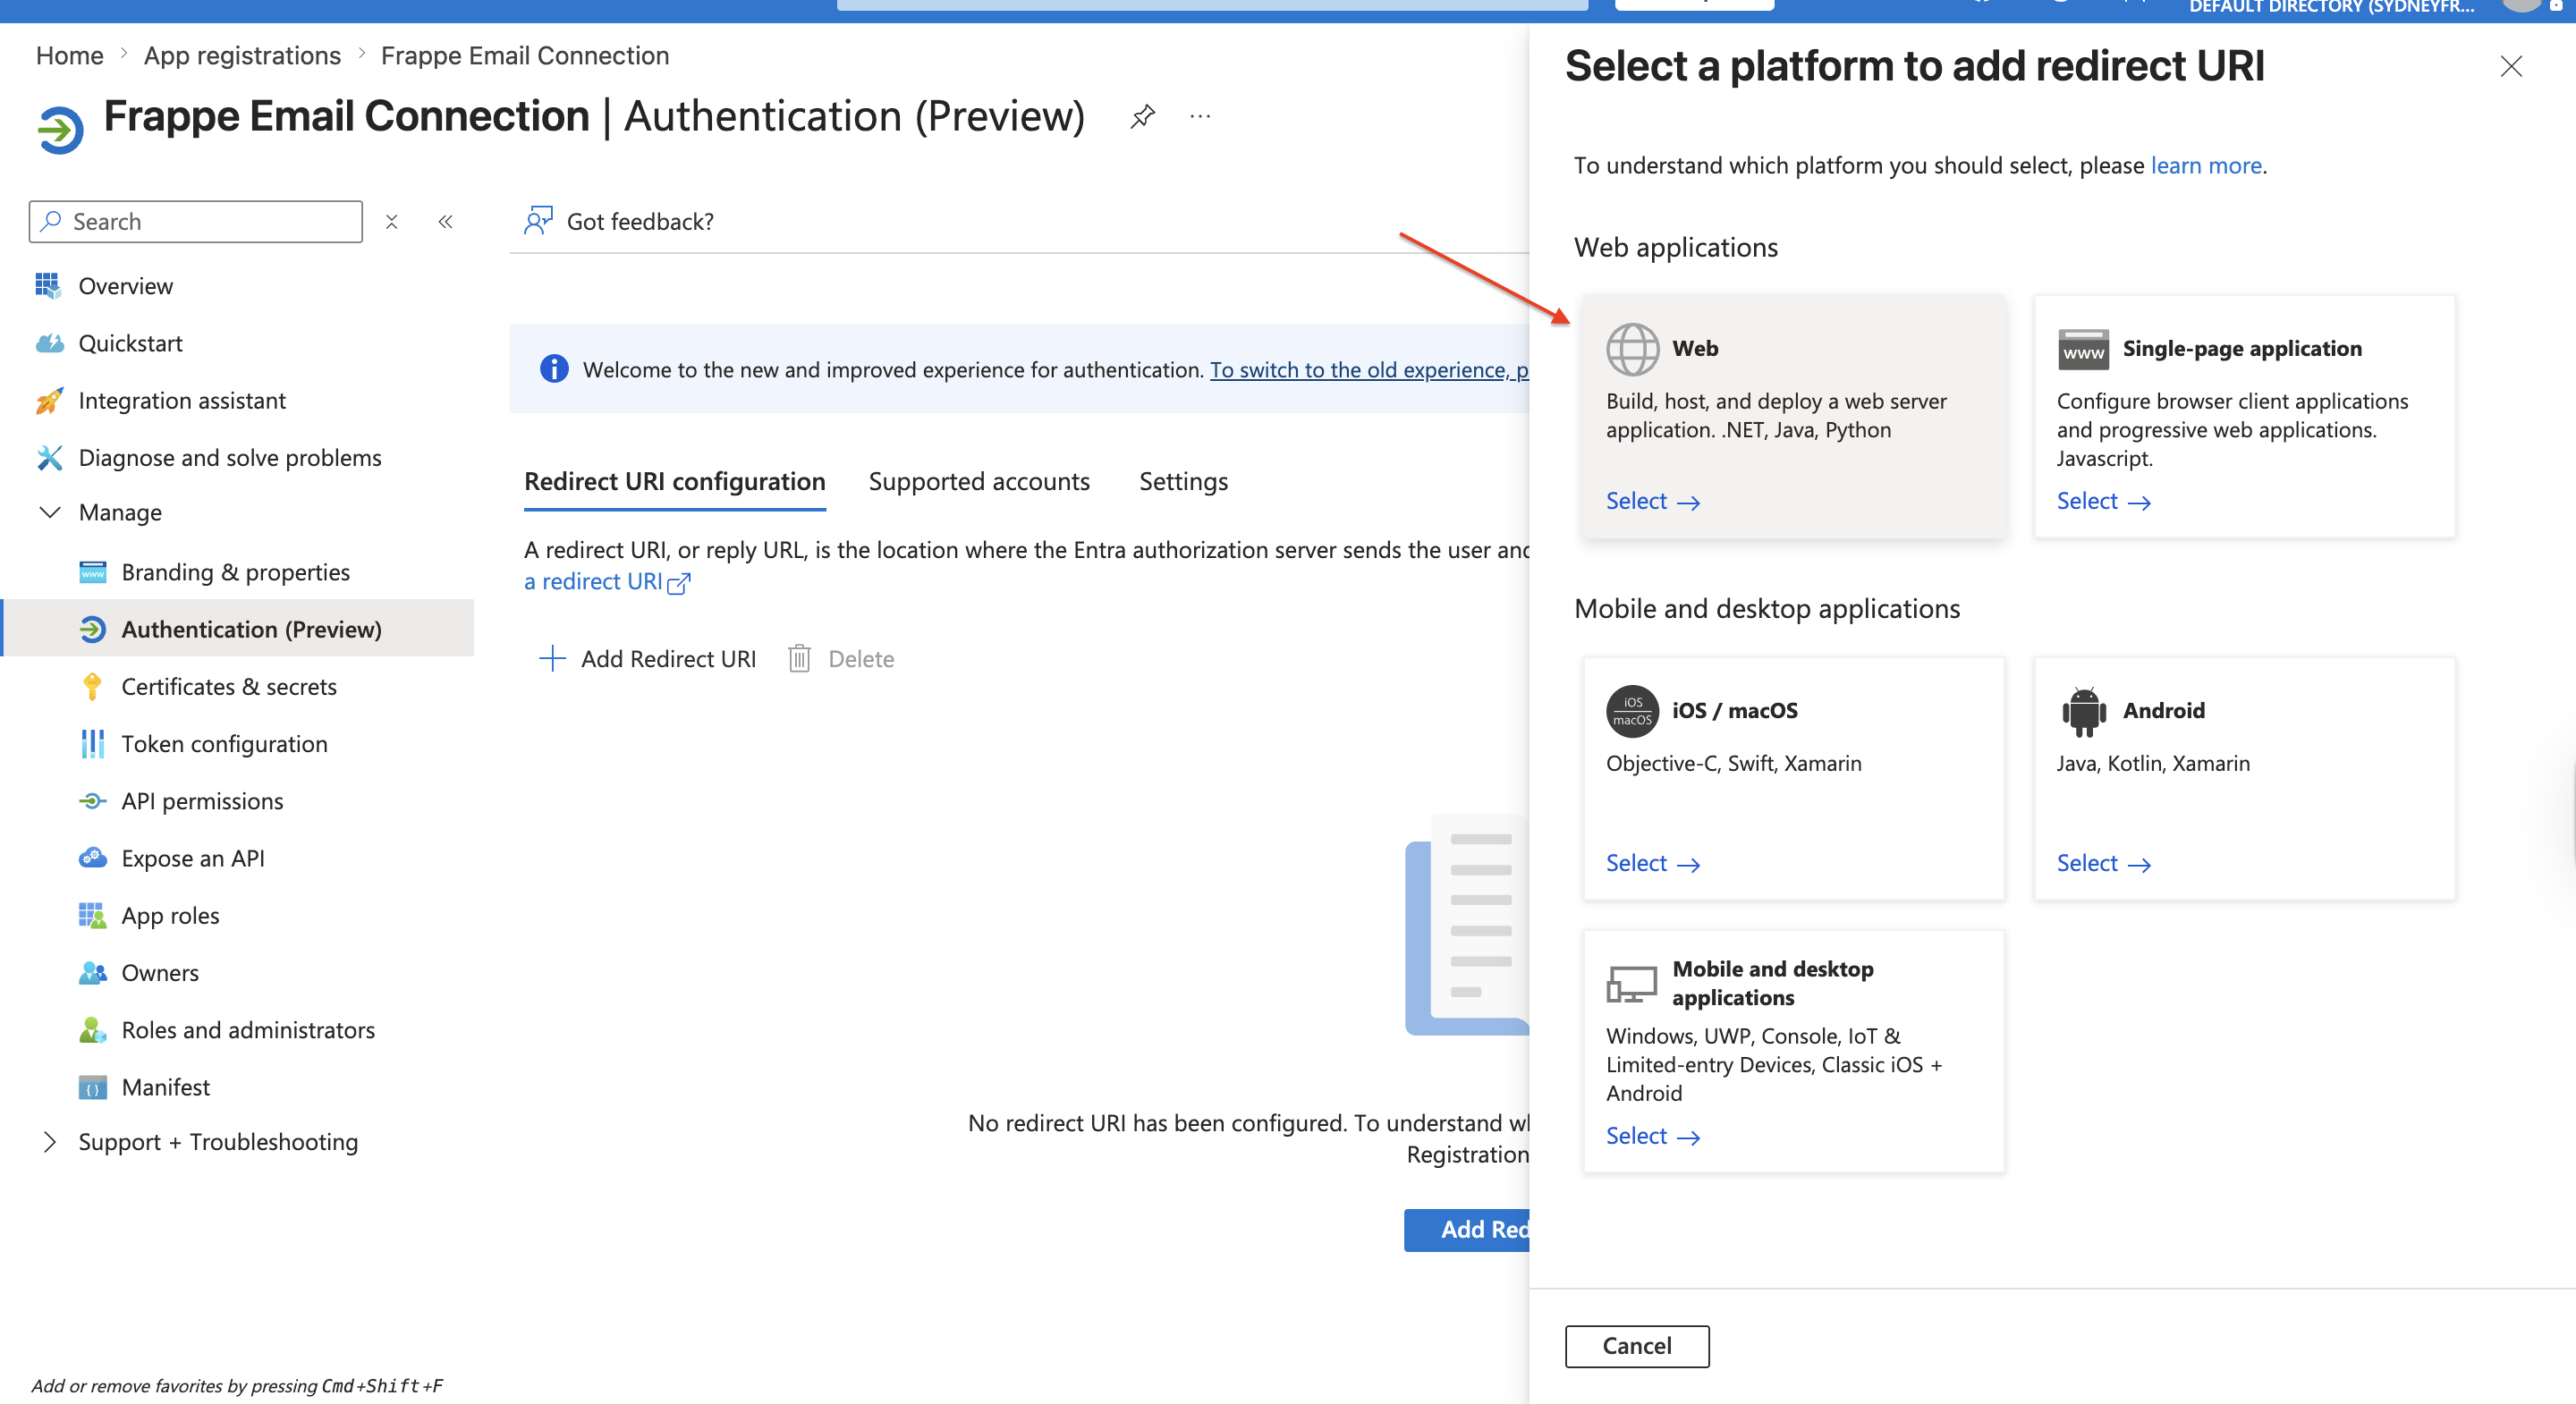
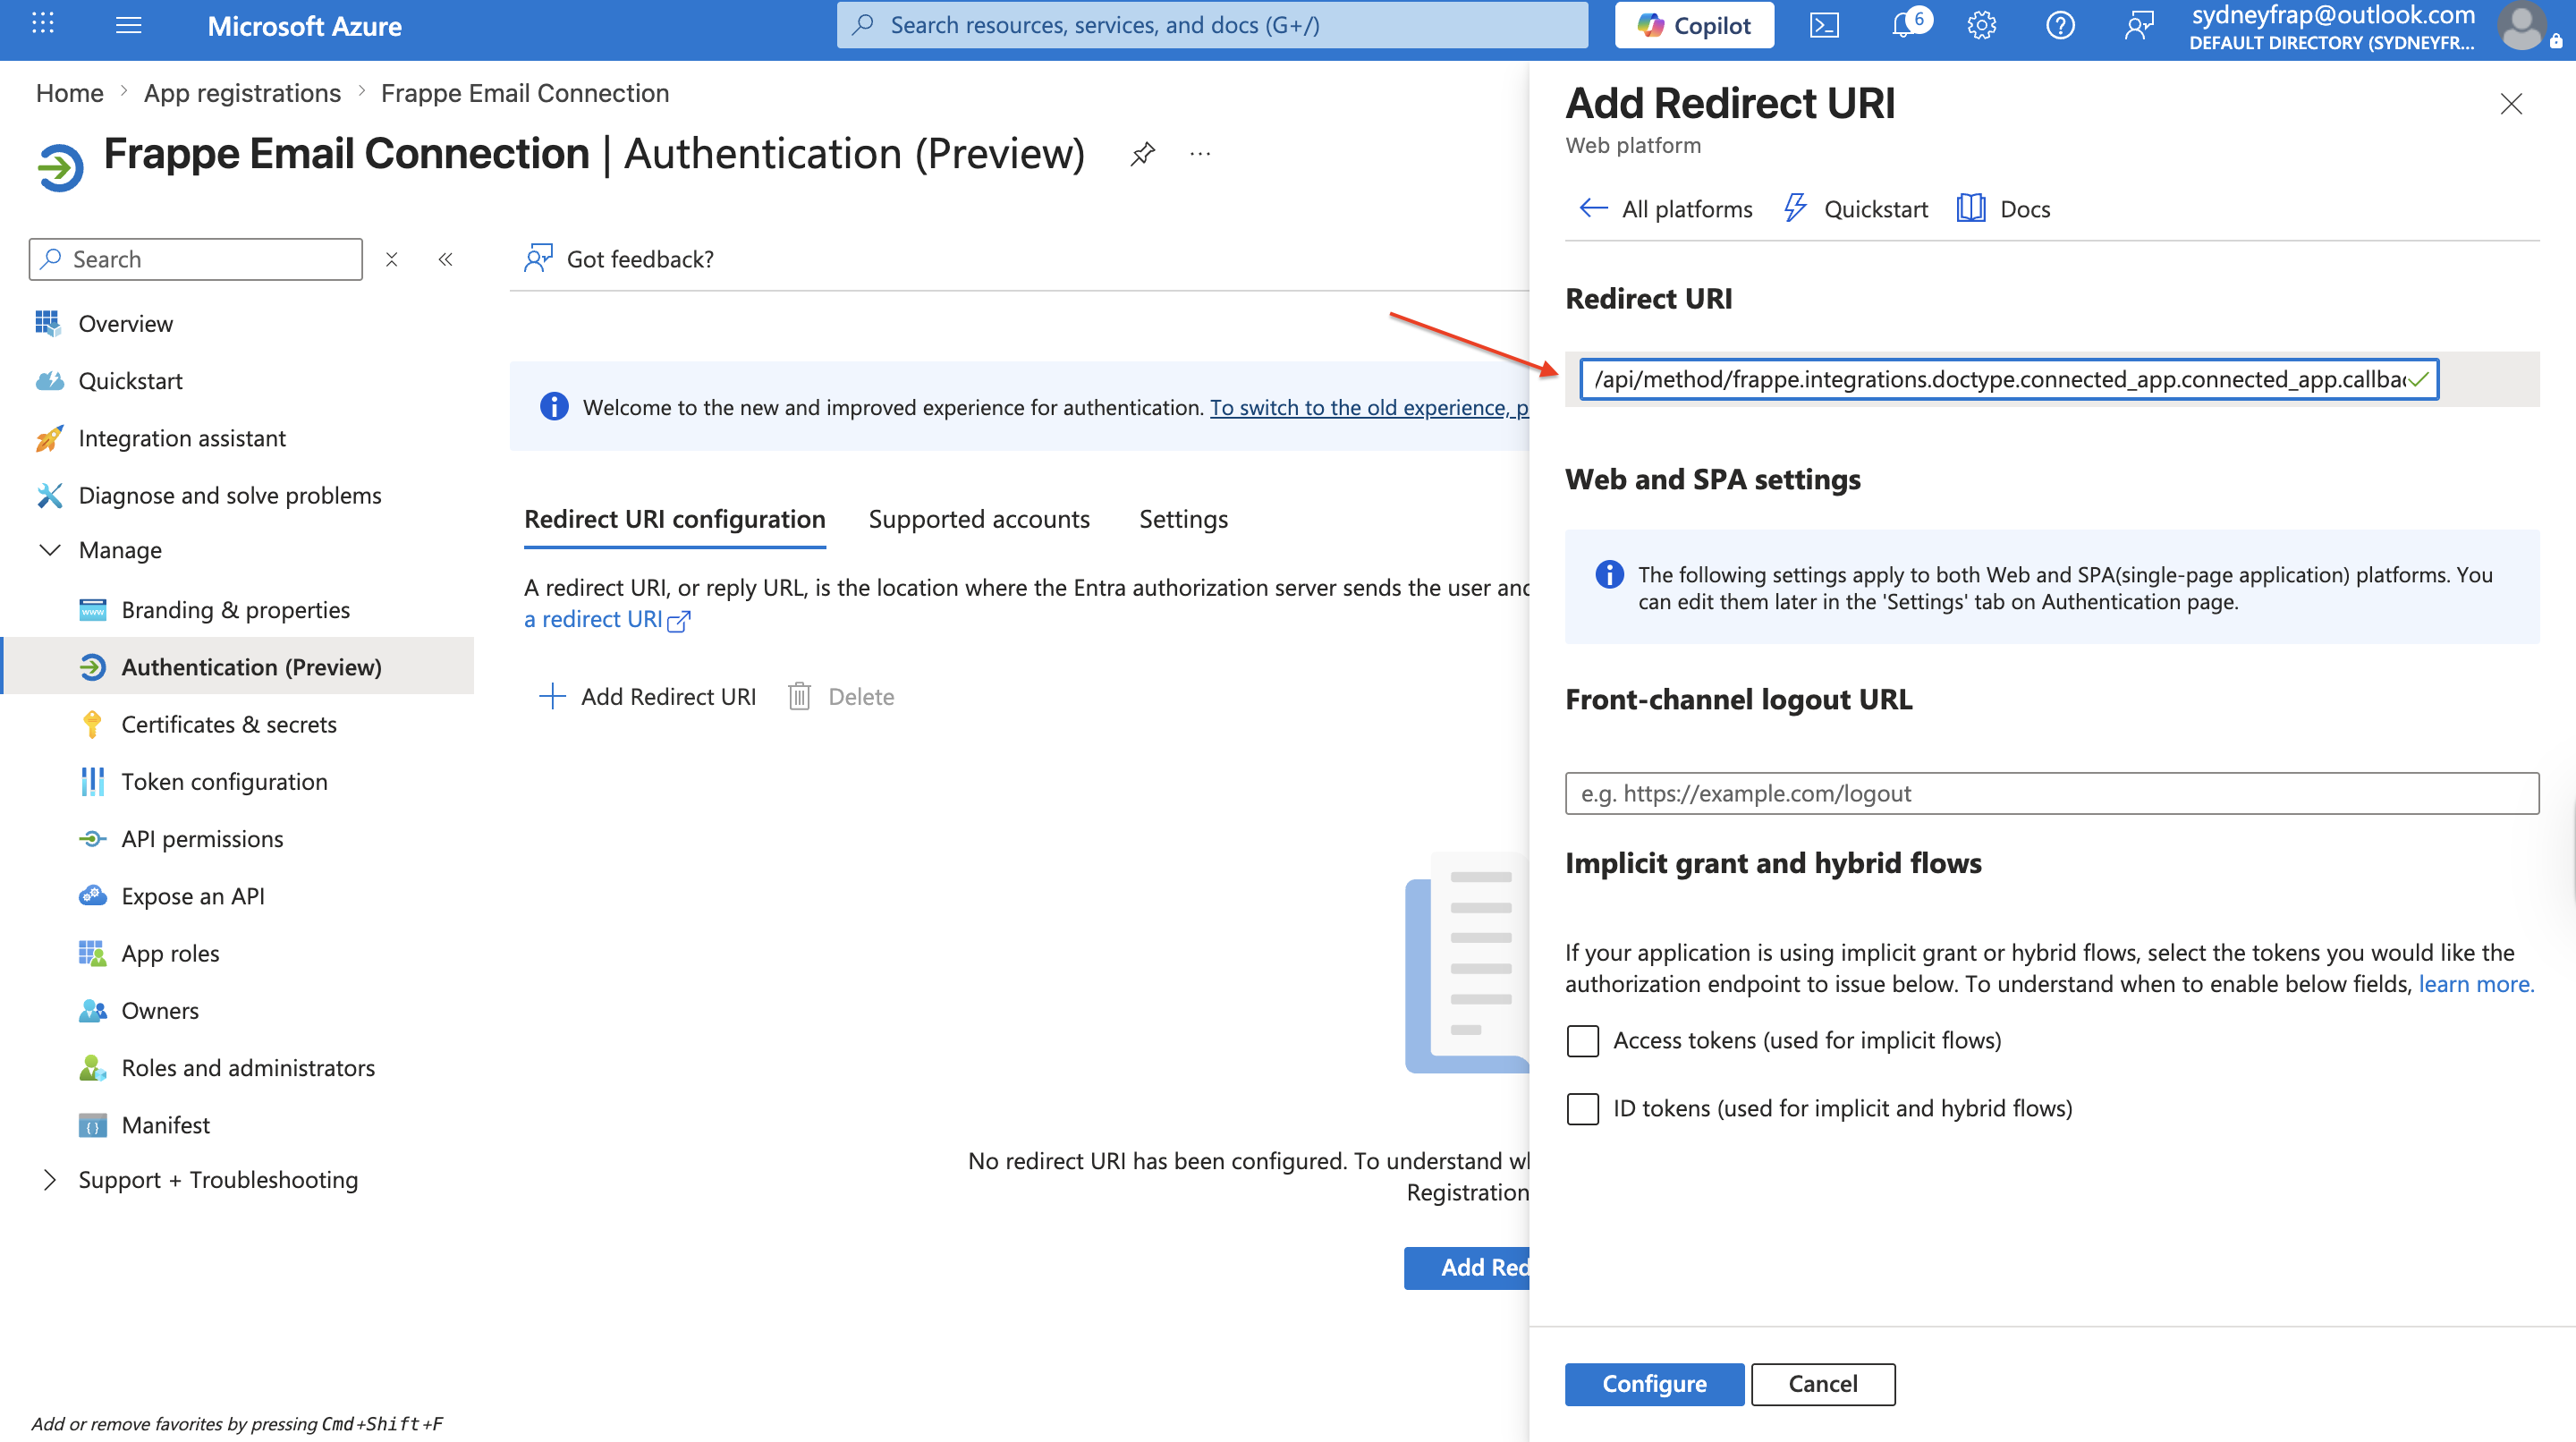
add your redirect URI and then configure
Lastly click on the Connect to Provider button to grant permissions for frappe to access resources from your outlook based on the scope defined.

Part 3: Connect your Email Account
Log in to Frappe as the actual mailbox user (not Administrator) before authorizing — the connection is granted for whoever is signed in.
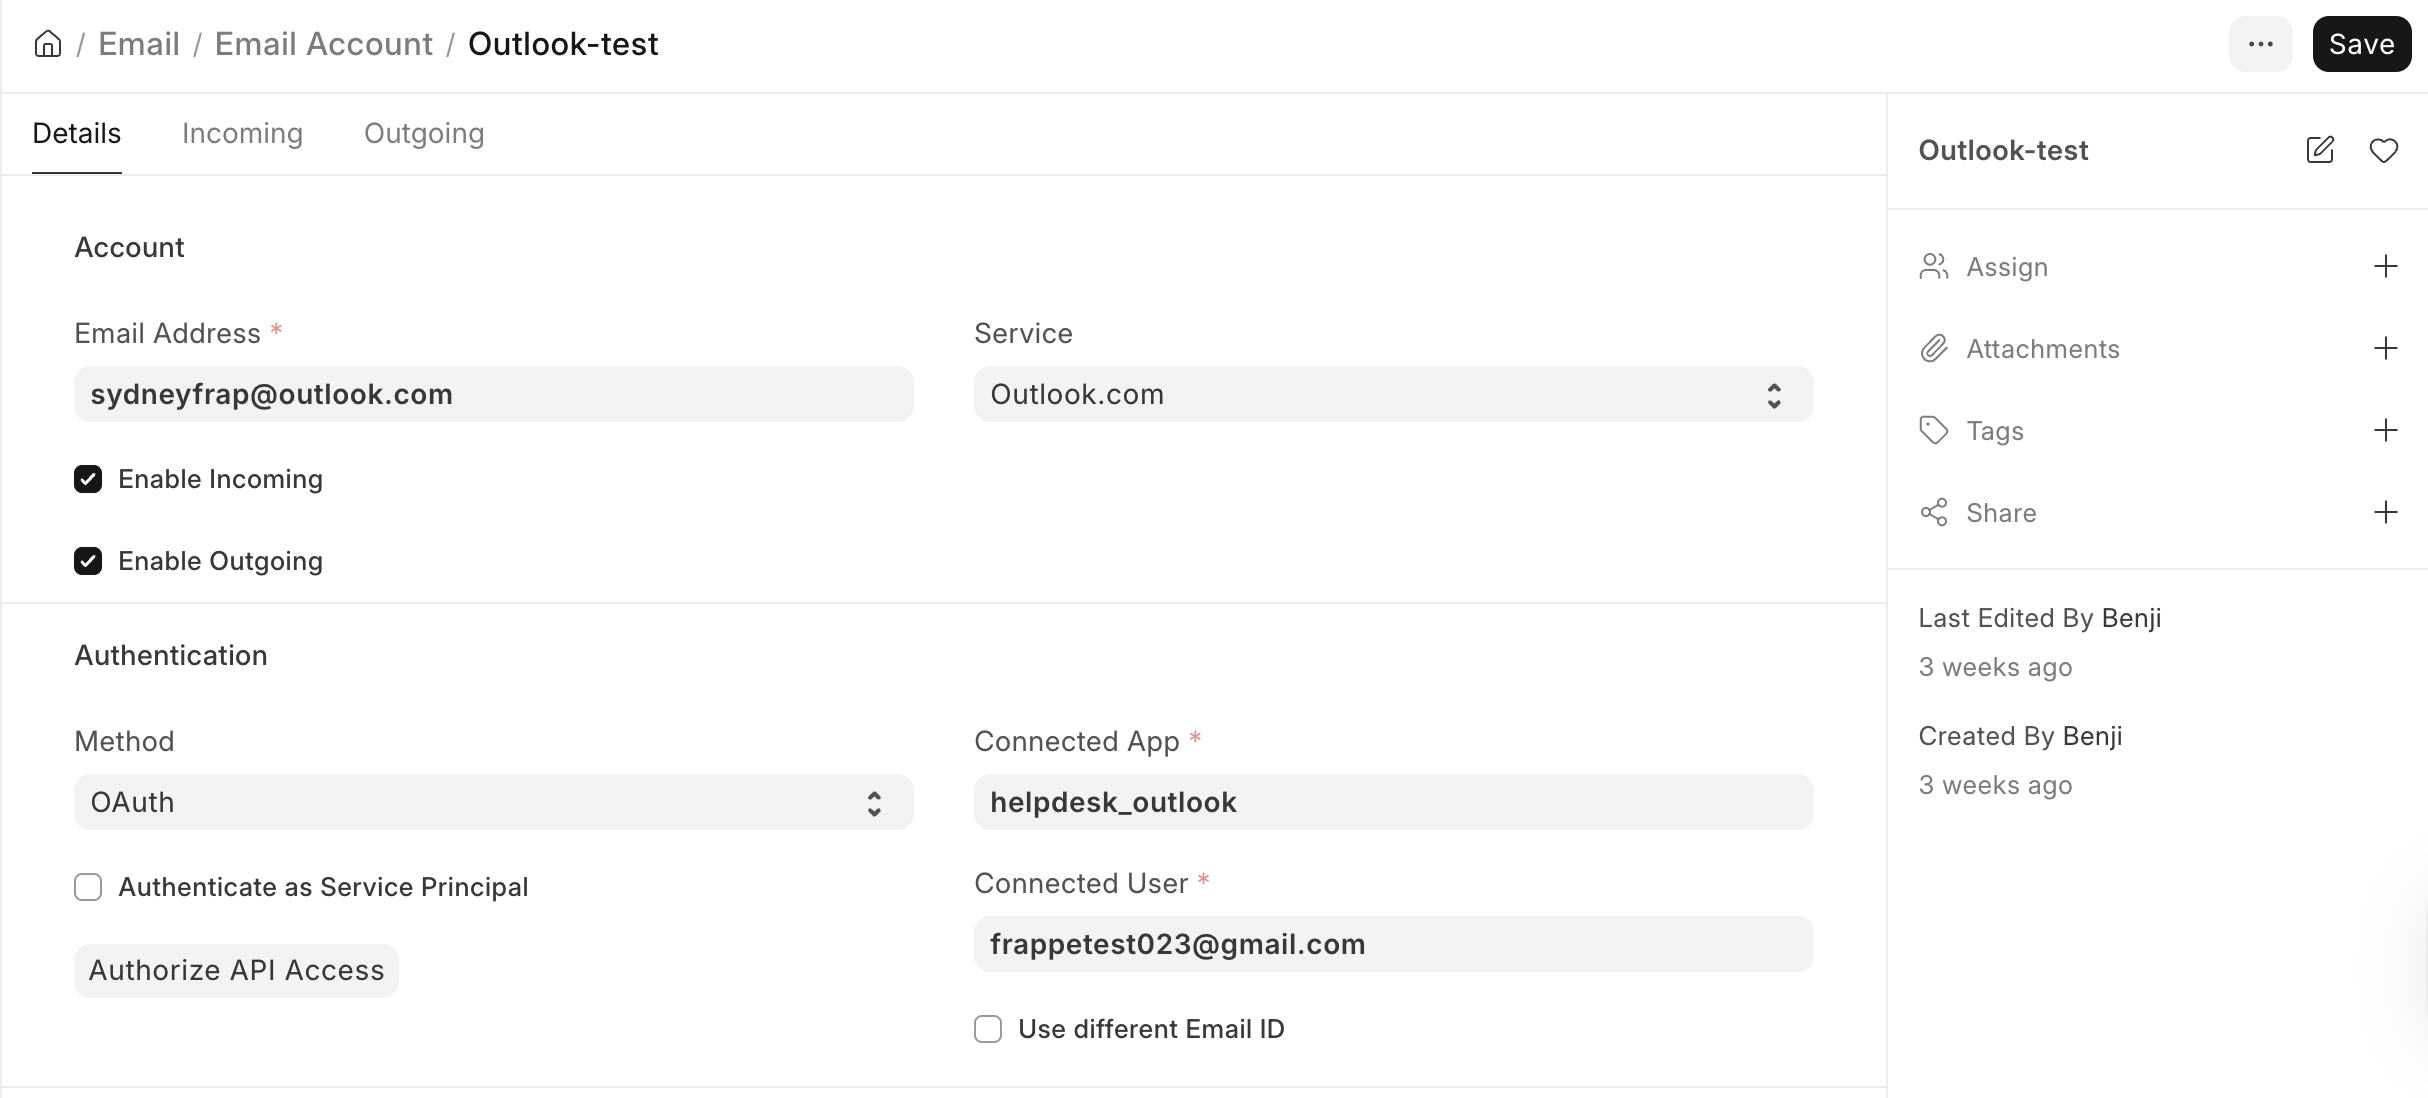
- Go to Email Account and create a new one (or open an existing account).
- Enter the Email Address for the mailbox.
- Set the incoming and outgoing servers:
  Incoming (IMAP):  outlook.office365.com   port 993, SSL
  Outgoing (SMTP):  smtp.office365.com      port 587, TLS
- Enable Use OAuth, then link the Connected App you created in Part 2.
- Save, then click Authorize API Access. Microsoft will ask you to sign in and approve the request. Once approved, you're returned to Frappe and the account is connected.
- Mark the account as Default Incoming and/or Default Outgoing as needed, Use OAuth option for authentication and then click Authorize API Access.
If everything is correctly done you will be taken to the outlook page where you select the account you want to gain access to. On approval you have then successfully connected your email account to Frappe.
Troubleshooting
- Outgoing mail fails: Even with OAuth, SMTP AUTH must be enabled for the mailbox in the Exchange admin center. Check it at aka.ms/smtp_auth_disabled.
- Authorization is blocked: If your organization uses Microsoft Security Defaults (which block legacy auth), confirm SMTP AUTH is enabled for the specific account.
- "Admin consent required" error: Return to API permissions in Azure and make sure Grant admin consent was clicked for every permission.
- Wrong account connected: Re-authorize while logged in to Frappe as the intended final user, not Administrator.
Sources:
- Tutorial: Connecting Frappe/ERPNext to Microsoft 365 Mail Services (OAuth)
- Frappe Helpdesk — Installation
- Frappe Helpdesk — Email Communication