
Email Communication
This feature allows you to seamlessly exchange emails with your customers directly from the Lead/Deal page within the system. All email interactions are conveniently stored and accessible, promoting efficient communication and record-keeping.
Sending Emails
- Locate the Reply Button: On the Lead or Deal page, find the "Reply" button, typically situated at the bottom of the page.
- Compose Your Email: A new email composition window will appear. Here, you can:
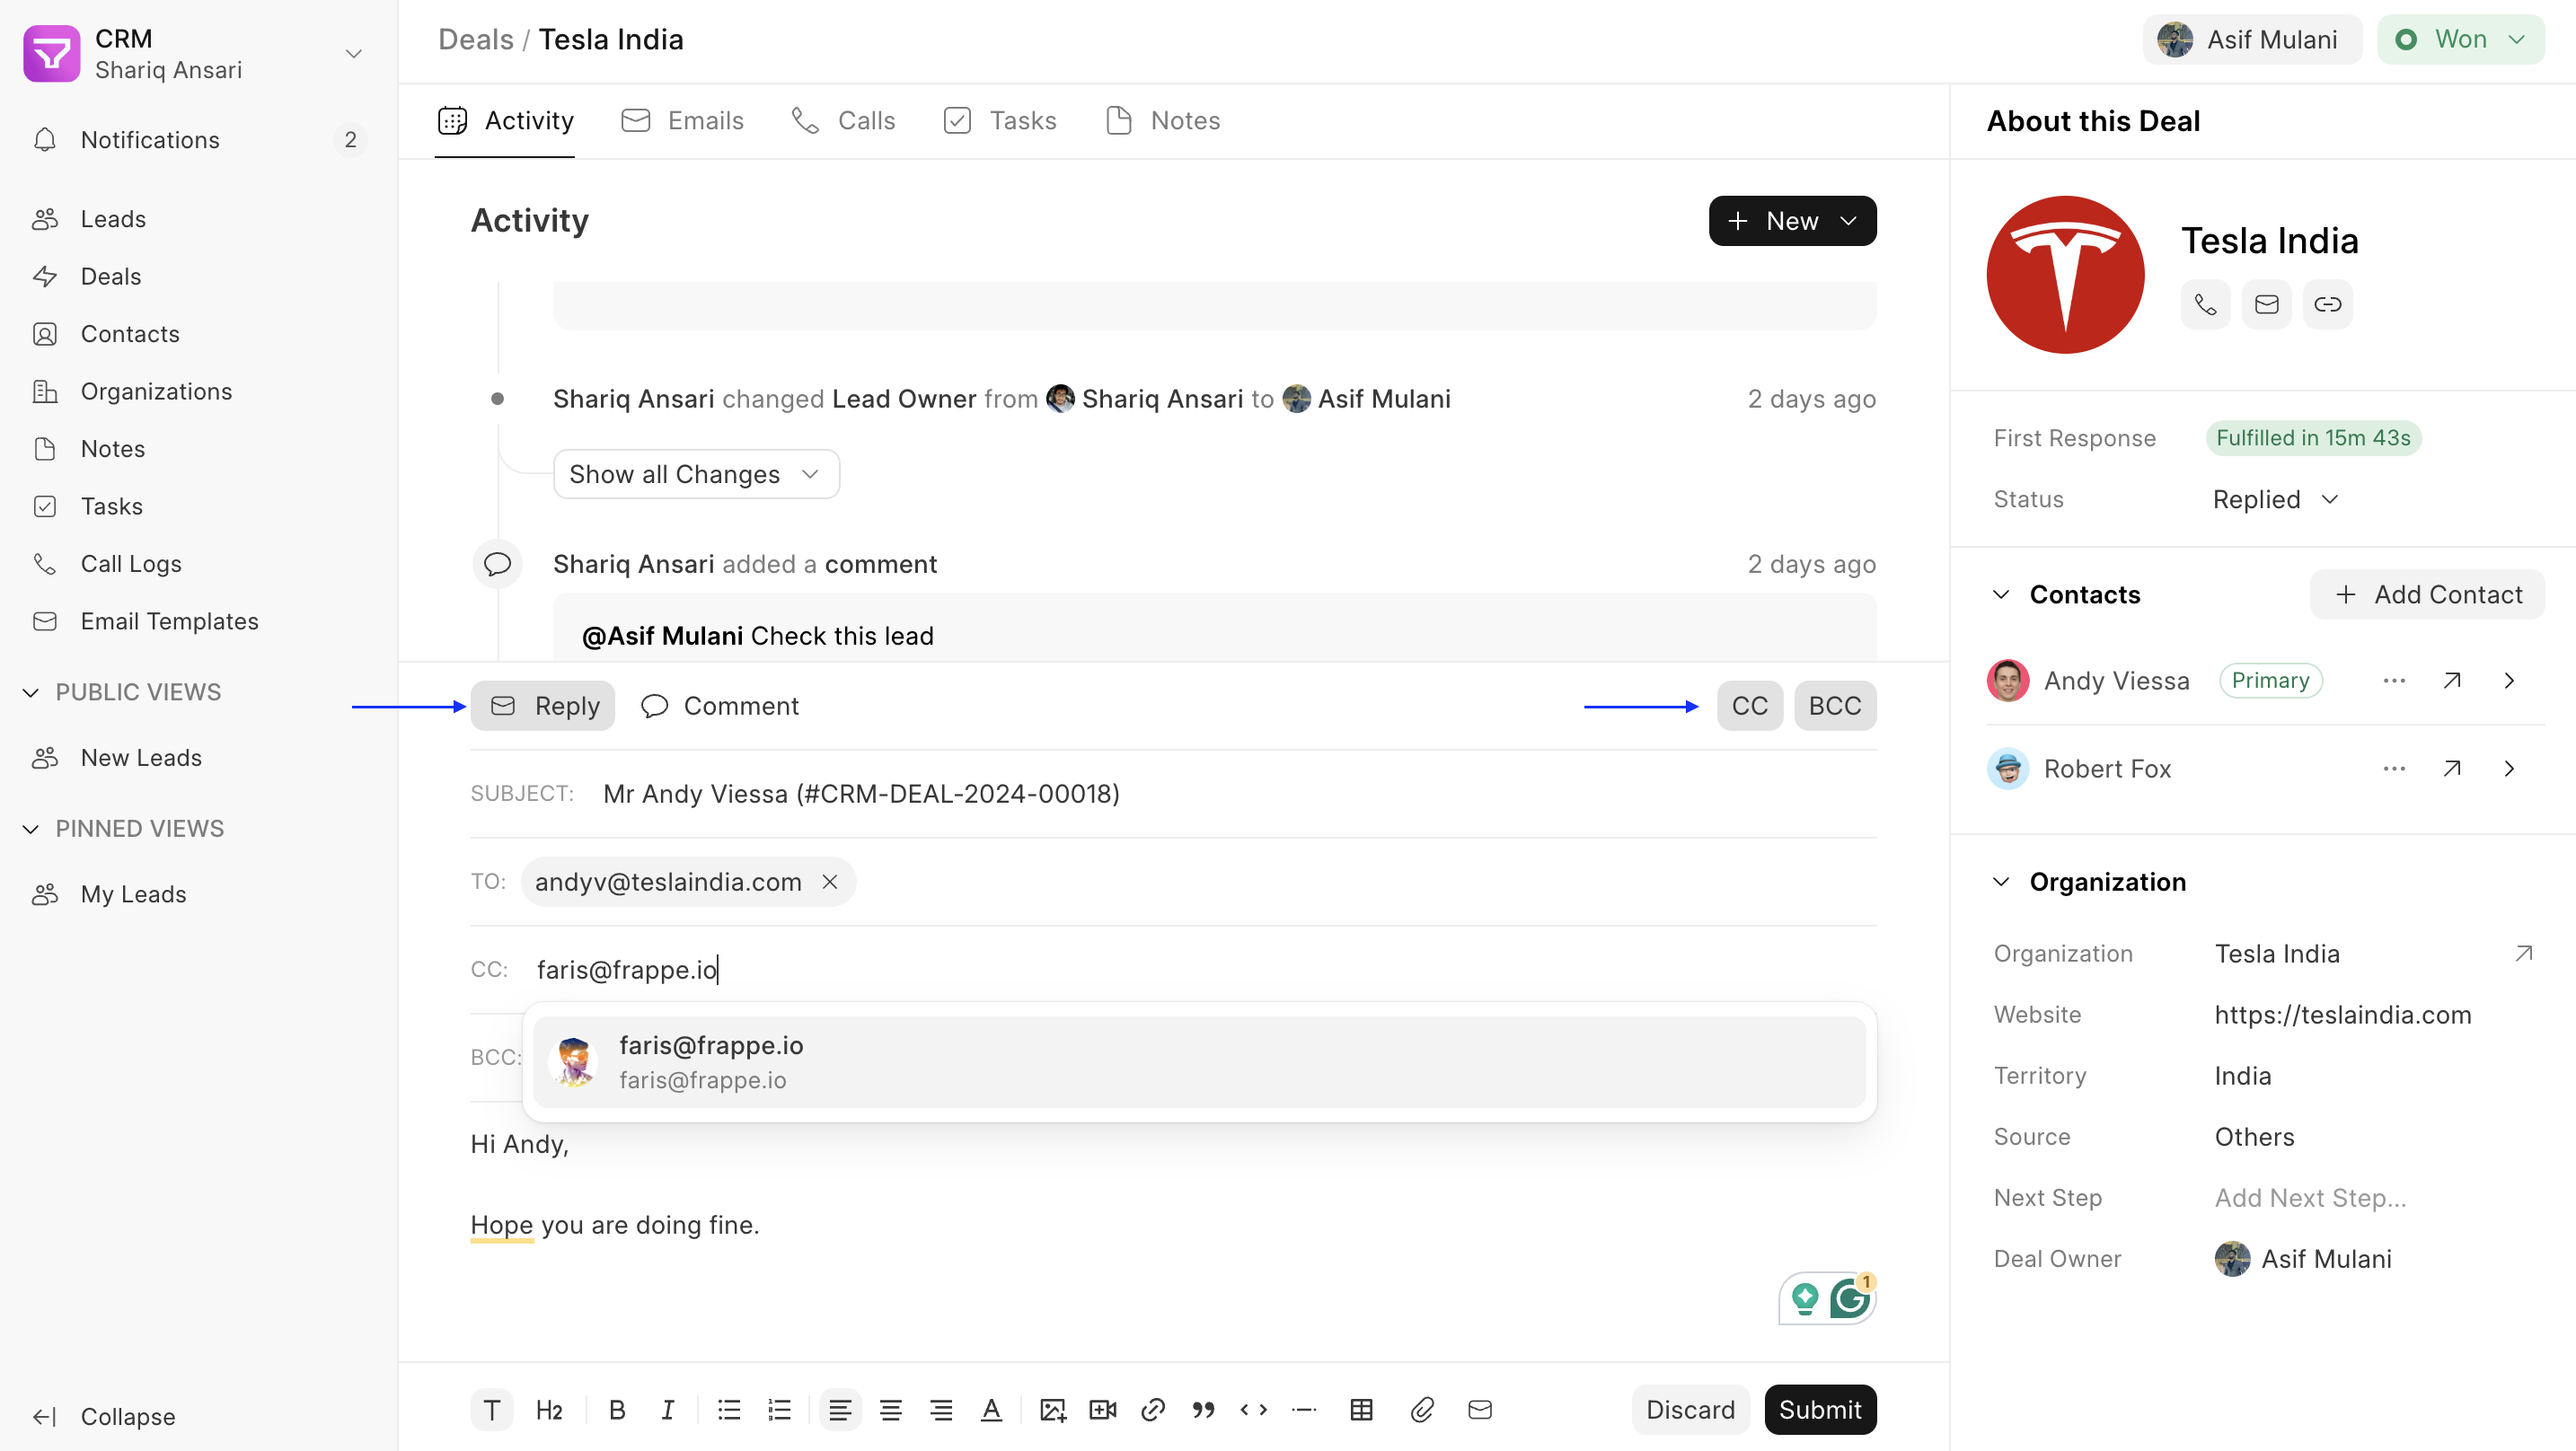
- Subject: Craft a clear and concise subject line that summarizes the email's purpose.
- To: Enter the recipient's email address in the "To" field.
- Cc & Bcc (Optional): Utilize the "Cc" (Carbon Copy) field to include additional recipients who should be informed but not required to respond. The "Bcc" (Blind Carbon Copy) field allows you to send a copy to recipients without revealing their addresses to other recipients.
- Message Body: Compose the main content of your email. You can leverage formatting options for better readability and include attachments if necessary.
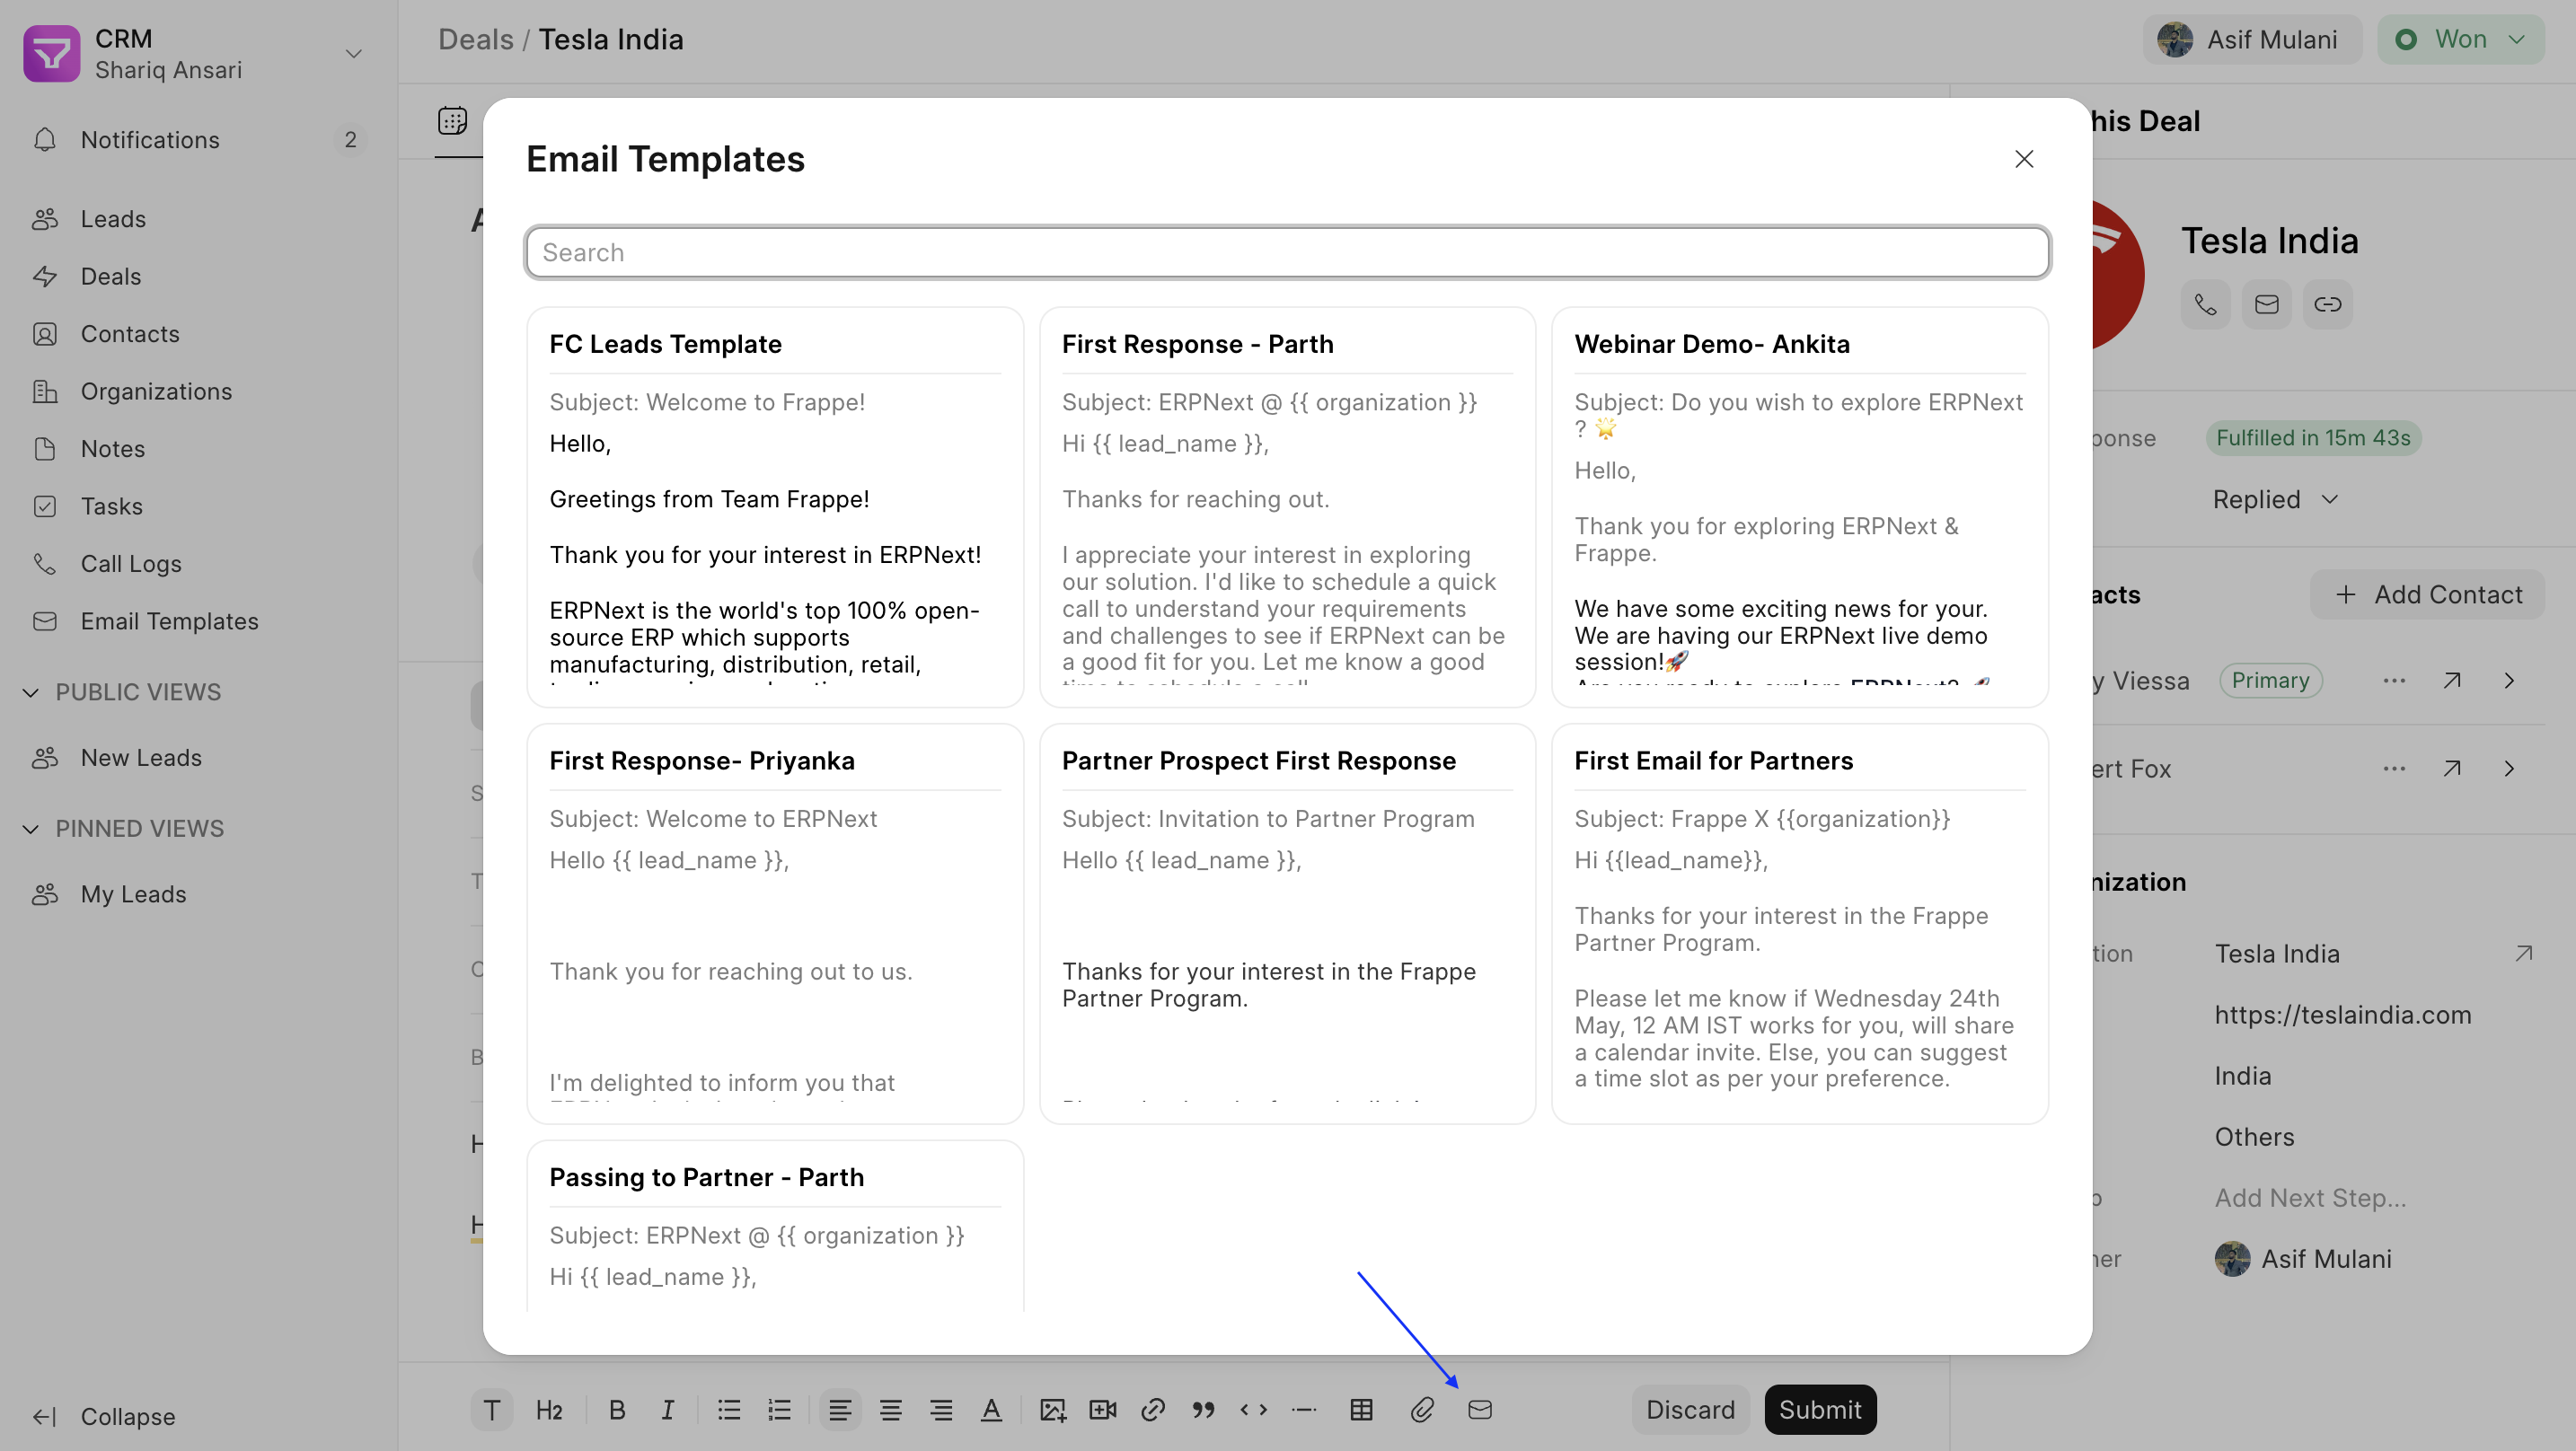
- Leverage Email Templates (Optional): Streamline communication by incorporating pre-defined email templates. Click on the "Email Template" icon and select the desired template from the available list. This pre-populates the message body, saving you time and ensuring consistency.
- Hit Submit: Once you've crafted your email, click the "Submit" button to send it to the recipient(s).
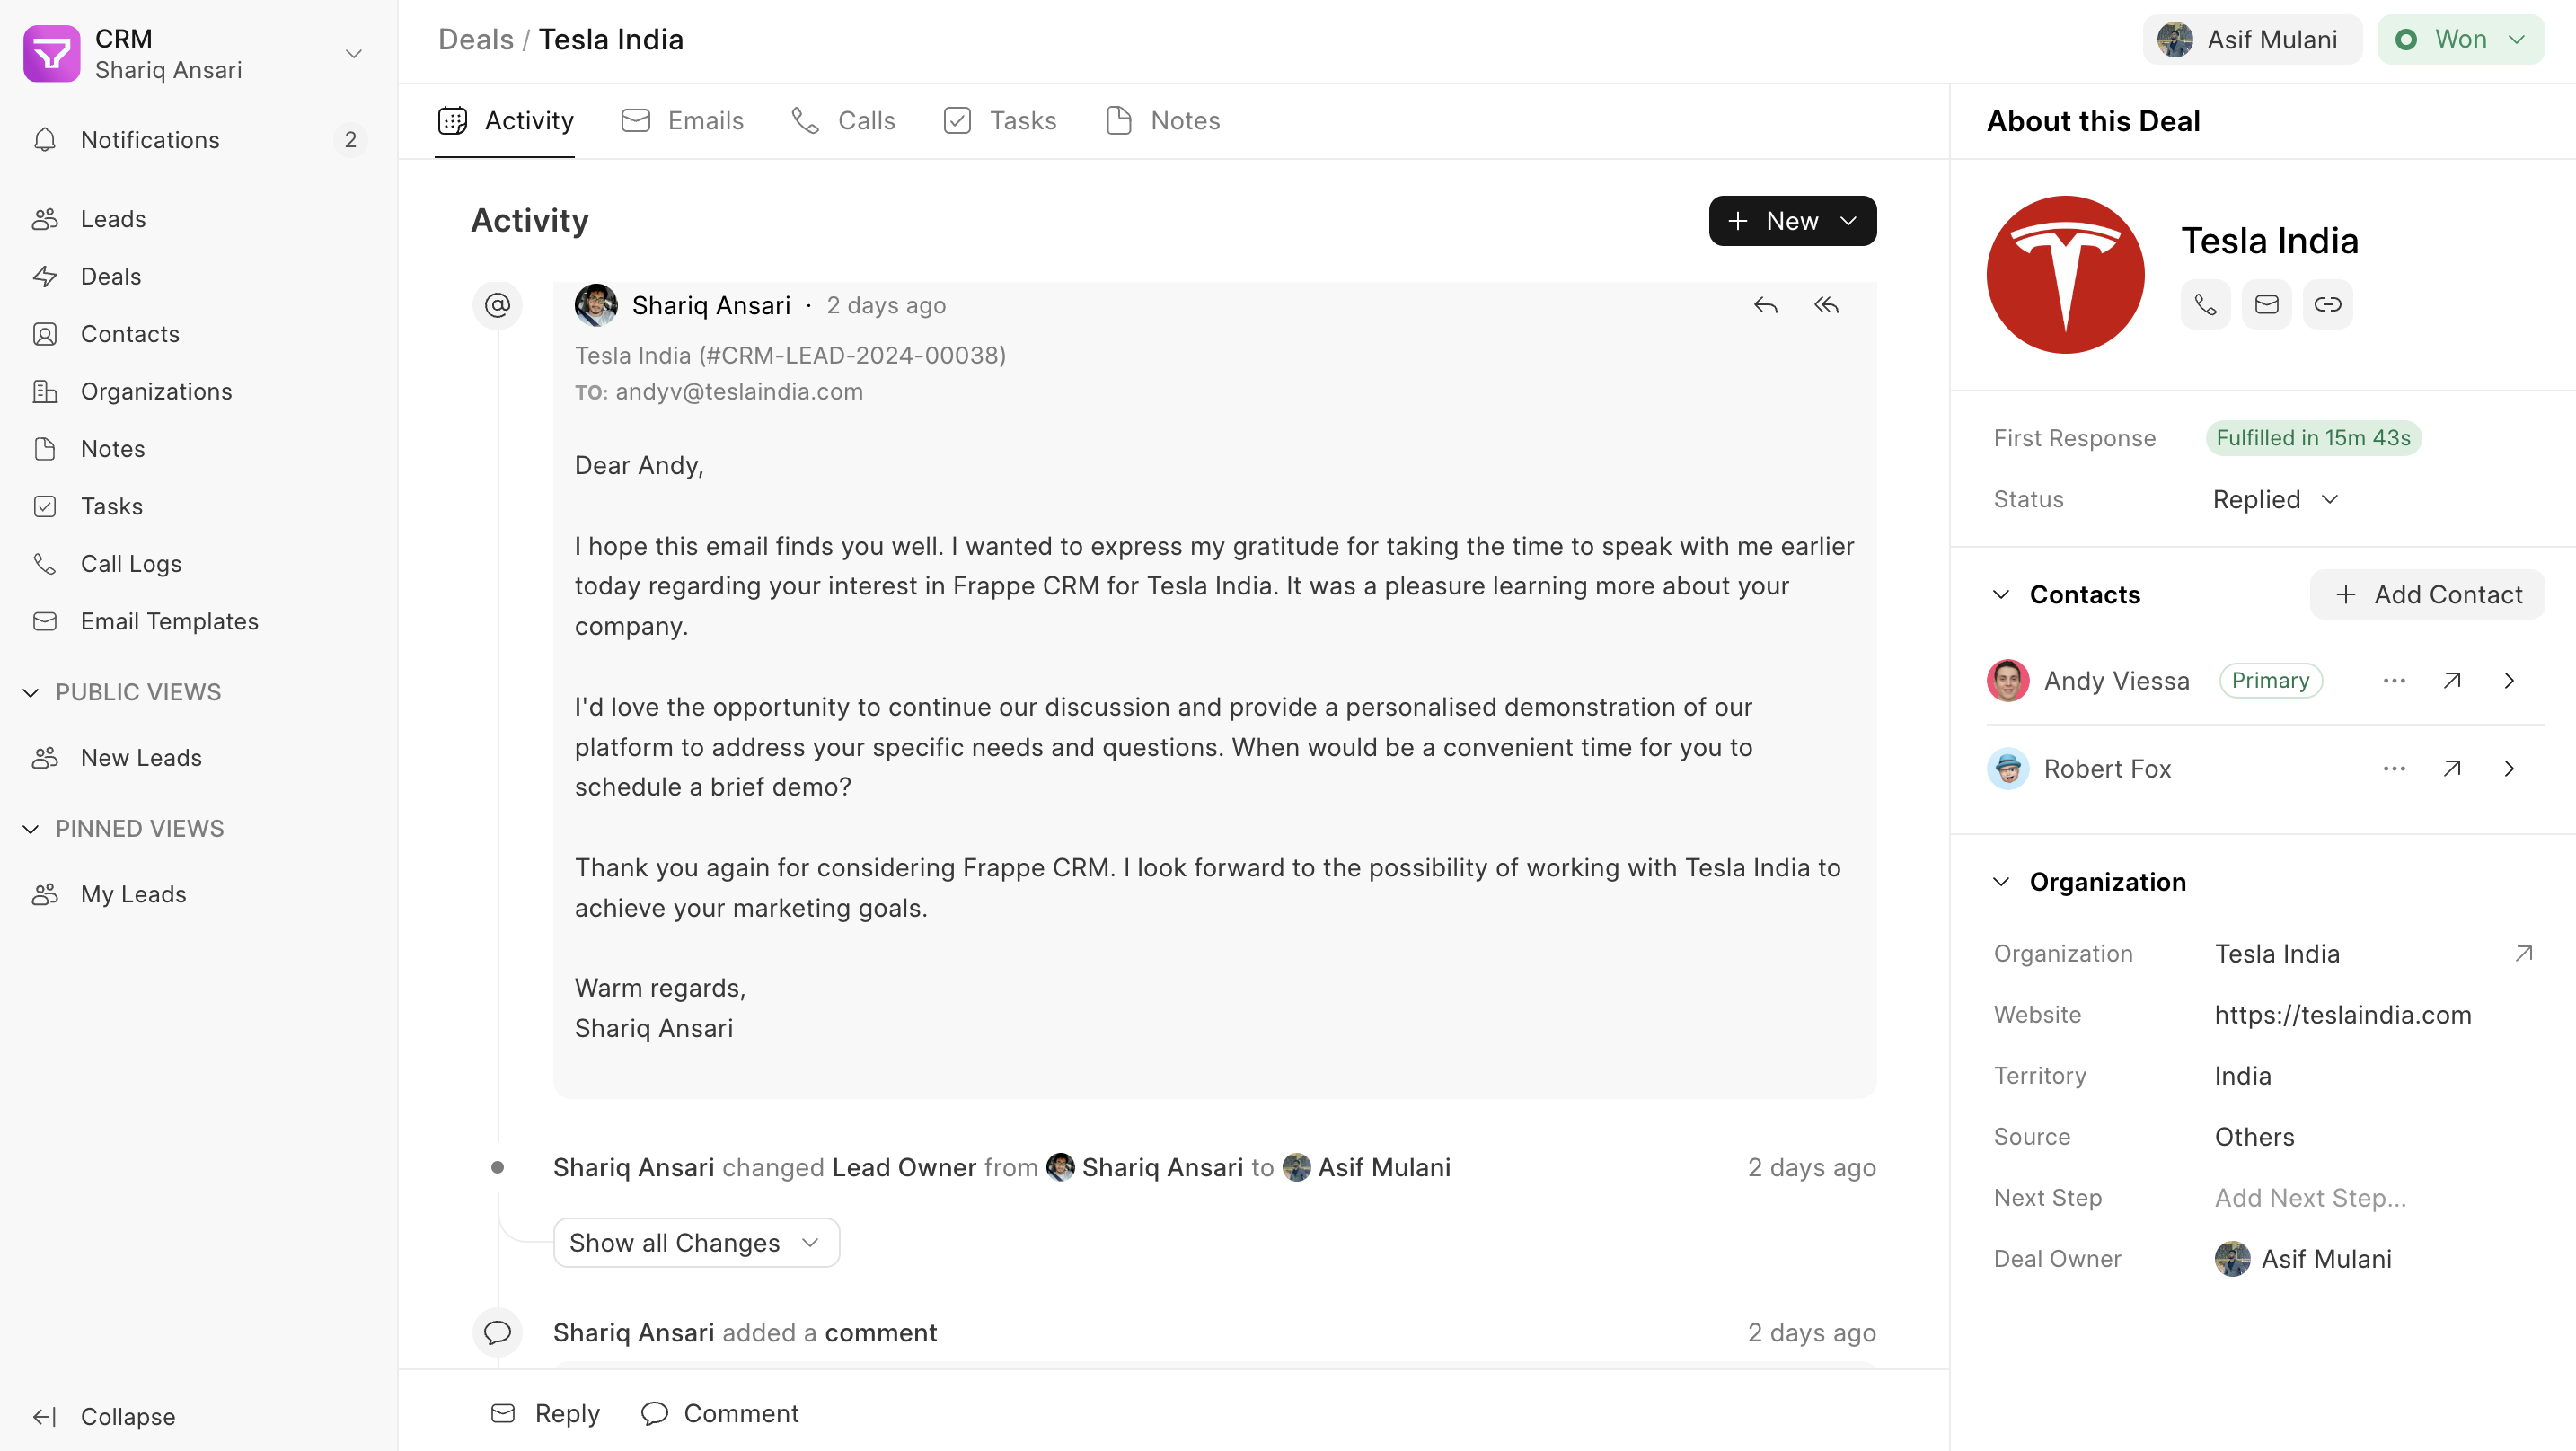
Viewing Email Communication
All email interactions related to a specific Lead or Deal are consolidated within the system. You can access them in two ways:
- Activities Tab: This tab provides a comprehensive view of all activities associated with the Lead/Deal, including emails, calls, tasks, and notes.
- Emails Tab: For a focused view solely on email communication, switch to the dedicated "Emails" tab. This tab exclusively displays email threads related to the Lead/Deal, offering a clear and organized record of your email exchanges.

Email Account Setup
You can sync your email account with Frappe CRM to send and receive emails from Frappe CRM.
You can manage multiple incoming and outgoing Email Accounts in Frappe CRM. There has to be at least one default outgoing account and one default incoming account. If you are on the Frappe CRM cloud, the default outgoing email is set by us.
To access Email Accounts, go to Email Account Master from the desk.
1. Prerequisites
Before creating an Email Account, you need an Email Domain. However, you can skip creating an Email Domain if you're using one of the services listed here.
For detailed Email Account setup you can check ERPNext documentation here
2. How to create an Email Account
- Go to the Email Account list, and click on New.
- Enter the email address with the domain. Domains need to be created to create an email account. You don't need to create a domain if you're syncing an email from certain providers as listed here.
- Enter the email account password.
- Save. If the credentials are correct, the email account will be synced.
For some services like Gmail, you may need to enable 2FA and use App Passwords.
3. Additional options when creating an Email Account
- Use Different Email Login ID: To use an alternative email login and password to access this account. For example, if you have [email protected] and you want users to access this email with an alternate email ID, they should tick this checkbox. The recipients will see [email protected] as the sender.
- Awaiting password: If you're creating this account on behalf of someone and the password is unknown, tick this checkbox. When the other user logs in, they'll be prompted to enter the password.
- Use ASCII encoding for the password: Ticking this will use ASCII encoding for the password.