
Exotel is a cloud telephony platform that enables businesses to manage voice calls, SMS, and communication workflows without traditional phone hardware. The integration with Frappe CRM combines these communication capabilities with customer relationship management to provide a unified system for handling customer interactions.
Make call
- Lead page: A call button is available in the right section above lead details. Use this button to initiate a call, but ensure the Mobile No field in the Person section includes the country code.

- Deal page: In the Contacts section on the right side. You can add multiple contacts and designate a primary contact. The call button will utilize the primary contact's number.

- Contact page: Directly initiate a call by clicking the Mobile No displayed below the contact's name.

Make sure to complete your KYC on Exotel before making calls docs
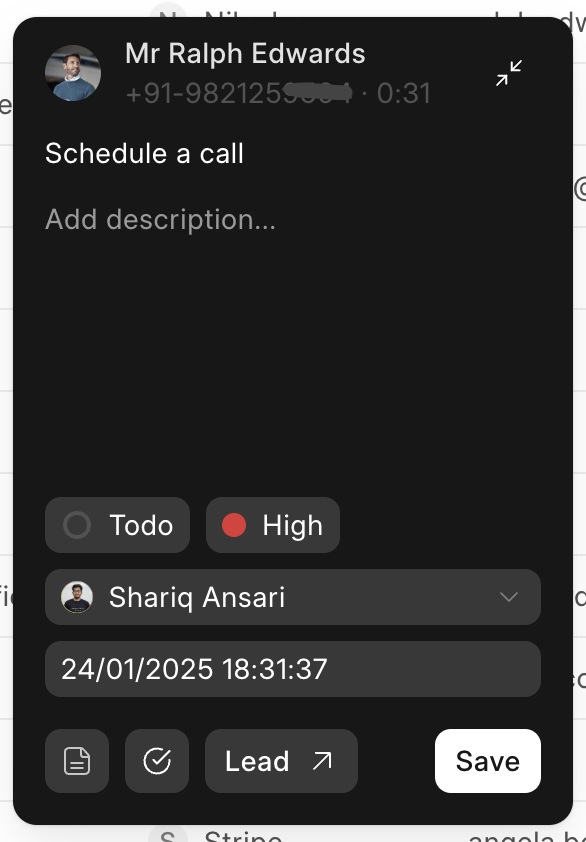
Call pop-up
Upon making or receiving a call, a pop-up window appears displaying:
- Caller name
- Mobile number
- Call status
- Call duration
- Note button
- Task button
- Lead/Deal button
- Action buttons (Close or Minimize)

This window can be minimized, allowing navigation to other screens, while remaining accessible in the far-right corner of the navbar.

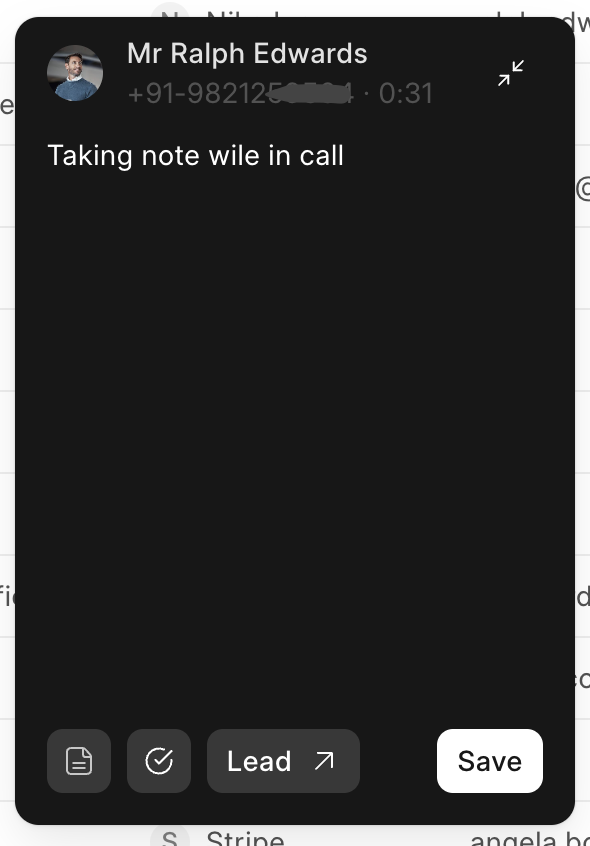
Take notes & task during a call
While on a call, you can take notes/task using the note/task button. These notes/task are saved in the Call Log for later viewing and editing.
Exotel setup
To configure Exotel for use within the CRM, follow these steps:
-
Exotel Subscription: Obtain an active Exotel subscription (refer to Exotel's documentation for details).
-
Exotel Credentials: From your Exotel account, retrieve your Account SID, Subdomain, API Key, API Token and Exotel Mobile Number (Exophones).


-
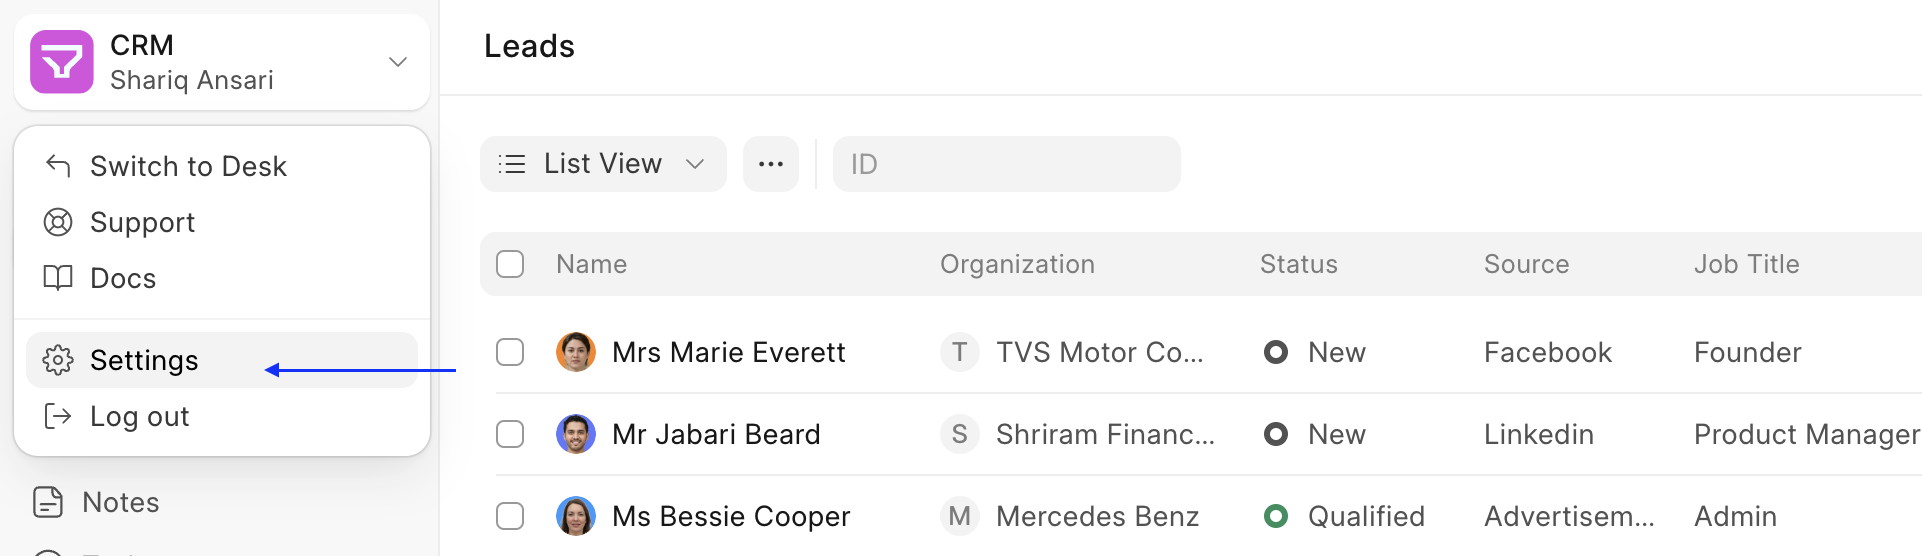
Settings: Click the dropdown menu on the top left logo and select "Settings."
-
Telephony Settings: Navigate to Telephony Settings and enable Exotel. Add your Account SID, Subdomain, API Key, API Token and set Webhook verify token (it can be anything it will be used later in Exotel incoming call flow configuration). You can also enable call recording at this point.

-
Telephony Agent: Go to Telephony Agent (In Desk) and add users (agents) with Exotel mobile number designated for making calls and also personal number(do not forget to mark one number as primary).
Make sure the email is same in both Telephony Agent and Exotel.

Exotel incoming call flow configuration
For your CRM's API to connect with Exotel, perform the following configurations within Exotel:
-
Login to your Exotel account and go to App Bazar.
-
Create a new "App" for a new flow.

-
Setup the flow as you wish it to be.
-
Set "Dial Whom" as user group. In user group there can be multiple agents. Incoming call will be redirected to agents in this group in the order they are added.


-
You can also set how you want to distribute calls.

-
In your connect API under "Create popup...", copy and paste URL (Callback API) mentioned below. Here use webhook verify token which was mentioned in Exotel Setup (point 4).
https://<yoursitename>/api/method/crm.integrations.exotel.handler.handle_request?key=<webhook-verify-token>
-
After that add a "Passthru applet" under "After Call Conversation ends" and paste the same URL.


Note: Make sure to check "Make Passthru Async".
-
Similary, add another "Passthru applet" under "If nobody answers..." section and paste the same URL.


Note: Make sure to check "Make Passthru Async".
-
Save the flow.
-
Now assign this newly created "App" to your ExoPhone from which you receive your business calls.

Once this is done, you should see all new incoming calls on your exotel phone number in the "Call Log" list in your CRM instance.
