
Public Views are saved views that are accessible to every sales user in the system. They function similarly to your personal saved views, but instead of being confined to your workspace, they become a shared resource accessible to everyone.
When to use public views
Public Views are ideal for situations where a specific filter or layout needs to be consistently used by your entire team. Here are some examples:
- A view that filters leads/deals by a particular source or industry.
- A view that prioritizes high-value deals that require immediate attention.
- A view that displays specific customer information relevant to the sales team.
By creating Public Views for these commonly used scenarios, you can ensure everyone has access to the same information and is working from the same perspective.
Who can create a public view
Only users with the Sales Manager and Admin roles can create Public Views. This helps maintain control over what information is shared publicly within the CRM system.
Creating a public view
- Prerequisite: Create a saved view. If you already have an existing saved view, go to the next step.
- Go to the List dropdown and navigate to the saved view you want to make public.
- Hover over the desired view and click on the three-dot (...) menu.
- From the menu that appears, select Make Public.
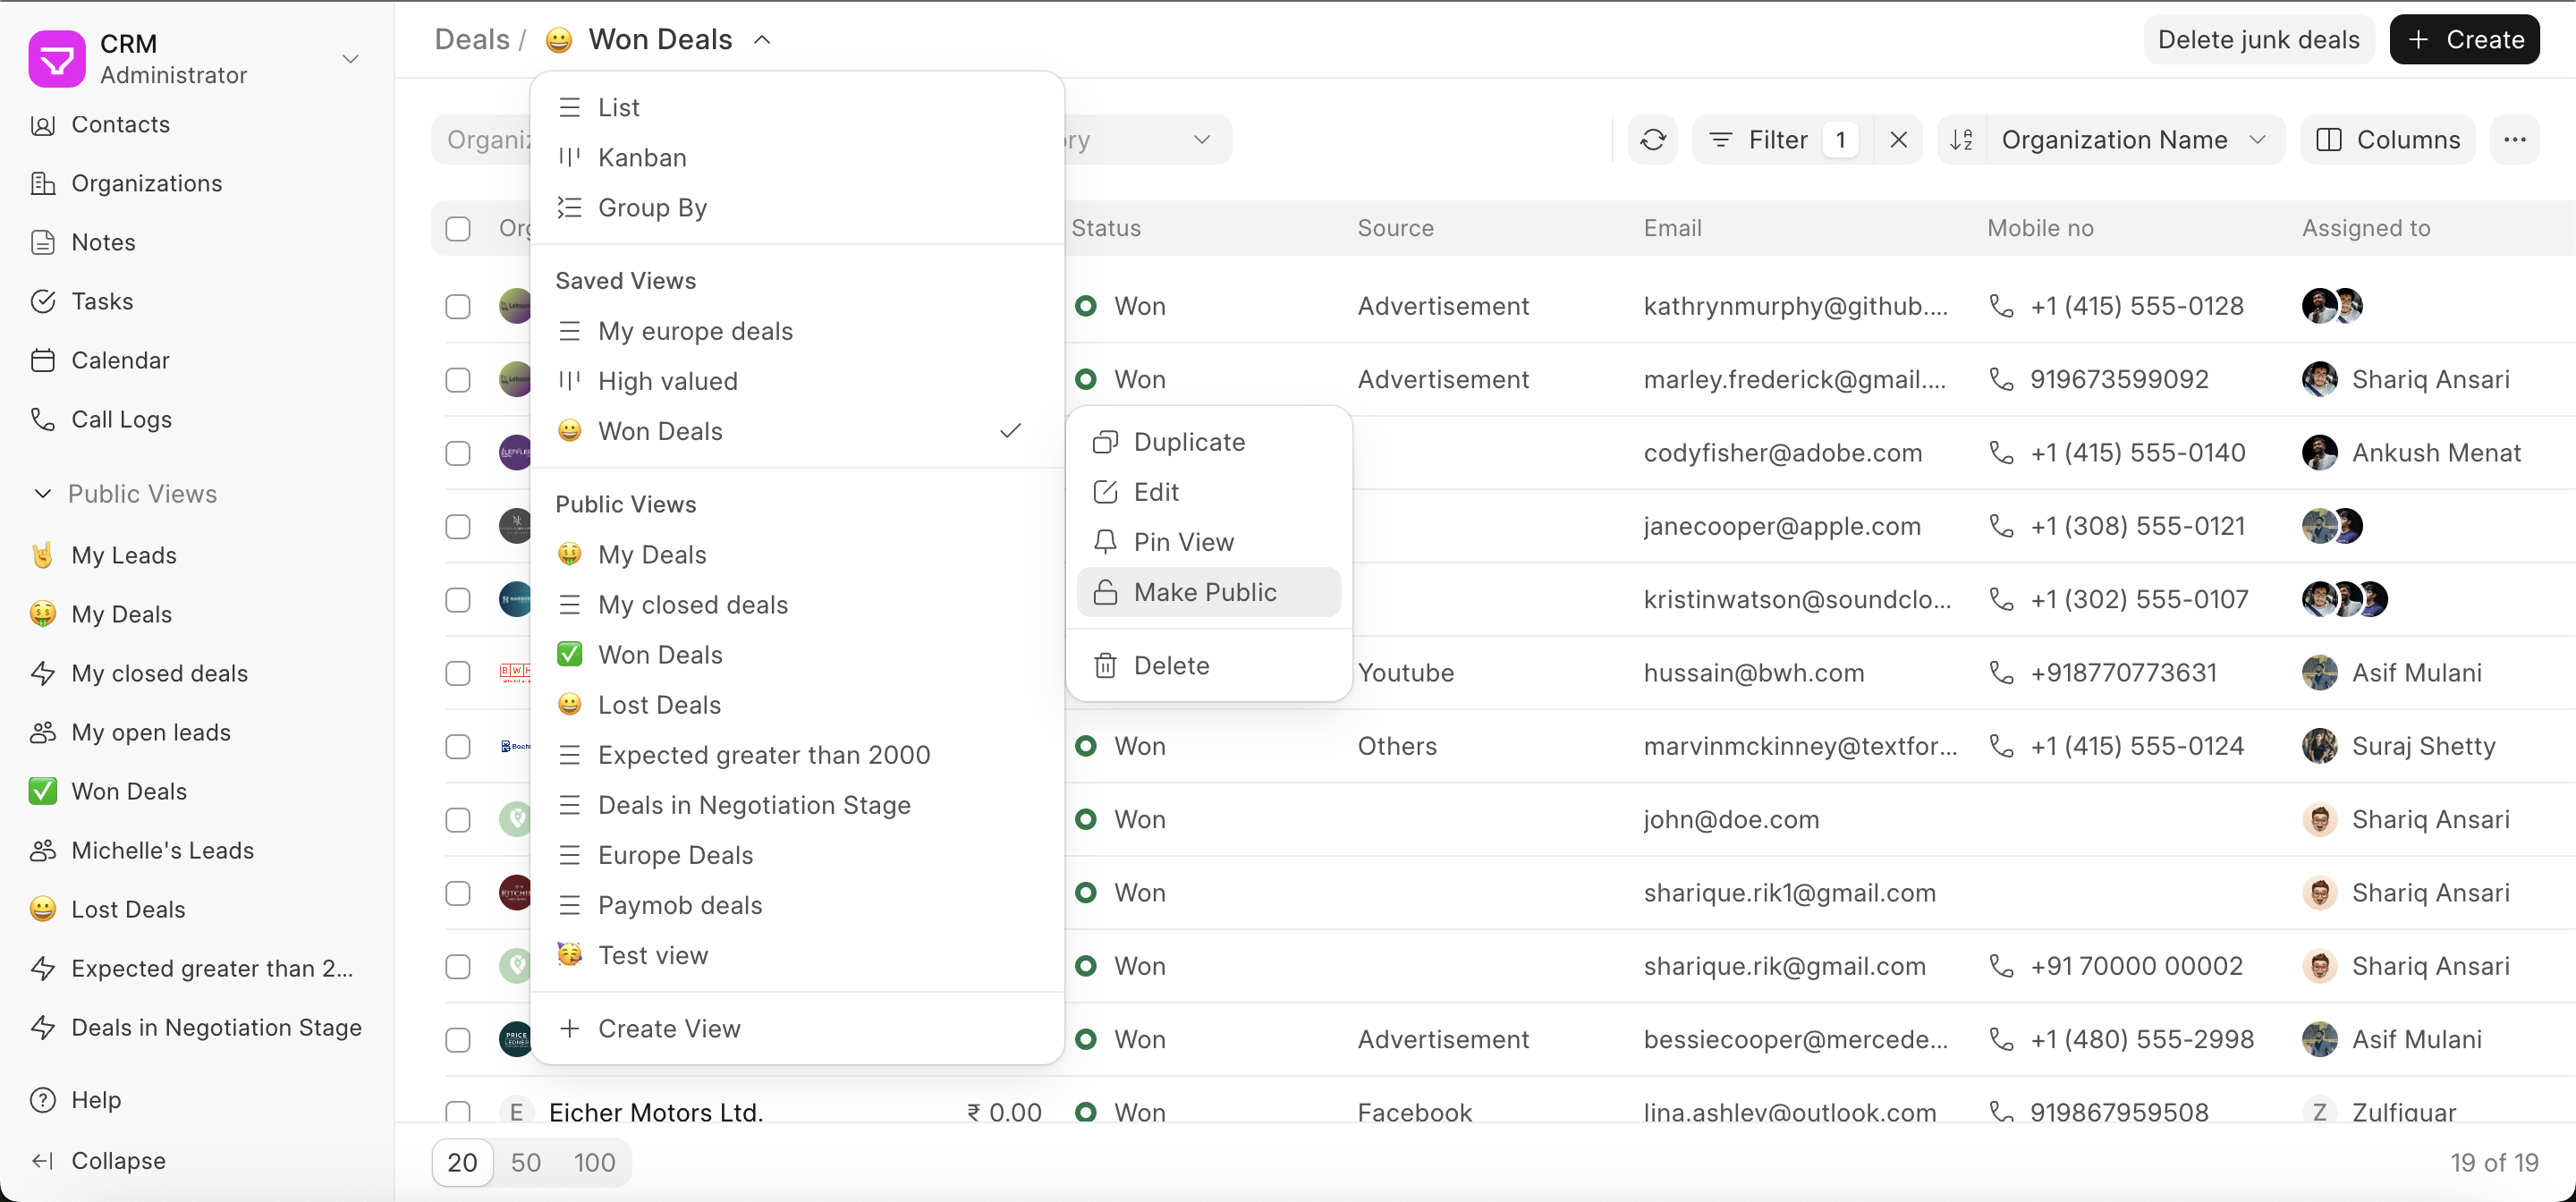
This will convert your saved view into a Public View, making it accessible to all users in the sidebar under the Public Views section.
Making a public view private
Public Views can be reverted to private views at any time. Simply follow the same steps mentioned above and select Make Private from the three-dot menu.