
A lead is someone who has shown interest in your product or service but hasn't become a customer yet. It could be someone who filled out a form on your website, someone you met at an event, or a referral from an existing customer. The lead stage is where you figure out if they're worth pursuing further.
The Leads List
When you click on Leads in the sidebar, you see all your leads in one place. Each row shows you the key details at a glance – name, organization, status, email, phone, who it's assigned to, and when it was last updated.
You can filter, sort, and search across your leads from here.
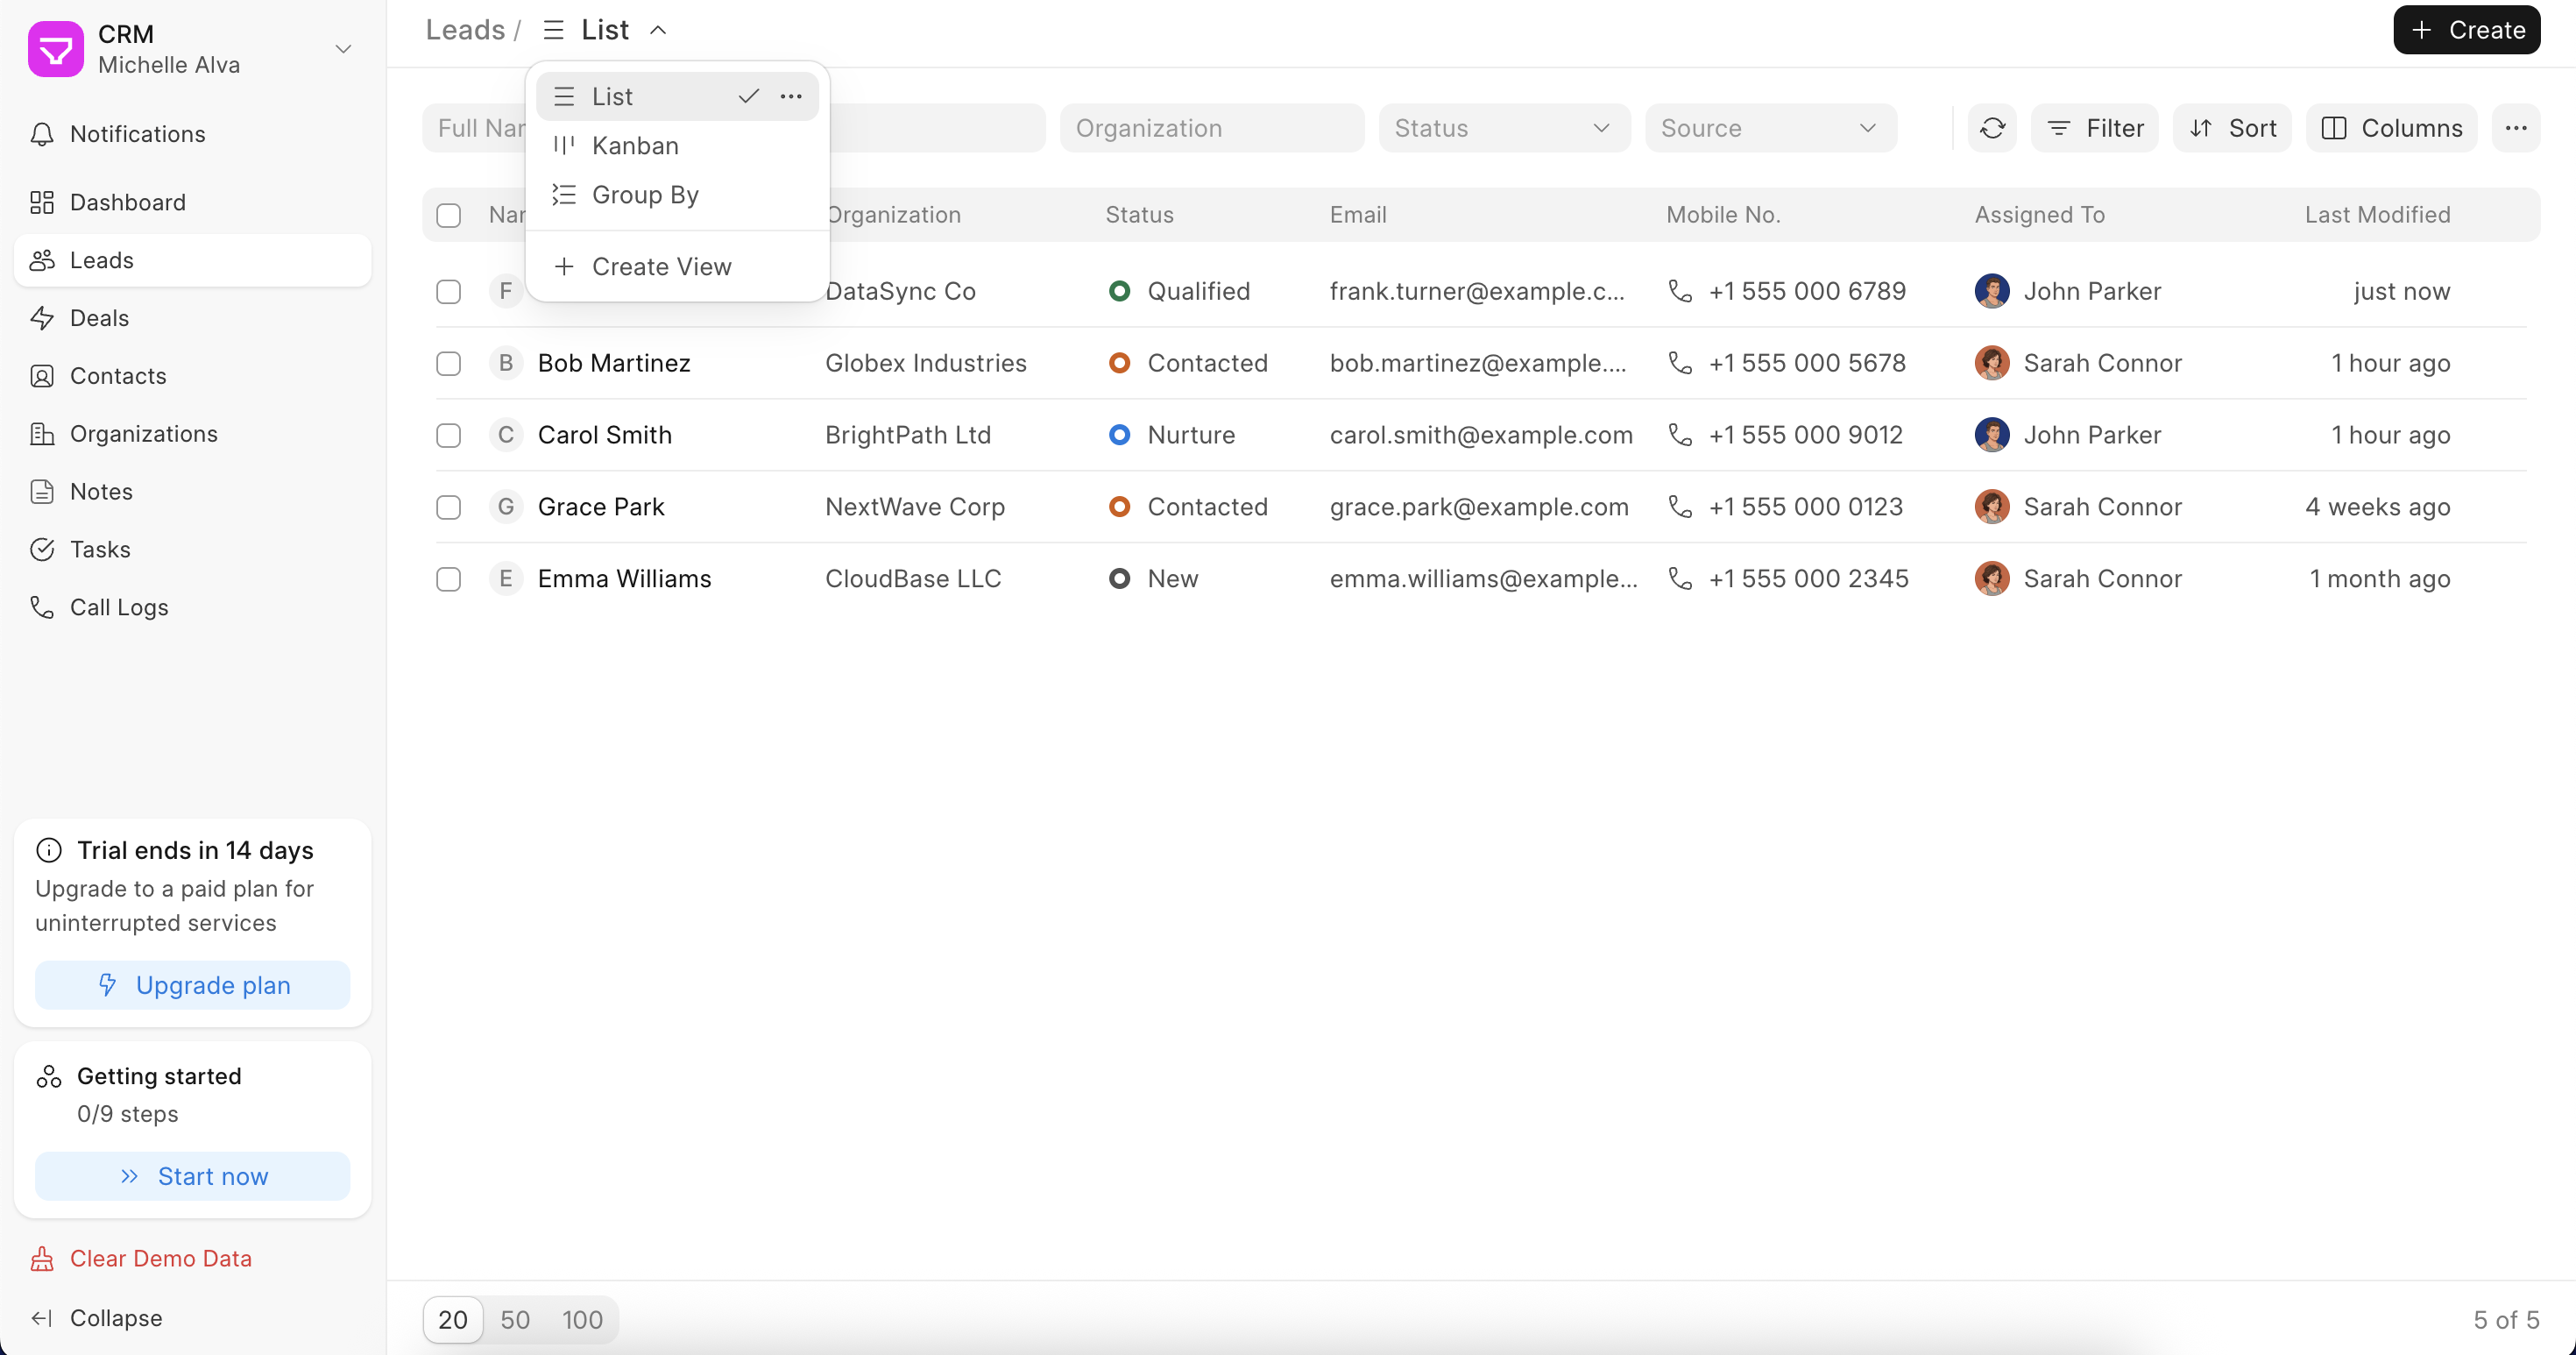 List View
You can also switch between List and Kanban view depending on how you like to work.
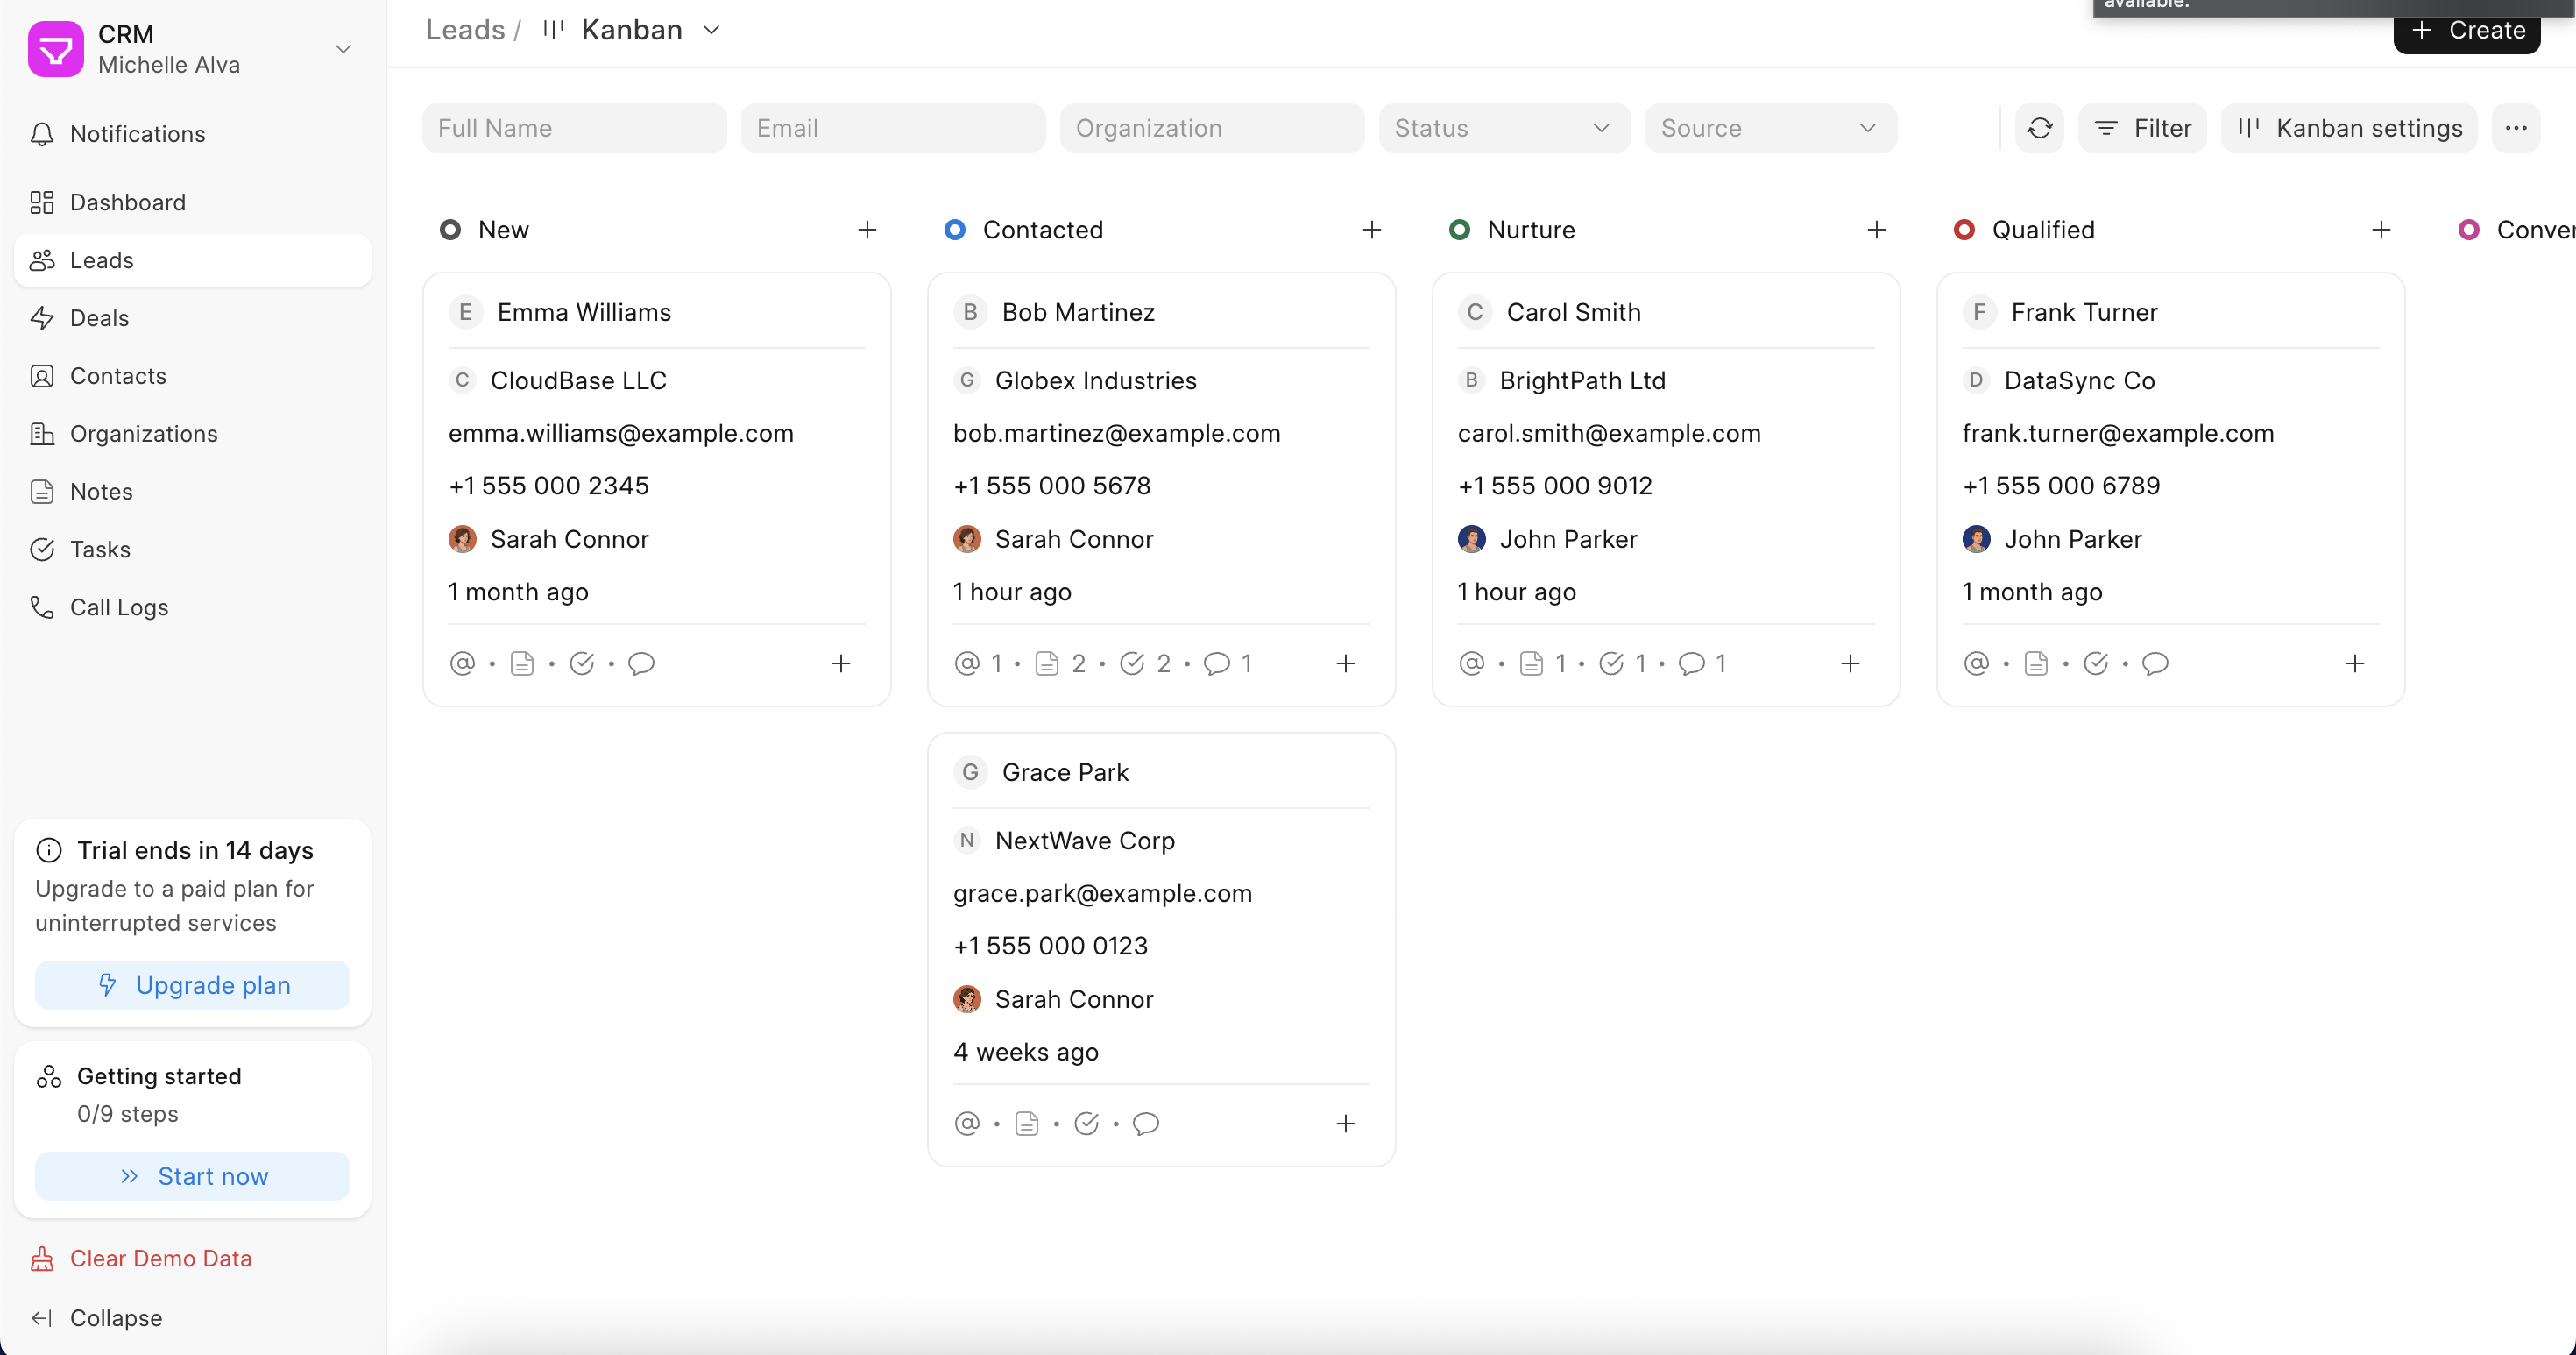 Kanban View
To create a new lead, hit + Create in the top right. This is the manual way to create a lead.
Capturing Leads
There are a few ways to get leads into Frappe CRM without adding them manually one by one. You can embed a web form on your website, sync leads from Facebook and Instagram ads, bulk import them from Excel/spreadsheets, or write custom scripts to pull leads from other sources.
These are covered in detail in the Capturing Leads section.
Inside a Lead
When you open a lead, everything about that person lives in one place.
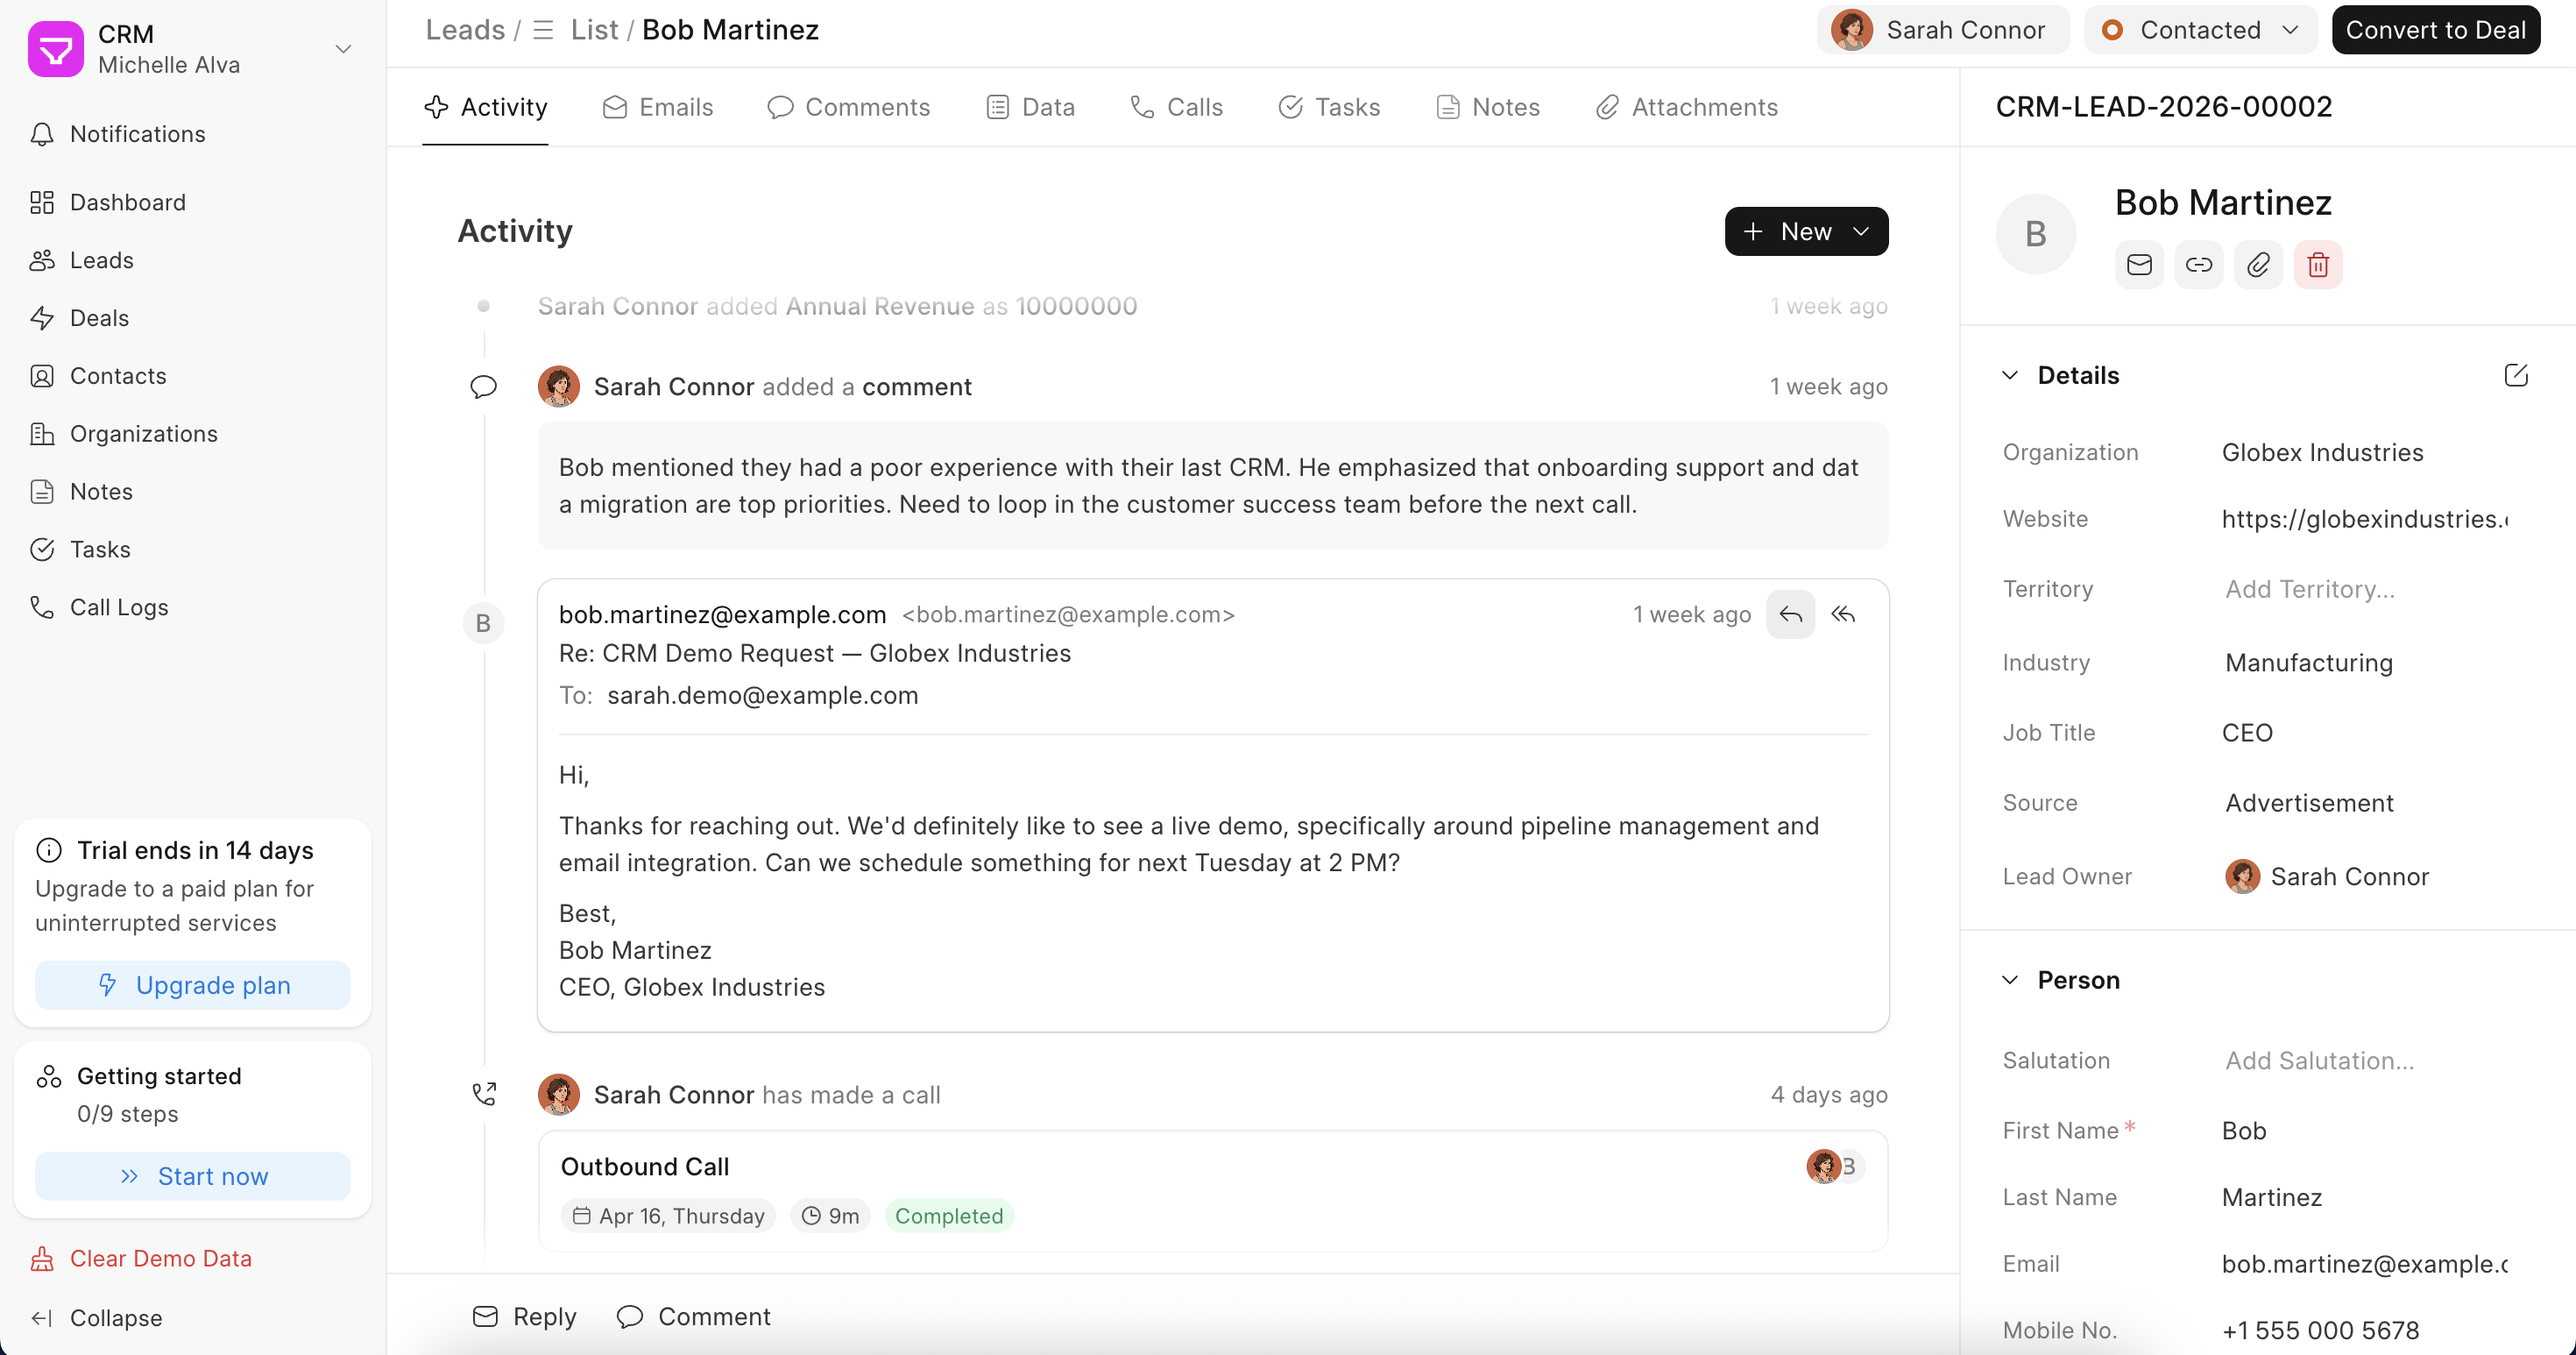
On the right side are the lead's details – their name, email, phone, organization, job title, source, industry, and who owns the lead. You can edit any of these inline.
On the left is the activity panel, with tabs across the top:
- Activity – A full timeline of everything that's happened. Emails, comments, calls, field changes — all in one feed
- Emails – Send and receive emails directly from here. No switching tabs
- Comments – Leave notes for your team, tag teammates, keep the conversation in context
- Data – Additional fields and information about the lead
- Calls – Log and view call history
- Tasks – Create and track tasks related to this lead
- Notes – Freeform notes that don't need to be part of the activity feed
- Attachments – Files, documents, anything relevant
Adding a new Lead Status
At the top, you'll also see the Lead status. Some of these statuses are available out of the box. If you want to add custom statuses, you can add them by going to the Desk view (more details read here) and searching for CRM Lead Status. Add the status of your choice, choose the type, and click on save.
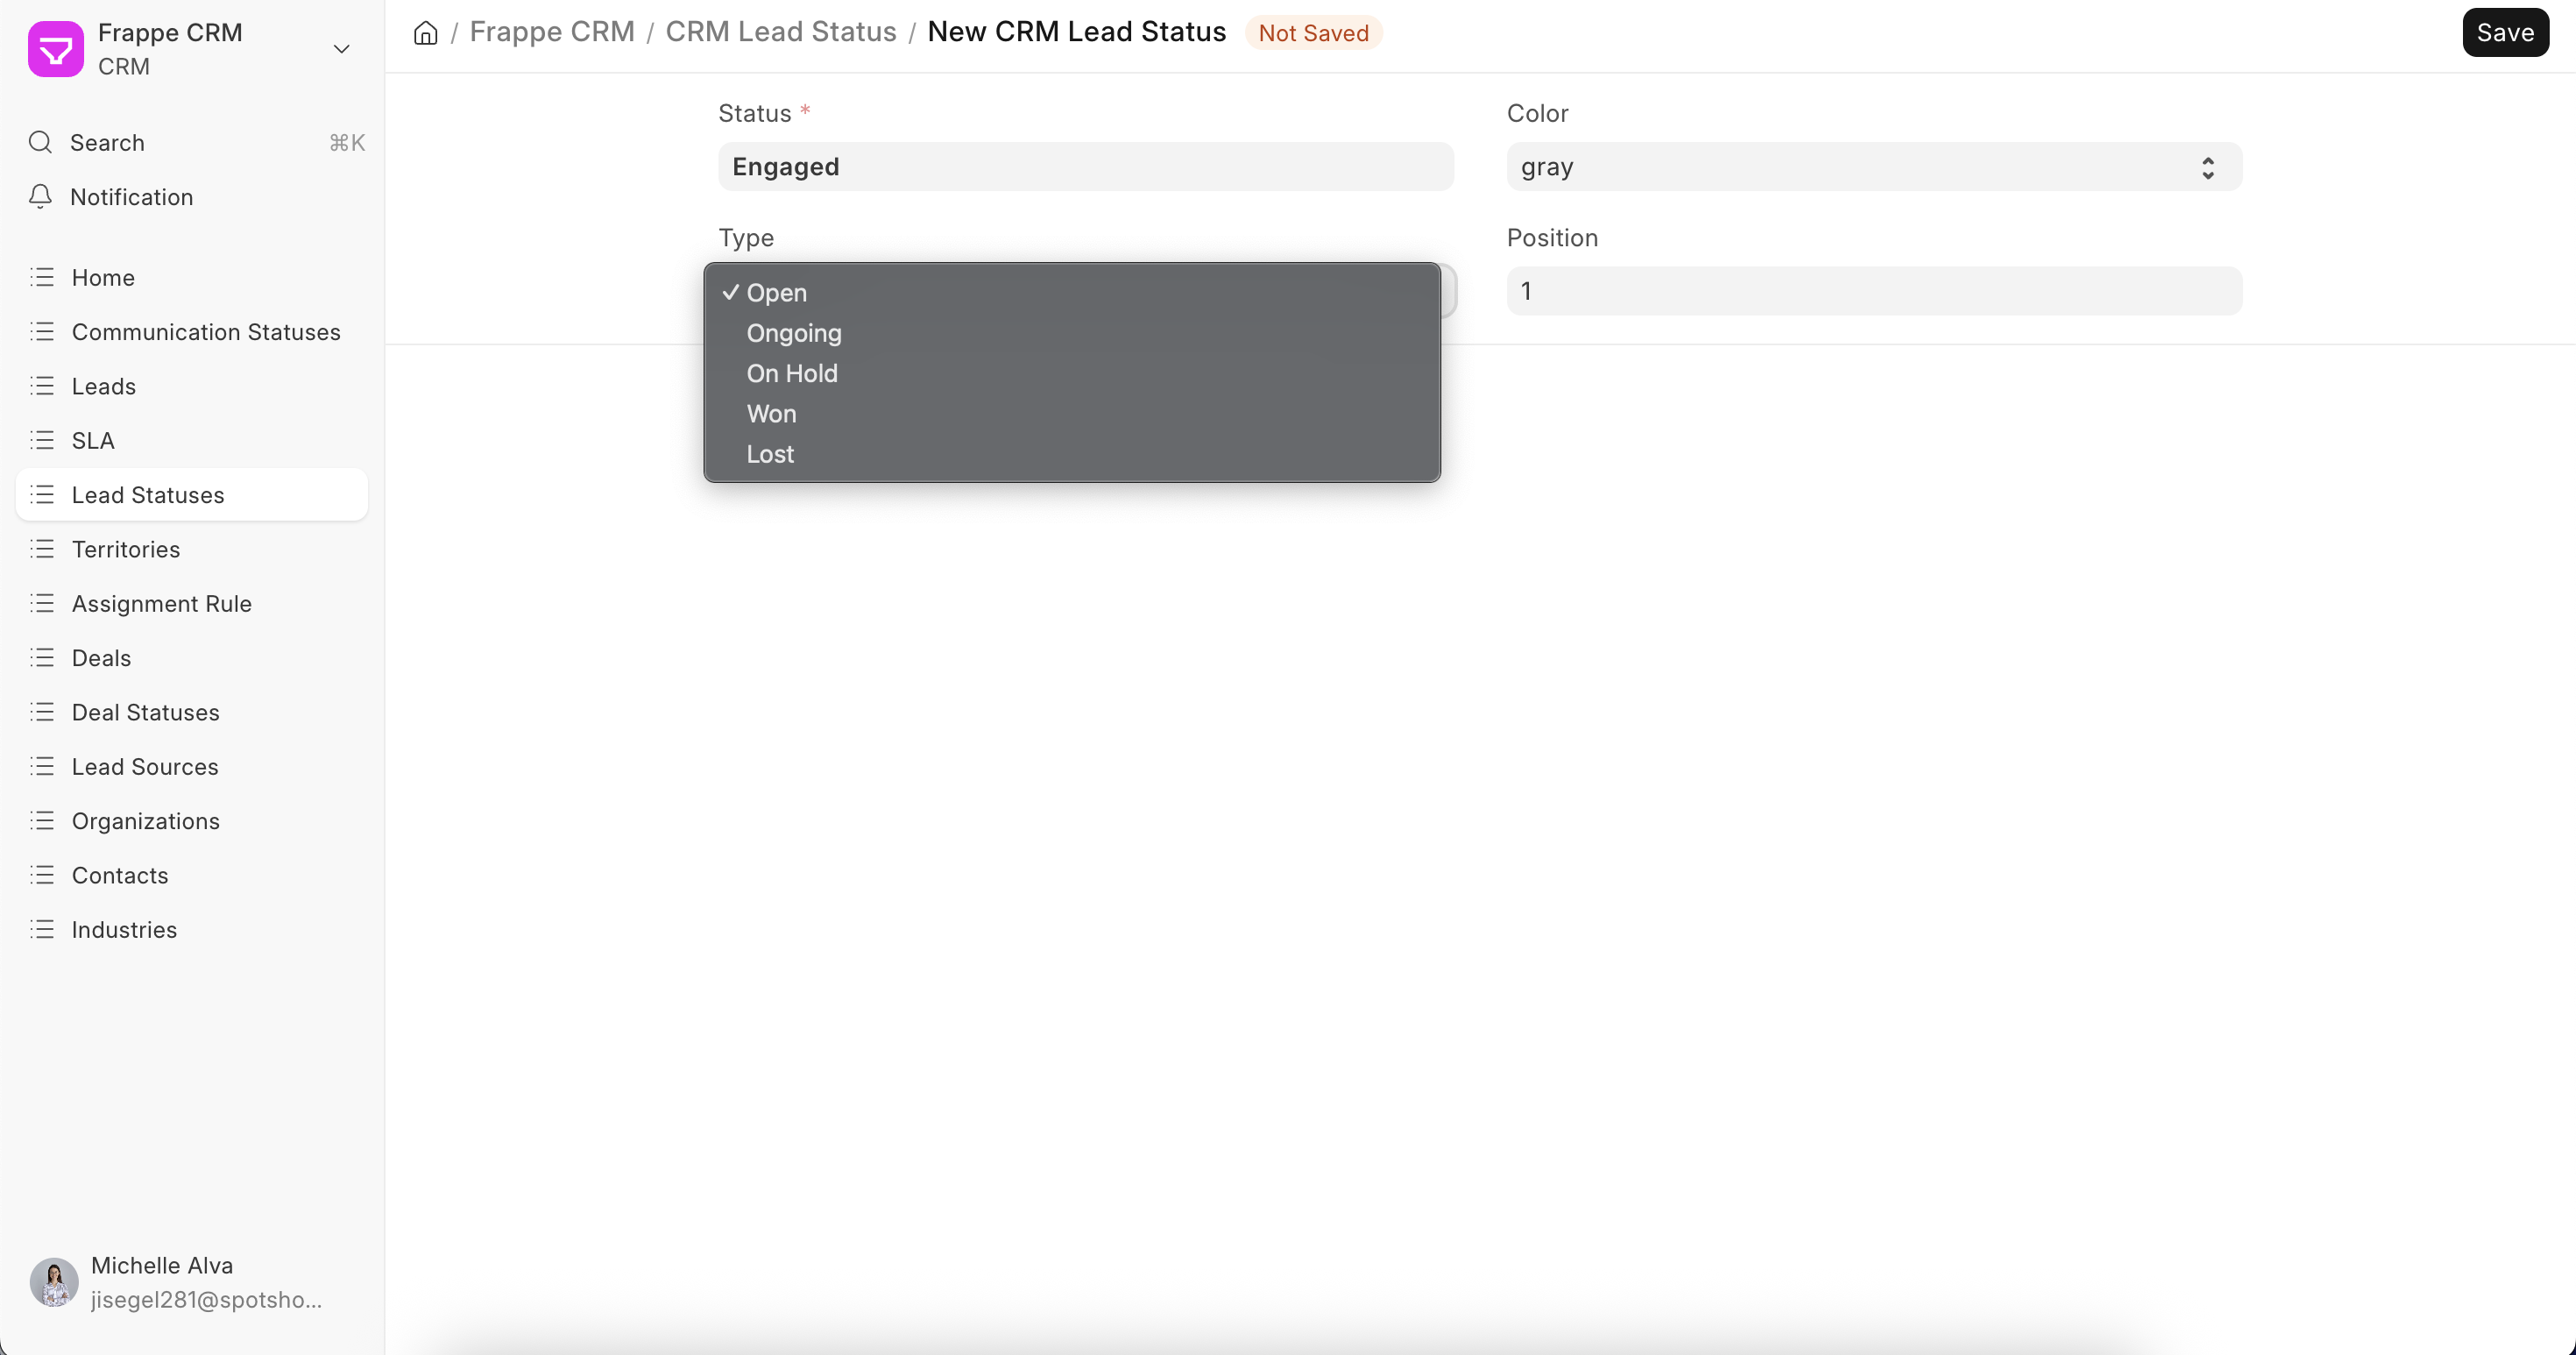 Adding new CRM Lead Status
It should then appear as a newly added status in the frontend view too.
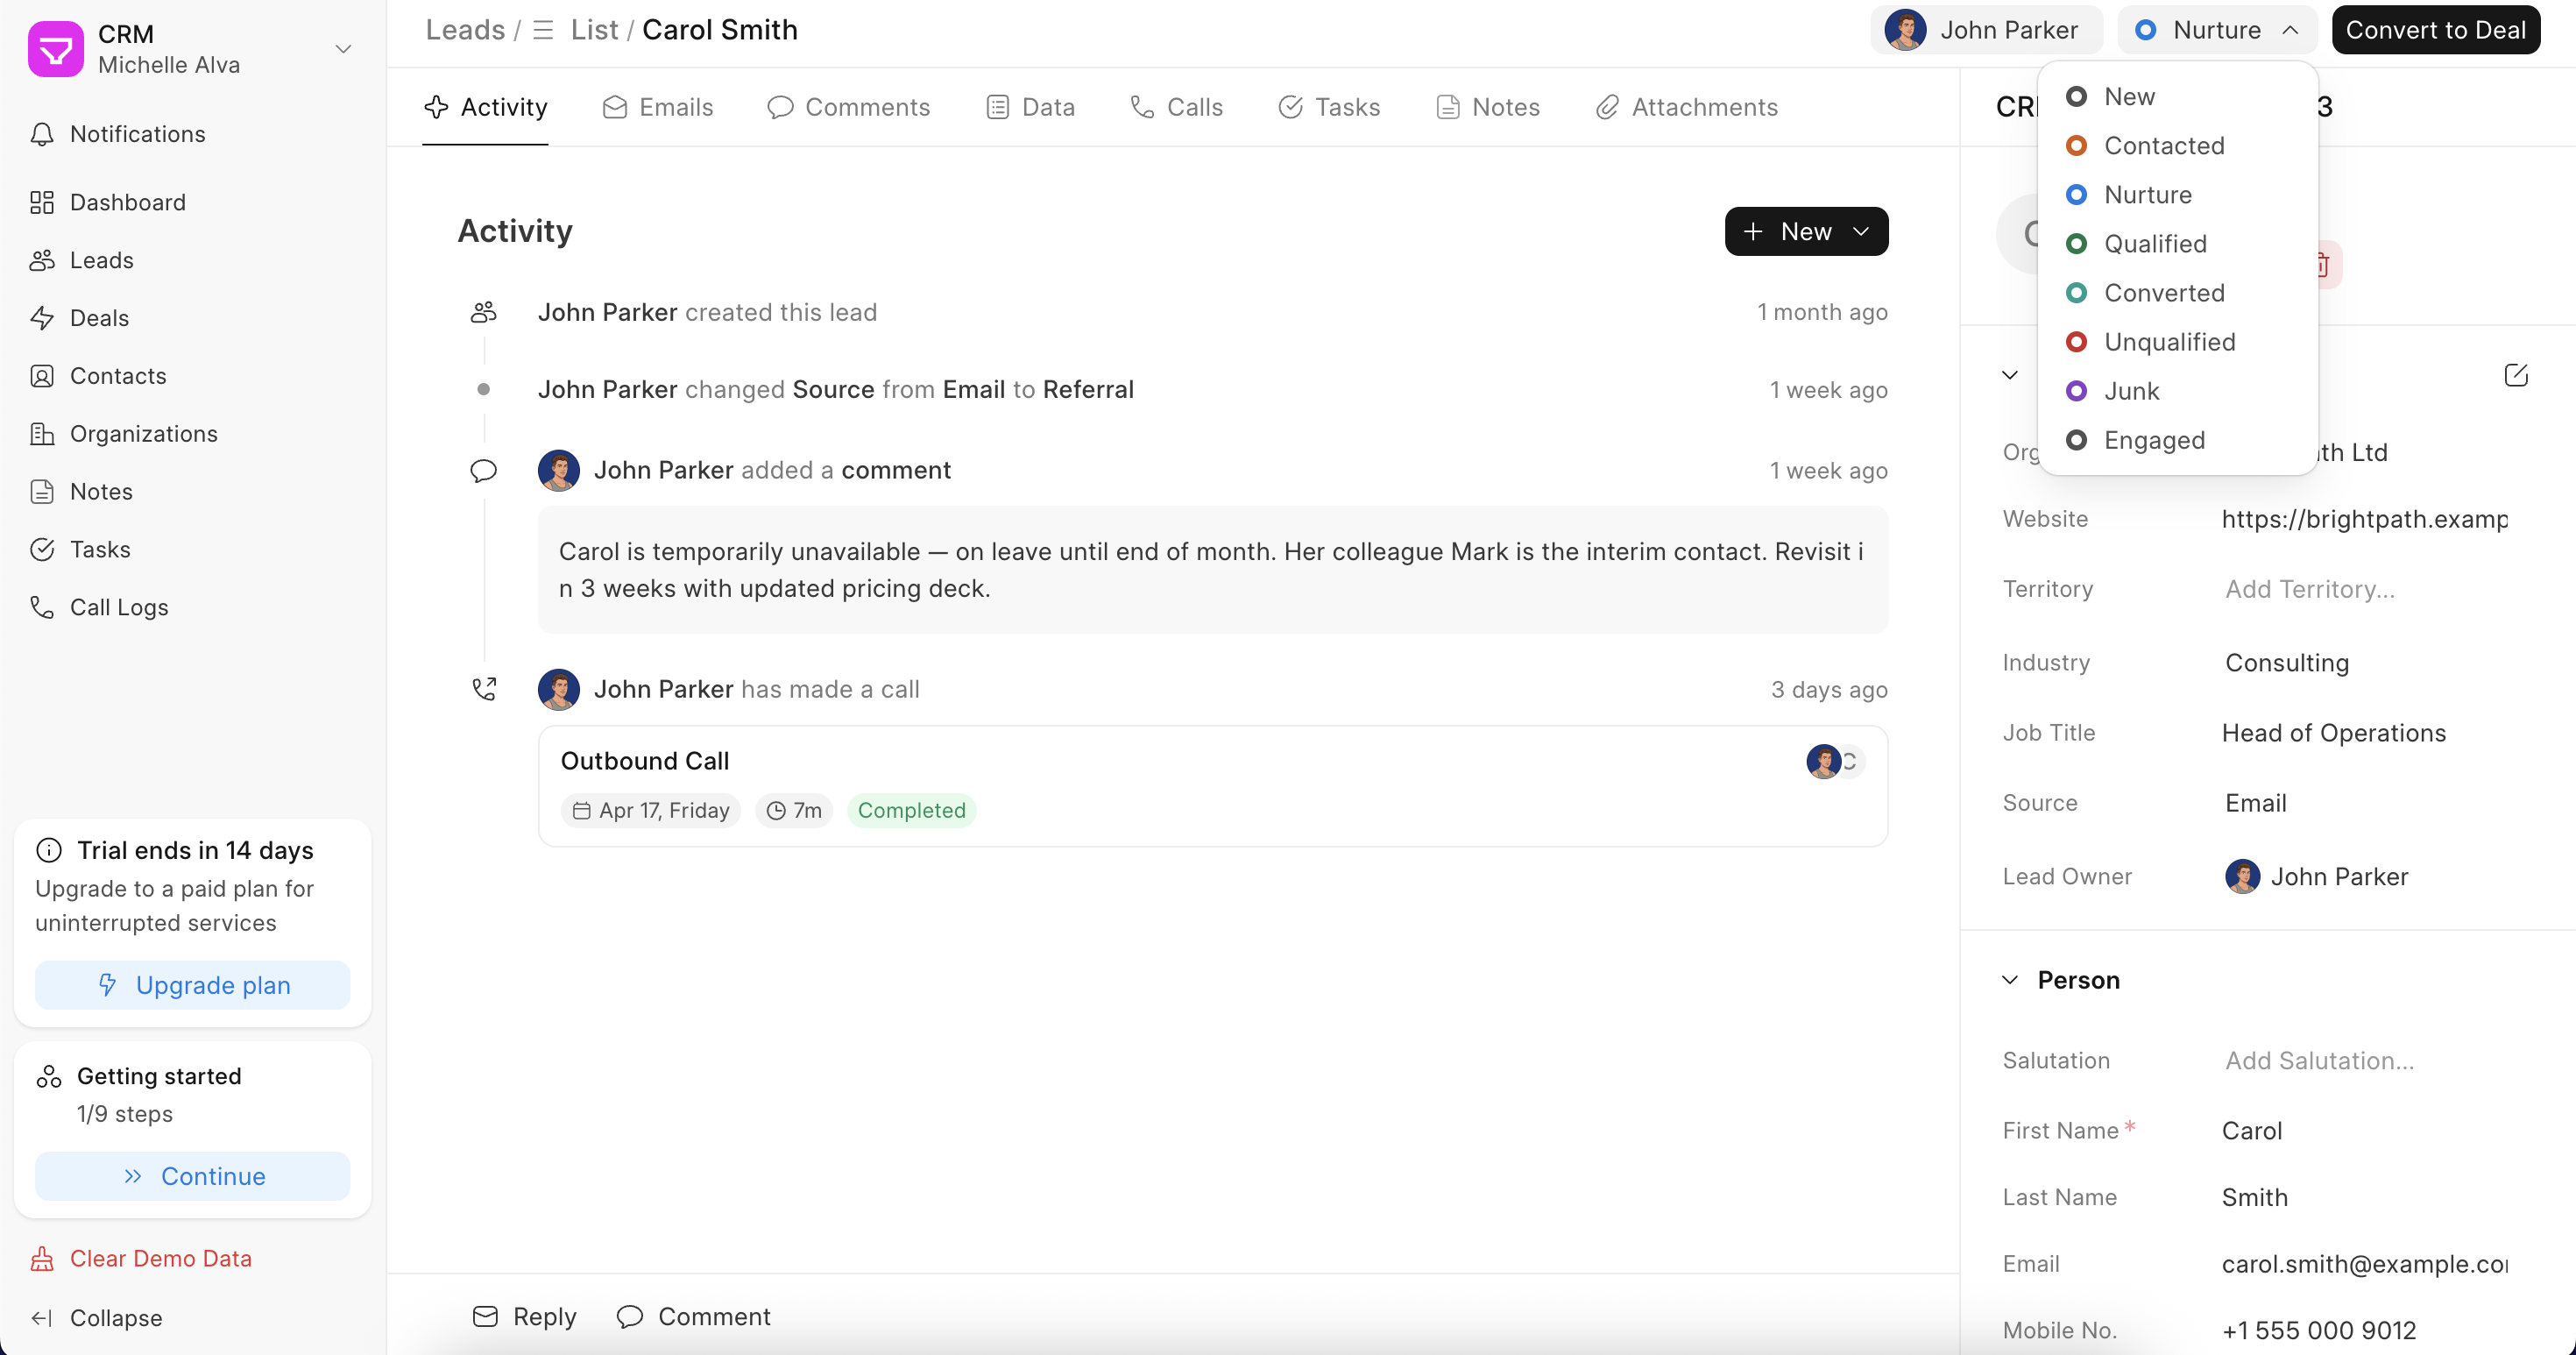
You can see who the lead is assigned to, what status it's in, and a Convert to Deal button for when you're ready to move them forward.
Converting a Lead to a Deal
When a lead is qualified and ready to move forward, hit Convert to Deal. You'll get the option to create a new Contact and Organization from the lead's details, or link to existing ones if they're already in your CRM. Also, choose the status you want your Deal to be in.
Once converted, the lead becomes a Deal and moves into your sales pipeline.