

















Use the Import Wizard to make many entries at once from a .csv file. You can also type the entries in its table.
Prepare the File
- Click Setup > Import Wizard in the sidebar.
- Select an Import Type, such as Sales Invoice or Item.
- Click Save template. The browser downloads a
.csvtemplate file. - Open the file in a spreadsheet app, and enter the values below the header row.
- Save the sheet as a
.csvfile. - Click Select file, and select the file.
The import types are Sales Invoice, Purchase Invoice, Payment, Journal Entry, Party, Item, Tax Template, Account, Address, and Number Series. When inventory is on, you can also import Stock Movement, Shipment, Purchase Receipt, and Location.
The Import Wizard makes new entries only. It does not change entries that exist.
A template column for a table field has the table name in brackets, such as Item (Items). The Import Wizard also reads files from the Export button of a list view, and templates from the Frappe Books desktop app.
Check the Values
The rows of the file show in a table.
- To change a value, click its cell and edit it.
- To add a row, click Add row. You can use this to make entries without a file.
- To remove a row, click the x button in the # column.
If the Import Wizard cannot convert a value, the cell gets a red border. Move the pointer over the cell to see the error.
Each column has a field selector at the top. If your file does not use the template, select the field for each column. Select None to ignore a column. You cannot import while two columns have the same field (Duplicate columns found), or while a required field has no column (Required fields not selected).
To leave fields out of the template and the import, click the … button in the page header, and then click Pick import columns. You cannot clear a required field.
Import the Data
- Click Import data.
- For entries that you can submit, such as invoices, the Submit entries? dialog opens. Click Yes to submit the entries, or No to keep them as drafts.
- Wait for the import to complete.
If the Cannot import dialog opens, fix the cells or the links that it lists. Then click Import data again.
The Import complete dialog shows the number of imported entries, and each failed entry with its error:
- Show me opens the list of the new entries. This button shows only when no entry failed.
- Done clears the Import Wizard so that you can make more entries.
- Fix failed keeps only the failed rows. Fix them, and click Import data again.
Import Entries with Child Tables
Some entries have a child table. For example, a sales invoice has an Items table with one row for each item that you sell. For these entries:
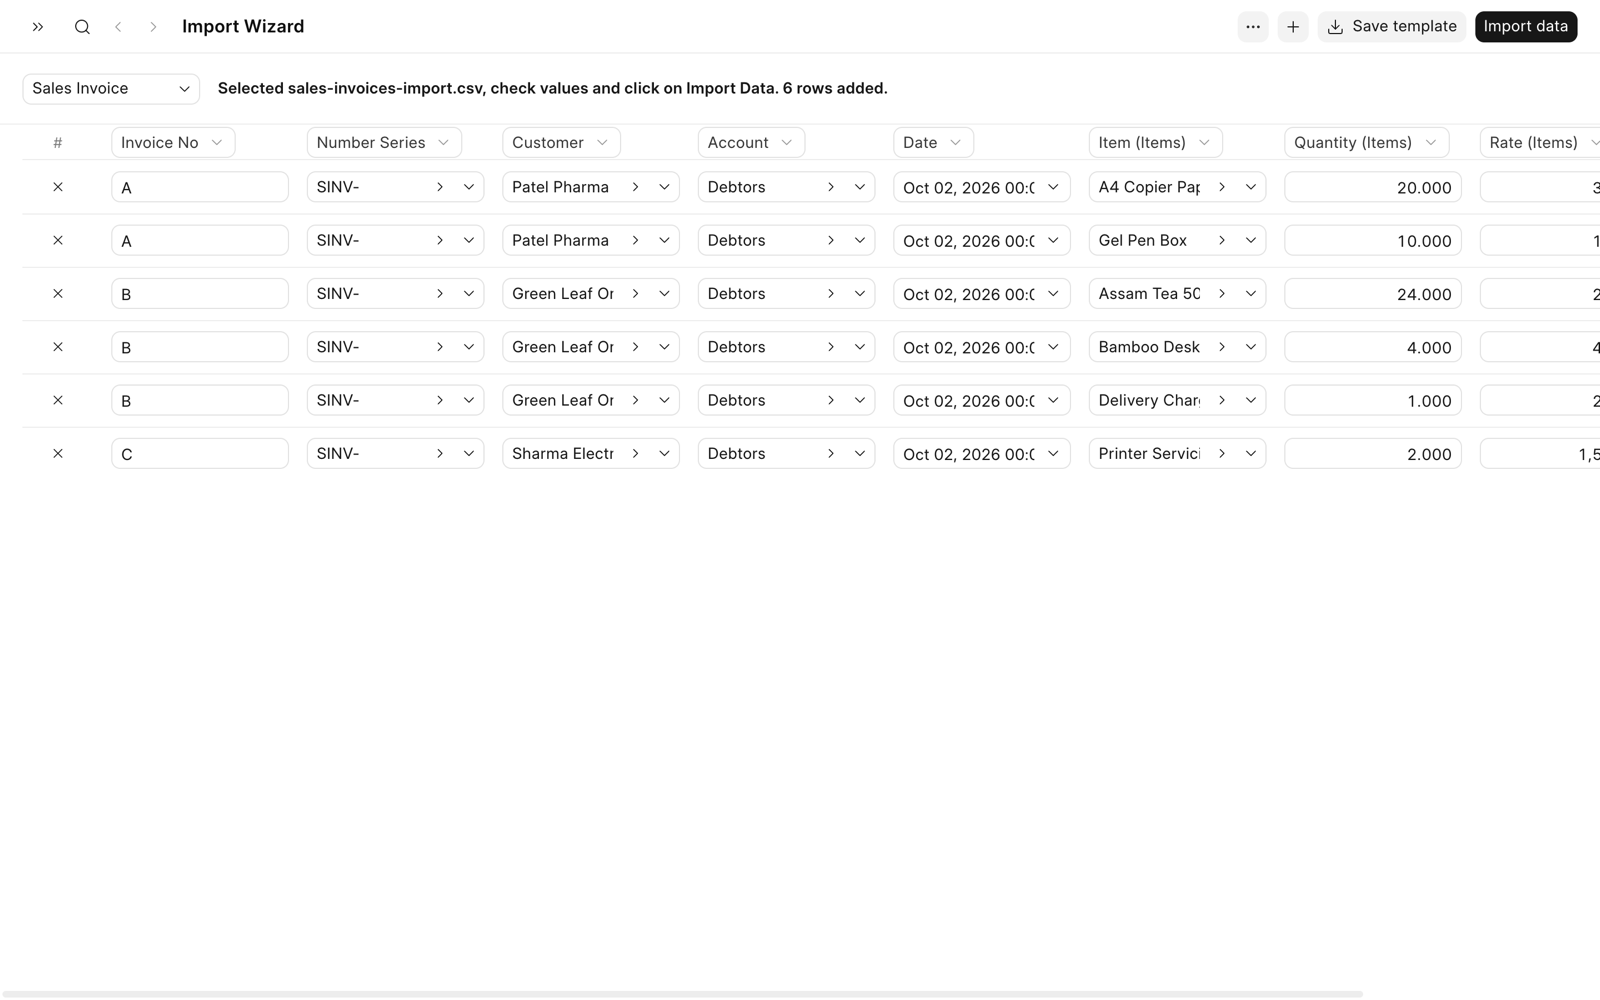
- Put each table row on a different row of the file.
- Give all the rows of one entry the same value in the name column, such as Invoice No.
- Enter the other values of the entry, such as the customer, in the first row. You can also repeat them in each row.
For example:
| Invoice No | Customer | Item (Items) | Quantity (Items) |
|---|---|---|---|
| A | Lin | Bat | 1 |
| A | Lin | Ball | 3 |
| B | Andy | Pen | 10 |
| B | Andy | Pencil | 20 |
| B | Andy | Ink | 2 |
This file makes two sales invoices. Invoice A has two items, and invoice B has three items. The name column only groups the rows. Frappe Books names each new entry from its number series, such as SINV-1001.