

















This page explains the parts every automation is made of, then walks you through building your first one.
Before you begin
- You need the System Manager role to create, edit, enable or test automations.
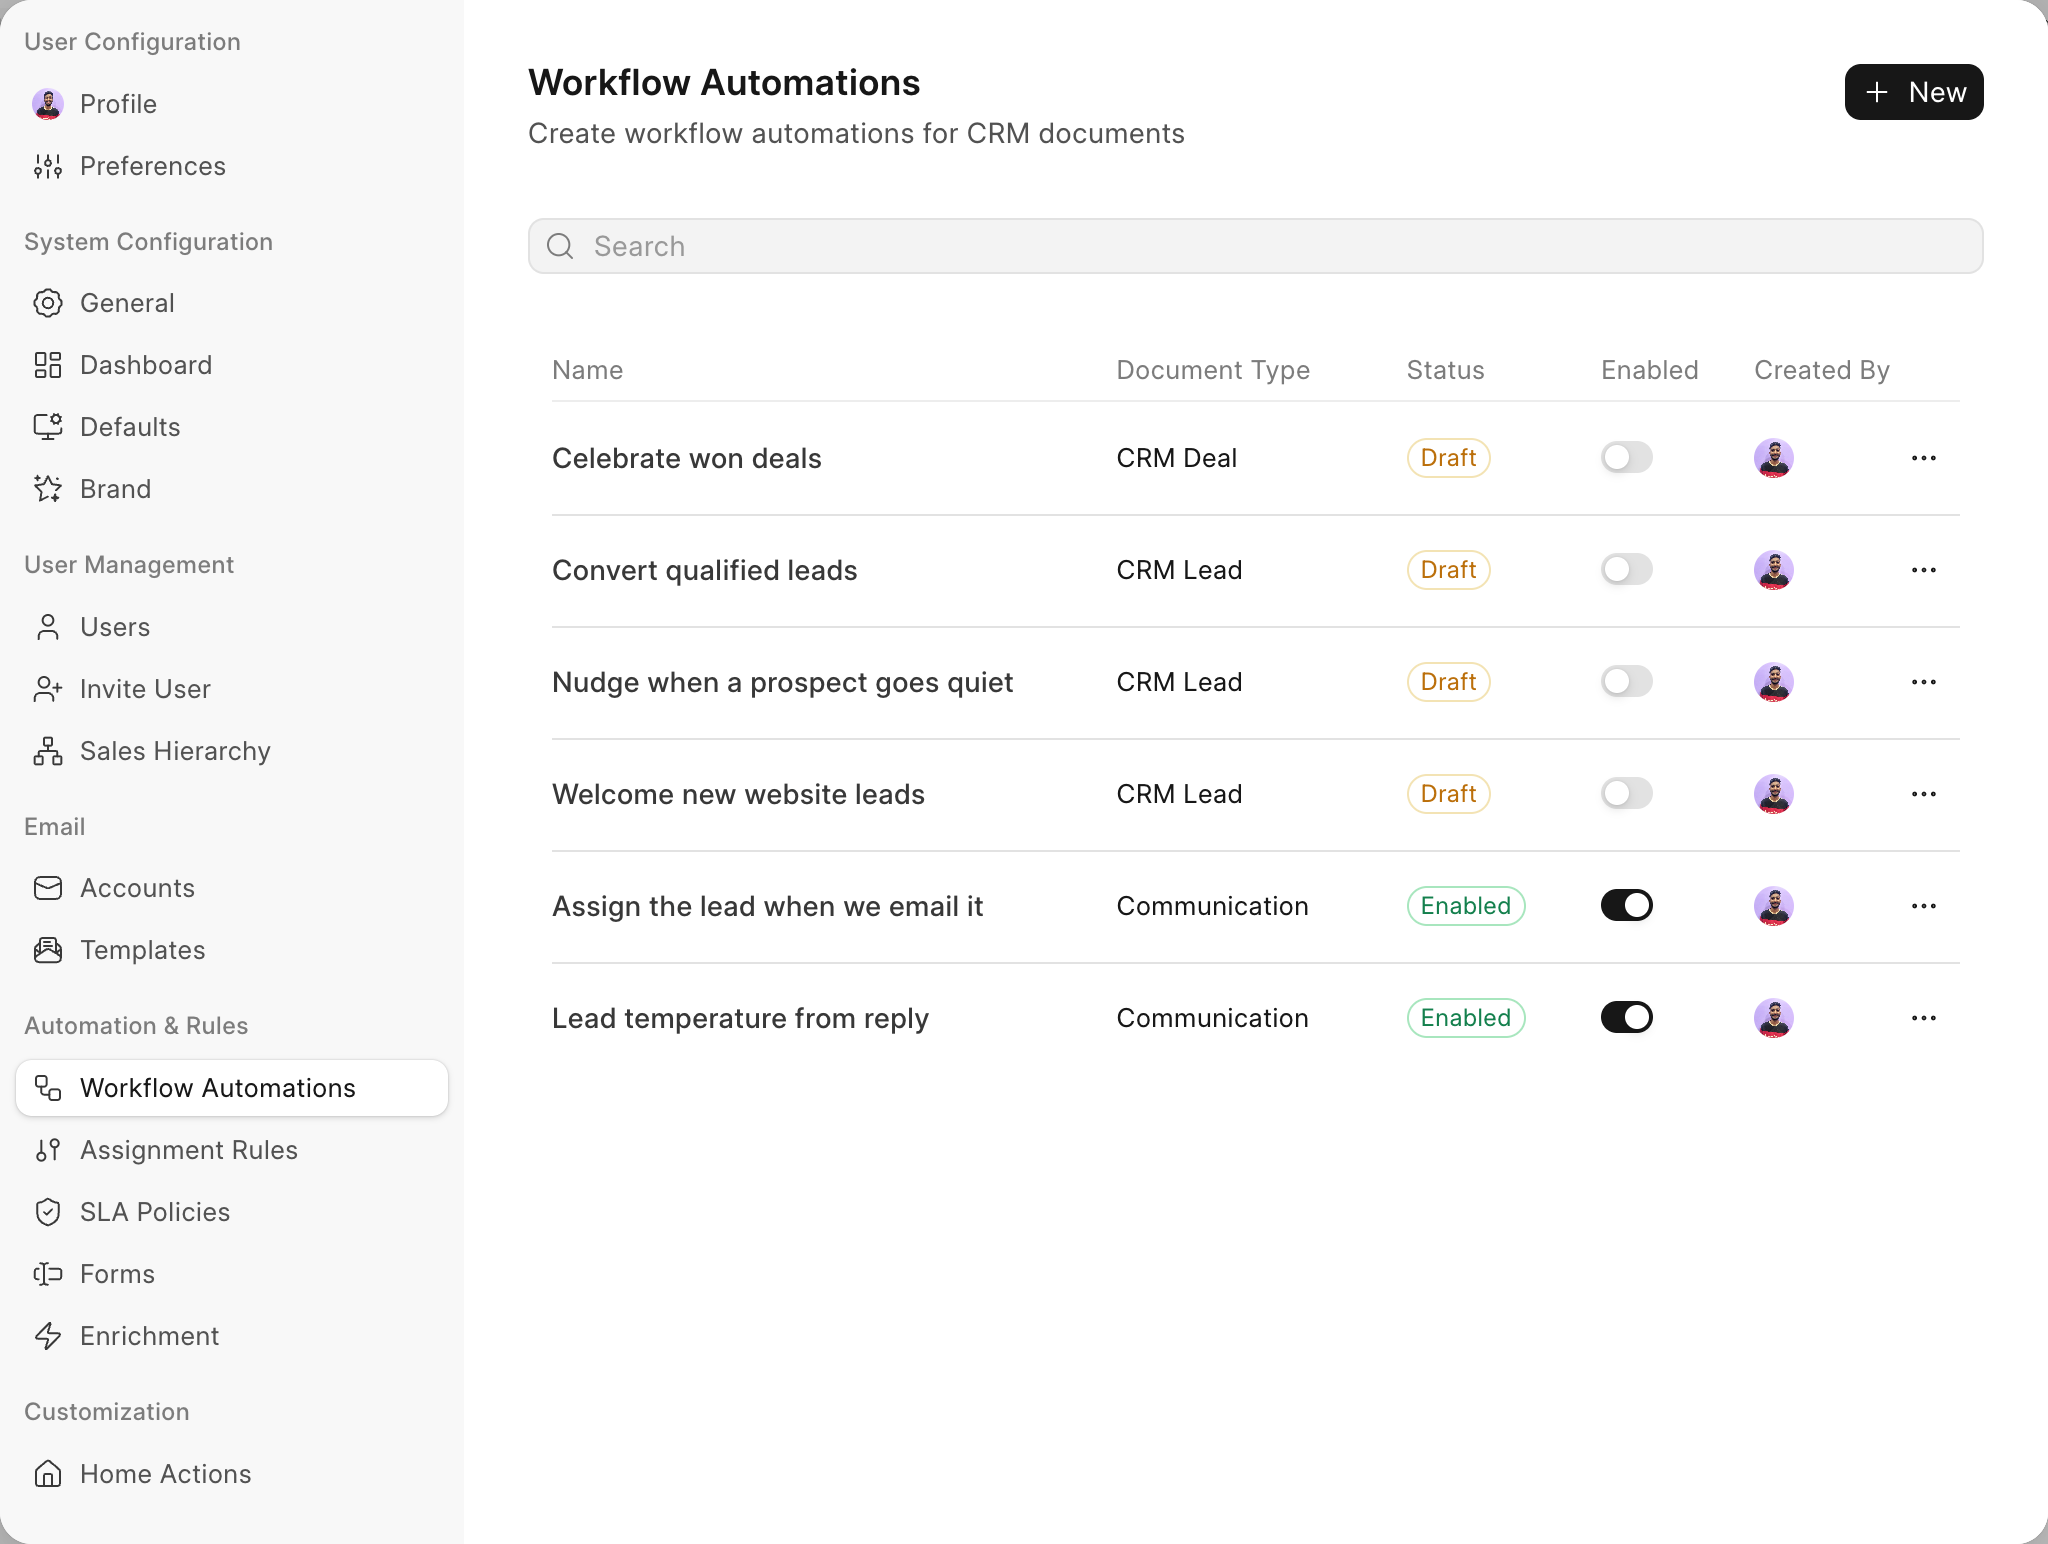
- Open Settings > Automation & Rules > Workflow Automations and click New.
What an automation is made of
| Part | What it answers | Example |
|---|---|---|
| Document type | Which kind of record does this automation watch? | CRM Lead |
| Trigger (event) | When should it start? | A lead is created |
| Filters | Which records should it apply to? | Source is Website |
| Steps | What should happen, and in what order? | Wait 1 day, then send an email |
| Run as | Whose permissions are the steps run with? | Automation User |
| Status | Is it live? | Enabled or Draft |
Document type
Every automation belongs to a document type, such as CRM Lead, CRM Deal or CRM Task. The record that starts a run is called the trigger record. Steps act on it by default.
Trigger
The trigger is the event that starts a run: a record being created or updated, a field changing value, a prospect replying, a date arriving, a schedule, and more. See Events for the full list.
Filters
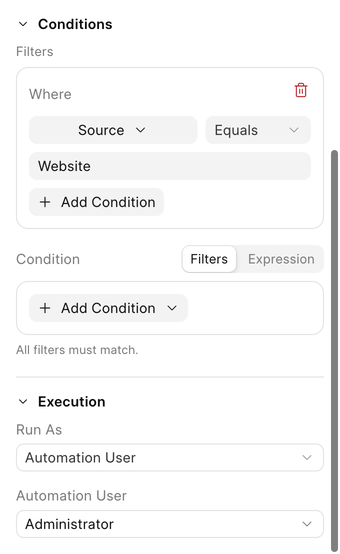
Filters narrow the trigger down to the records you care about. Click Add Condition to add a rule, for example Status equals New and Annual revenue is greater than 100000. Use Add Condition Group to combine rules with AND / OR.
For logic the filters cannot express, use the Condition field under Conditions. It takes a Python expression in which the record is available as doc:
doc.source == "Website" or doc.annual_revenue > 100000
Both live in the trigger's side panel under Conditions, above the Run As setting:
Steps
Steps run from top to bottom. There are two kinds:
- Blocks control the flow: If / Else, Wait and Wait for event. See Blocks.
- Actions do the work: send an email, set a field, assign a user, convert a lead, call a webhook, and more. See Actions.
An automation needs at least one action before you can enable it.
Each step can act on the trigger record or on a related record, such as the lead's organization, its contacts, or a deal created by an earlier step. Pick it in the step's Record field.
Run as (permissions)
Automations run in the background, so you choose whose permissions they use. Every step still runs the normal permission checks for that user.
| Option | The steps run as |
|---|---|
| Automation User (default) | A fixed user you pick. Defaults to Administrator. |
| Triggering User | The user whose action started the run, such as the person who saved the lead. |
| Document Owner | The user who created the trigger record. |
Pick the least powerful user that can still do the job. For example, an automation that only updates leads does not need Administrator.
When a step fails
If a step fails, the run stops at that step and the steps after it do not run.
If an automation fails 10 times in a row, it is disabled automatically, the reason is shown on the automation, and its owner is notified. Fix the cause, then enable it again.
Build your first automation
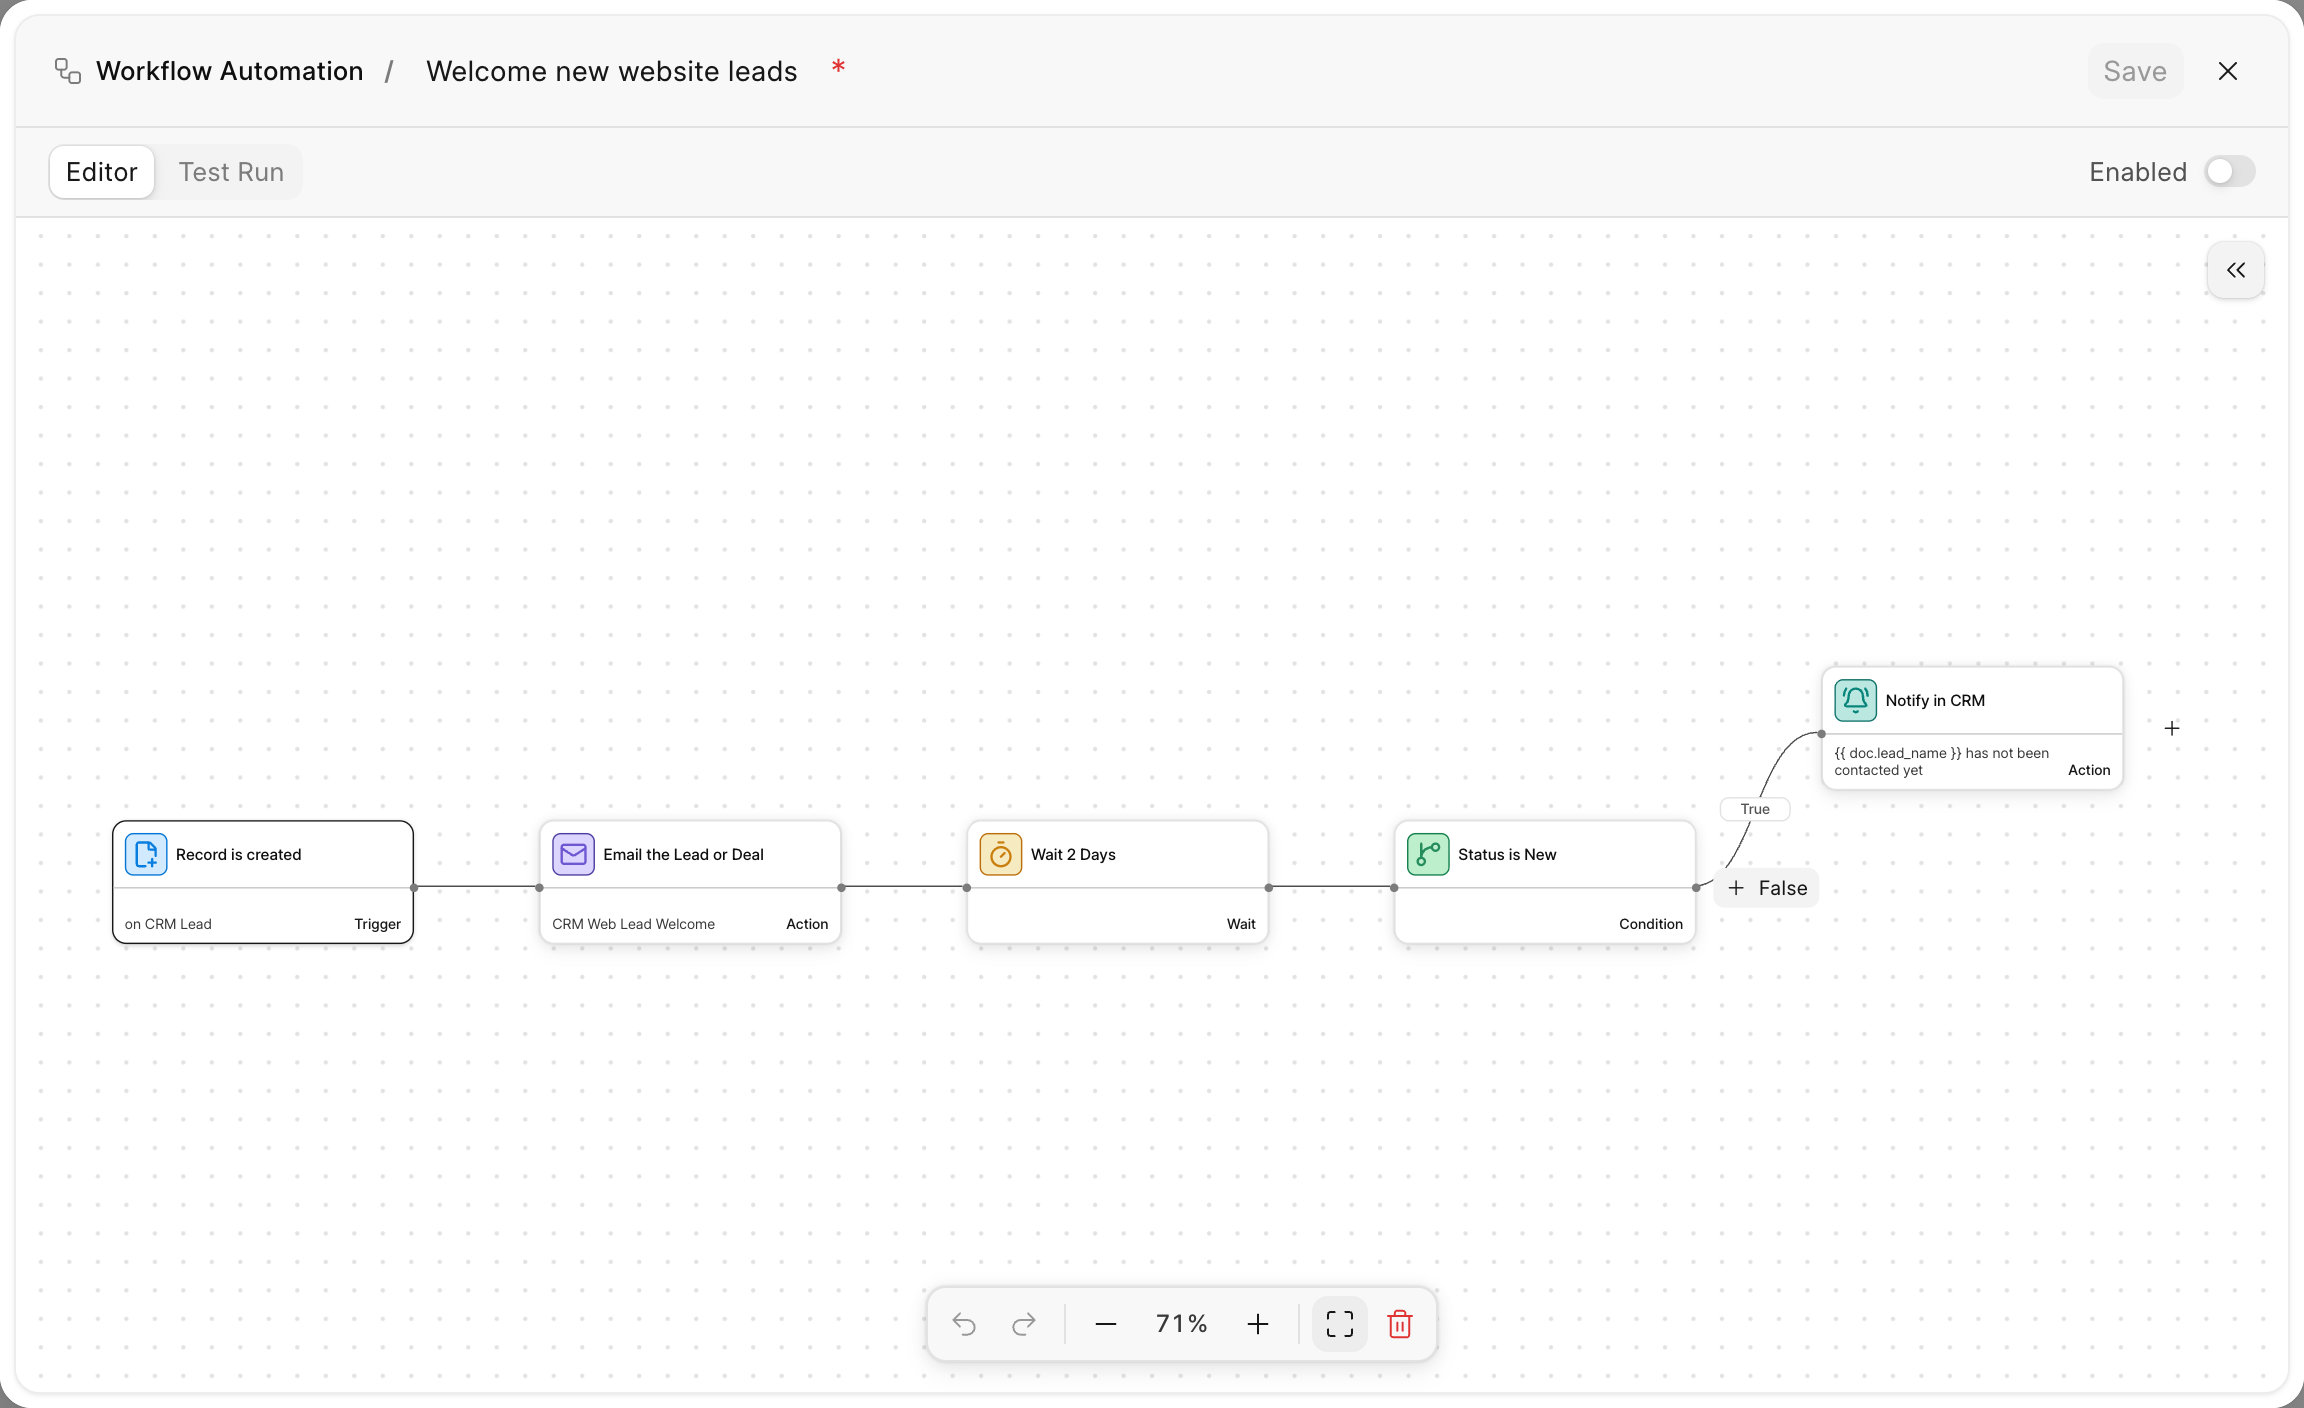
In this example, you send a welcome email to every new lead that comes from the website, then remind the lead owner if the lead is still New after two days.
- Go to Settings > Automation & Rules > Workflow Automations and click New.
- Give it a title, such as Welcome new website leads.
- Click the trigger on the canvas. In the side panel, set DocType to CRM Lead and choose Record is created.
- Under Filters, click Add Condition and add Source Equals Website.
- Click + after the trigger and add Email the Lead or Deal. Pick your welcome Email Template.
- Add a Wait block and set it to 2 Days.
- Add an If / Else block. Set its Condition to Status Equals New.
- On the True branch, add Notify in CRM. Set Recipients to Document owner and write the notification, for example
{{ doc.lead_name }} has not been contacted yet. - Click Save, then open Test Run and try it on an existing lead.
- When you are happy with it, turn on Enabled and save again.
The finished automation looks like this:
Test before you enable
Open the Test Run tab, pick a record under Select a record and click Start test run. The whole automation runs against that record, then every change is rolled back. Nothing is saved and no email is sent:
- Wait blocks are simulated, so you can see the steps that come after them.
- Wait for event takes the Timed out branch. Click Run Event happened under the block to test the other branch.
- Call Webhook reports the request it would have made, but does not send it.
The result shows how many steps ran, and marks each step that ran on the canvas. Steps on the branch that was not taken are greyed out.
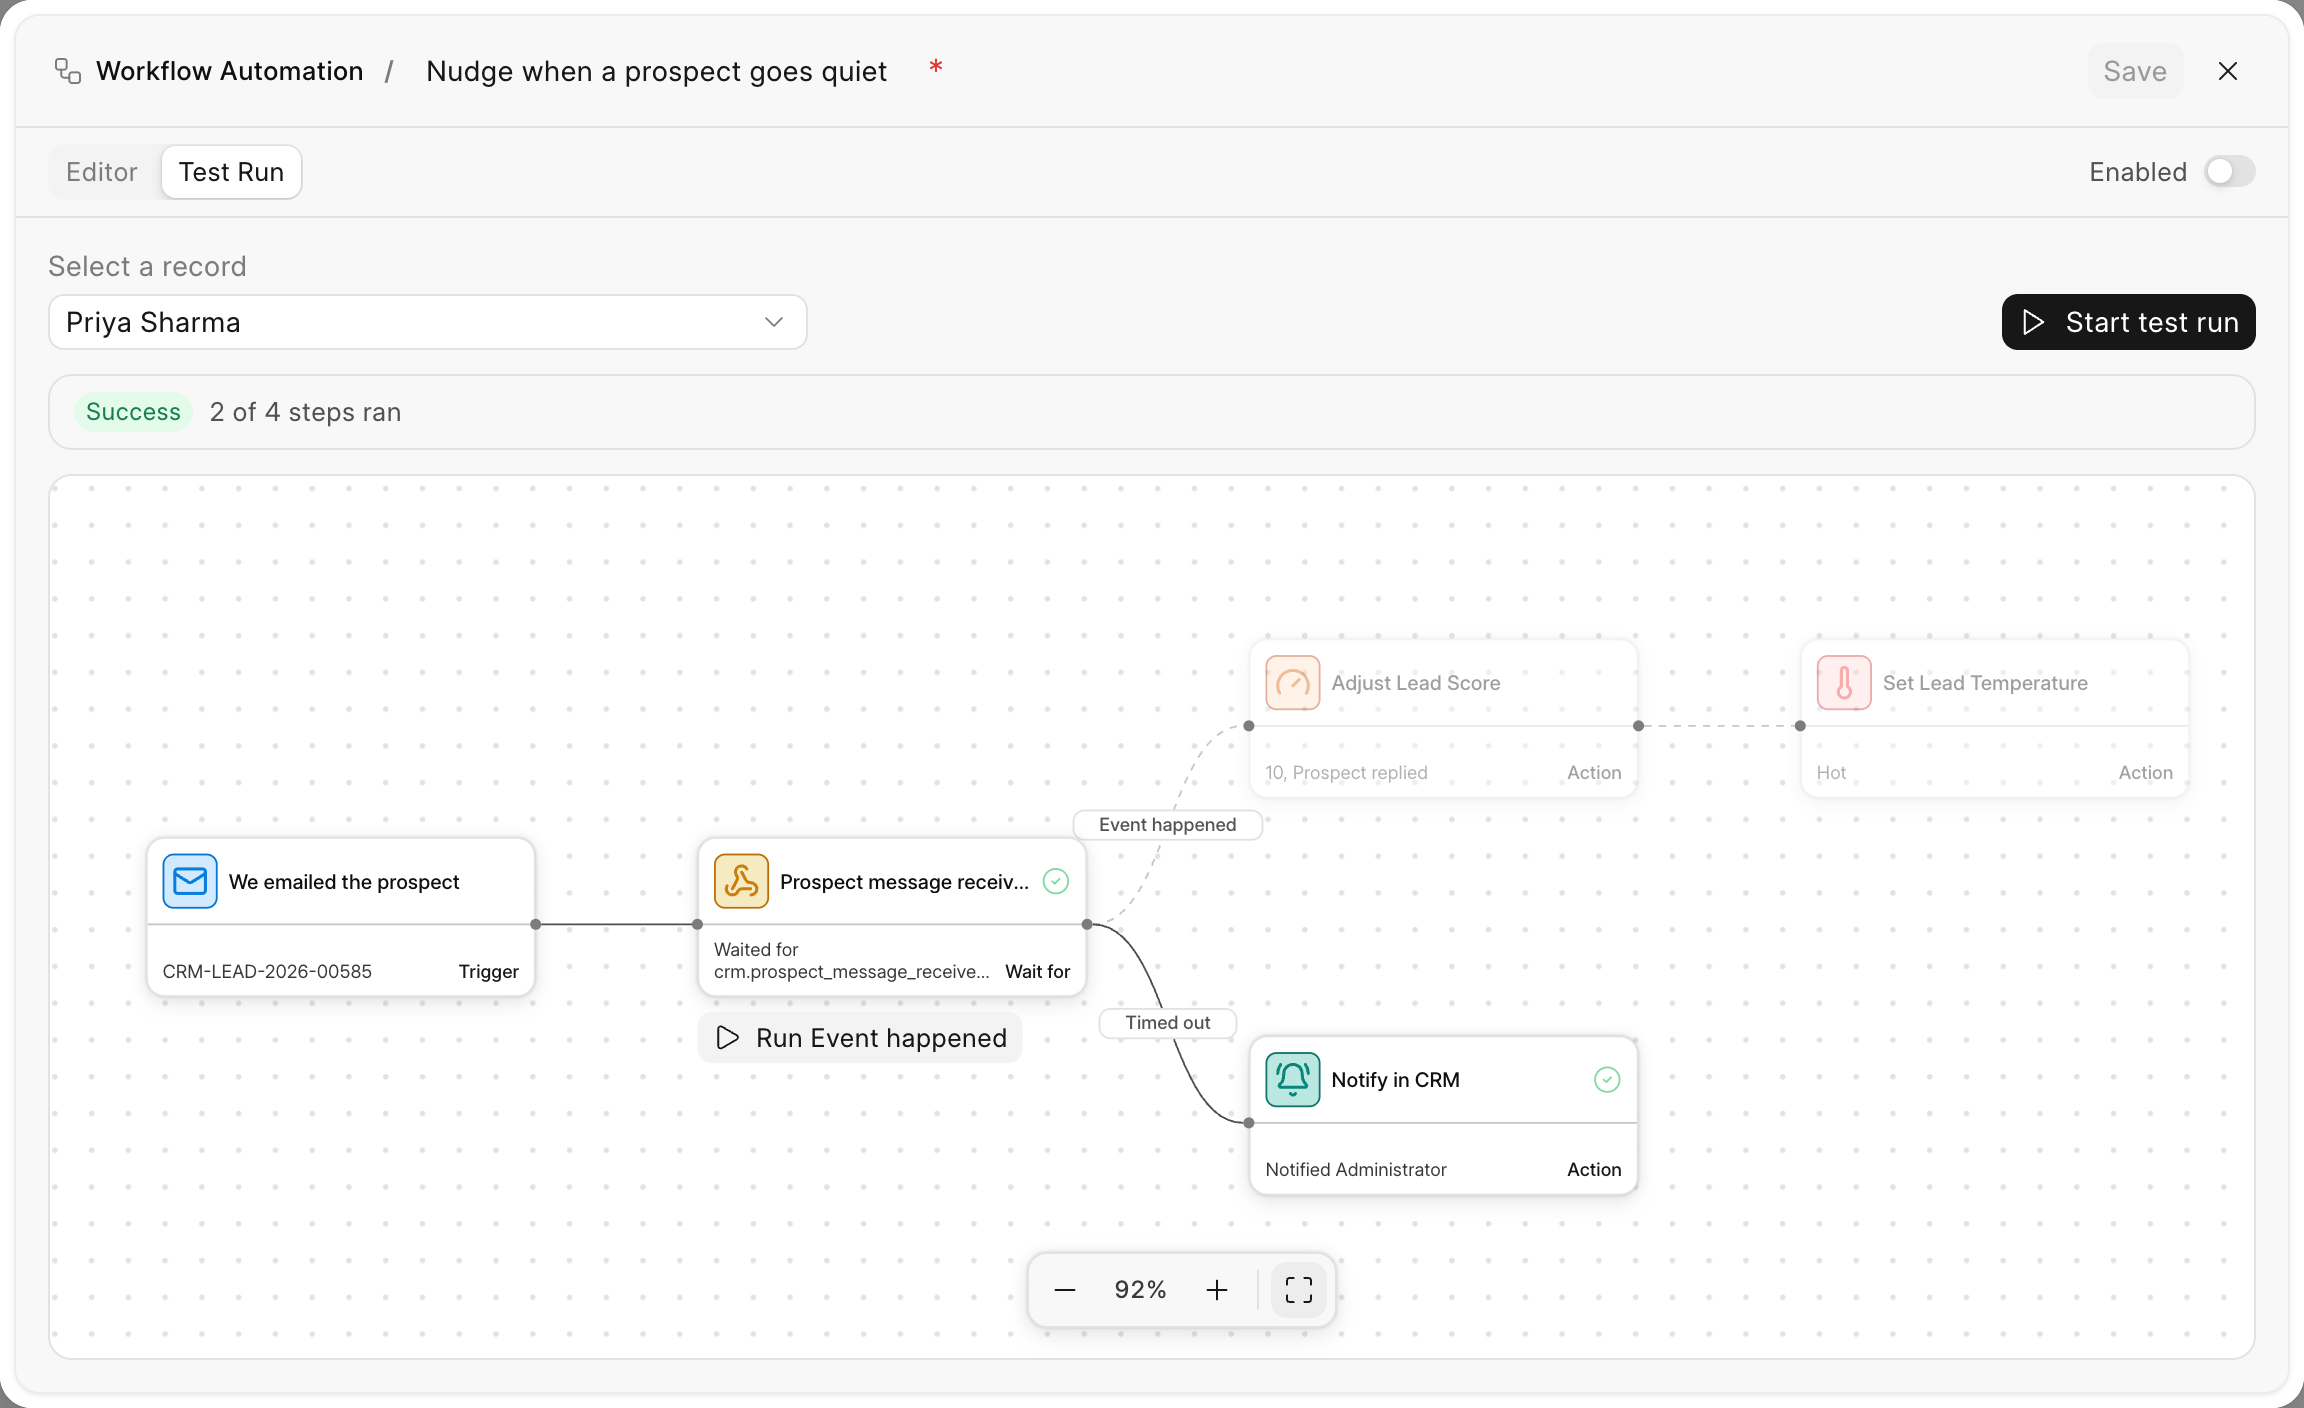
Save your changes before you test: a test always runs the saved version.
Use record values in text
Most text fields in a step, such as a subject, a message or a field value, accept Jinja templates. Click Insert field under the box to pick a field, or wrap a value in {{ }} yourself:
| Write | To insert |
|---|---|
{{ doc.lead_name }} |
A field of the record the step acts on |
{{ trigger.name }} |
A field of the record that started the run |
{{ payload.previous_status }} |
A value carried by the triggering event |
For example, the subject Welcome to Acme, {{ doc.first_name }} becomes Welcome to Acme, Priya.
Site-wide settings
A System Manager can adjust engine-wide behaviour in the desk under Automation Settings, such as pausing all automations at once, how many consecutive failures disable an automation, and how many times one automation may trigger another.