

















Forms in Frappe CRM let you collect Leads or Deals directly from your website or by circulating web forms without writing a single line of code.
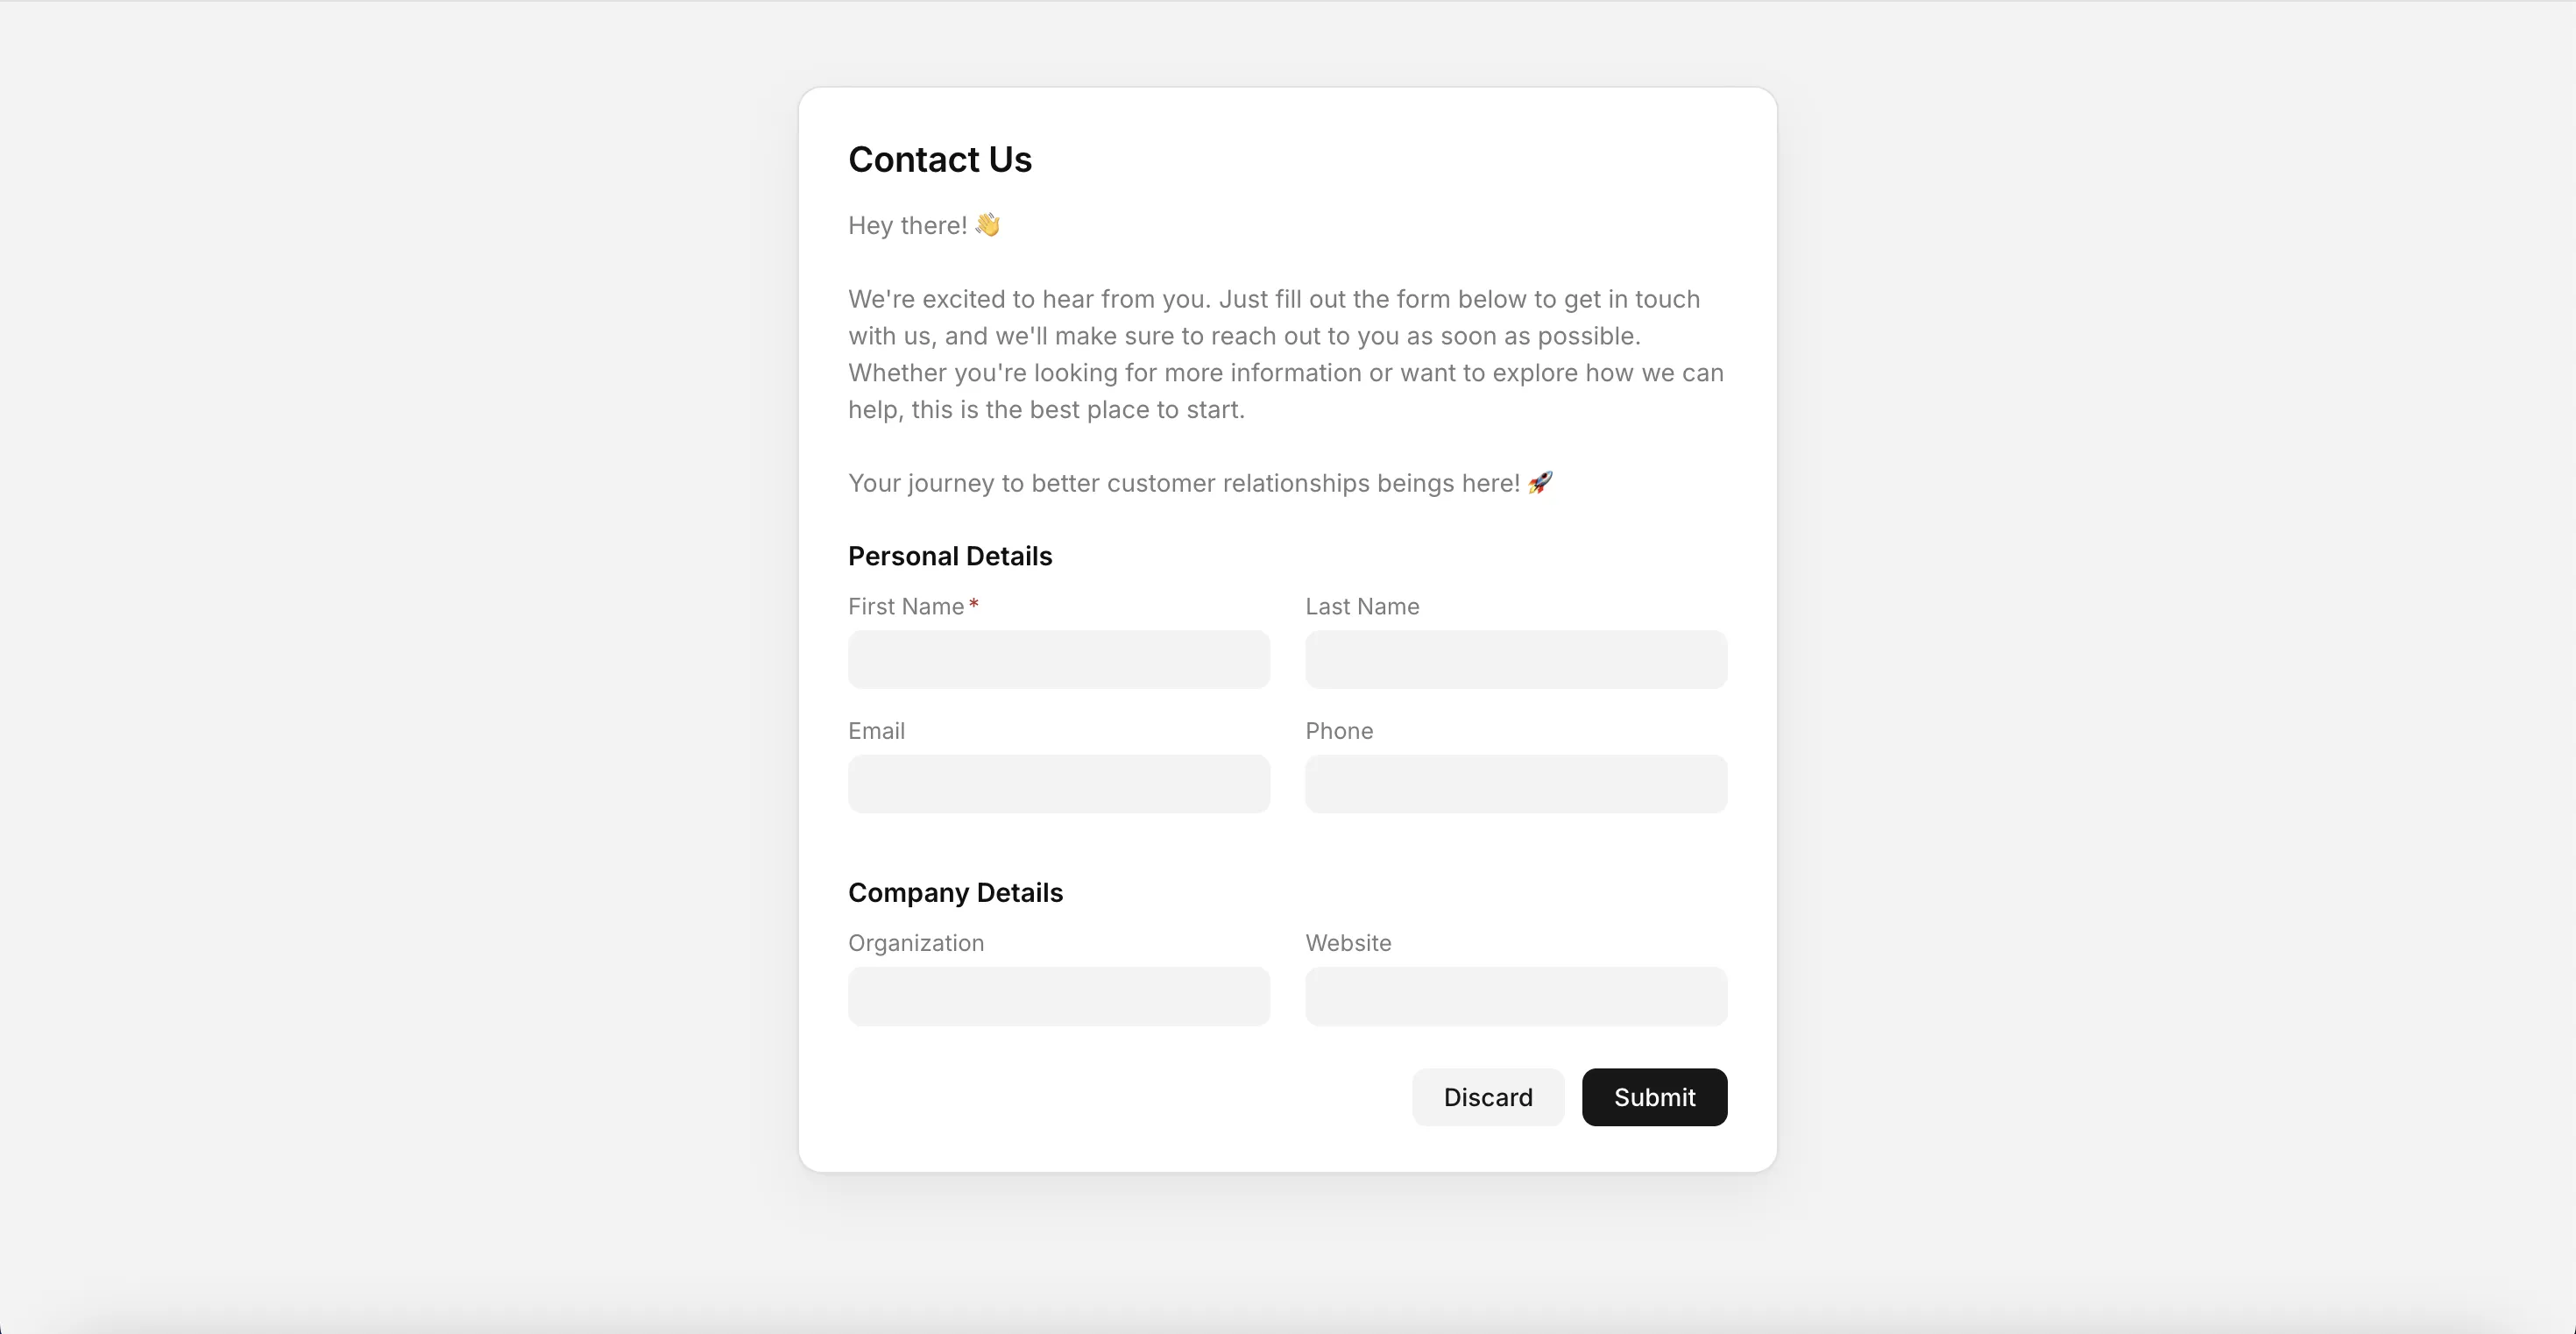 A sample form
Creating a form
Follow these simple steps to create one:
- Open Settings → Forms. (You'll need the Sales Manager or System Manager role to see this.)
- Click New.
- Give it a title, choose whether submissions become a Lead or a Deal, and set the route. This becomes the last part of the form's public URL (
/crm-form/your-route). The route fills itself in from the title until you edit it directly. - Click Create form.
It opens straight into the builder with a starting layout already in place – name, email, and phone for Leads, plus organization name for Deals, so there's something to look at and publish right away.
Building the layout
The editor is a canvas of sections and columns, all drag-and-drop:
- Add Section starts a new labelled group. Click on the title to name it.
- Inside a section, Add Field searches every field on the Lead or Deal; you can select and add which you want to show on your form.
- Click a field to expand it and set:
- Required - visitors can't submit without filling it in.
- Placeholder - example text shown inside the empty field.
- Description - helper text under the field.
- Drag the grip on the left of a section or field to reorder it.
- Remove a field with the ×. Fields the record (Lead or Deal) itself requires (like Status) can't be removed outright — they move to a Hidden required fields panel instead, where you set the default value that gets applied automatically on submission. If fields are added to the hidden section, they aren't visible to the audience on the public form.
Previewing
Click Preview to see the form as a visitor would, fill it out, and check that the success screen shows what you'd expect. Nothing here is actually saved. Discard or Preview again resets it, and Edit takes you back to the canvas.
Settings
The Settings tab holds:
- Route - the public URL slug.
- Maps to - Lead or Deal.
- Submit button label - you can edit this label as per your preference.
- Success message - shown after submission if there's no redirect.
- Redirect URL - send visitors somewhere else (a thank-you page, say) instead of showing the success message.
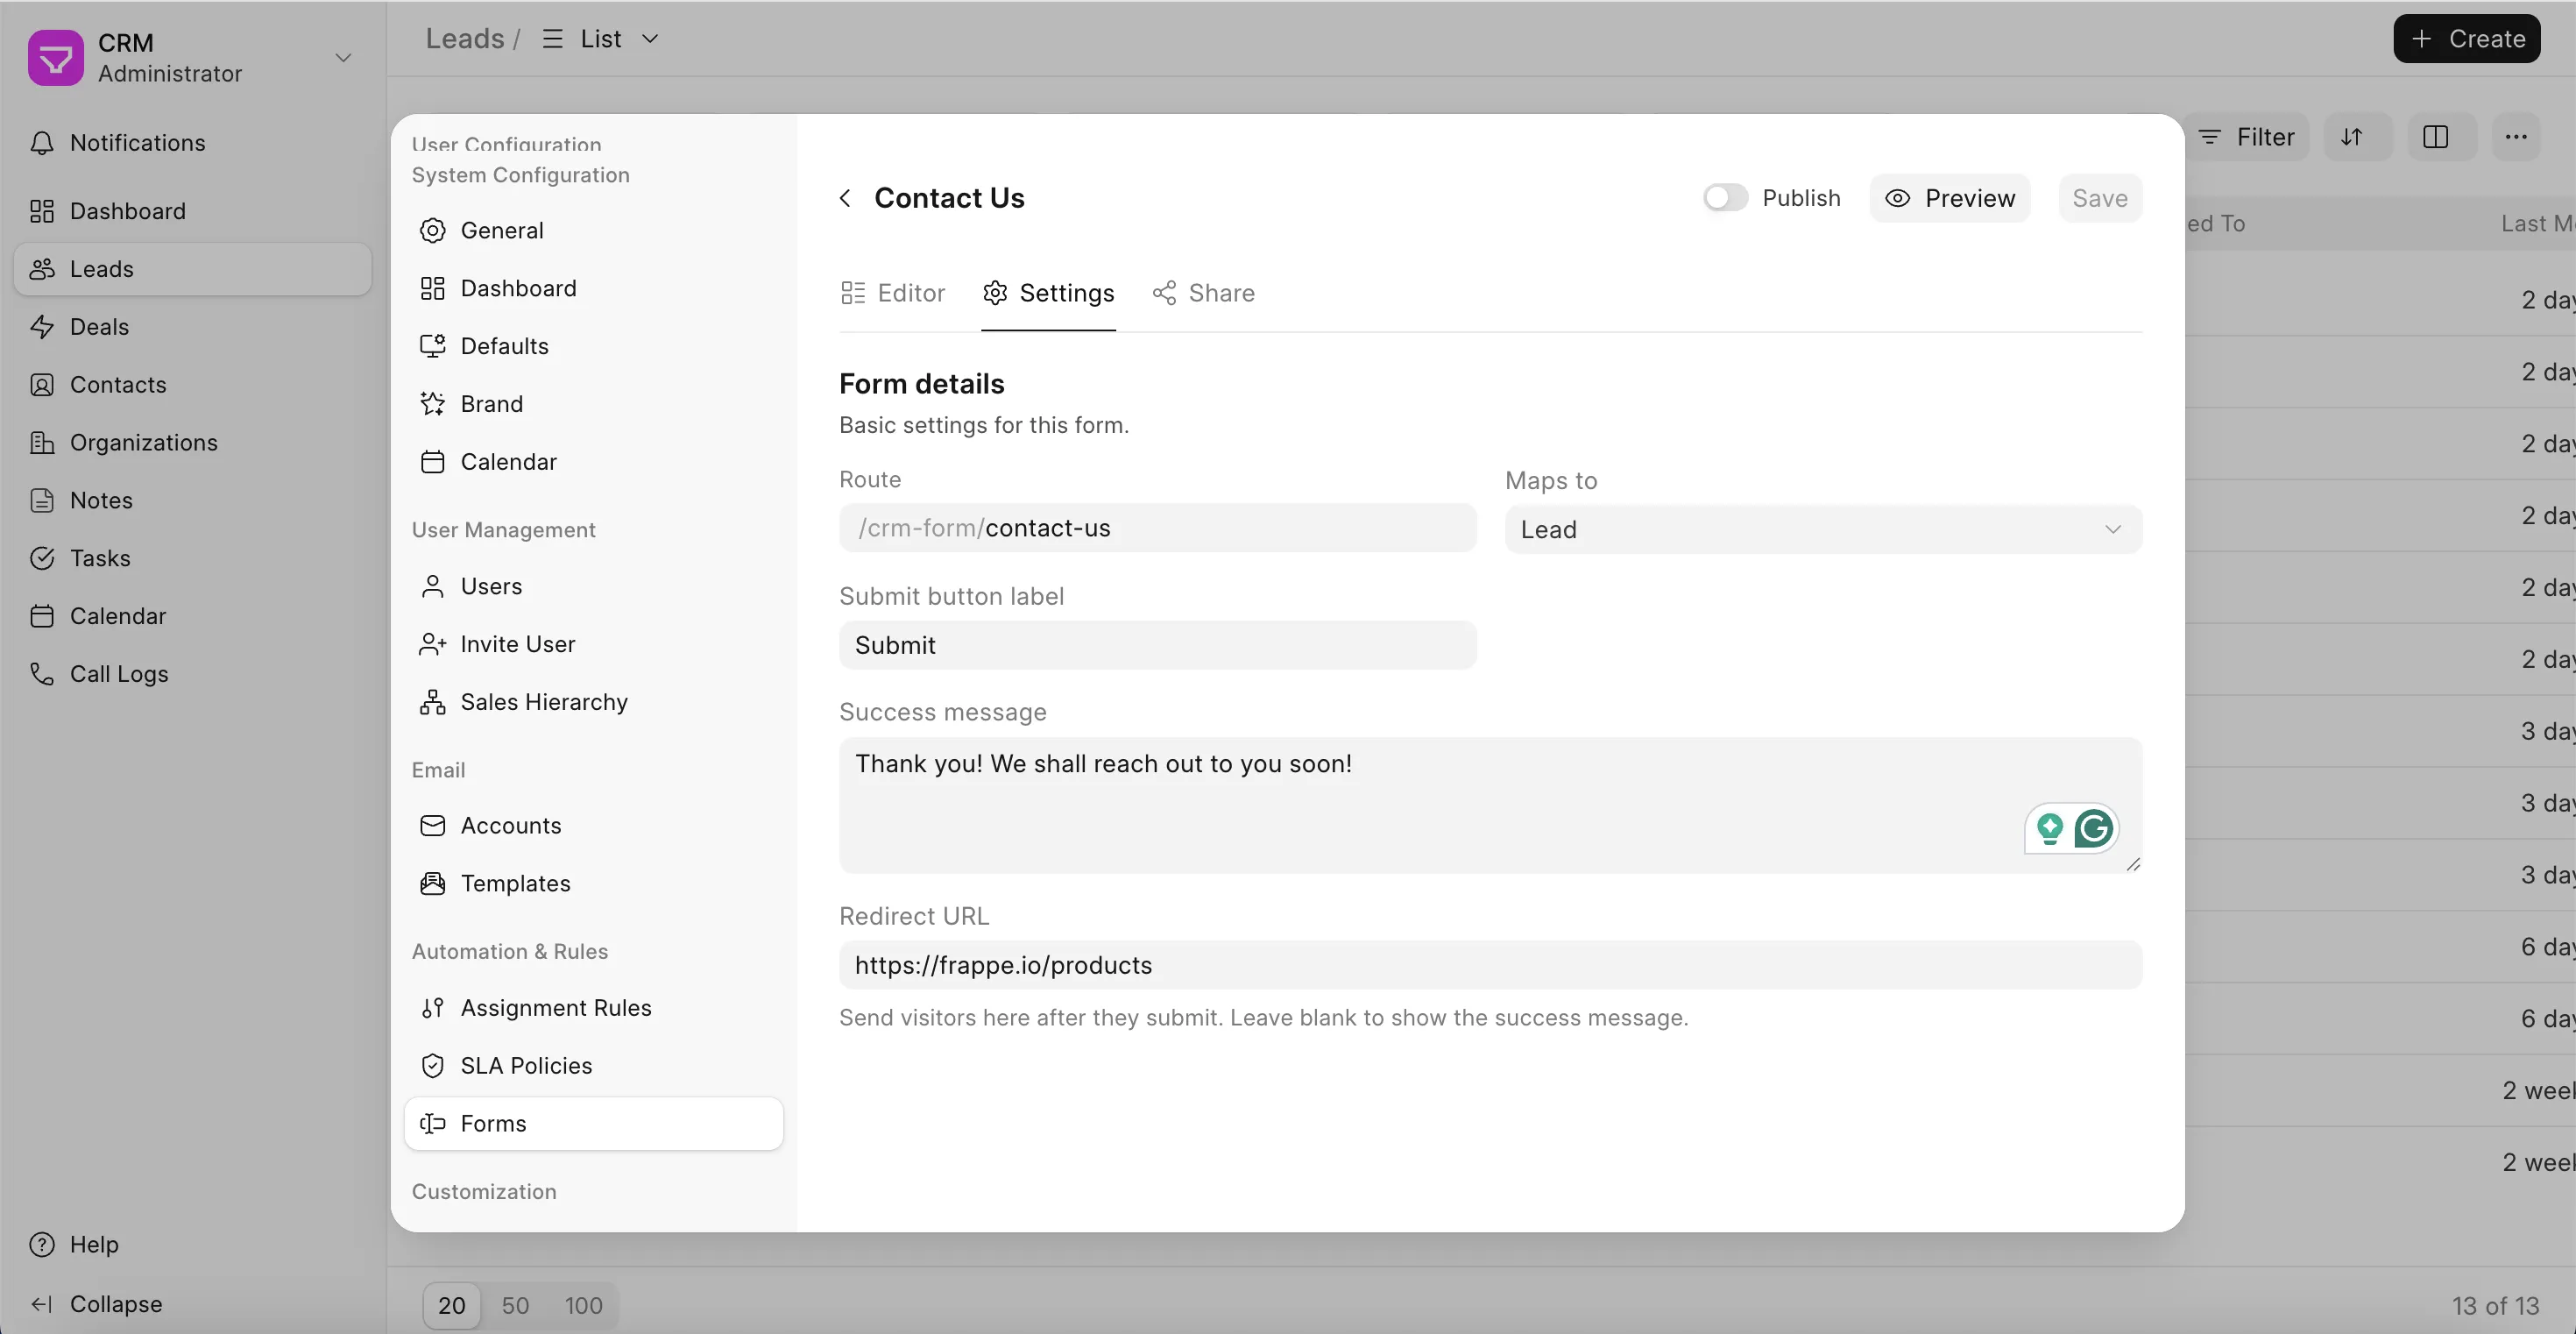 Settings page in Forms
Publishing
Flip Publish on in the header to make the form live. It won't publish until every hidden required field has a default set.
Unpublishing doesn't delete anything. It just takes the public page down. As a manager, you can still open the link yourself to preview a draft; everyone else gets a 404 until it's published.
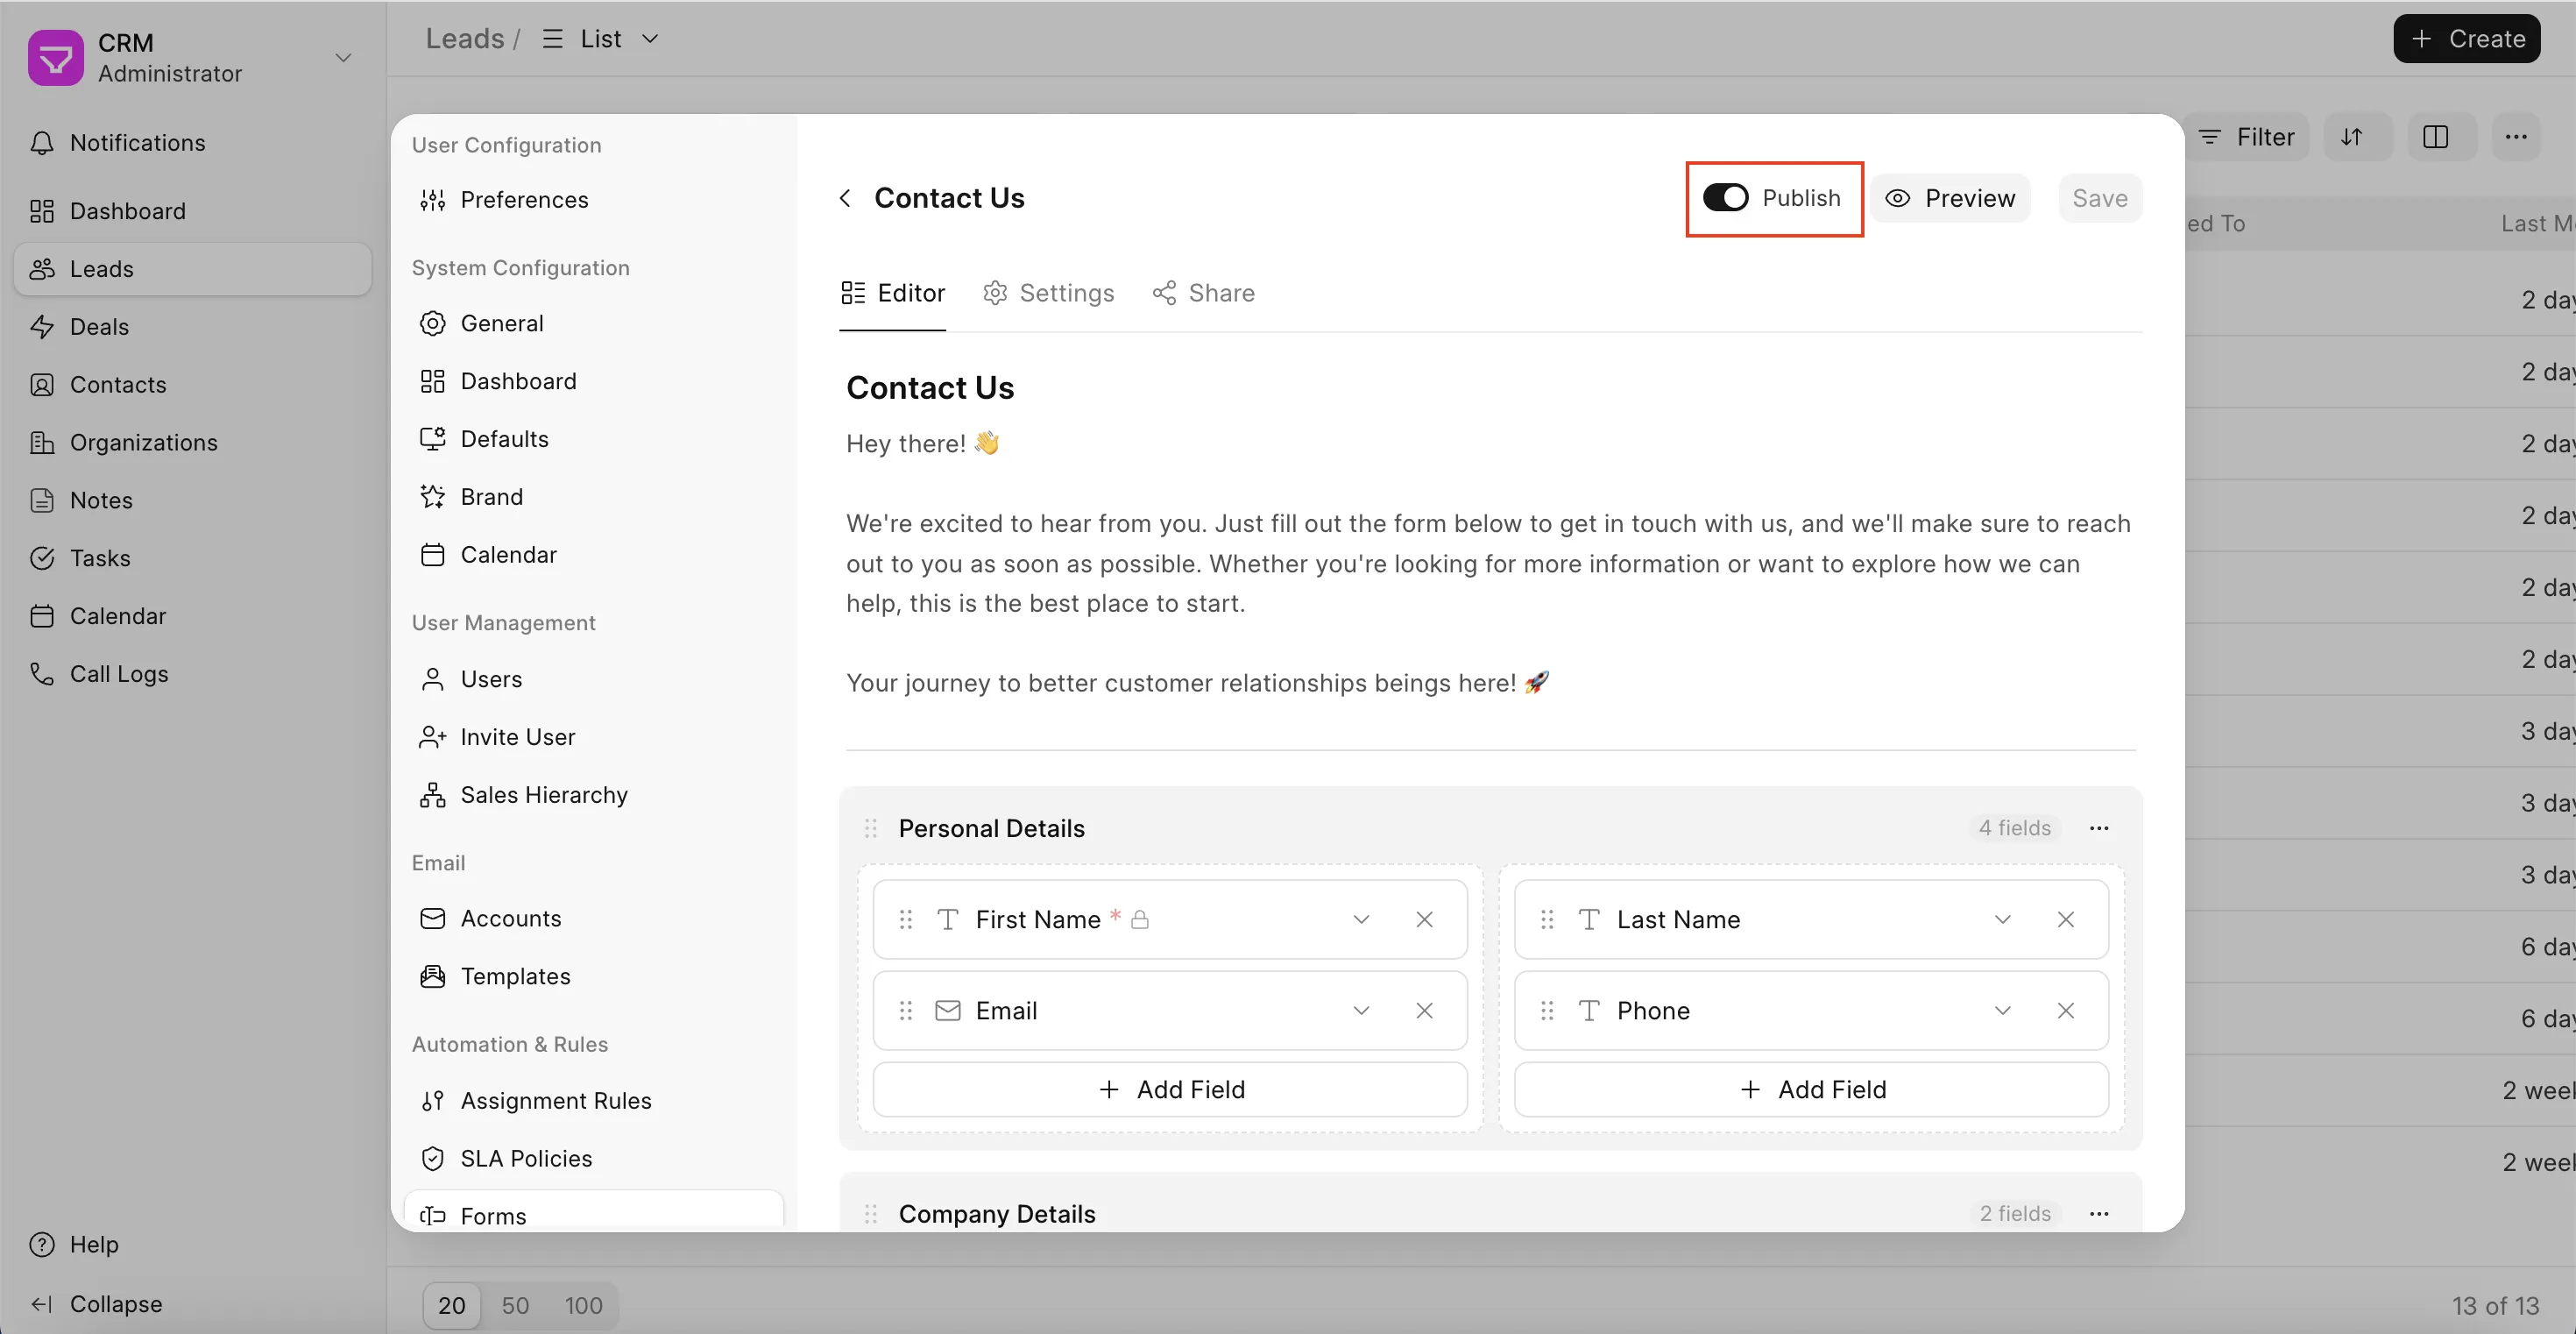 Enable "Publish" to make your form public
Sharing and embedding
Once published, the Share tab gives you:
- Link - the hosted form's own page, ready to send directly.
- Embed - an iframe snippet for dropping into your own site.
- Allowed domains - list the sites (one per line) allowed to embed the iframe. Leave it empty, and the embed only works on your CRM's own domain.
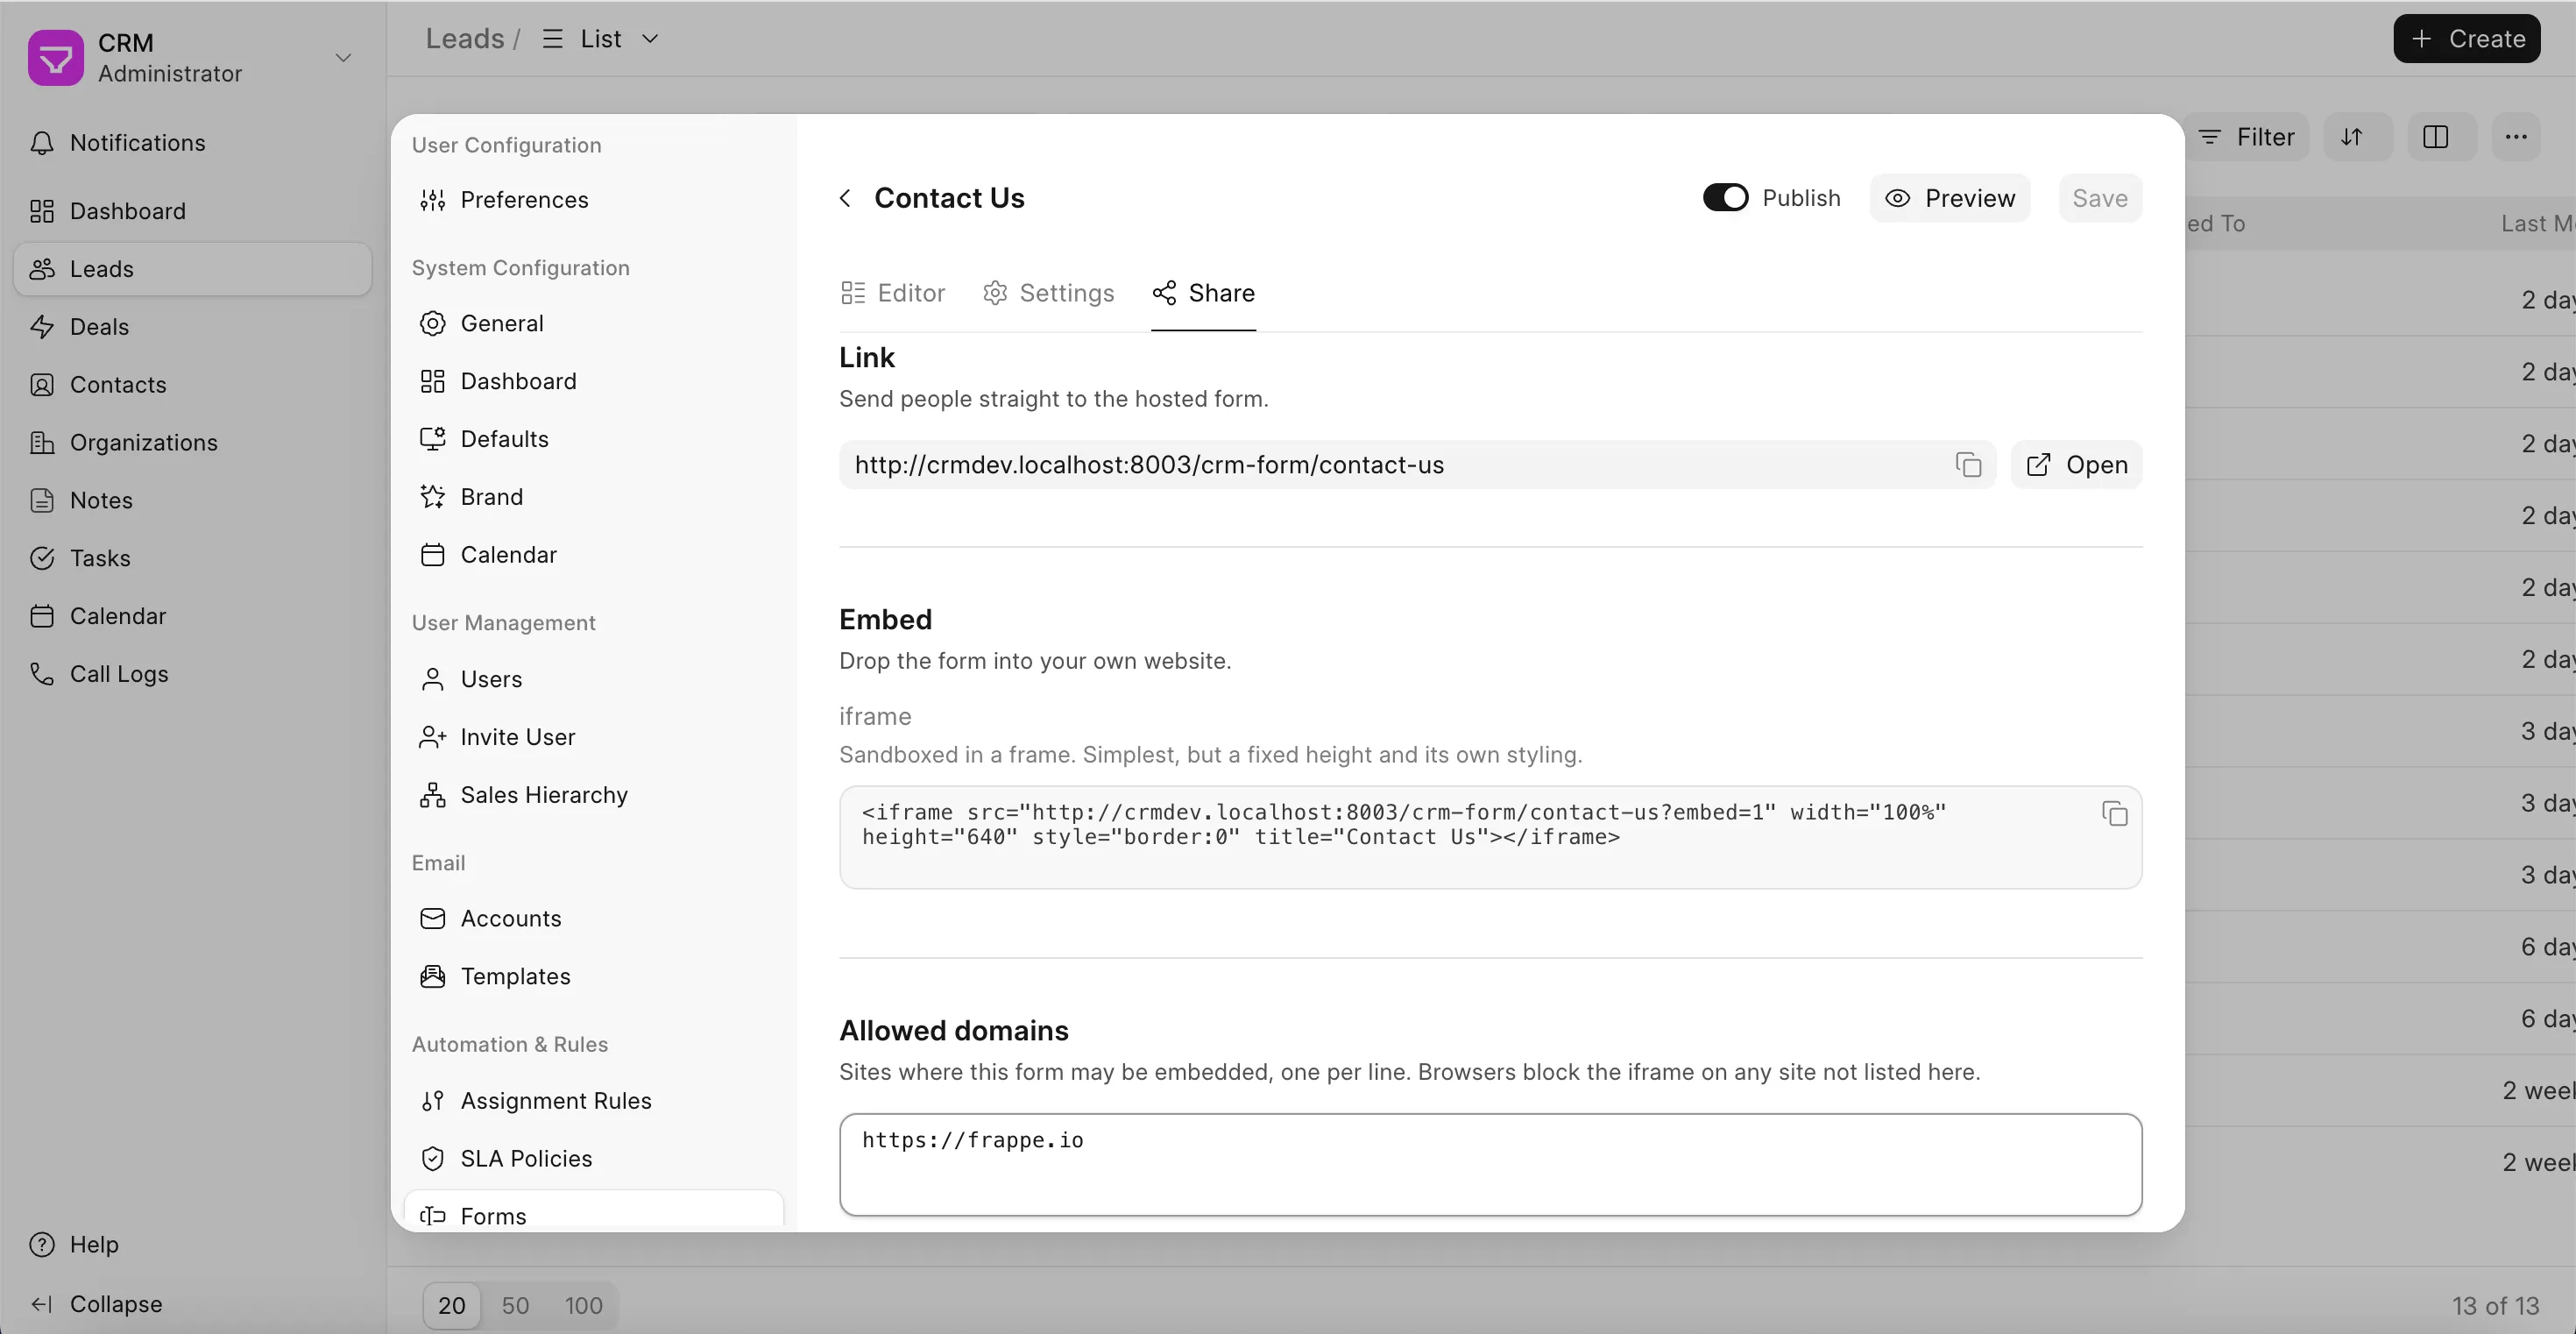 Share tab in Forms
That's it. Once you have embedded the form in your website, your site visitors can fill it up and a Lead / Deal as configured will get created in your CRM with source = Web Form.
P.S. In case you want to add more automations and colour to your form like custom CSS, banner images, etc. you can check your form in the desk view by going to Desk -> Web form. Refer to this link for more details.