
Purchasing an Asset
Purchasing an asset in ERPNext involves creating the asset record, optionally automating asset creation from a purchase, and following the purchase and accounting cycle.
Assets can be purchased manually or automatically created when receiving an item in a Purchase Receipt or Purchase Invoice. This ensures accurate asset tracking and proper accounting entries.
1. Prerequisites
Before purchasing a new asset, ensure the following are configured:
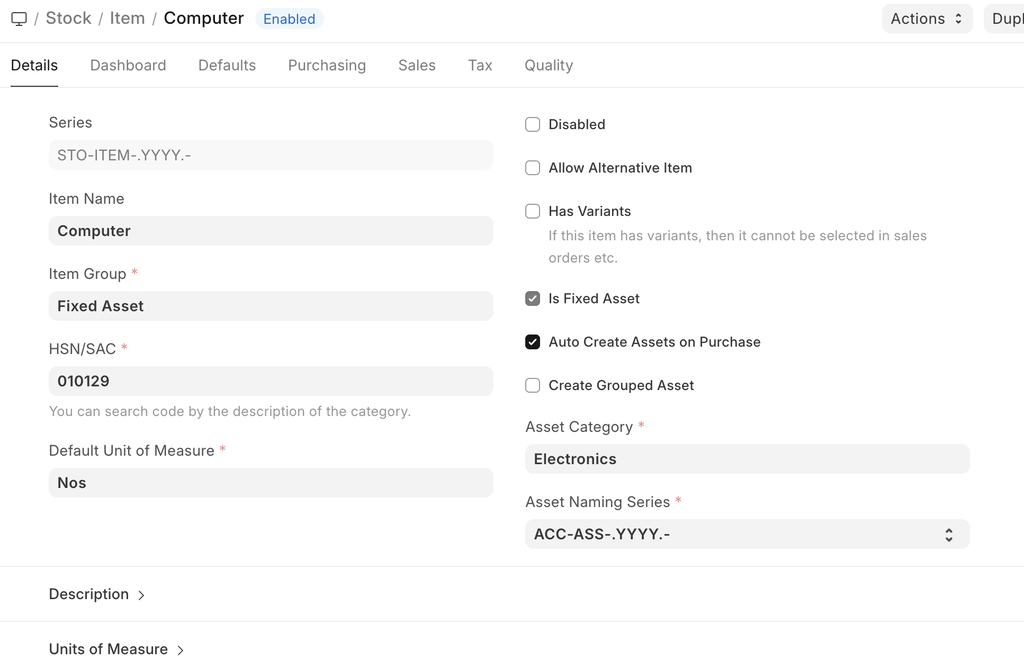
- Asset Category is created
- Item is created with ‘Is Fixed Asset’ enabled
- Optional: Enable ‘Auto Create Assets on Purchase’ in the item master if you want assets to be created automatically upon receipt
 Item Master
2. How to Purchase an Asset
- Follow the standard purchase cycle for the asset:
- Create a Purchase Order (if required)
- Receive the item via Purchase Receipt
- Submit a Purchase Invoice
- Enter the asset location in the Items table of the Purchase Receipt or Purchase Invoice.
- On submission of the Purchase Receipt:
- If Auto Create Assets is enabled, ERPNext will automatically create the Asset record.
- You can then update other details manually in the Asset form.

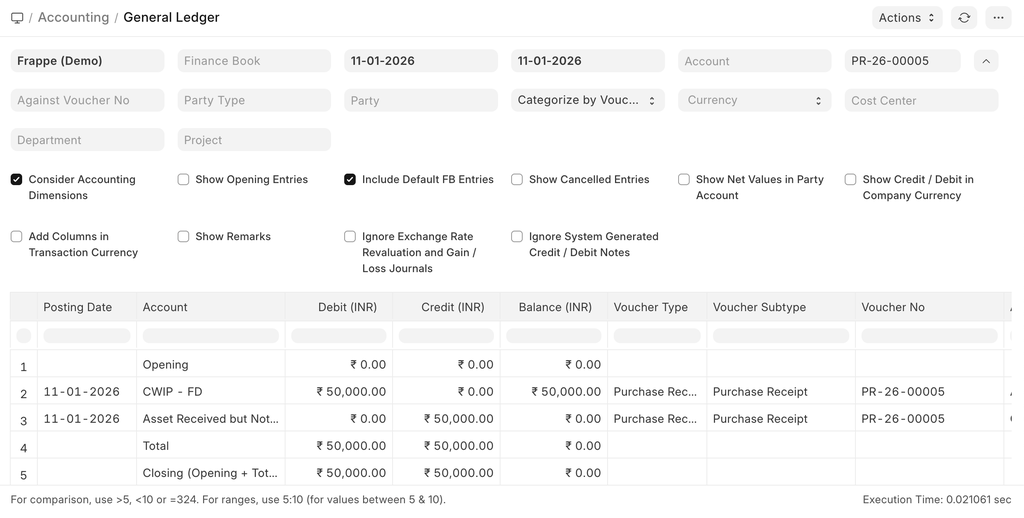
2.1 Accounting Entries
- With Capital Work in Progress (CWIP) Enabled
- On submitting the Purchase Receipt, the CWIP account is debited instead of the asset account.
- This represents that the asset is purchased but not yet available for use.
- When the asset becomes available for use, CWIP is credited, and the corresponding asset account is debited.
- With CWIP Disabled
- The receipt entry is posted directly to the asset accounts defined in the Asset Category.
- Temporary Liability Account
- ERPNext uses “Asset Received But Not Billed” (a liability account) when submitting a Purchase Receipt.
- On submitting the Purchase Invoice, this account is debited/reversed.
3. Related Topics
Last updated 4 days ago
Was this helpful?