
The Project Module in ERPNext is used to track work that involves multiple steps, people, and transactions. A project brings together tasks, time, materials, deliveries, and billing under a single reference.
The example below shows how a simple manufacturing job can be managed as a project and how it connects with other ERPNext modules.
Scenario**:**
A manufacturing company receives an order to make a custom metal storage rack for a warehouse customer.
Prerequisites:
- Create an Item - Storage Rack
Step 1: Create a Sales Order for the rack
- To create a sales order, go to:
Home > Selling > Sales Order
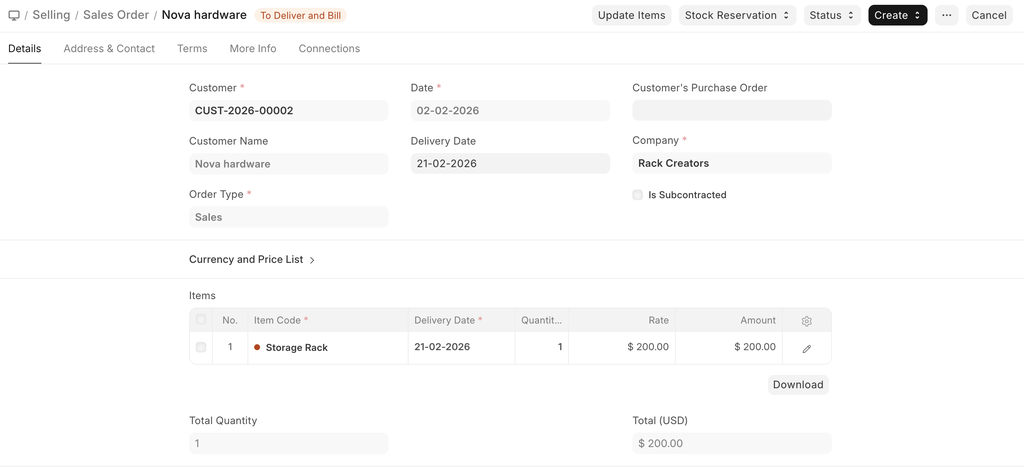 Sales order with the Storage Rack
Step 2: Create the project from the Sales Order
- After the sales order is submitted, we can create the project from it
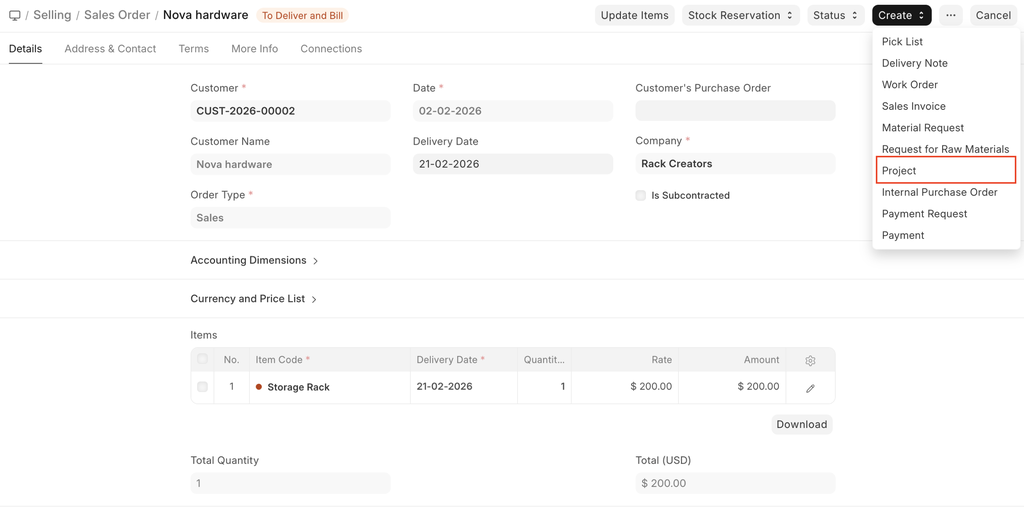 Creating project from Sales Order
- Once the project is created, the dashboard will be created, which will allow the creation of tasks and timesheets
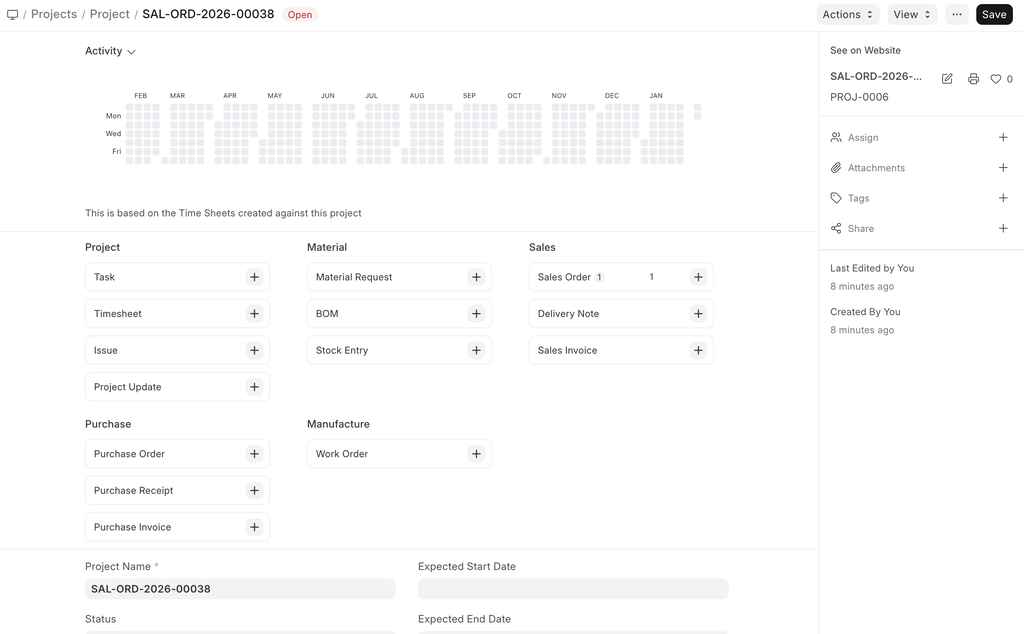 Project Dashboard
Step 3: Creating the Basic Tasks for the project
- We create separate tasks for the project, like cutting and welding, painting, and final assembly.
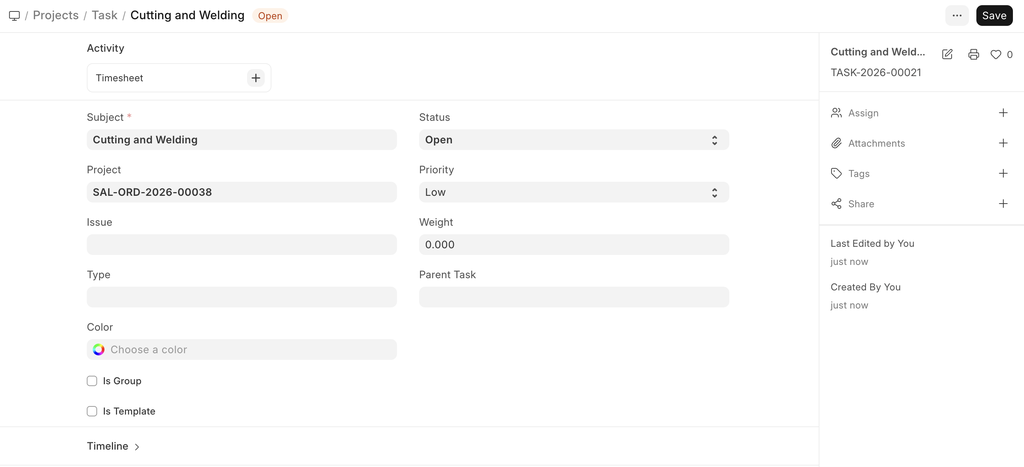 Task for Cutting & welding
Step 4: Create purchase orders for the raw materials and respective stock entries as well
- The raw material required for making the Storage rack would be purchased, therefore the purchase order would be made for the same
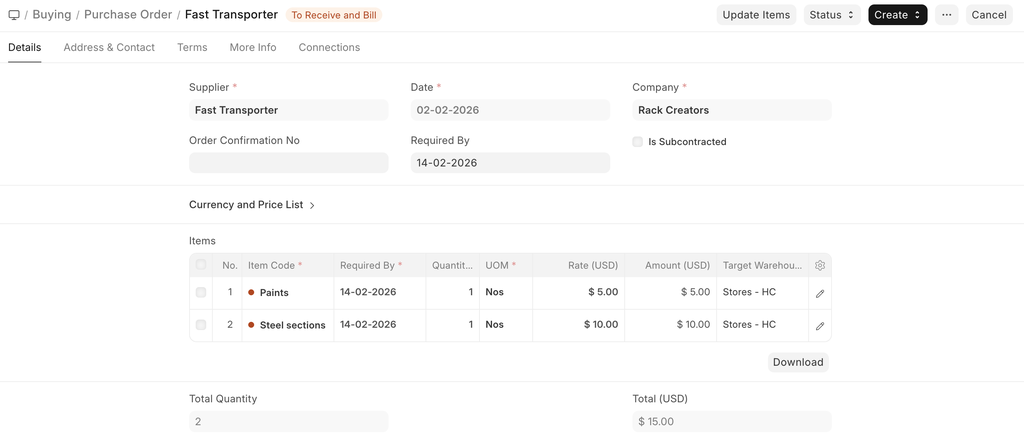 Purchase order for raw material
Step 5: Create a timesheet to record the execution of steel sections and paints
- To maintain the execution of the steel sections and the painting of the storage rack, we create a timesheet
- The changes made in this project will reflect the costing and billing details
 Execution details in timesheet
Step 6: As the process continues, we update the task with its progress
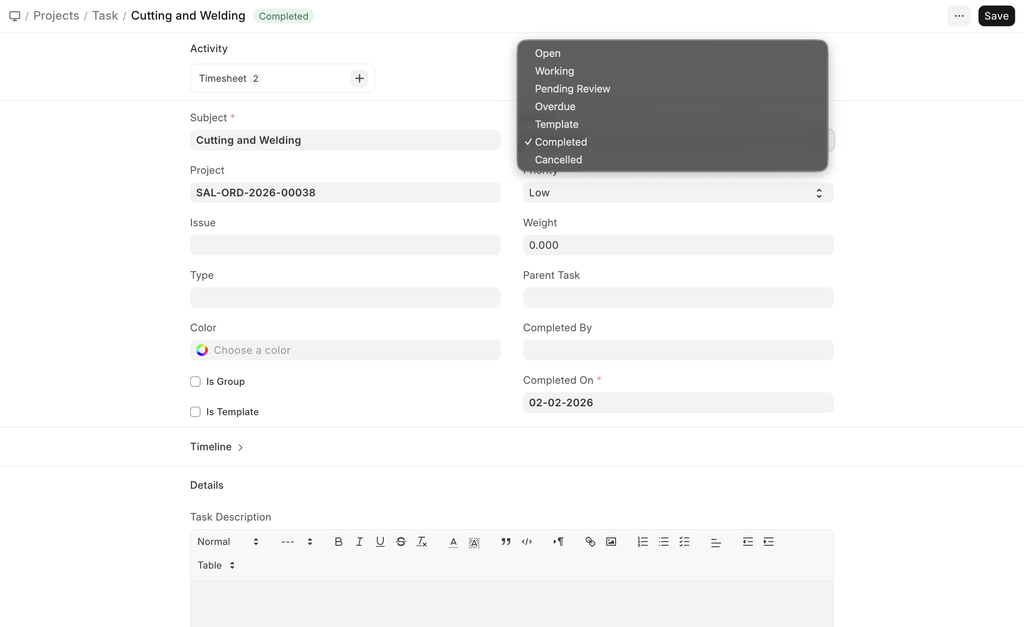 *Task Status *
- Once all the tasks are completed, the project moves into a fully completed state as well
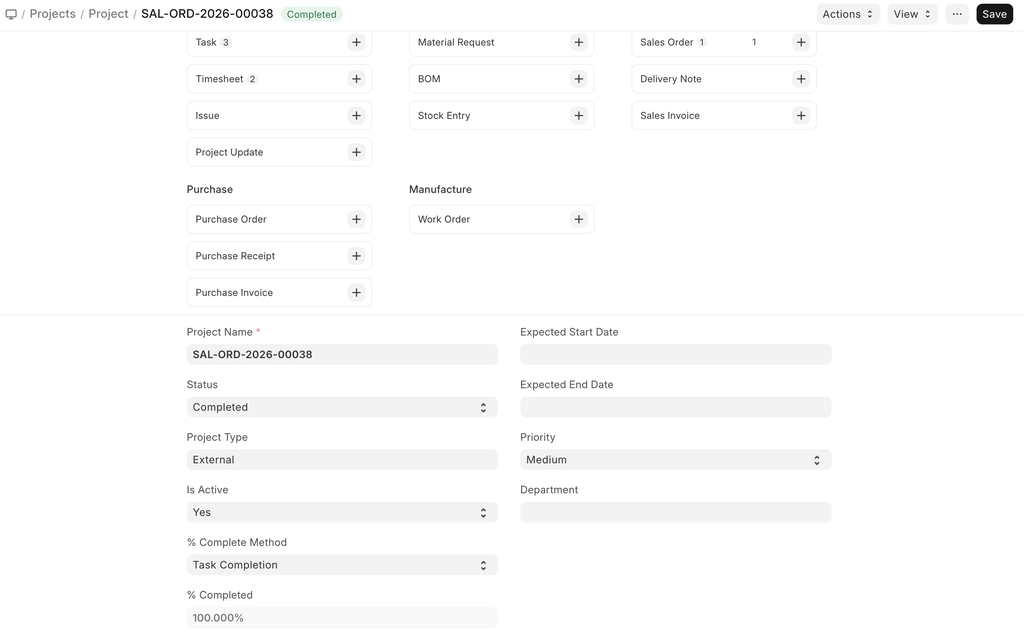 Final Project Status
Last updated 5 months ago
Was this helpful?