
The Data Import tool in ERPNext allows users to import records into the system using CSV or Excel files.
It provides a convenient way to upload or update large volumes of data at once, especially master data, without the need for manual entry.
This tool is commonly used during initial system setup, data migration, or when bulk updates are required. By using the Data Import tool, users can ensure faster data entry while maintaining consistency across records.
To access the Data Import tool, navigate to:
Home > Data
Or go to the Document you want to import and click on Menu > Import
Before starting the import process, make sure that all required data is prepared correctly and follows the expected format. The Data Import tool supports two main operations:
Inserting New Records
The Data Import Tool in ERPNext allows users to upload bulk records into the system using a predefined template. This document outlines the step-by-step process for importing new records.
- Navigate to Data Import
- Select the Document Type and the Import Type as Insert New Records.
- Click on Save and then download the template.
Download Template
We have an option to download the template to insert the records/update the records
- Clicking on Download Template opens a dialog box
 Download Template Dialog box
While inserting new records, the template should be blank. If you have a few records in your system, you can select Export Type as "5 Records" to see the format in which you have to enter the data in the template.
- After you choose the export type, every field appears in the list. Mandatory fields show a red * next to the name. Conditional fields (for example Depends On or autoname-related) show a small info icon—point at it to read the note.
- Fields that are ticked but not mandatory are ones with Include in Import Template on—set on the DocType or in Customize Form—so they show in the list by default without being required.
- Click Export and get the exported file.
- Now, save your template as an Excel or Comma-Separated Values (CSV) file.
You can leave the ID column as blank while inserting new records. When you import this template, each row will make a record in the system.
- Once the template is updated and ready with the data, we can import it.
Importing a Template
Once the data has been added to the downloaded template, the following steps are followed:
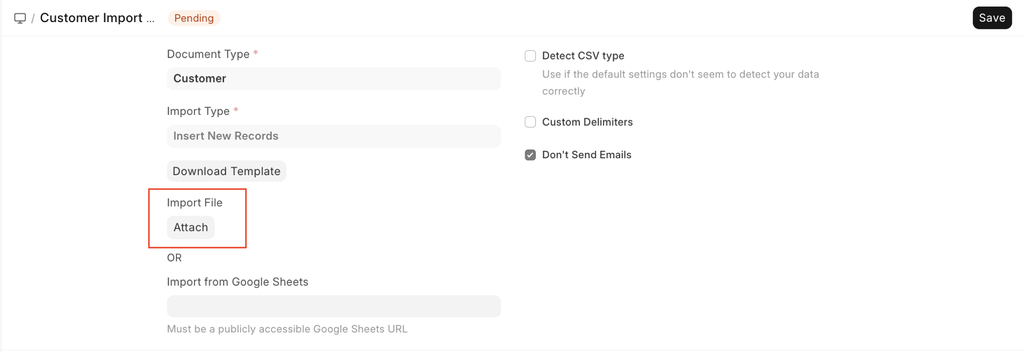
- After updating your template file, go back to the Data Import form and attach the file by clicking on the Attach button.
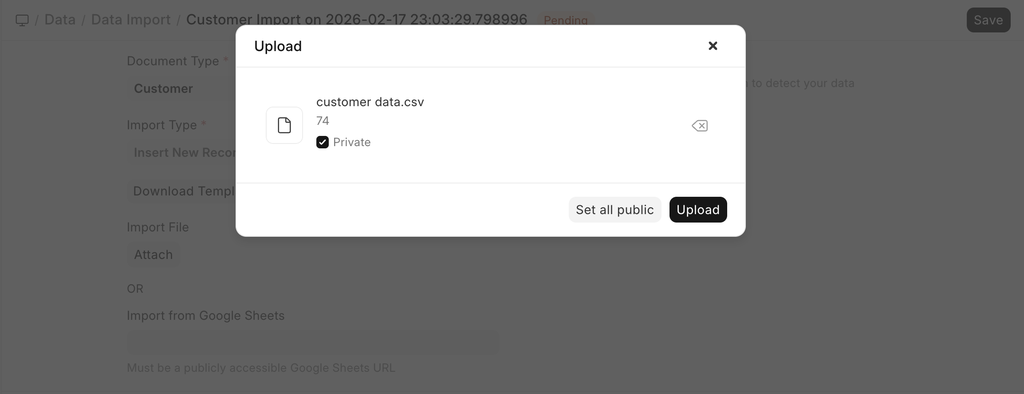 Attaching file for import
 - Select the template file and click on Upload, after the upload is successful, click on Start Import. There are various ways to import the data; you can refer here
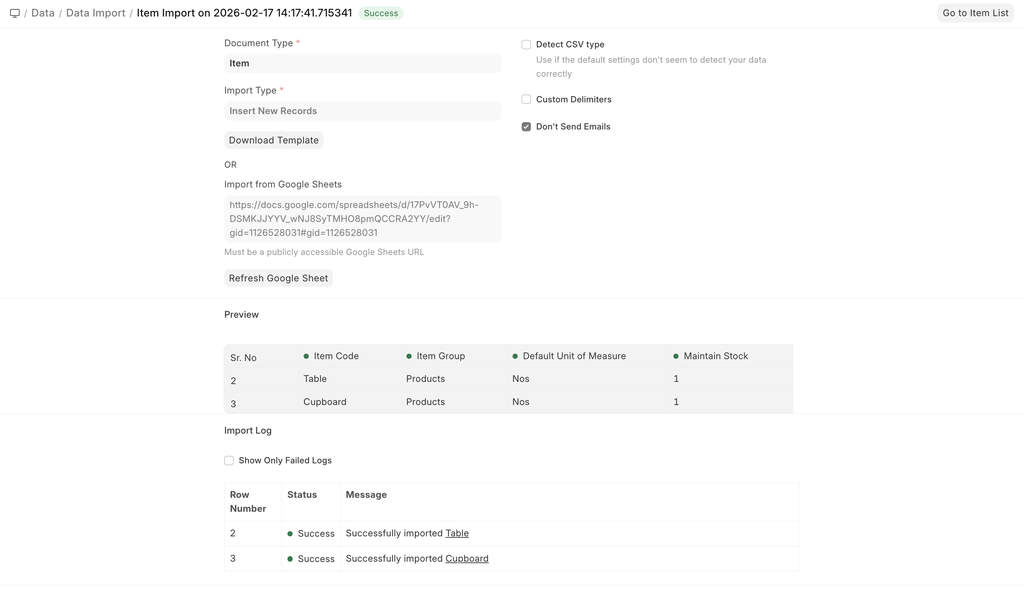
- Once the Sheet is uploaded, the system validates the sheet and gives the result on screen before importing the data
- If there are any errors in your template, they will be shown in the Warnings section. The warnings will be categorized by Row or Column with their number so that you can easily track them down in the template and resolve them. You must resolve all the warnings before you can import the data.
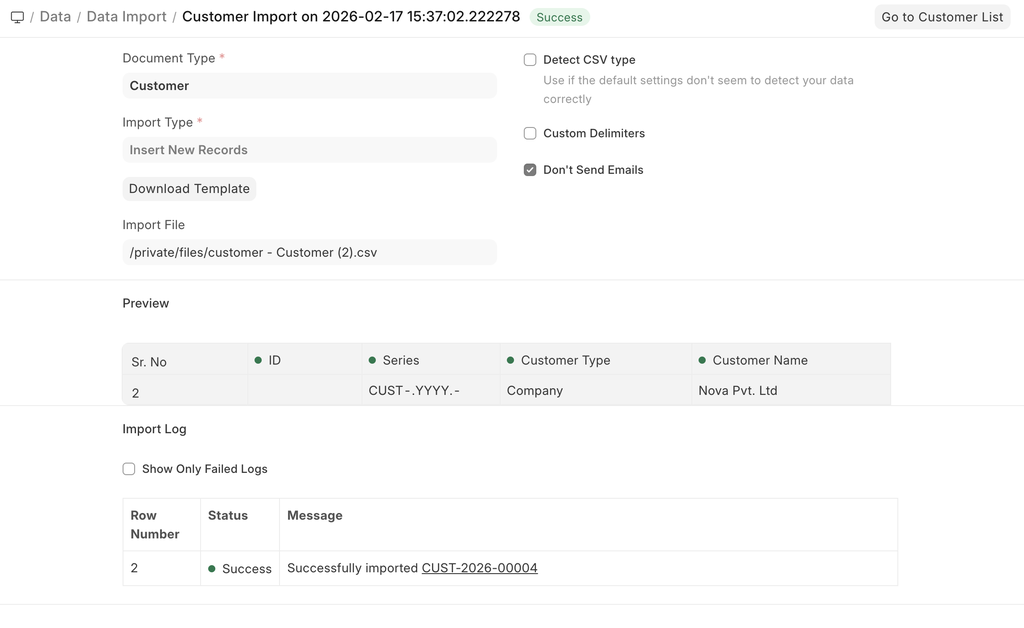
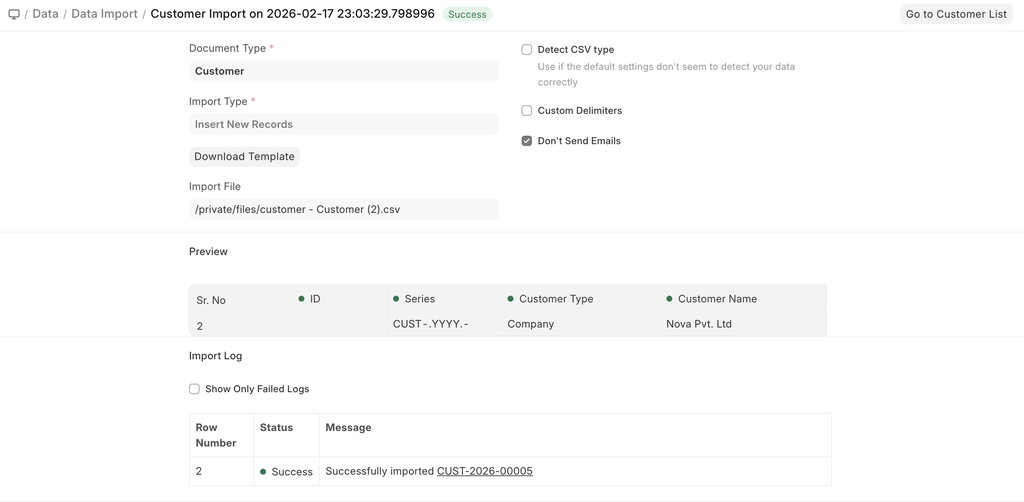
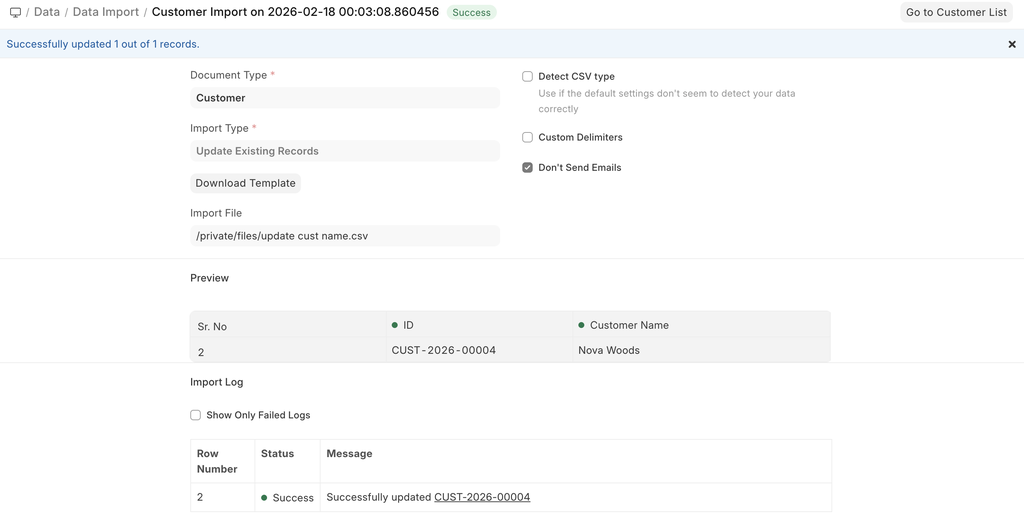
- After you have resolved the warnings, click on Start Import again to import the data. On successful import of the data, you'll see a log of each record that was created in the Import Log section.
Validations and Errors in Importing
Duplicate Name
In case we try to add a record with a duplicate name, it will throw an error like this
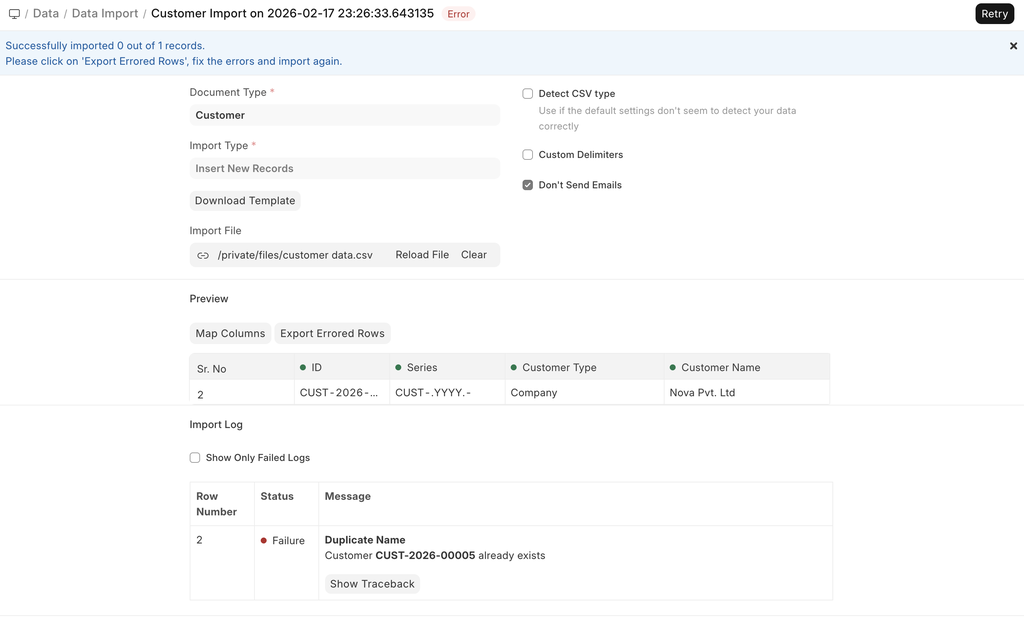 Duplicate Name Error
Mapping of missed columns
When we add additional columns while downloading the template, or we have renamed a column in the template we are importing, it may throw an error about not being able to match the columns.
To resolve this, we can click on the map columns and manually map the columns to the corresponding columns in the Document.
Importing child records
Data in ERPNext is stored in tables like a spreadsheet with columns and rows of data. Each form likes Sales Order, has multiple fields like Customer, Company, etc. It also has tables like the item table, tax table, etc. In Data Import, the set of fields in the Sales Order is treated as the main table, and the rows inside the child table (item table) are treated as the child table for data import.
Each form in ERPNext can have multiple child tables associated with it. The child tables are linked to the parent tables and are implemented where there are multiple values for any property. For example, an Item can have multiple prices, a Sales Invoice has multiple Items, Taxes, and so on.
When you export a document with child tables, for e.g., each child row will appear on a separate row, but it is associated with a single parent row. The subsequent values in the parent columns will remain blank. You must ensure that this order is not broken when you are importing it via Data Import.
 Child records importing
Updating Records
Let's say you want to update Customer data in bulk in your system. The first step is to download the template with the data.
- We start by downloading the template. While doing this, since we want to update, we can use filters to extract the exact records and import them back for updating.
- First, we select the document type and the import type as Update Existing Records, and Save
- When we try to download the template, we can apply filters, something like this
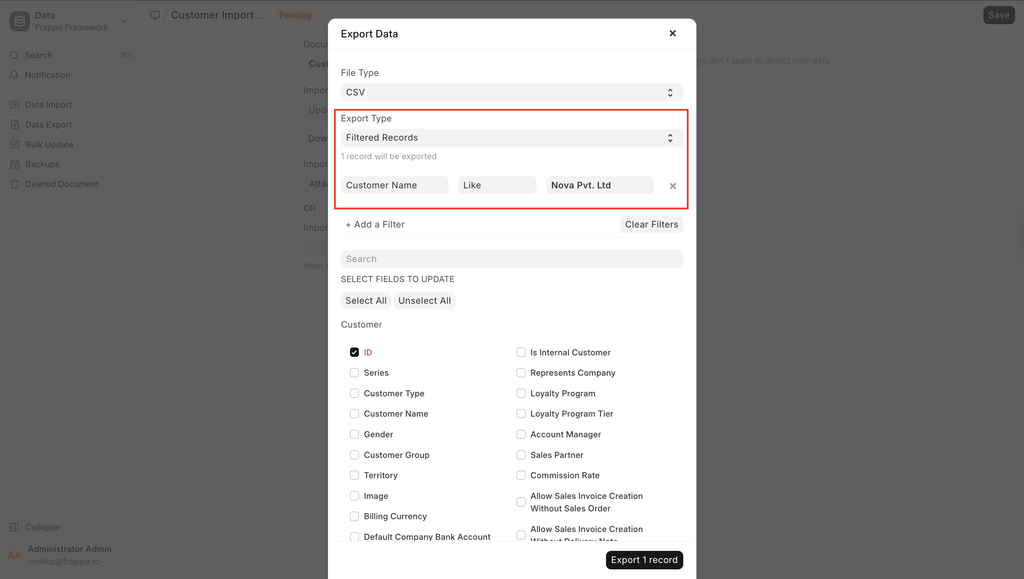
- We click on Export.
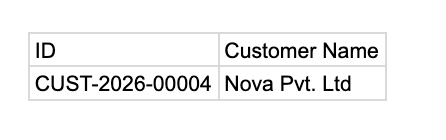
- Now, based on the template, the existing records look like this:
- Now, change the values in your template and save the file as Excel or CSV.
Ways to Import Data
Import from Google Sheets
You can import data directly from Google Sheets by following these steps:
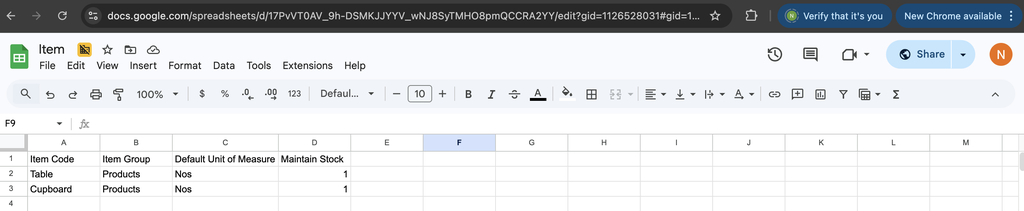
- Upload or copy your template into Google Sheets.
- Enter or update your data in the sheet.
- Ensure the Google Sheet is set to Public access.
- Once confirmed, use the Google Sheets link in the Data Import page to proceed with the import.
 Google sheet Data File
 Post Import using google sheets
Import from the file system
- On the Data Import Page, there are two available options:
- Attach File
- Import Using Google Sheets
- After clicking Attach, you will see multiple upload options:
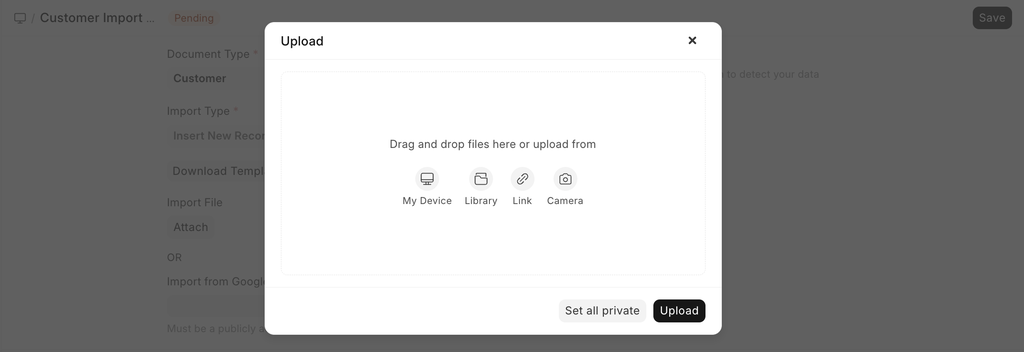
- Available Upload Options
- My Device
Upload a file directly from your local computer. - Library
Select a file that has already been uploaded and stored in the system’s file library. - Link
Provide a direct web URL to a file hosted online.
- Choose the appropriate option based on where your file is stored, then proceed with the upload.
Submit After Import
In ERPNext document types are mainly of two types - masters and transactions. The masters are records like Customer and Task which can only be saved not submitted. Transactions like Sales Orders, Purchase Invoices are submittable documents and can be submitted.
When you select a submittable document type for Import, you can tick Submit After Import to submit the document after it is imported.
Don't Send Emails
Let's say you have created a Notification in your system and whenever a Lead is created an email is sent. Now, if you are bulk importing Leads then a lot of emails will be sent, which may not be desired. You can disable this option to avoid sending emails.
Additional Notes
Upload Limit
There is no hard limit on the number of records that can be imported. But you must try and upload only a few thousand records at a time. Importing a large number of records (let's say 50,000) might slow down the system considerably for the users that are using the system.
CSV Files
A CSV (Comma Separated Value) file is a data file that you can upload into ERPNext to update various data. Any spreadsheet file from popular spreadsheet applications like MS Excel or Open Office Spreadsheet can be saved as a CSV file.
If you are using Microsoft Excel and using non-English characters, make sure to save your file encoded as UTF-8.
For older versions of Excel, there is no clear way of saving as UTF-8. So save your file as CSV, then open it in Notepad, then save as “UTF-8”. (Or upgrade your Excel!)