


















Sections, columns and the page
Every print format is built from sections stacked down the page. This page explains how to add and arrange sections, split them into columns, give them borders and backgrounds, and use the header, footer and letter head.
Applies to Frappe v16 and later.
Sections
A section is a horizontal band of the page. Most formats have a few: one for the customer and dates, one for the items table, one for the totals, and so on.
- Add a section: open the Blocks tab and click Section, or drag it to where you want it. You can also click Add Section between two sections on the page.
- Move a section: drag it by its handle, or select it and press Alt+↑ or Alt+↓.
- Copy, duplicate or delete: right-click the section, or select it and press Ctrl+C, Ctrl+D or Delete.
Select a section to see its settings in the right panel.
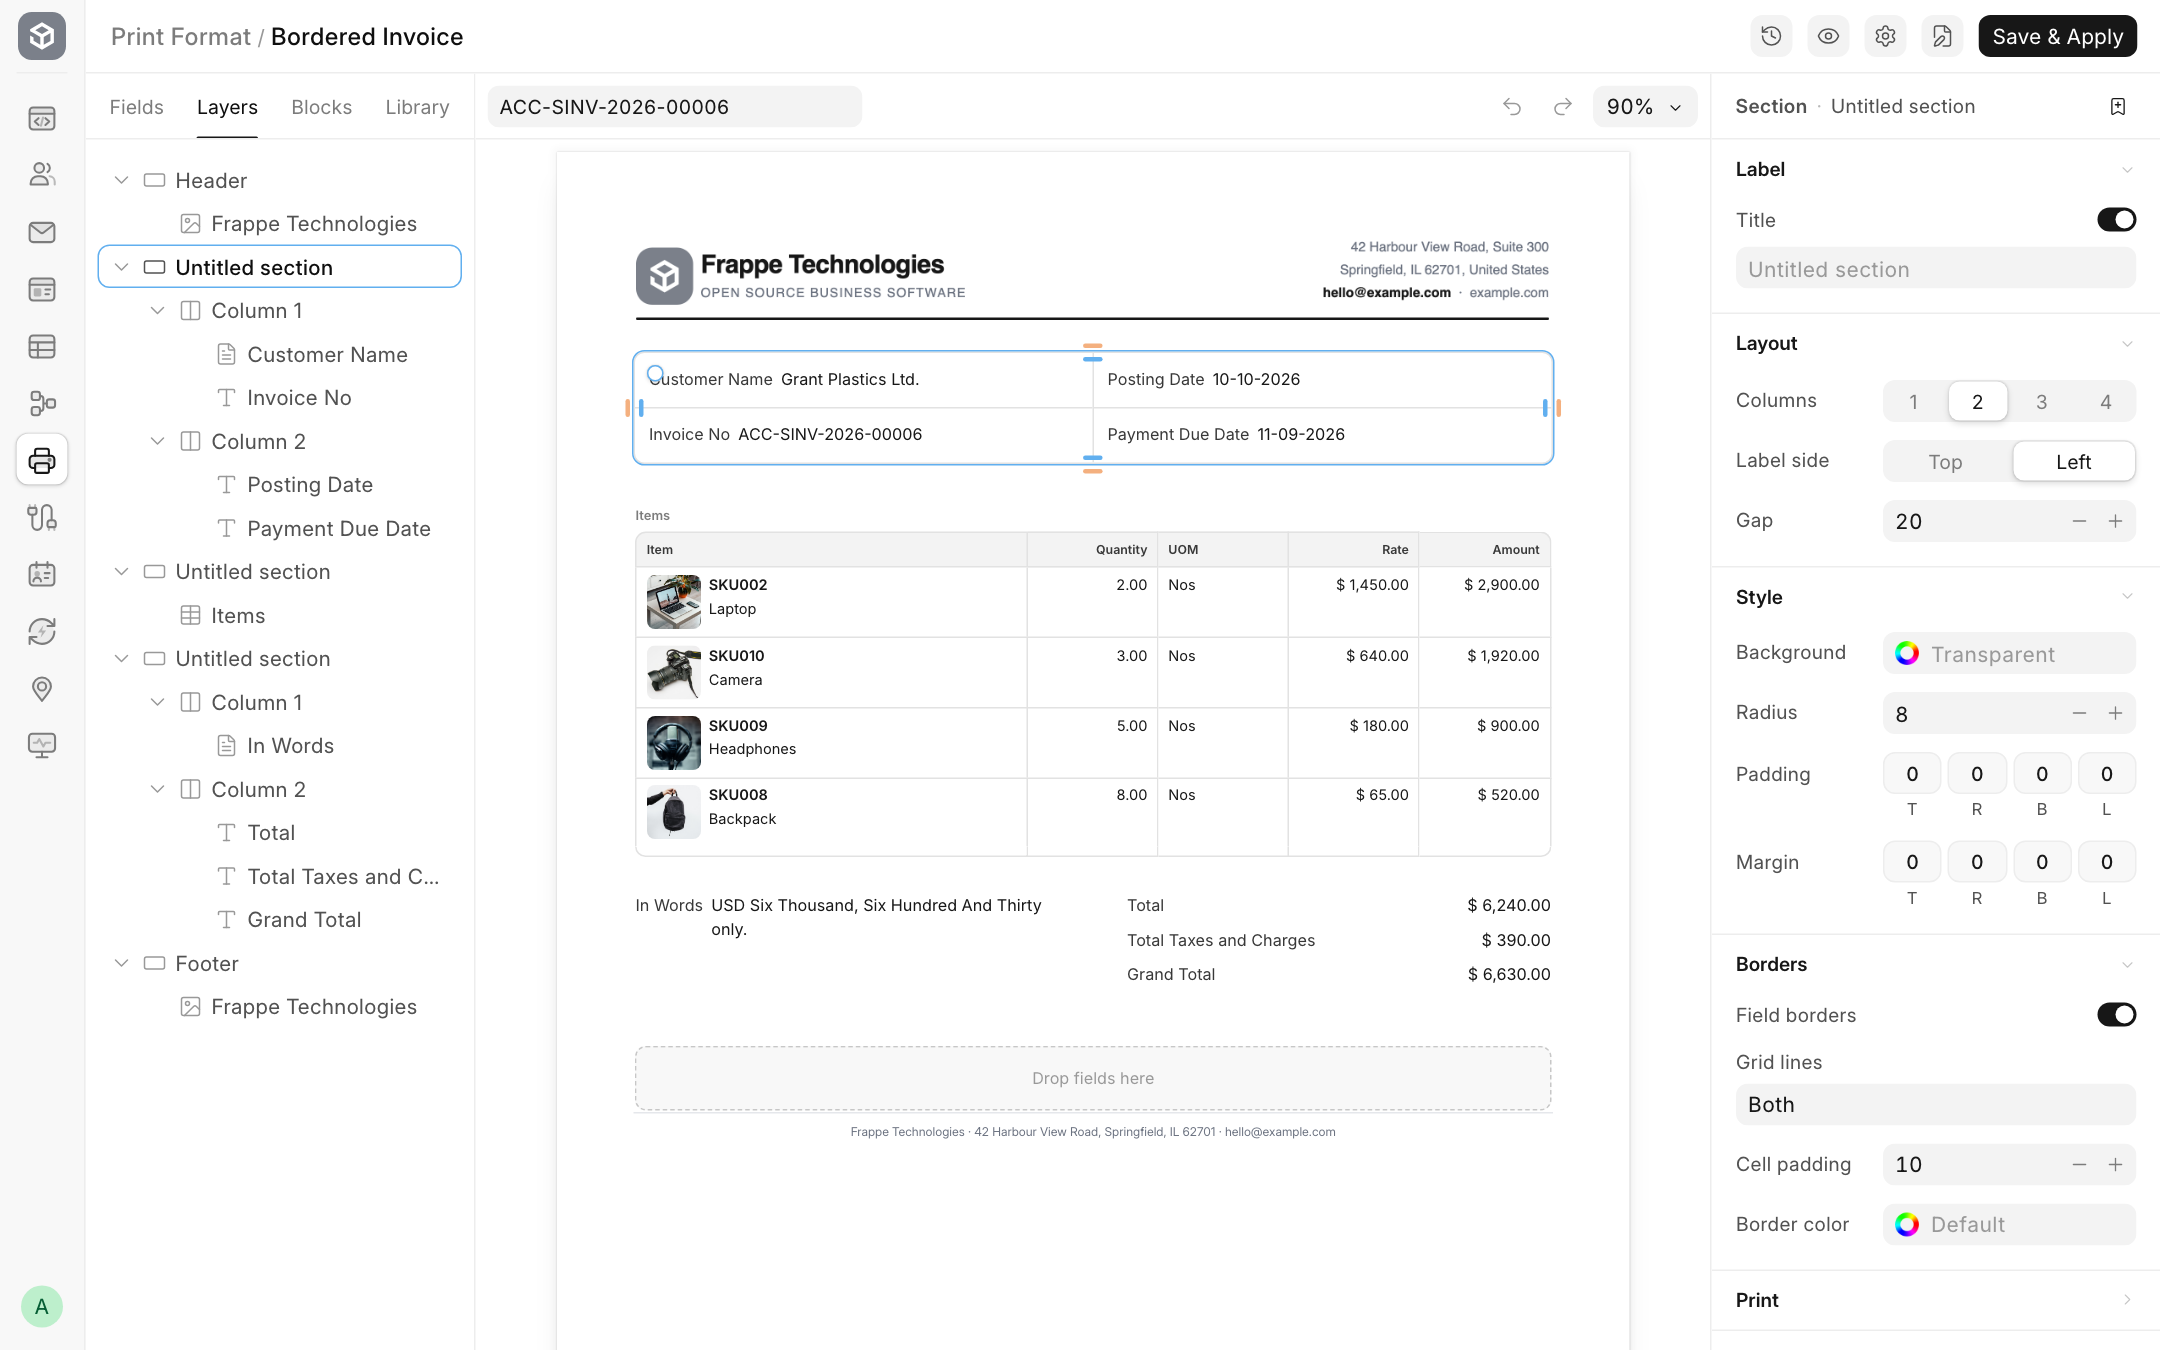
Label
| Setting | What it does |
|---|---|
| Title | A heading printed above the section, for example "Billing Address". |
| Show title | Turn off to keep the title in the editor but not print it. |
A section with a title is left out of the printout when none of its fields has a value. This keeps empty headings off the page. A section that holds a Custom HTML block always prints.
Layout
| Setting | Options | What it does |
|---|---|---|
| Columns | 1, 2, 3, 4 | Splits the section into columns. When you reduce the number, the fields of the removed columns move into the last column. |
| Label side | Top, Left | Top prints each label above its value. Left prints the label and value on one line, like Invoice No ACC-SINV-0001. |
| Gap | pixels, default 20 | Space between columns. |
Style
| Setting | What it does |
|---|---|
| Background | A background colour for the whole section. |
| Radius | Rounds the corners, in pixels. You can also drag the round handle in the corner of the section. |
| Padding | Space inside the section, top, right, bottom and left, in pixels. |
| Margin | Space outside the section, in pixels. |
You can also drag the small handles on the edges of a selected section to change its padding and margin.
Borders
Turn on Field borders to draw the section as a grid of boxes, one box per field. This is how the customer and date block at the top of an invoice usually looks.
| Setting | Options | What it does |
|---|---|---|
| Field borders | on, off | Draws a border around every field. |
| Grid lines | Both, Rows, Columns | Which lines to draw between the fields. |
| Cell padding | pixels, default 8 | Space inside each box. |
| Border color | colour | The colour of the lines. |
| Setting | What it does |
|---|---|
| Keep together | Stops the section from being split across two pages. If it does not fit on the current page, it moves to the next one. |
Custom CSS and Visibility
- Custom CSS adds your own CSS to this section only, for example
border-left: 3px solid #1f4e79;. - Visibility prints the section only when a condition is true. See Show or hide content.
Columns
Columns are created by the section's Columns setting. Drag fields and blocks into a column. Inside a column, items print from top to bottom.
To make one column wider than the others, drag the divider between them on the page.
Page breaks
To start a new page, open the Blocks tab and add a Page Break below the section that should end the page. The page shows it as "Page Break" with a button to remove it. Everything after it prints on a new page.
Note: page breaks are honoured by the Chromium renderer. Check the PDF preview if you use Typst.
Header and footer
Above the first section is the Header, and below the last one is the Footer. They hold:
- the letter head, if the format has one;
- any fields you drop into them, for example the invoice number at the top of the page.
When Repeat Header and Footer is on in Print Settings, the header and footer print on every page. When it is off, the header prints once at the top and the footer once at the end.
The header and footer only have Layout settings: Columns, Label side and Gap. They cannot be deleted.
Letter head
The letter head is your company's banner at the top of the page. Pick it in the page settings under Document > Letter head, or leave it empty to print without one. See Letter Head for how to create one.
Click the letter head on the page to change it right in the editor:
- Based on: Image or HTML.
- For an image: Align, Size, and a button to upload a new image.
- For HTML: Edit HTML opens an editor with a live preview.
Note: letter head changes are saved straight away and apply to every print format that uses that letter head, not just this one.