Upload Backups to Amazon S3
Prerequisites
To receive emails for failed and successful backups, please create an Email Account first.
Create S3 bucket and set up access
- Create a new s3 bucket.
In the bucket settings, enable "Block all public access" to keep your data private. Feel free to enable encryption, versioning or object lock as per your requirements (please refer to Amazon's documentation).
Open Identity and Access Management (IAM).
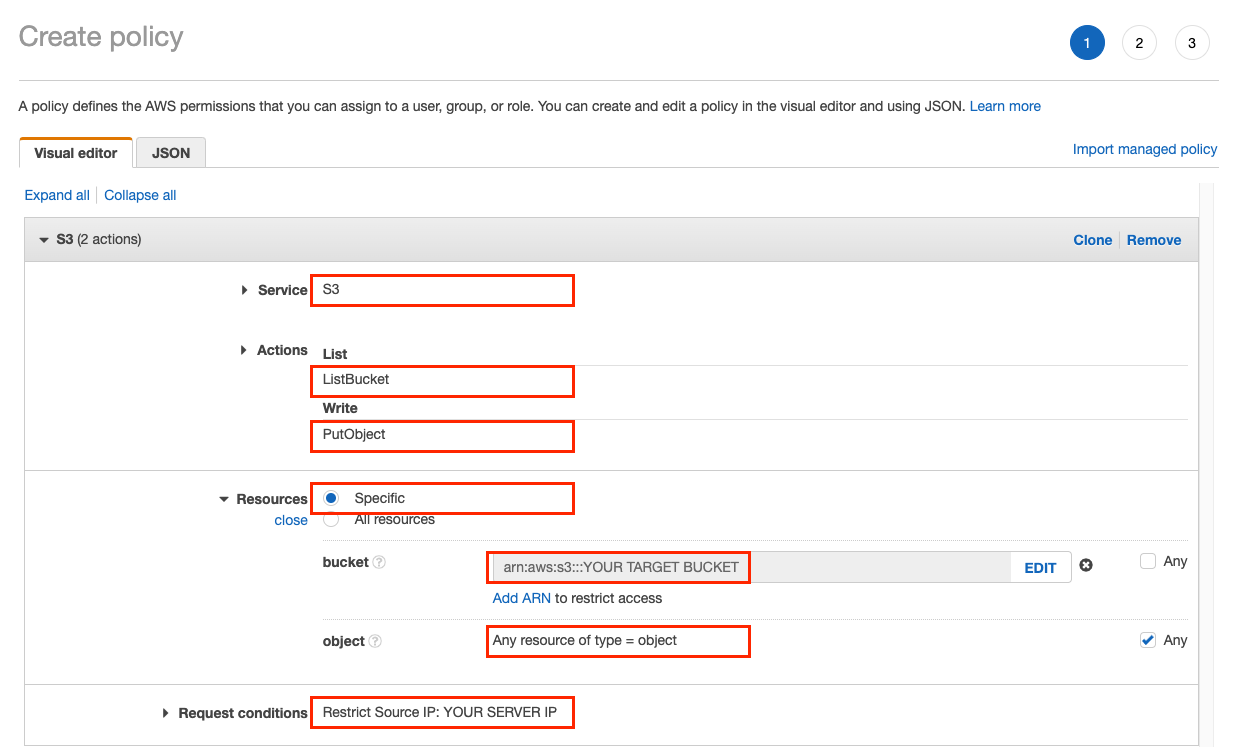
Create a new policy for the Service "S3", allowing the Actions "ListBucket" and "PutObject".

Or, using the JSON editor:
{
"Version": "2012-10-17",
"Statement": [
{
"Sid": "VisualEditor0",
"Effect": "Allow",
"Action": [
"s3:PutObject",
"s3:ListBucket"
],
"Resource": [
"arn:aws:s3:::*/*",
"arn:aws:s3:::YOUR TARGET BUCKET"
],
"Condition": {
"IpAddress": {
"aws:SourceIp": "YOUR SERVER IP"
}
}
}
]
}
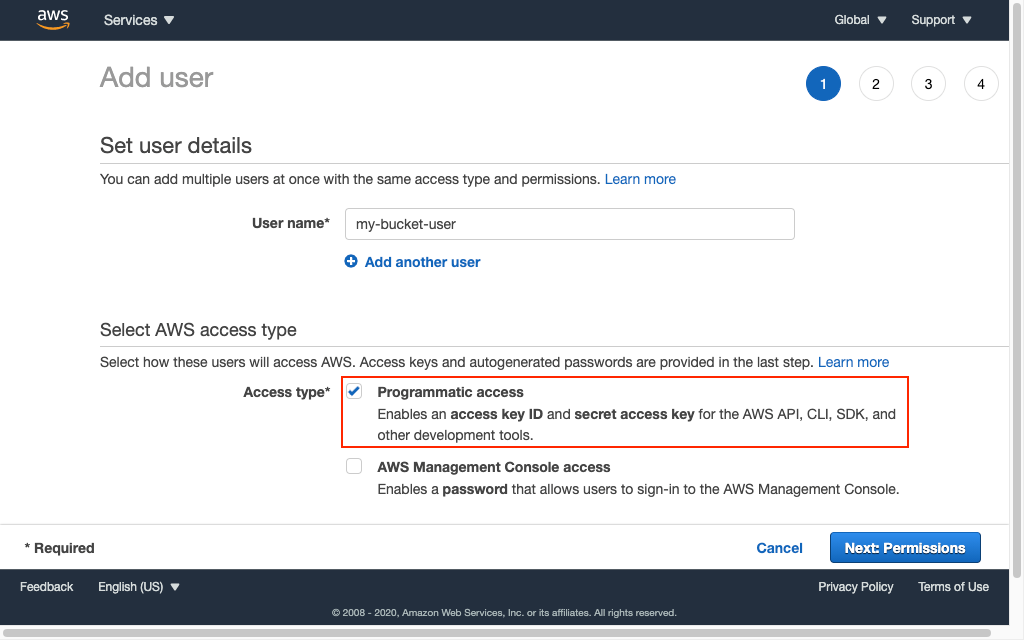
- Create a new user for programmatic access.

Attach the policy you created to the new user.
Copy the user's access key and secret.
To automatically delete old backups or move them to a cheaper storage class, have a look at lifecycle management.
Set up ERPNext
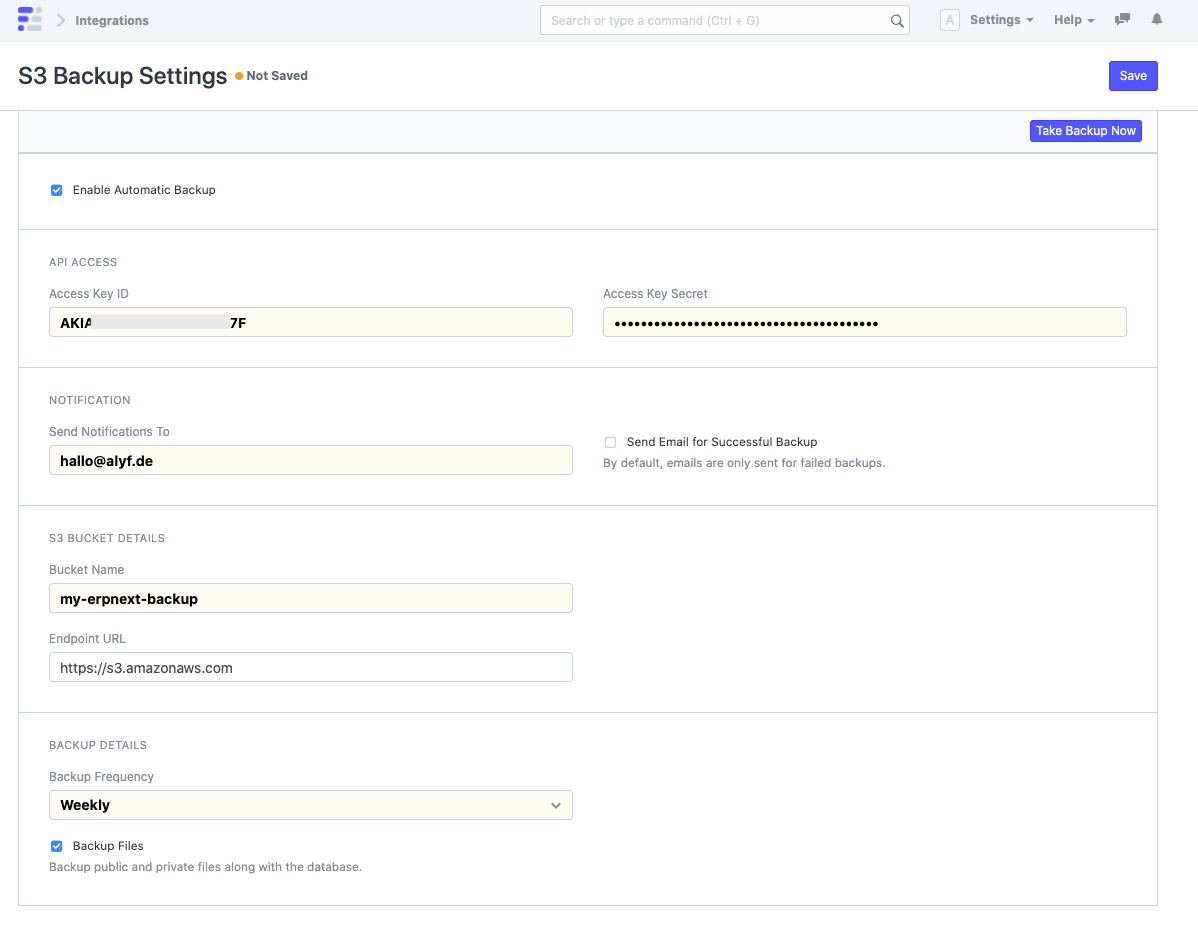
- Open S3 Backup Settings.
- Check "Enable Automatic Backup".
- Paste the access key and secret from AWS.
- Set an email address to receive a notification when a backup fails. If you would like an email for successful backups as well, enable "Send Email for Successful Backup".
- Specify the name of the bucket that you created in step 1.
- Choose how often you want to take and upload backups. This can range from monthly to daily. If you only want to take manual backups, set the frequency to "None".

Last updated 2 weeks ago
Was this helpful?