Healthcare Settings
Most of the global settings for the Healthcare module can be done via the Healthcare Settings page.
To view and change the settings, go to:
Home > Healthcare > Settings > Healthcare Settings
Note: Ensure that you have the "Healthcare Administrator" role enabled for your User to access this page.
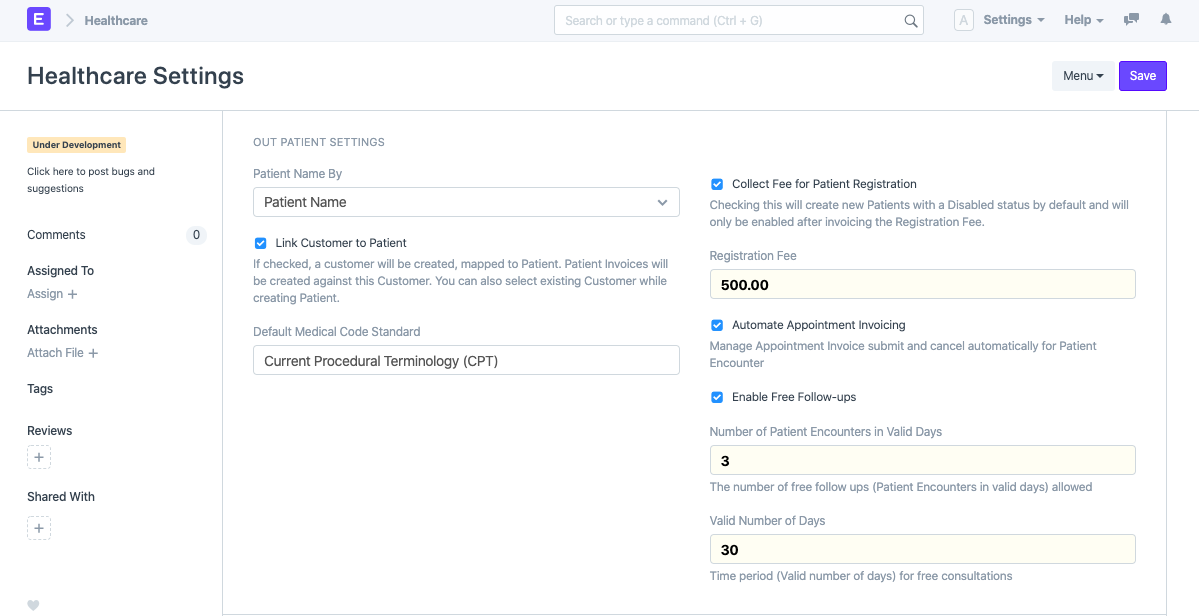
1. Out-Patient Settings

Patient Name By: By default Patient document uses naming series for naming but you can also opt to change this to "Patient Name" if required.
Link Customer to Patient: This option will enable the system to create and link a Customer whenever a new Patient is created. This Customer is used while booking all transactions. Patient Invoices will be created against this Customer. You can also select an existing Customer while creating a Patient.
Default Medical Code Standard: ERPNext Healthcare allows you to use multiple Medical Code Standards. Here, you can also select the default Medical Code Standard.
Collect Fee for Patient Registration: If you enable this, all new Patients you create will be _Disabled_ by default and will only be enabled after Invoicing the Registration Fee. To create an Invoice and record the Payment Receipt, you can use the Invoice Patient Registration button in the Patient document. Also note that all ERPNext Healthcare documents, filter out Patient records that are disabled.
Registration Fee: You can set the Registration Fee to be collected here if you have checked "Collect Fee for Patient Registration".
Automate Appointment Invoicing: If you wish to automatically create a Sales Invoice (with the selected Practitioner's consultation charges), you can enable this option. This feature is particularly helpful if your facility collects payment while booking an appointment. The Patient Appointment form will allow you to select the Payment Method and Amount Received. Also, the invoices will be canceled automatically on Appointment cancellation.
Enable Free Follow-ups: Many healthcare facilities do not charge for follow-up consultations within a time period after the first visit (Patient Registration). Check this if you want to enable free follow-ups. After this is checked, configure the number of free follow-ups (_Patient Encounters in Valid Days_) allowed as well as the time period (_Valid number of days_) for free consultations here.
2. Inpatient Settings

Allow Discharge Despite Unbilled Healthcare Services: Some healthcare facilities discharge the patient to make the room vacant for new admissions and then generate the bill later. If this is checked then while discharging a patient, the system will not validate unbilled services against the patient.
Do Not Bill Patient Encounters for Inpatients: Some healthcare facilities do not bill Inpatients for Patient Encounters separately. If this is checked then while using the Get Items From > Healthcare Services functionality in the Sales Invoice, the system will not fetch patient encounters which have an Inpatient Record linked to them.
3. Default Healthcare Service Items

ERPNext Healthcare utilizes the Accounts module for billing Patients. You can configure default "Items" for billing consultation charges, procedure consumption items, etc. here. Make sure that the "Inpatient Visit Charge Item" and "Out-Patient Consulting Charge Item" are service items i.e they have _Maintain Stock_ checkbox disabled.
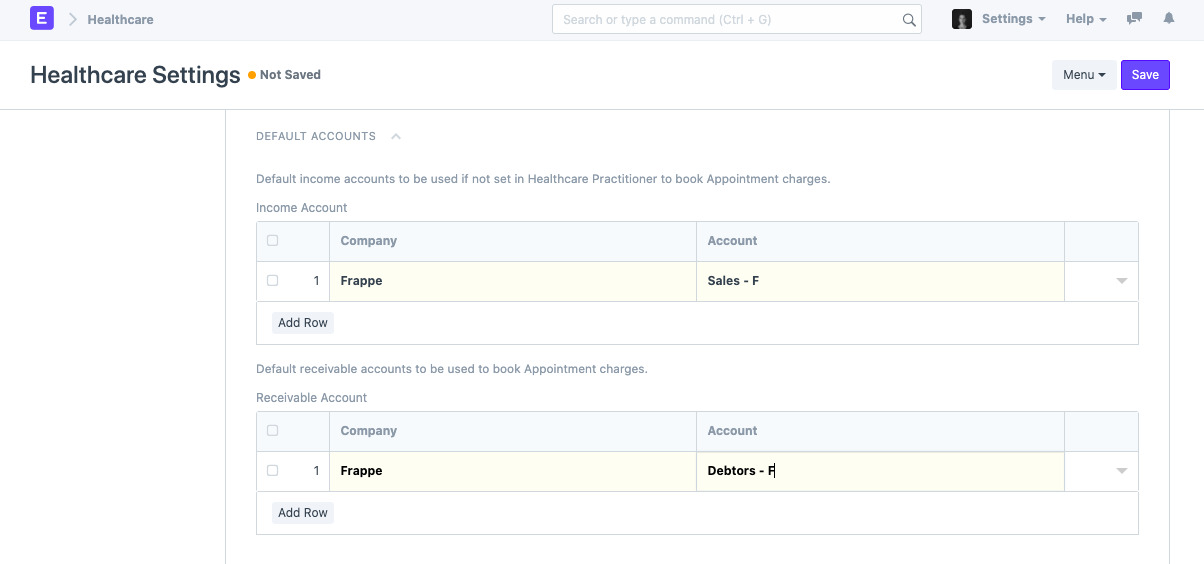
4. Default Accounts
If you wish to override default accounts settings and configure the Income and Receivable accounts for Healthcare, you can do so here.

Income Account: Default Income Accounts to be used if not set in Healthcare Practitioner to book Appointment charges.
Receivable Account: Default Receivable Accounts to be used to book Appointment charges.
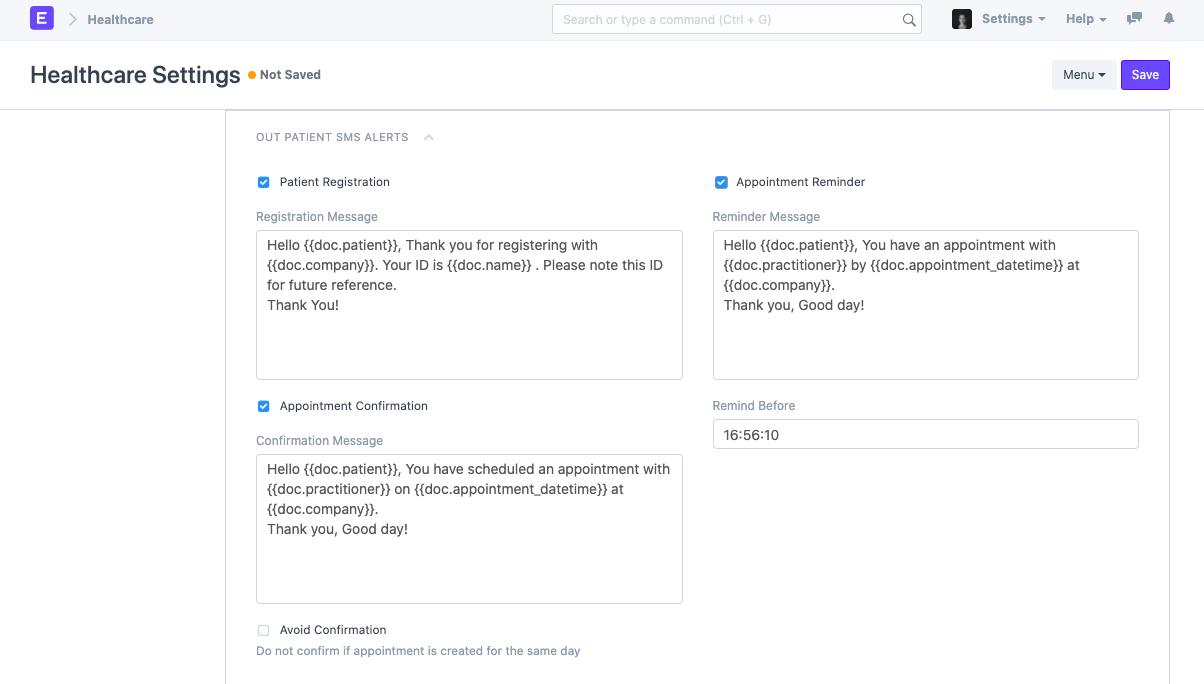
5. Out-Patient SMS Alerts
You can enable sending SMS alerts on Patient appointment Booking, Patient Registration, etc., and also configure a message in this section.

Patient Registration: This message will be sent when a new Patient is created in your instance.
Appointment Confirmation: This message will be sent when an Appointment is booked for the Patient.
Avoid Confirmation: Check this if you don't want to send the Appointment Booking message when the Appointment is booked on the same day.
Appointment Reminder: This message will be sent on the day of the appointment as a reminder.
Remind Before: You can configure the time before all reminder messages should be sent.
6. Laboratory Settings

Create Lab Test(s) on Sales Invoice Submit: If your facility creates Invoices and collects payments from Patients before performing the Lab Test, you can enable this option to create Lab tests automatically for all the Tests that are billed. If you have enabled the "Create Sample Collection document for Lab Test" and the Lab Test has a _Sample_ configured in the Lab Test Template, a Sample Collection document will also be created.
Create Sample Collection document for Lab Test: If this flag is enabled, every time you create a Lab Test, a Sample Collection document will be created.
Employee Name and Designation in Print: Enable this option if you want the name and designation of the Employee associated with the User who submits the document to be printed in the Lab Test Report.
Do not print or email Lab Tests without Approval: Checking this will restrict printing and emailing of Lab Tests unless they have the status as Approved. You can use this flag to ensure that every Test result leaves your facility after verification.
7. Laboratory SMS Alerts
You can configure ERPNext Healthcare to alert Patients via SMS when the Lab Test result gets ready (Submit) and when you Email the result. You can configure the templates for the SMS as registered with your provider here.

This Form has been Changed in Version 13