GST Features in ERPNext
1. Setting up GSTIN
GST Law requires that you maintain the GSTIN number for all your suppliers and vendors. In ERPNext, GSTIN is linked to the Address
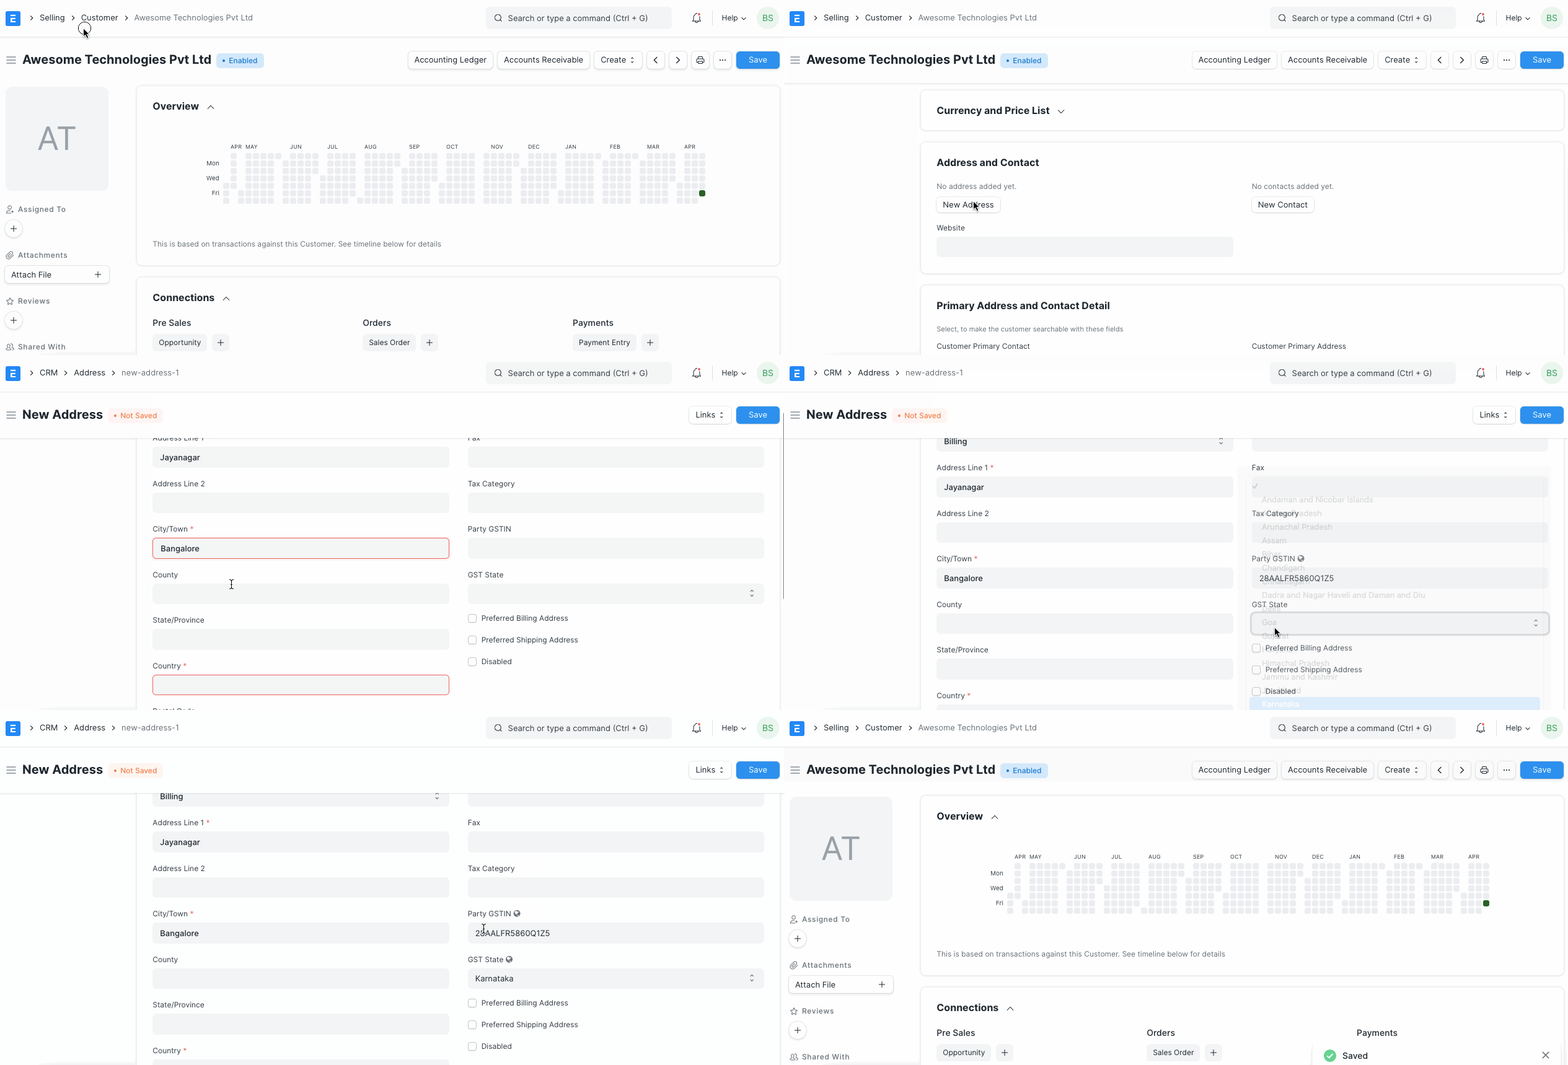
GST for your Company Address
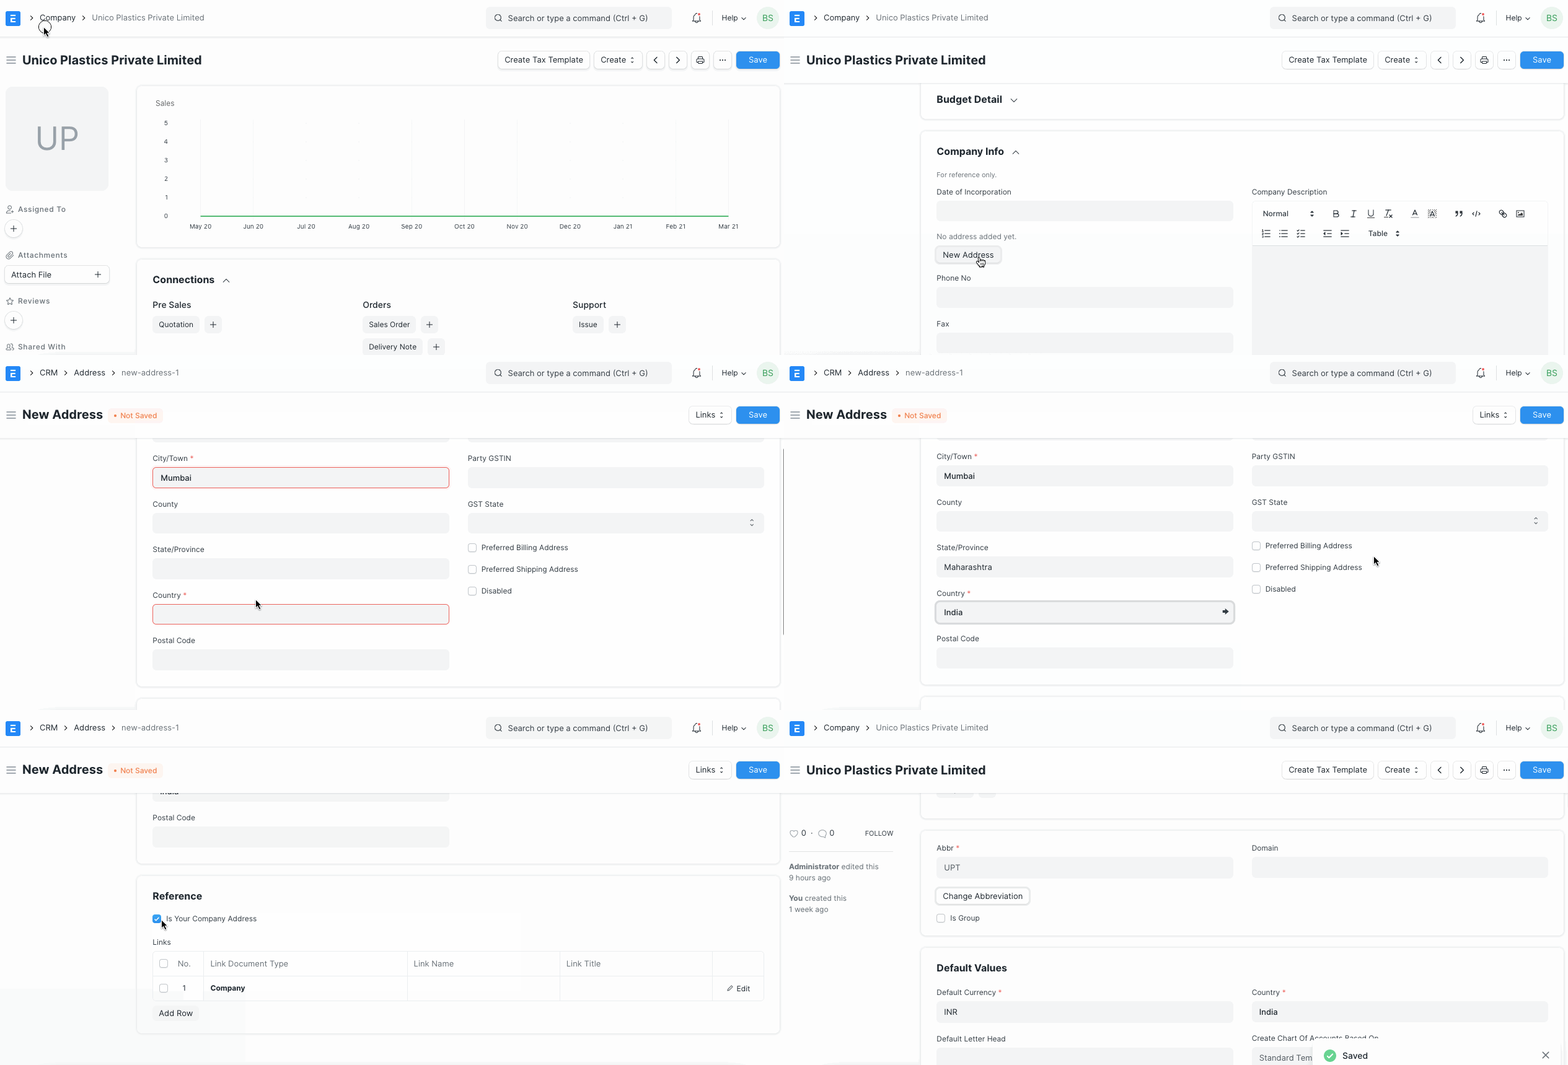
You also need to set the Address for your own Company and your Company's GST Number
Go to the Company master and add the GSTIN to your default address.
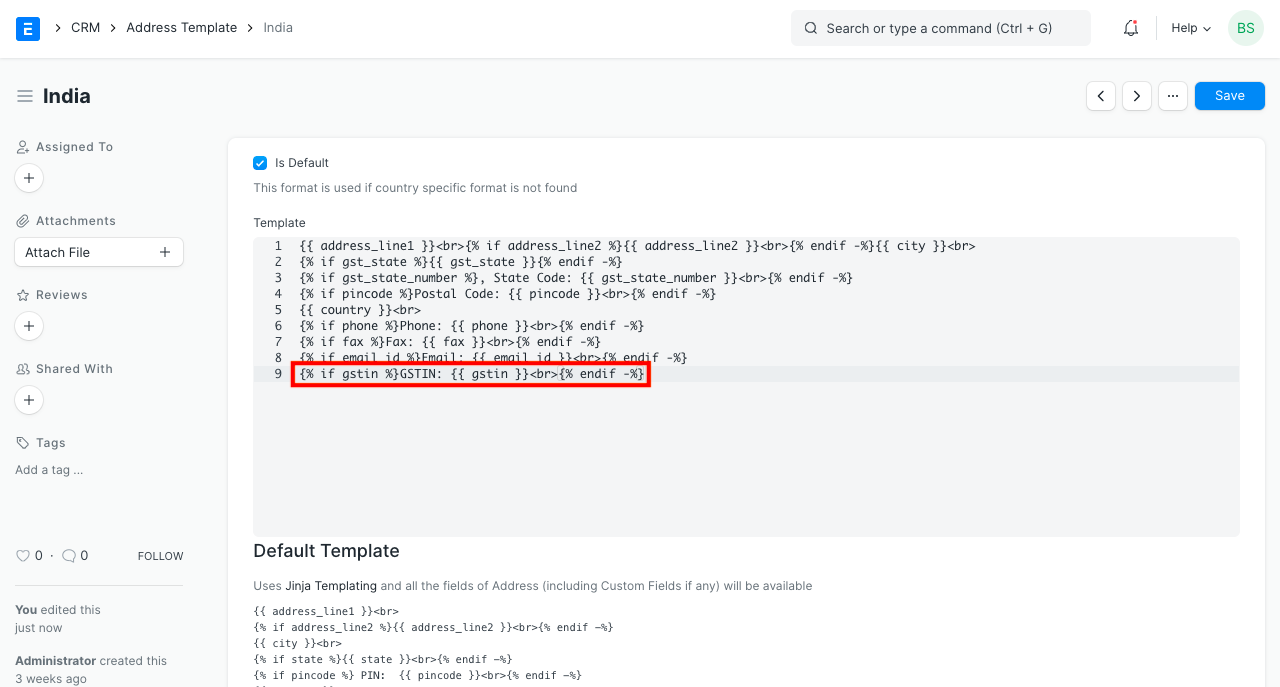
Include GSTIN number in the Address Template
Open Address Template record for India, add GSTIN number and State Code there if not exists.
2. Setting up HSN Codes
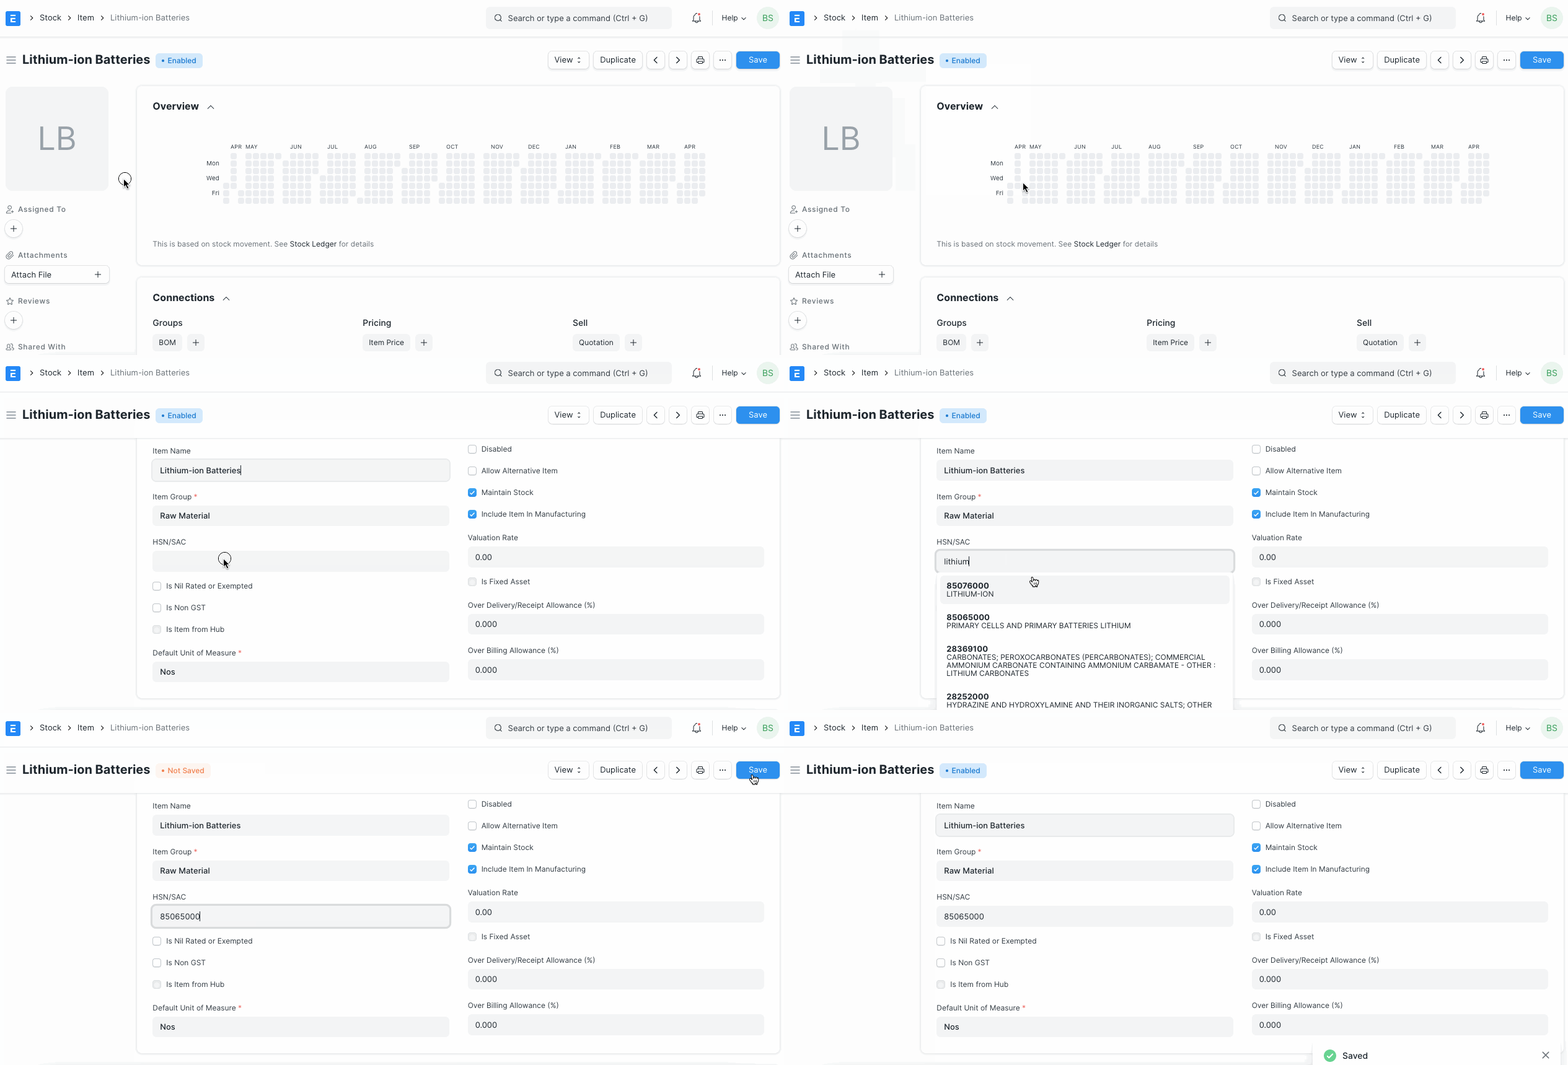
According to the GST Law, your itemised invoices must contain the HSN Code related to that Item. ERPNext comes pre-installed with all 12,000+ HSN Codes so that you can easily select the relevant HSN Code in your Item
3. Making Tax Masters
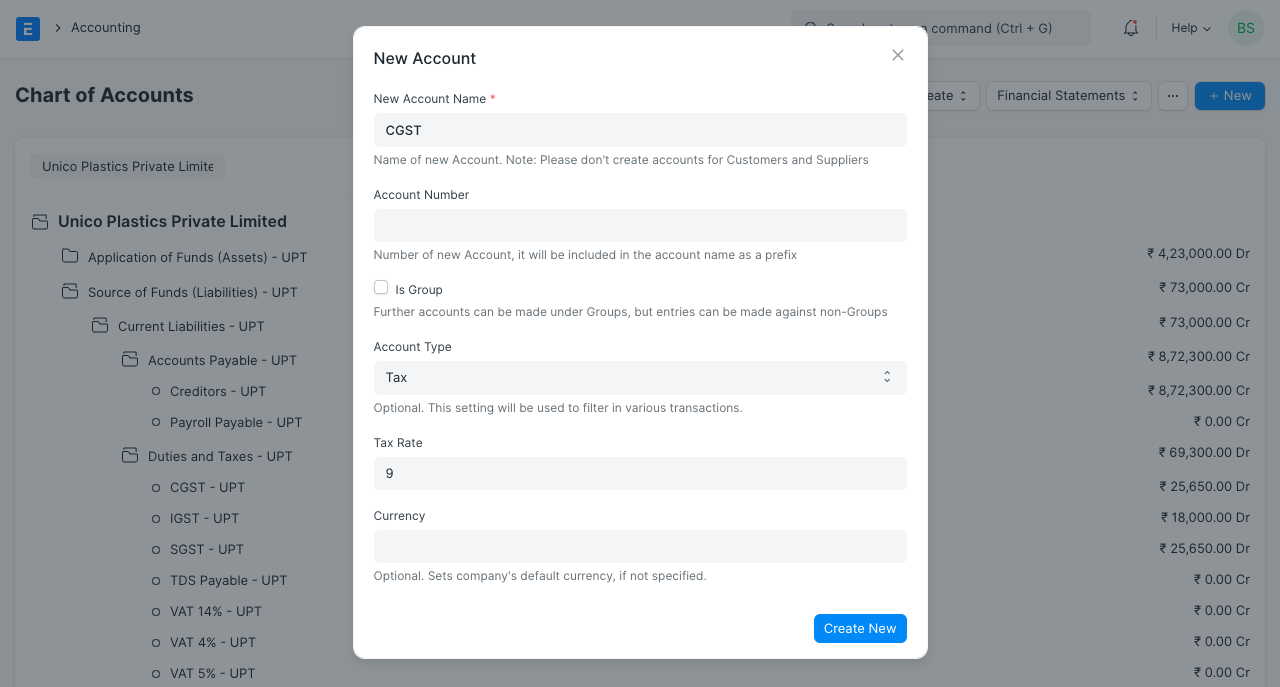
To setup Billing in GST, you need to create 3 Tax Accounts for the various GST reporting heads CGST - Central GST, SGST - State GST, IGST - Inter-state GST
Go to your Chart of Accounts, under the Duties and Taxes head of your account, create 3 Accounts
Note: Usually the rate in CGST and SGST is half of IGST. For example if most of your items are billed at 18%, then create IGST at 18%, CGST and SGST at 9% each.
4. Add GST Accounts in GST Settings
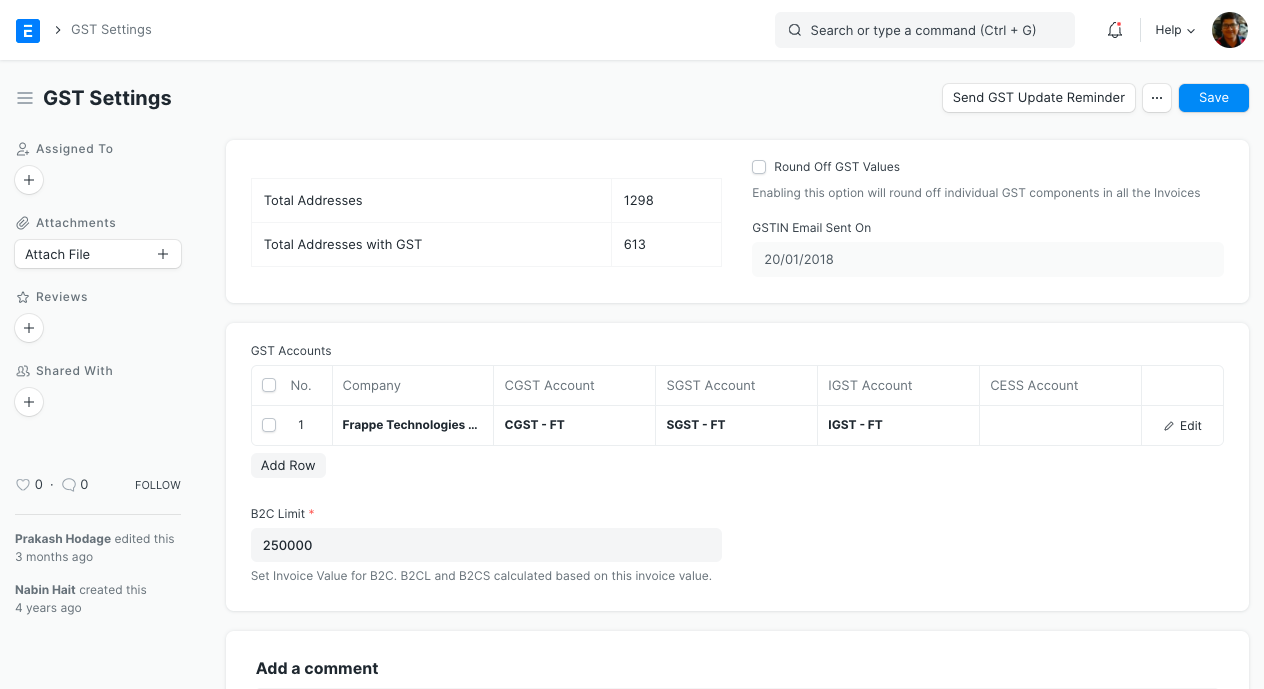
Add all the GST Accounts in GST Settings. Adding these accounts in GST Settings will help the system identify all the GST accounts and generate GST reports.
You can also enable the "Round Off GST Values" in case you want to round off individual GST components in the invoices.
5. Make Tax Templates
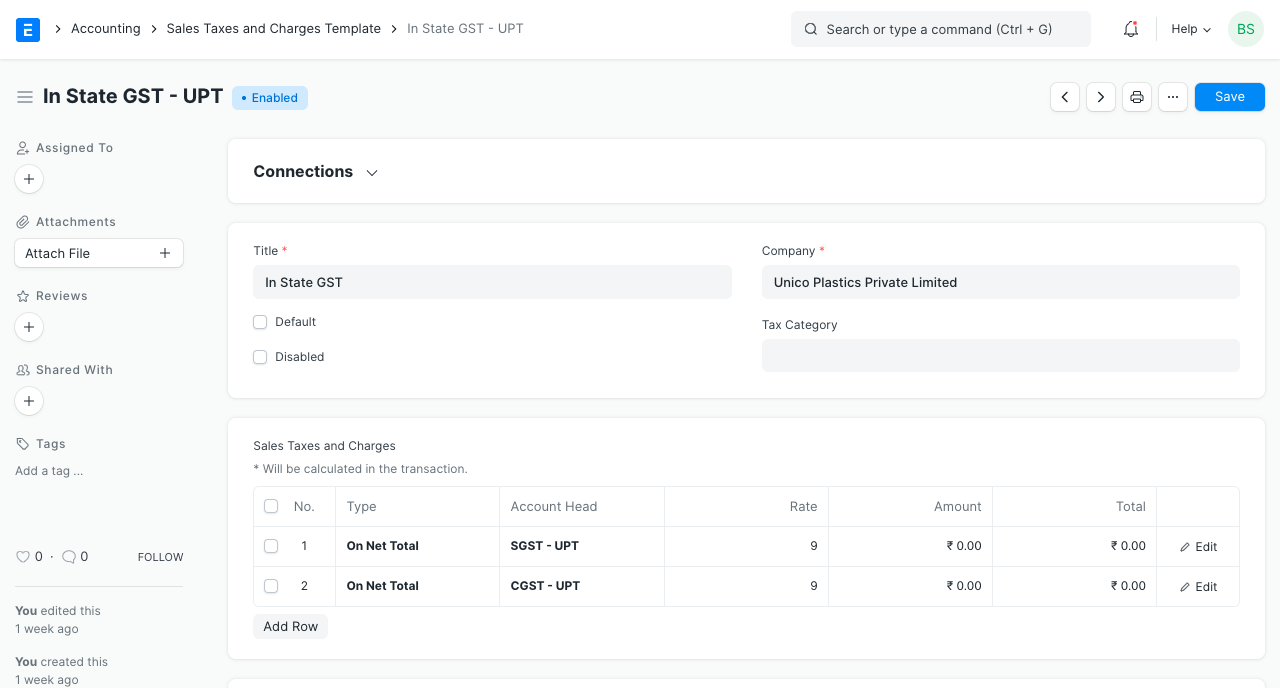
You will have to make two tax templates for both your sales and purchase, one for in state sales and other for out of state sales.
In your In State GST template, select 2 accounts, SGST and CGST
In your Out of State GST template, select IGST
6. Making GST Ready Invoices
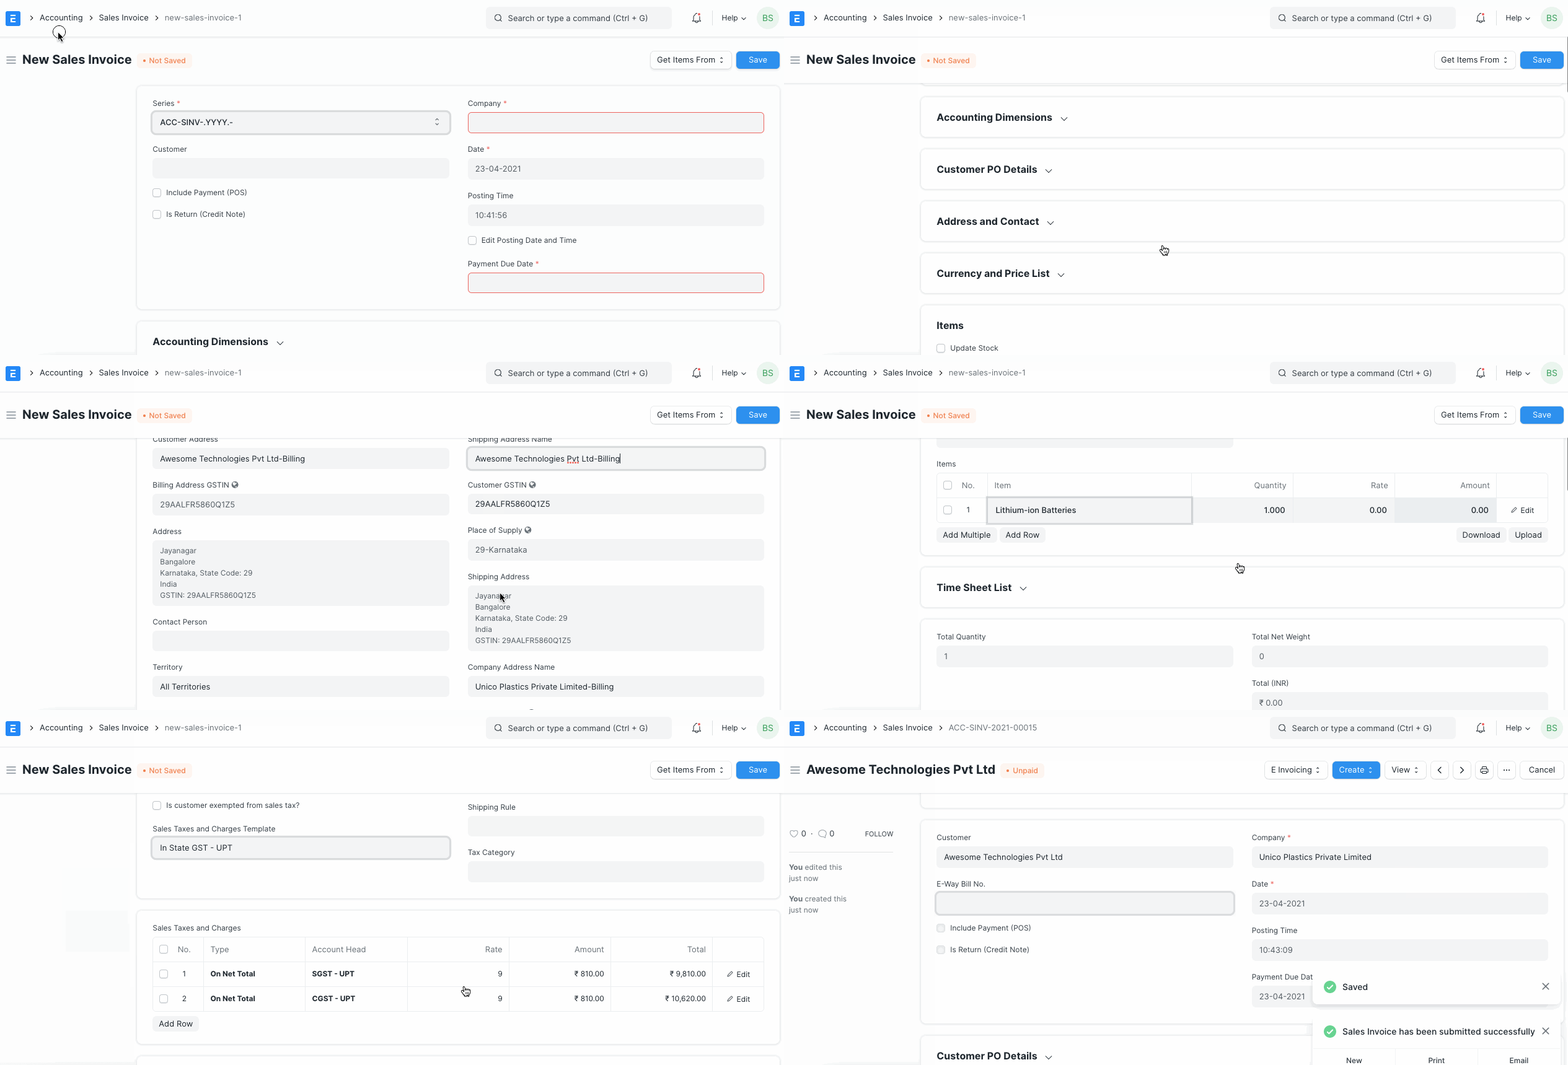
If you have setup the GSTIN of your Customers and Suppliers, and your tax template, you are ready to go for making GST Ready Invoices!
For Sales Invoice,
- Select the correct Customer and Item and the address where the transaction will happen.
- Check if the GSTIN of your Company and Supplier have been correctly set.
- Check if the HSN Number has been set in the Item
- Select the the In State GST or Out of State GST template that you have created based on the type of transaction
- Save and Submit the Invoice
7. Print GST Tax Invoice
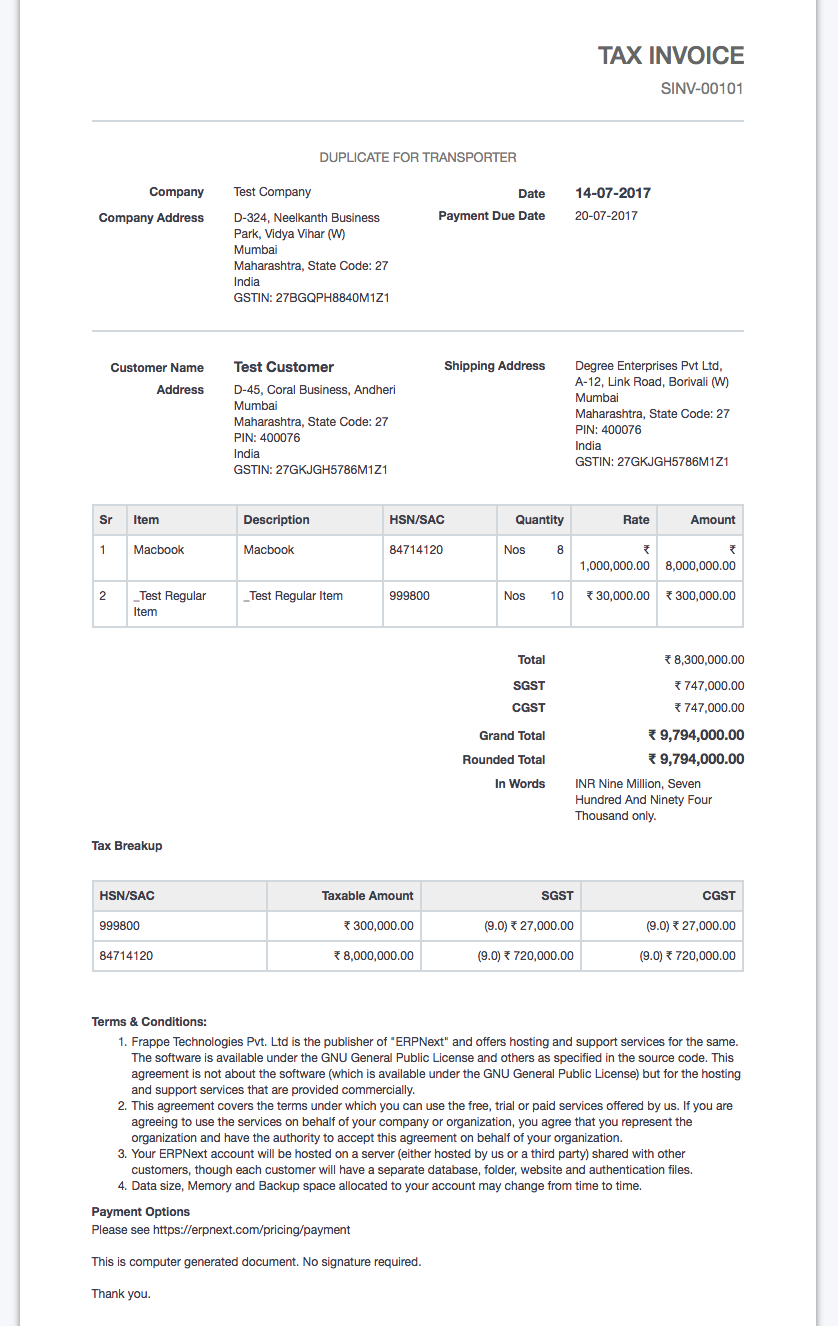
To print Tax Invoice as per GSTN guidelines, please select GST Tax Invoice print format. This print format includes company address, GSTIN numbers, HSN/SAC Code and item-wise tax breakup. And while printing select correct value of Invoice Copy field, to mention whether it is for the Customer, Supplier or Transporter.
8. GST Transactions
8.1 Reversal of Input Tax Credit
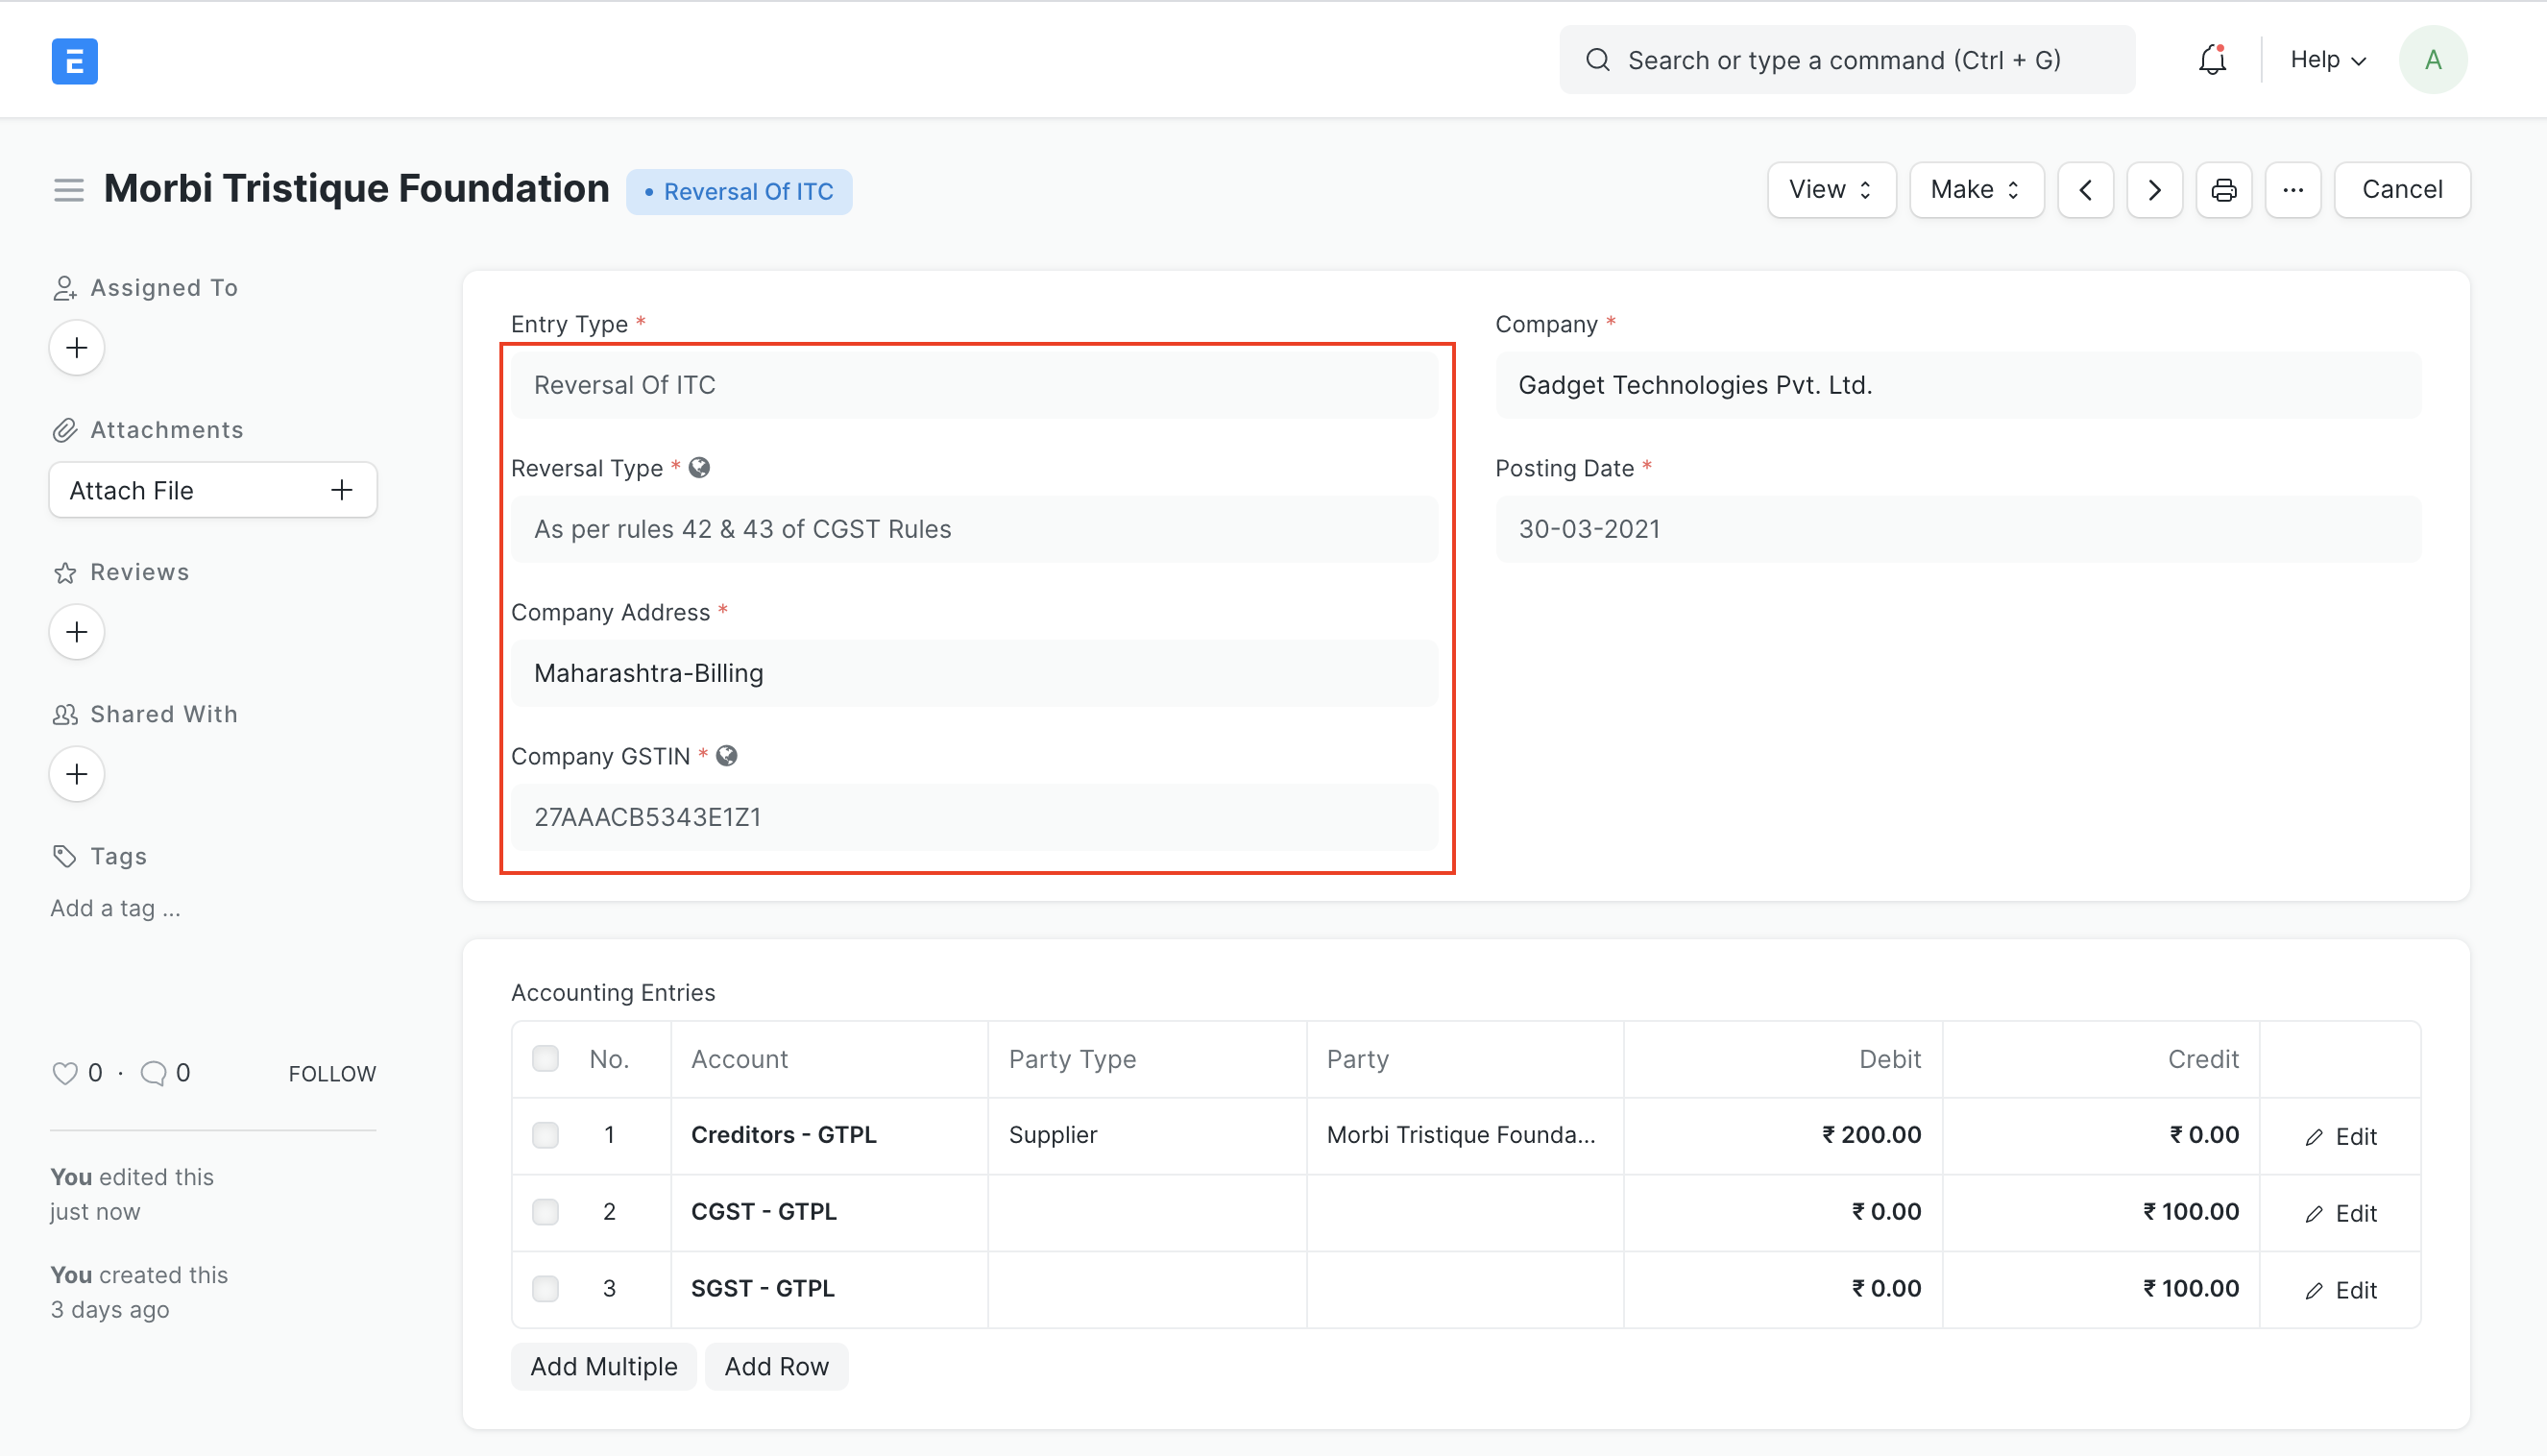
To book reversal of ITC go to Journal Entry doctype and follow the following steps
- Select "Entry Type" as "Reversal Of ITC"
- In "Reversal Type" select "As per rules 42 & 43 of CGST Rules" or "Others" based on the types of reversal
- Select appropriate Company Address (GSTIN) for which ITC is being reversed
- Fill the accounts and amounts in the Accounting Entries as shown below
- Save and Submit
9. Setting up reverse charge and posting reverse charge purchase invoices
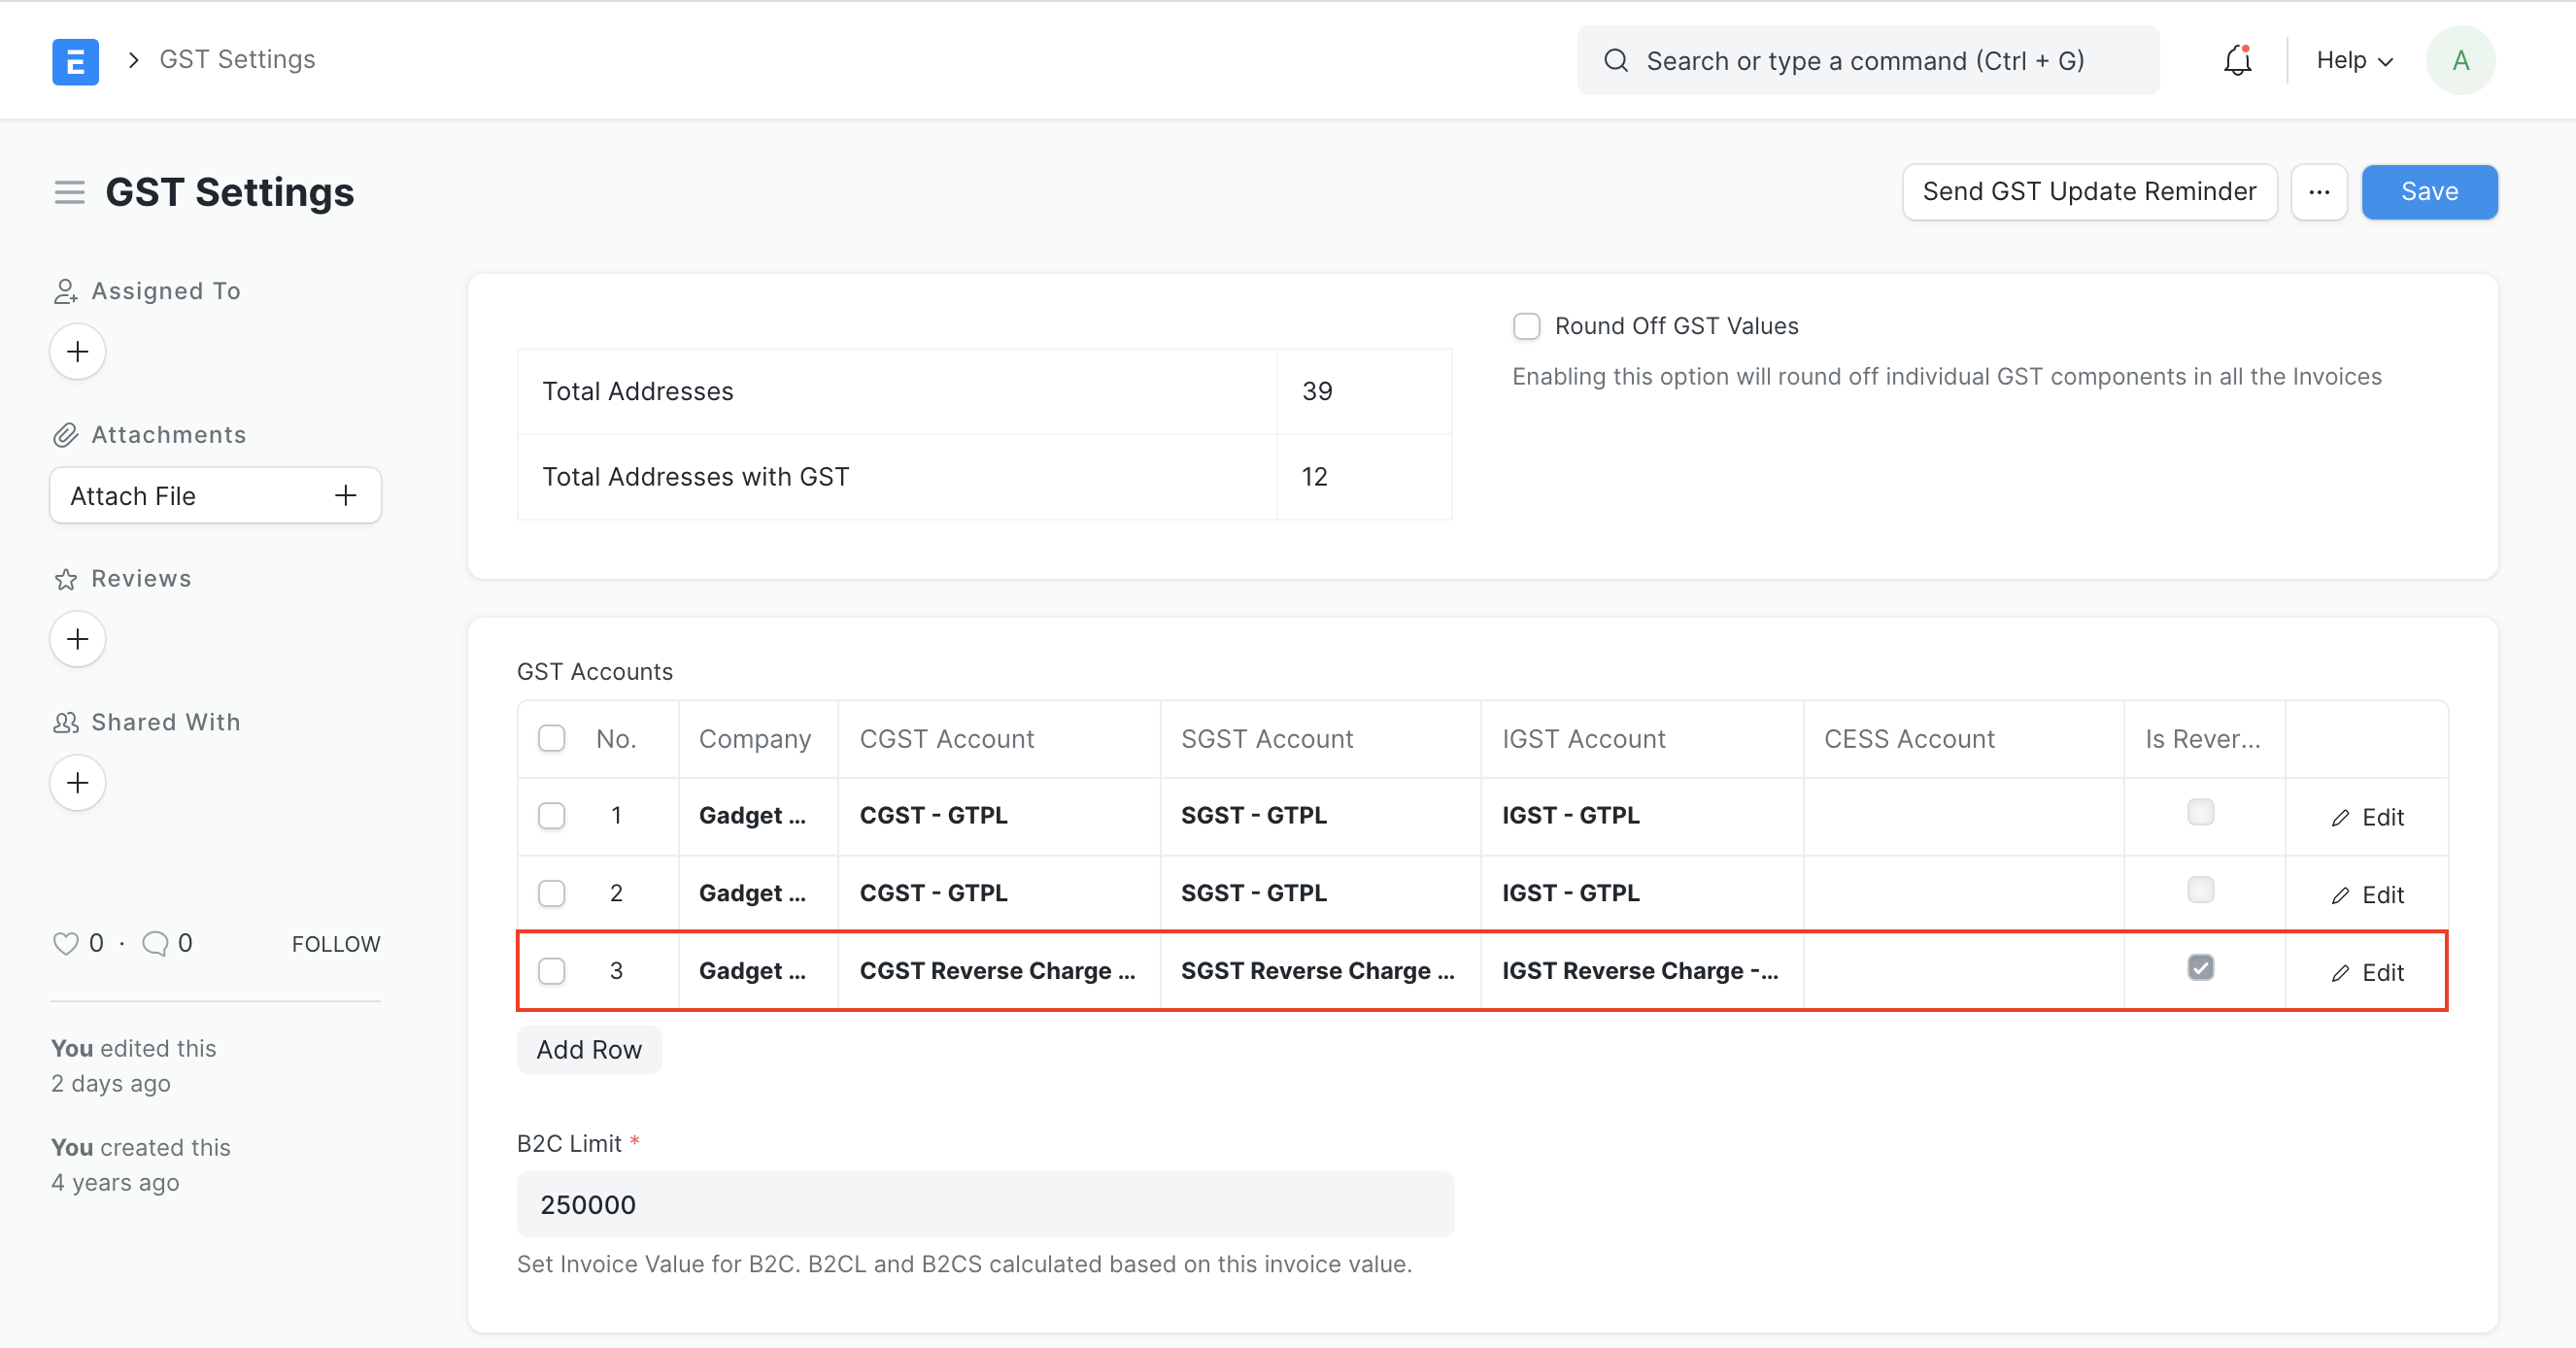
9.1 Add reverse charge accounts in GST Settings
Add reverse charge accounts for GST as shown in the image below and check the "Is Reverse Charge Account" as shown in the image below. Instead of separate reverse charge account the Output GST tax account used for sales can also be marked as reverse charge account
9.2 Making purchase invoices liable to reverse charge
To make purchase invoices liable to reverse charge invoices please follow the following steps
Select Supplier and add items to the invoice as usual
Select "Reverse Charge Applicable as "Y" under GST Details Section
If GST paid is eligible for input tax credit, in "Eligibility for ITC" select "ITC on Reverse Charge"
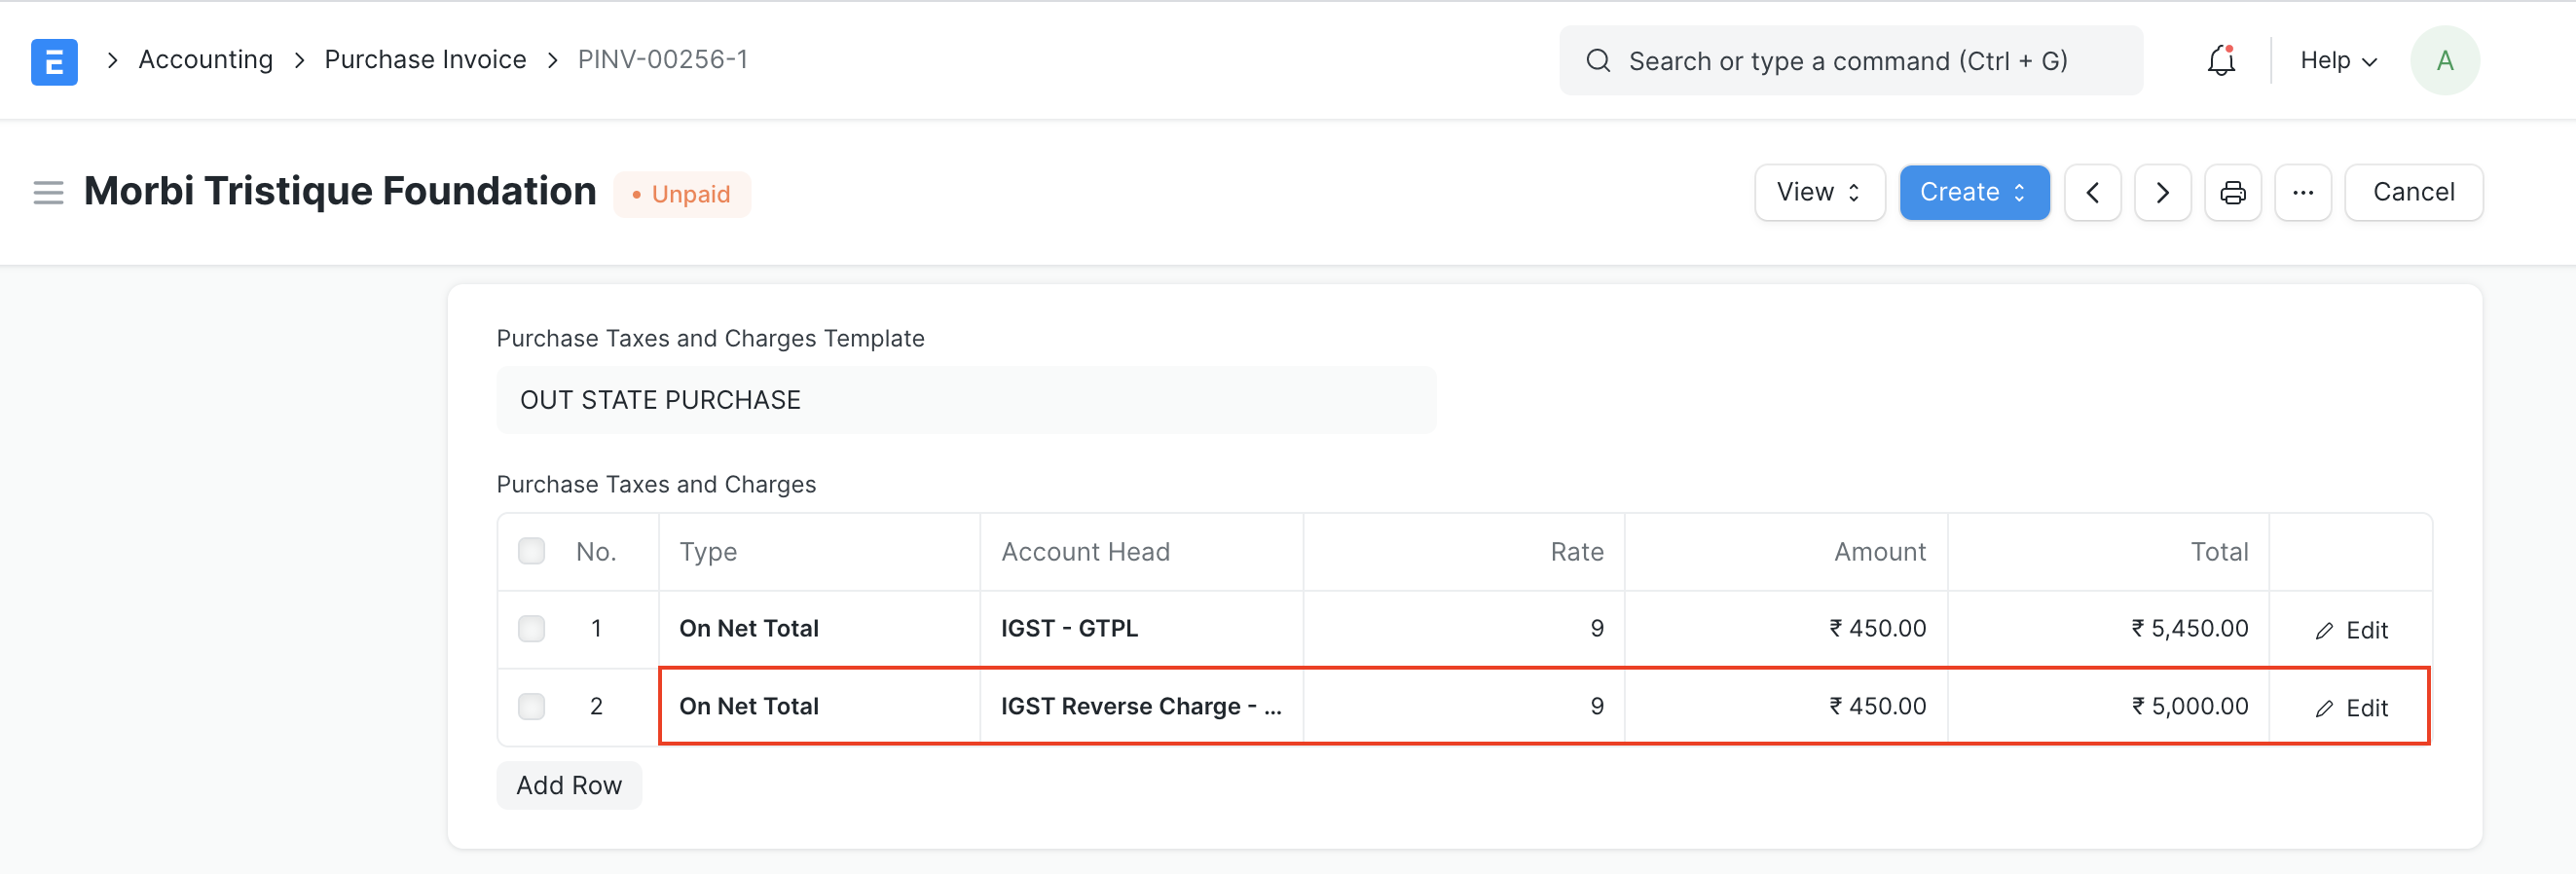
"Add" taxes using the regular Input Tax account heads
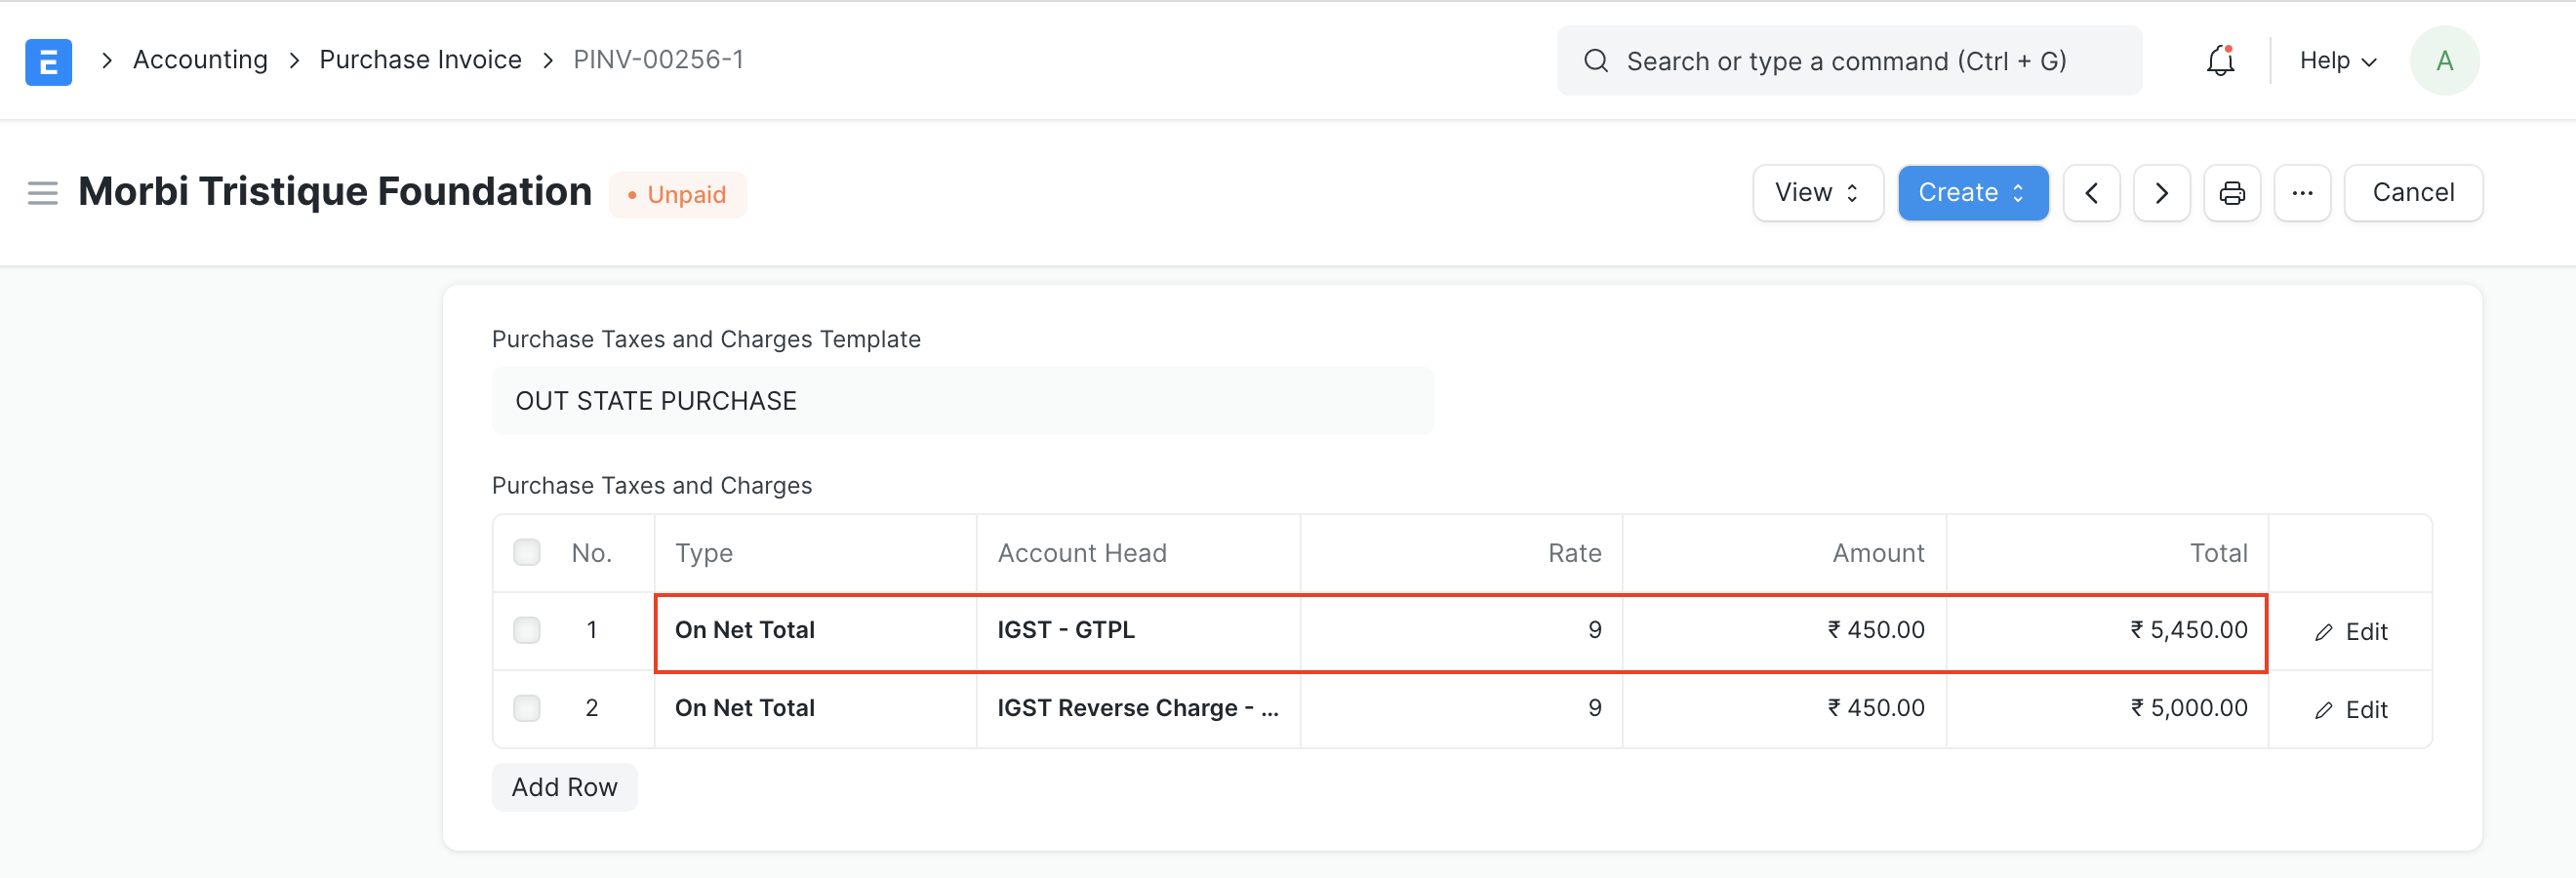
- "Deduct" the same amount of taxes using the reverse charge accounts so that the net GST payable by the supplier is 0
- Save and Submit
In order to avoid manual selection of accounts and automate this process please follow below steps
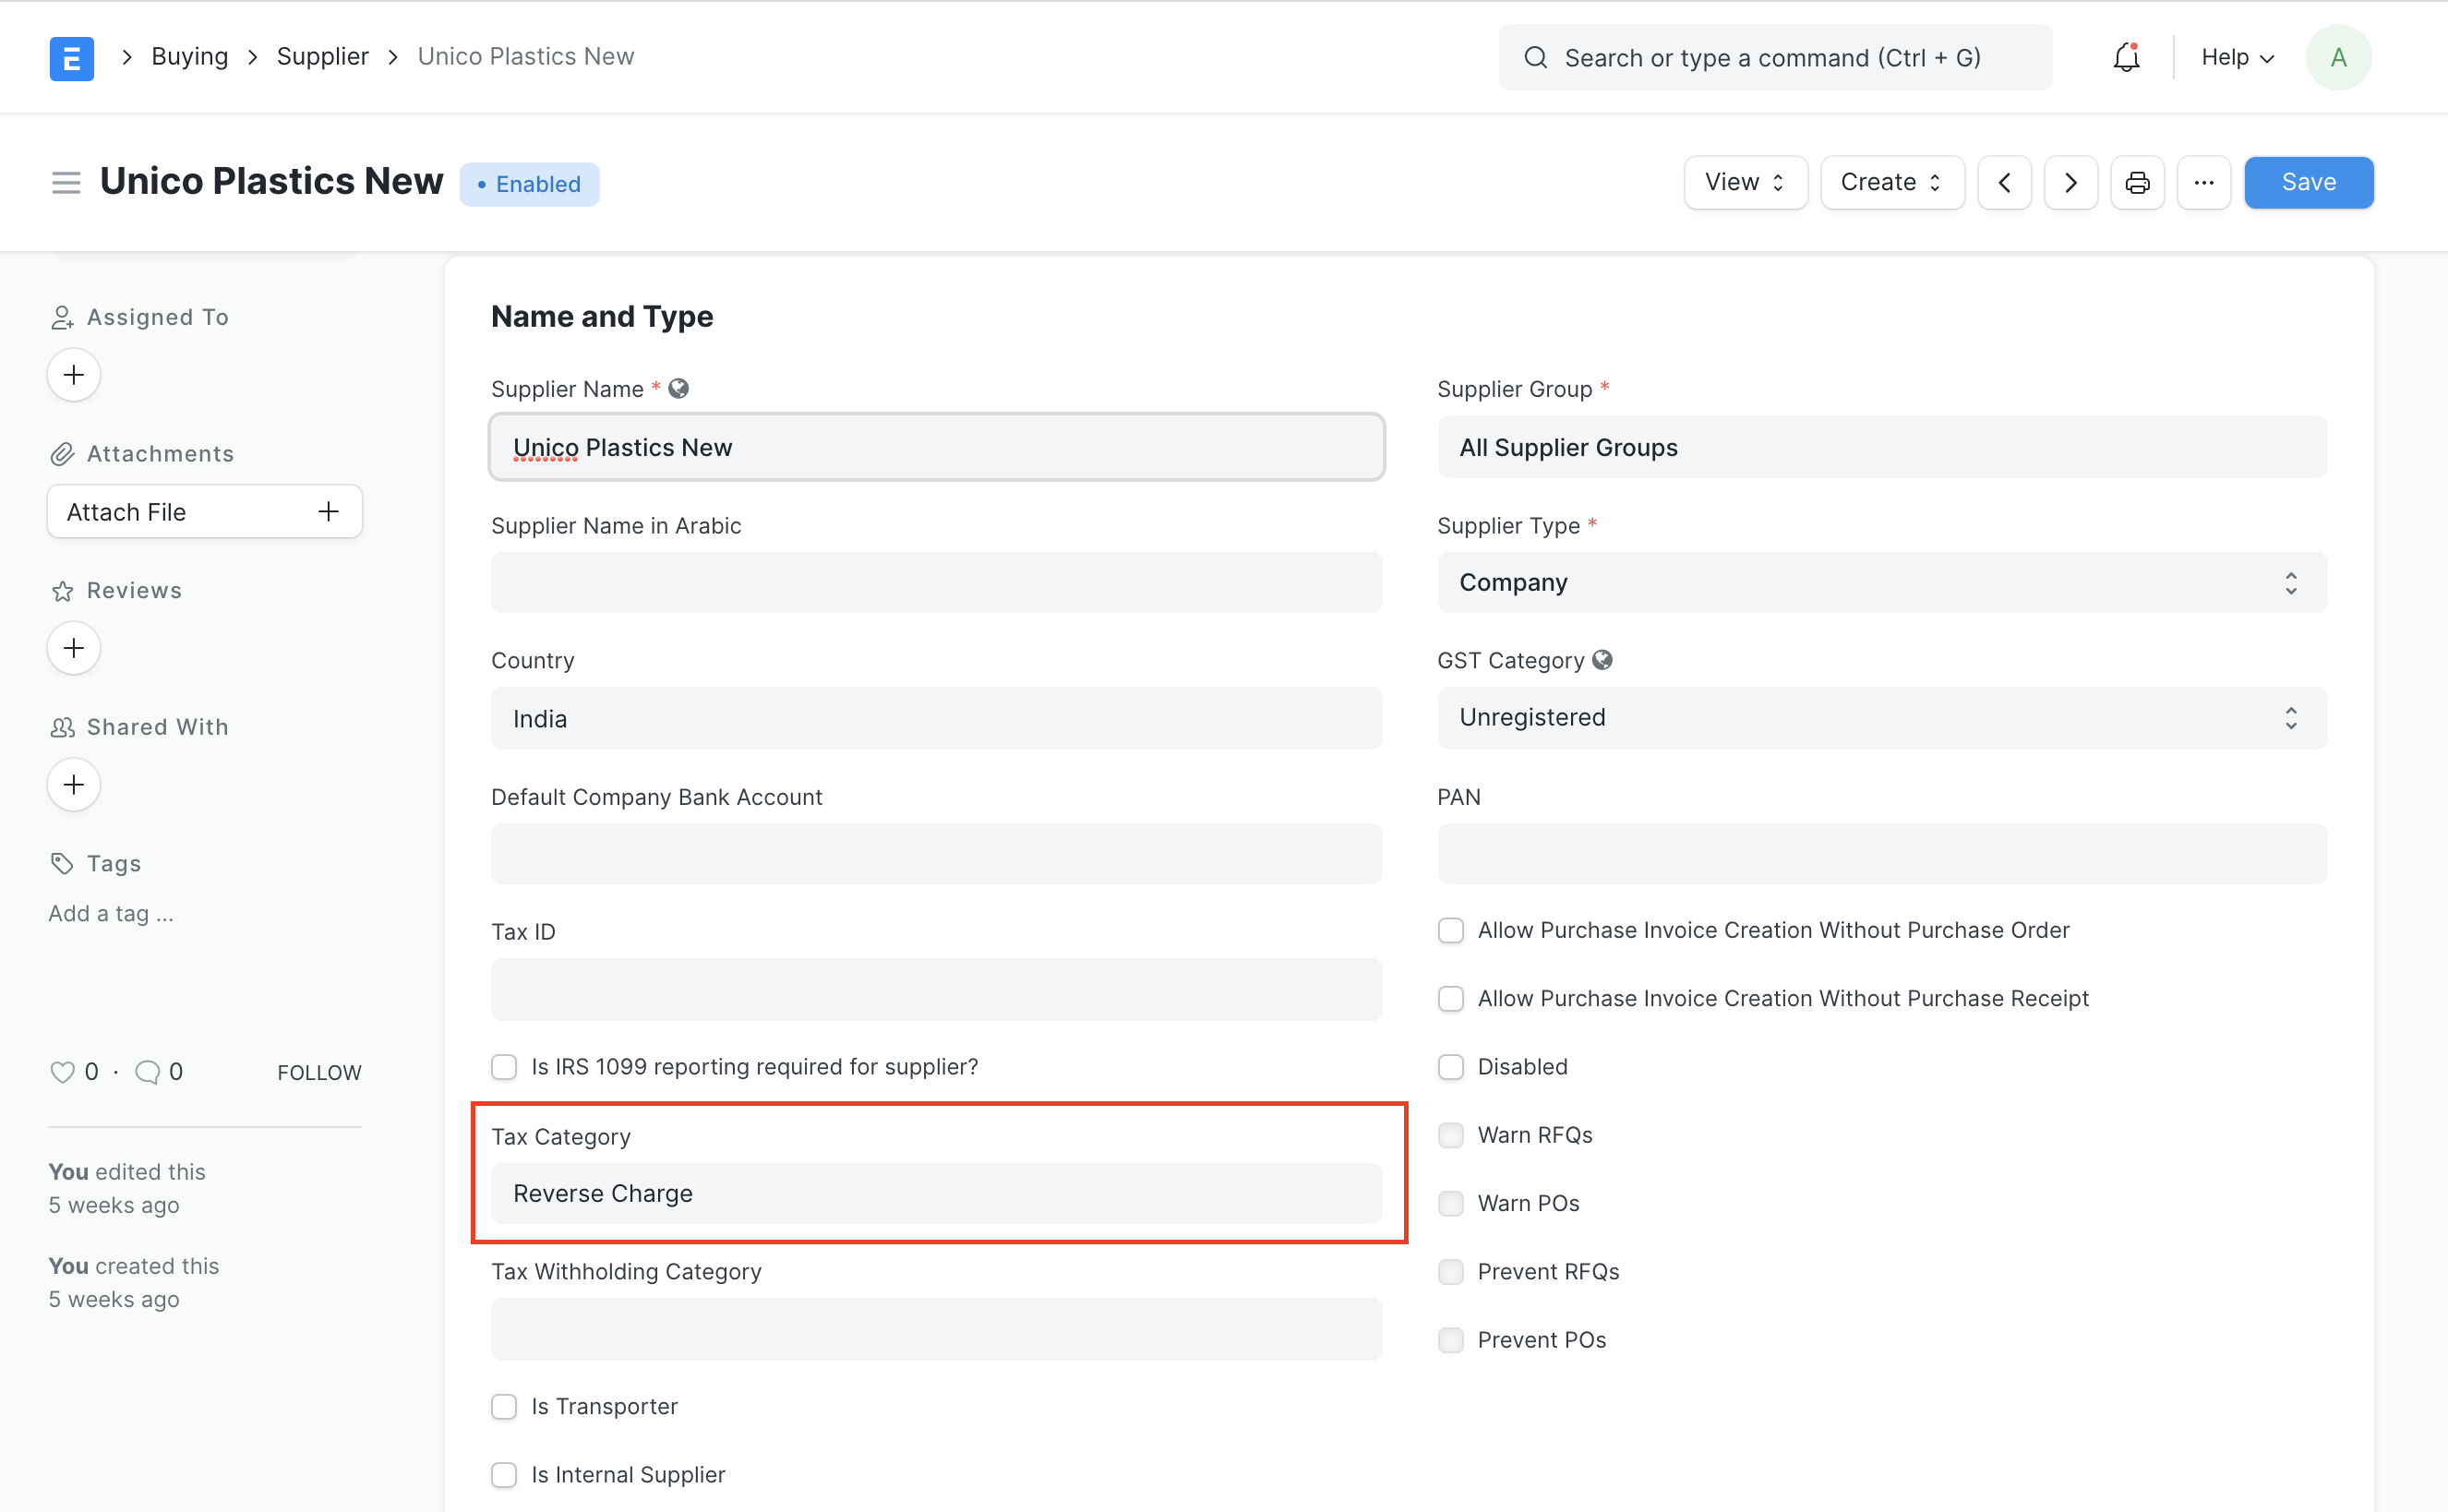
- Create Tax Category for reverse charge

- Update tax category in the relevant supplier masters
- Create Purchase Taxes and Charges template for reverse charge
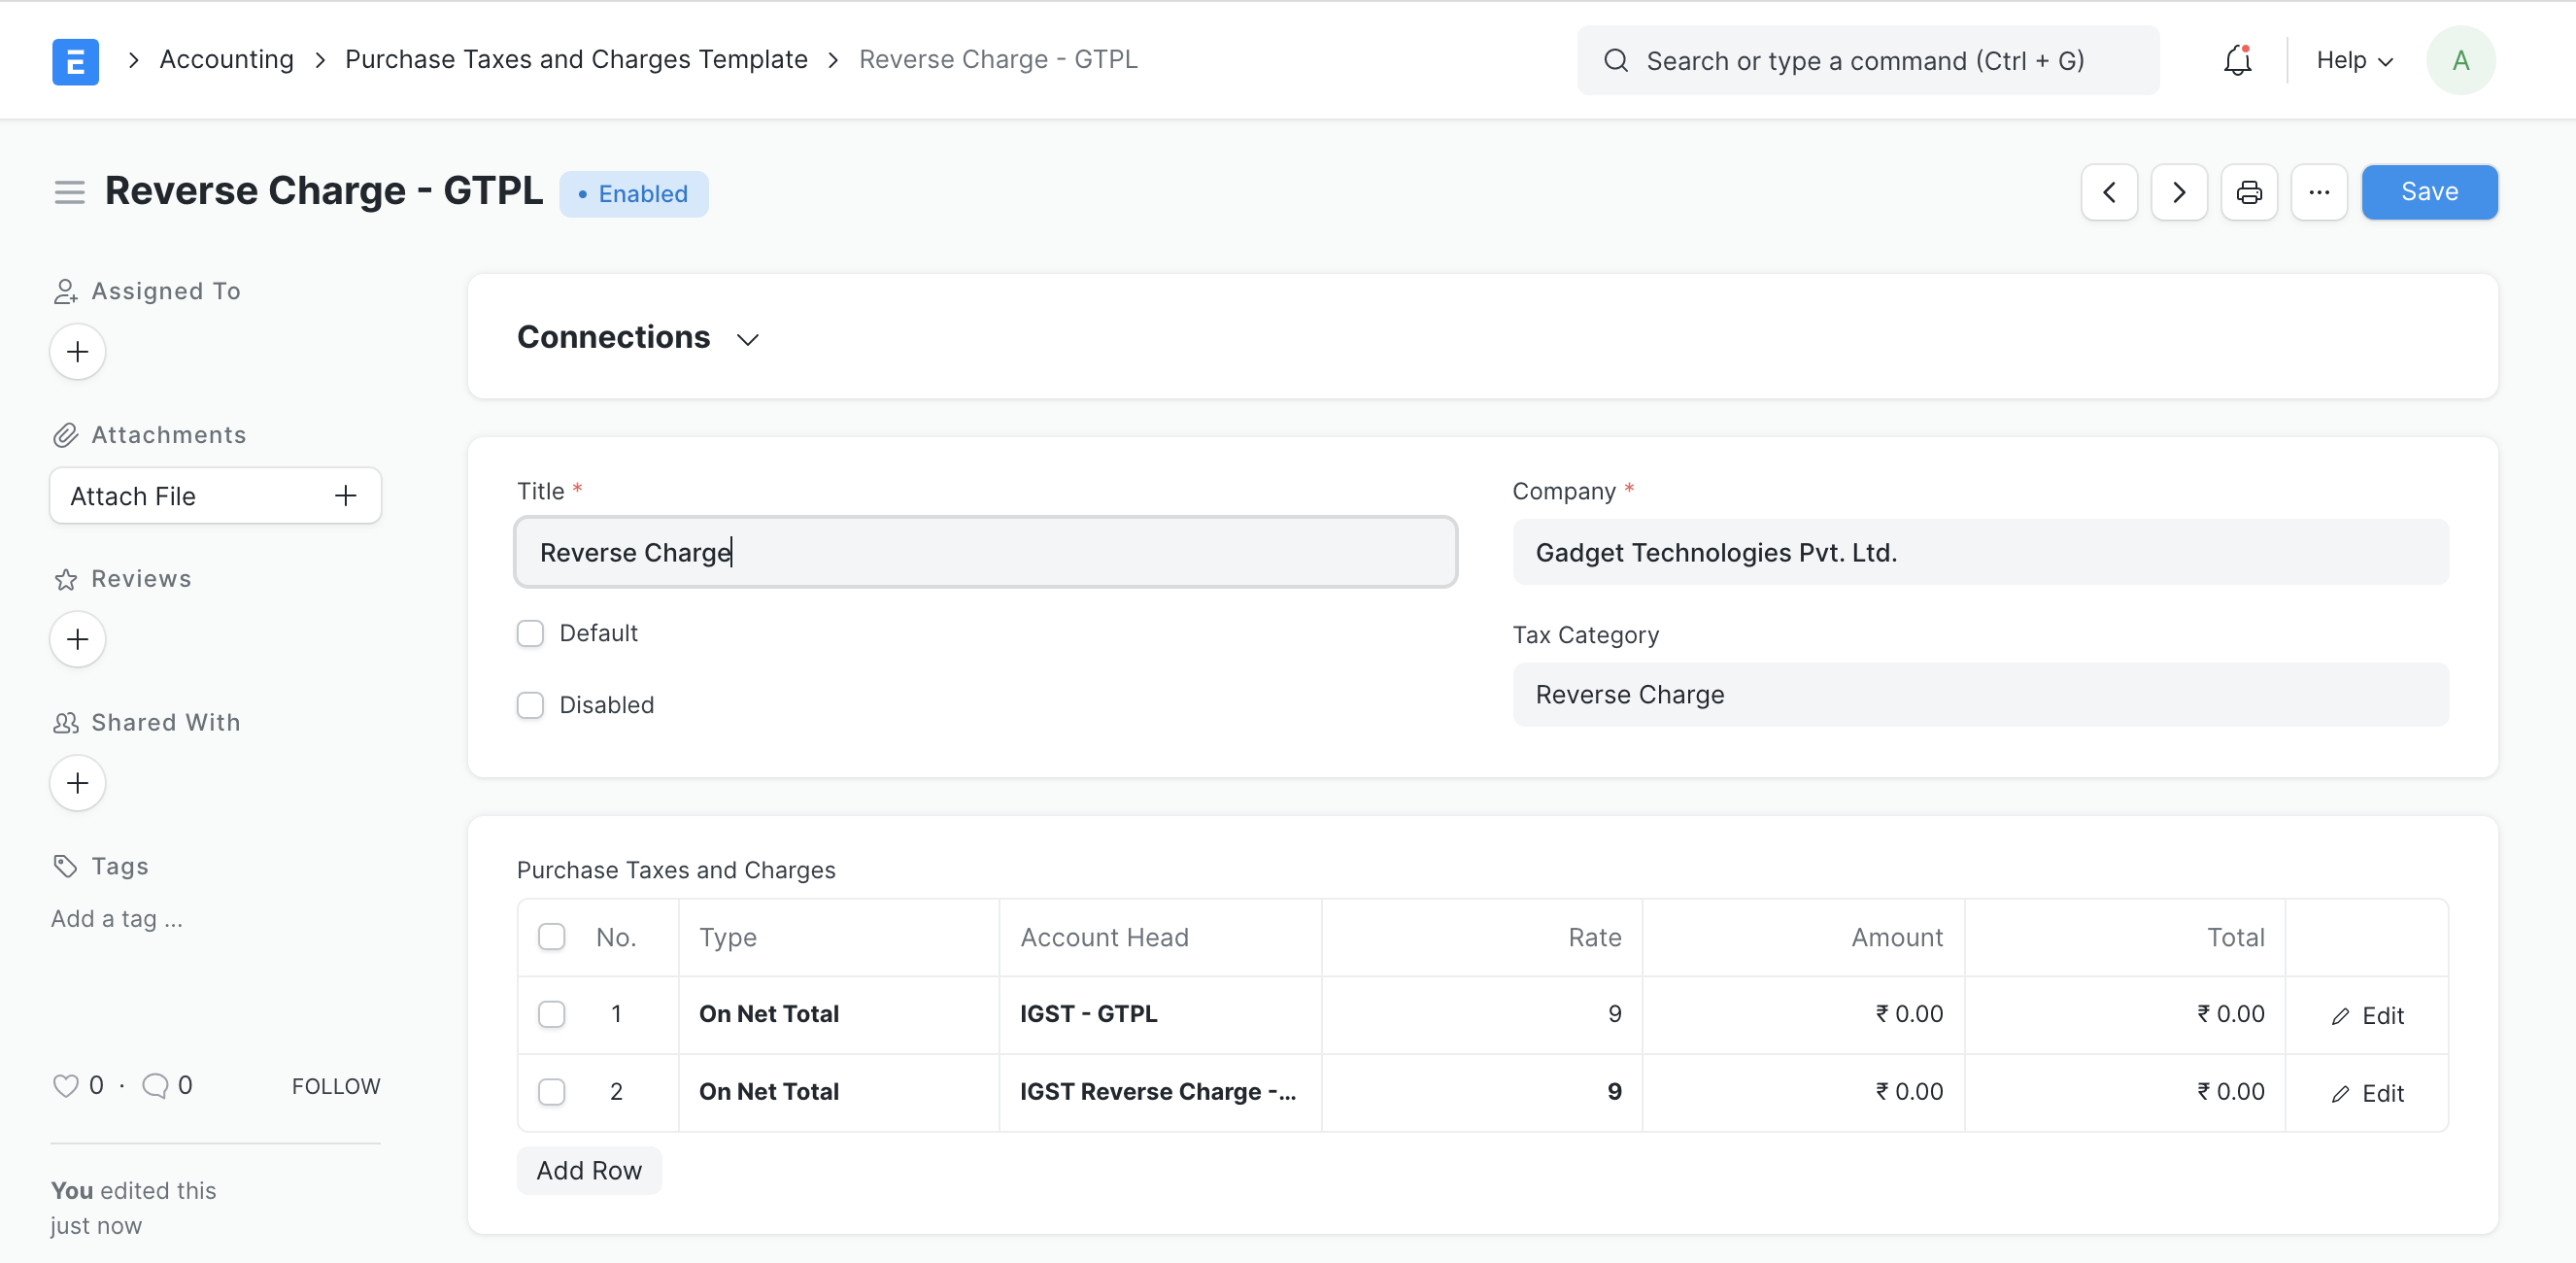
- Once this configuration is done, on selection of supplier appropriate Purchase Taxes and Charges Template will be applied
Reports
ERPNext comes with most of your reports you need to prepare your GST Returns. Go to Accounts > GST India head for the list.
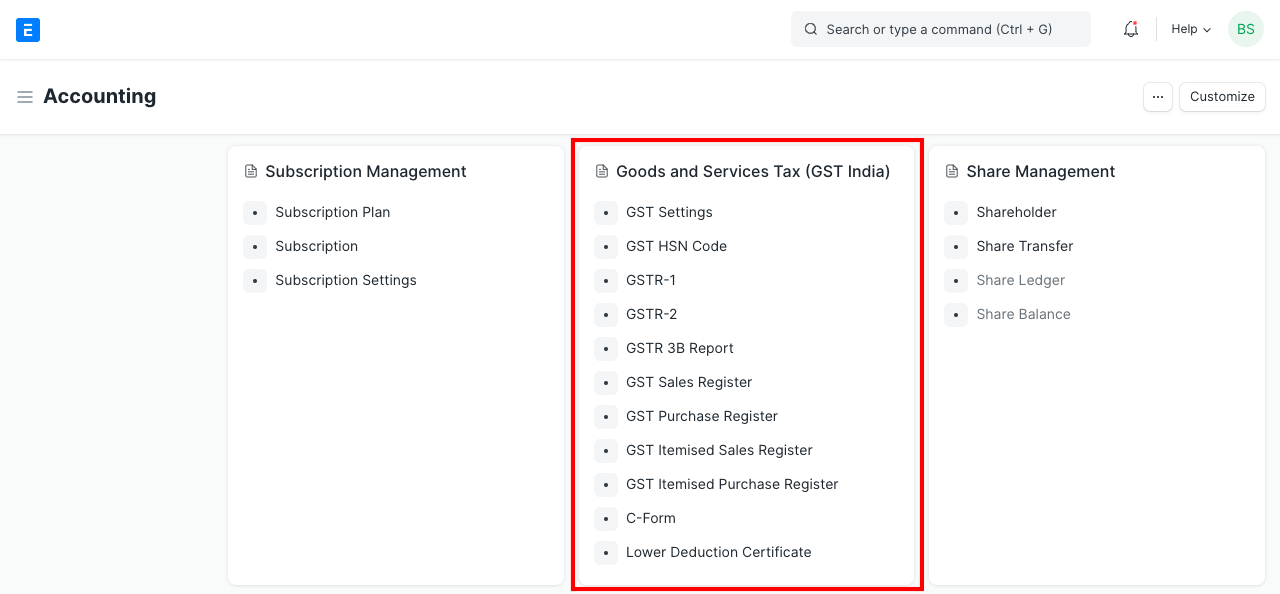
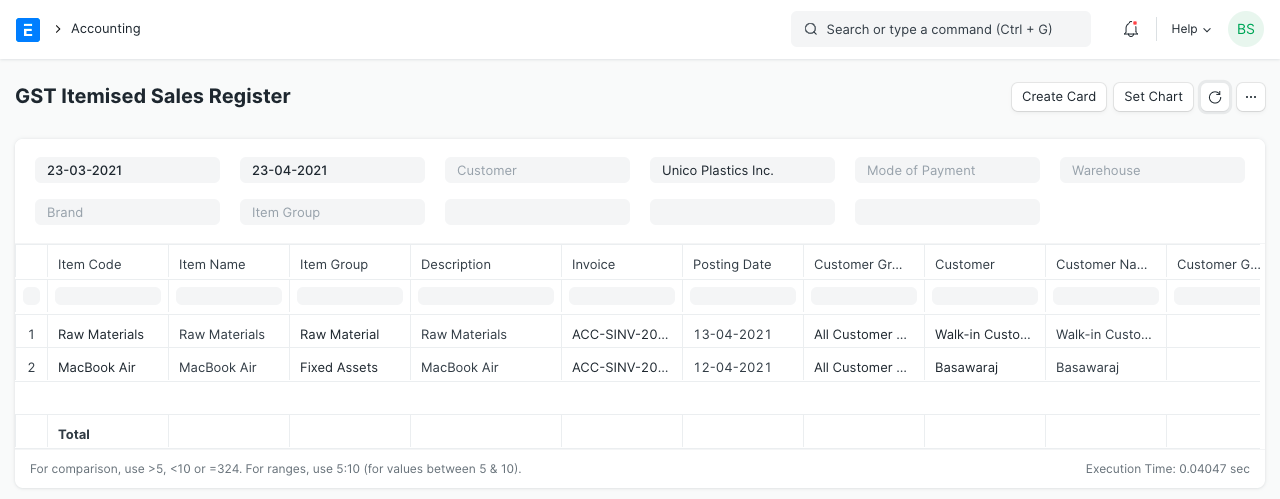
You can check the impact of your invoice in the GST Sales Register and GST Itemised Sales Register
