Introduced in version 13
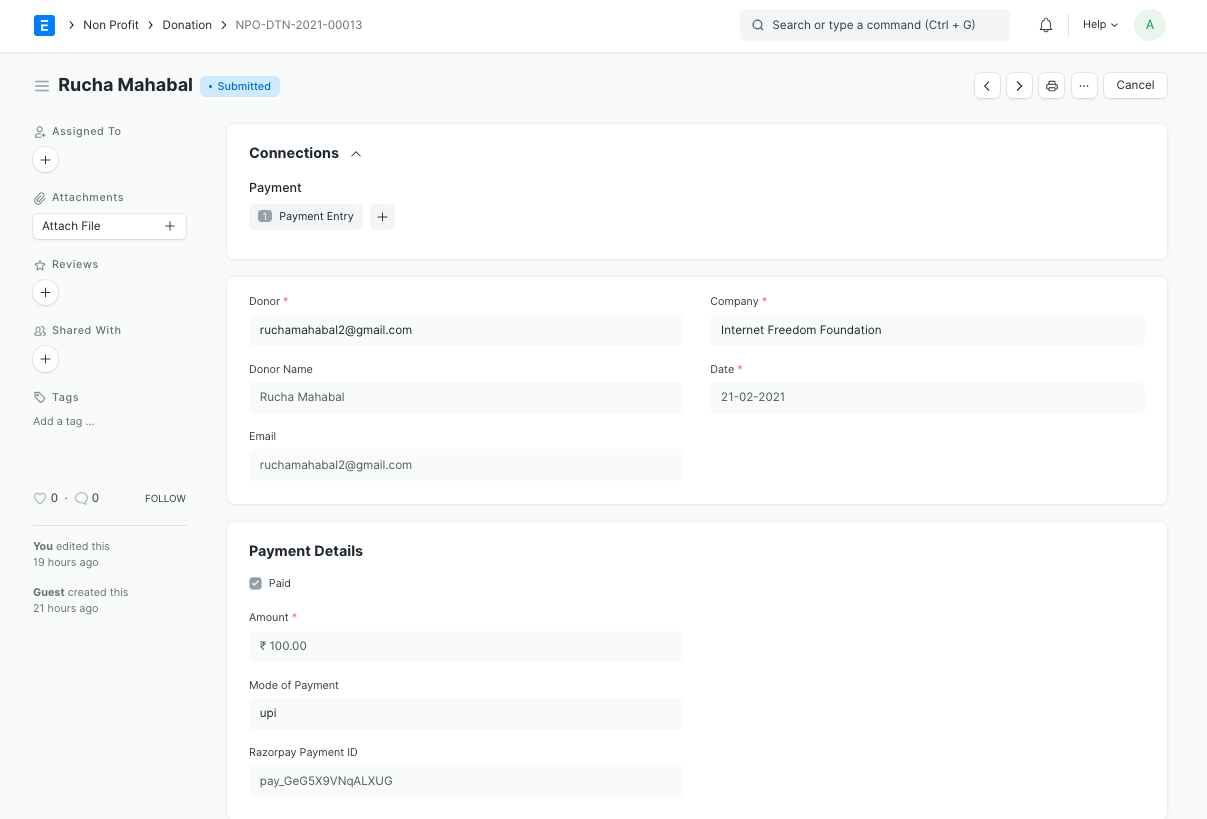
The Donation doctype allows you to record donation details for the Donor.
1. Prerequisites
Before creating a Donation, you need to create a Donor first.
2. How to Create a Donation
To create a new Donation go to:
Non Profit > Donation > New

- Select the Donor. The Donor Name and Email will be fetched automatically.
- Set the Date of Donation.
- Set the Amount and Mode of Payment.
- Save and Submit.
3. Features
3.1 Payment Entry for Donation
On submitting a donation, you can create a Payment Entry against it using the Create Payment Entry button.
3.2 RazorPay for Donations
You can set up RazorPay for capturing donations. You can find instructions on setting up razorpay here.
You can follow the steps listed below to setup Razorpay for donations.
- Setup RazorPay
- Setup RazorPay Webhook
3.2.1 Setup RazorPay
You can find instructions on setting up razorpay here.
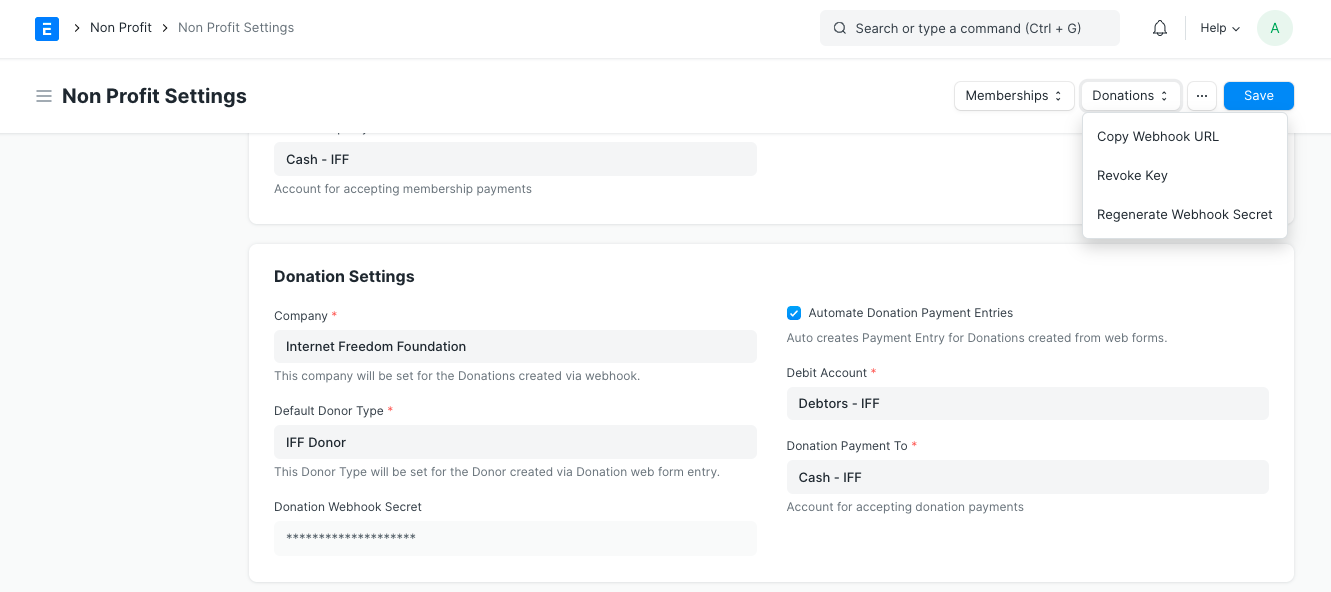
In order to capture the donations, you need to set certain defaults in the Donation Settings section in the Non Profit Settings
- Default Company: This company will be set for the Donations created via webhook.
- Default Donor Type: This Donor Type will be set for the Donor created via Donation webhook.
- Automate Donation Payment Entries: You can enable this to auto-create Payment Entry for Donation entry created via webhook.
If _Automate Donation Payment Entries_ is enabled, you will have to set the default Debit Account and Donation Payment Account for Payment Entry.

3.2.2 Setting up webhook
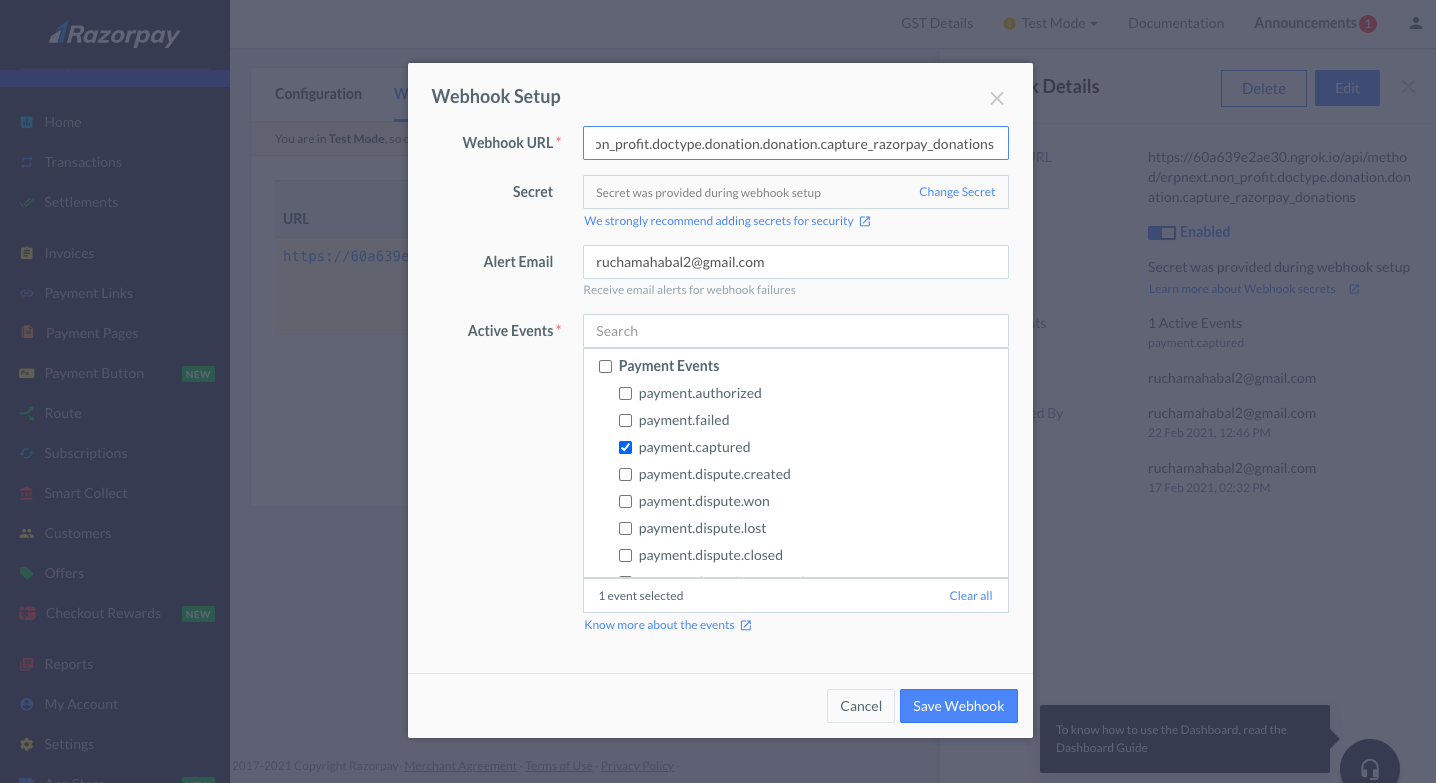
You can set up a webhook from the RazorPay dashboard in Settings. You can read more about webhooks in RazorPay here. This webhook will notify your ERPNext site whenever a new donation is created.

You will need the following details to set up the webhook.
- Webhook URL: The following is the URL for your ERPNext site. This is the endpoint RazorPay will utilize to notify of any new donations created.
https:///api/method/erpnext.non_profit.doctype.donation.donation.capture_razorpay_donations
Secret: In order to secure your API endpoint, it is always better to generate and set a Webhook Secret for the API Endpoint. To do so, on your ERPNext site, you can click on the Donations > Generate Webhook Secret button in the Non Profit Settings. Copy the secret and paste it in the secret field on the RazorPay dashboard to set up webhooks.
Event: You have to enable the
payment.capturedevent.Active: Check this to enable the webhook.
With this, your webhook is activated.